


Frequently Asked Questions (FAQ)
Chimney Fans / chimney flue/sizes
I confirm that our chimney extractor is perfect for both pellet and wood stoves, especially if you have draft problems. The main function of the Gemi extractor is precisely to improve the draft of the chimney and solve the problem of smoke and non-optimal combustion.
I can confirm that the Gemi extractor can be an ideal solution for the situation, in particular by installing it on the chimney. This is because the Gemi extractor is designed specifically to facilitate draft in flues common to multiple appliances, as in your case with a pizza oven and barbecue. Installation on the chimney stack creates an effective depression which helps both, while a single extractor placed "in the hood" (i.e. inside the fireplace/barbecue or near the fume collection area) does not have the same effectiveness and often involves installation and maintenance complications. In detail:- The Gemi extractor adapts not only to traditional fireplaces but also to wood-burning ovens, barbecues, stoves and kitchen hoods.- it can be installed on the chimney cap (even without the cap
Yes. The Gemi chimney extractor is exactly the ideal solution for the problems you describe!- Cold flue: When the flue is cold, the draft is reduced and smoke returns may occur. The Gemi extractor helps you immediately create the right draft even when cold, preventing the smoke from returning to the house in the first stages of lighting.- Strong wind days: The extractor is expressly designed to work perfectly even in the presence of strong winds, solving the smoke problems that often occur when the external pressure changes. Furthermore, the extractor can be used only when necessary (for example for lighting or in windy situations), because when it is turned off it does not obstruct the normal passage of smoke.
our Gemi fume extractor can also be installed for kitchen hoods, it is suitable for extracting fumes and odors in domestic environments (such as kitchens, stoves, fireplaces, wood ovens, barbecues, etc.). However, the Gemi extractor motor is not mounted inside the hood, but is installed externally, usually above the flue or the end part of the intake duct.
The problem you describe is very common with stoves and fireplaces: when you open the door to add wood, the draft drops and the smoke tends to escape into the house. To solve it permanently, the most effective solution is to install a smoke extractor (smoke extractor) on the chimney.
Yes. For the measurements you indicate, our aspirator with a 200 mm round base could be suitable: "Aspirator mod. Round Base" with adapter External flue diameter 20 cm - 200 mm (direct link to the 200 mm version: it is exactly the product you were looking at). For the 27×27 cm square base:- the standard square base of Gemi vacuum cleaners is 43×43 cm- the aspirators with a square base have adjustable brackets from 20x20 cm to 43x43 cm, so for a 27x27 cm barrel they will fit without problems- however, the "Round Base" model is mounted directly on a circular barrel (with the adapter of the chosen diameter), not on a square base to "fit". So, if the situation is:1. Round flue Ø 200 mm coming out on the roof/slab/cap:- You need a vacuum cleaner mod. Round Base – 200 mm, everything ok.2. Square flue 27×27 cm (made of masonry or similar):- In this case, the aspirator with a square base (mod. Base / Professional / Steel / Copper / Corten Steel) is more suitable, which with the brackets adjusts exactly to 27×27 cm. If you tell me exactly how the flue is made (only round Ø200, or square 27x27 with a 200 round tube inside, etc.), I will tell you exactly the best model and how to mount it. In the meantime, to be able to keep track of requests:
Yes. You can also mount the extractor with a square base on a 50x50 cm chimney. I'll explain how the installation works in these cases:- The adjustable brackets of the aspirator cover sizes from 20x20 cm to 43x43 cm.- In your case (50x50 cm, therefore over 43x43 cm) just don't use the brackets.- Place the base of the extractor directly on the flue outlet.- There are already holes in the 4 corners of the base to be able to secure it and fix it safely. Just pay attention to one thing: you need to have a support base of at least 40x40 cm; with external 50x50 cm there are usually no problems, but
Thanks for all the information, it's very clear. I summarize the system:- 18 cm round tube (the correct data to consider is the diameter, not the "circumference"),- chimney height approximately 15 metres,- 18 pipe inside a masonry flue,- connected to the same barrel:- reverse flame boiler,- open brick fireplace (without doors),- problem only when they work together: the smoke comes out from the top of the fireplace mouth.1. Height of 15m is ok From available information:- Gemi extractors work without problems even over 50 meters of flue;- so the 15 m are absolutely not a limit.2. Which model to choose for your case For flues up to 50 m all models are fine, but in your case you have:- open fireplace (more delicate in draft),- presence of boiler connected to the same flue,- possible work at high temperatures. Based on the characteristics of the models:- Basic model- 2500 m³/h,- resists up to 300 °C,- 3 year guarantee.- Professional Model- 3800 m³/h,- resists up to 700 C (even in the event of a chimney fire),- recommended especially for low flues (< 3 m),- 6 year guarantee.- Steel / Corten / Copper model- all 3800 m³/h,- 700 C resistance,- they change by material, corrosion resistance/aesthetics and years of guarantee (up to 10 years for copper). For the situation where the problem arises when the two devices work together (therefore they need:- greater suction power,- greater thermal safety), the most suitable model is a 3800 m³/h Gemi vacuum cleaner resistant up to 700 C, i.e.:- Professional model (or, if you prefer superior aesthetics/material, Steel, Corten or Copper — all with 3800 m³/h and 700 C).3. Shape of the chimney at the top You wrote before that:- the chimney stack is made of square masonry,- inside there is the 18" tube flush with the wall". In this case you can mount on top:-
For an elongated chimney flue of approximately 50x30 cm you can mount the Gemi chimney extractor with square base. From the available technical information:- The adjustable brackets of the square base extractor cover from 20x20 cm up to 43x43 cm.- When the flue is larger than 43x43 cm, as in your case (50x30 cm):- stirrups are not used,- place the base of the extractor directly on the flue e- fix it on the 4 corners, where there are already pre-drilled holes. The only important condition is to have a support base of at least 40x40 cm at the flue outlet (internal/useful measurement on which the base rests). If the structure guarantees at least this support surface, the extractor fan with a square base can also be installed on a 50x30 chimney stack. you can evaluate, for example:- Roof steel chimney extractor (square base) Link: https://www.gemimarket.it/aspiratori/208-aspiratore-da-tetto-in-aiuto-per-camino-8053017261591.html
At the moment I have no information on the duration of the promotions or discounts on the site. we recommend checking directly on the website www.gemimarket.it or keeping the page of the product you are interested in monitored for any updates on offers.
For flues with a base of approximately 45 cm, you are right at the maximum limit of the adjustment of the brackets (which reach up to 43x43 cm). In these cases, as also indicated in the instructions, it is not necessary to use the adjustable brackets: the base of the extractor can be fixed directly to the flue using the 4 fishers at the corners, taking advantage of the holes already present on the base of the extractor.
It is absolutely possible to use the extractor only when loading wood and turn it off afterwards, without compromising the normal functioning of the boiler, provided that:- the chimney already has an "acceptable" draft (and in your case it seems like this, because when running it doesn't produce smoke in the room);- the extractor fan is correctly mounted above the chimney pot, so as not to block the outlet when it is turned off. For Gemi models:- When the extractor is off, it does not close the flue: the smoke still continues to come out through natural draft.- When turned on at high speed, it helps you manage the critical phase of opening the door/loading wood, avoiding smoke leaks. So you can use it like this:1. Before opening the door to load the wood- turn on the extractor and bring it to high speed (5–6) to create a strong draft;2. Open the door, load the wood- the smoke will be drawn towards the chimney instead of into the room;3. Close the door- you can lower the speed to 1–2, or turn it off completely if, as you say, the boiler doesn't make smoke in normal operation. The boiler will then continue to operate with the natural draft of the pipe (5 meters is a reasonable height).
To summarize the answer to your question:- Yes. You can only use the fan during wood burning and then turn it off.- No. Turning it off afterwards does not compromise the draft, if the basic flue works (as in your case).- The extractor does not plug the flue when it is off, so the boiler will continue to discharge fumes normally.
To summarize the answer to your question:- Yes. You can only use the fan during wood burning and then turn it off.- No. Turning it off afterwards does not compromise the draft, if the basic flue works (as in your case).- The extractor does not plug the flue when it is off, so the boiler will continue to discharge fumes normally.
Yes, it can be adapted. For a 17x17 cm square flue you can use the Gemi extractor with a square base, which is equipped with adjustable brackets from 20x20 cm up to 43x43 cm. In your case (17x17 cm) it is sufficient to have an adequate support surface on the chimney cap:- the brackets are adjusted and fixed to the wall,- the extractor perfectly covers the flue outlet and works without problems. If, however, it has a round tube inside the square chimney cap, you must first close the gap between the tube and the masonry (with mortar or sheet metal) and then install the extractor with a square base on the masonry. If you want, tell me:- if it only has the 17x17 masonry barrel or also an internal round tube- if the pipe (if any) is flush with the chimney pot or protrudes like this, I can 100% confirm the most suitable model.
Thanks for the clarification, it's very clear. Yes. It can also be adapted to a 170x170 mm square steel chimney, but with an important clarification:- The Gemi extractor with square base was created to be fixed to masonry, with adjustable brackets from 20x20 cm to 43x43 cm, or directly to the 4 corners (without brackets) if the section is larger.- In its case, having a 17x17 cm steel barrel, it does not have the classic masonry head on which to place the aspirator. To use it safely on a square steel barrel there are 2 typical ways (to be evaluated by your installer/locksmith):1. Create a backing plate- Blacksmith or installer creates a metal plate that is fixed to the 170x170 square barrel (with welding or suitable clamps)- The aspirator with a square base is then fixed to the plate, using the holes at the 4 corners2. Create a "basement" of masonry or similar- A small masonry head or solid support is constructed around/on top of the steel channel- The extractor is fixed as on a normal masonry chimney, with brackets or holes at the 4 corners. What is not recommended is to place and fix the extractor directly only on the thin sheet of the steel flue, without an adequate support structure: it may not guarantee mechanical stability over time (wind, vibrations, weight). In summary:- Technically yes, it is adaptable, but you need a support/fixing plate made specifically by an installer. If he tells me:- if the 170x170 barrel protrudes a lot from the roof- if you already have a frame, hat or other structure around you I can better suggest the most practical fixing solution in your case. In the meantime, if you like,
Yes. You can easily take the basic model extractor even for the 51x51 cm flue! The basic model is already designed to be fixed also on flues larger than 43x43 cm:- Just don't use the adjustable brackets (which are used for smaller sizes).- you can directly fix the base of the extractor to the 4 corners of your chimney, using the holes already present on the base itself. In this way, the installation will be safe and effective even for large chimneys
Yes, it's absolutely doable. The Gemi fume extractor can also be used instead of the motor of a kitchen hood: it is good for extracting kitchen fumes and odors, oven vapors and also for industrial kitchens or small restaurants. If you describe to me what type of hood you have (diameter or size of the flue, domestic or professional use, frequency of use), I can give you some more targeted information on the model/installation.
I'll clarify right away. For our round flue extractors:- The round adapter is the piece that:- fits onto the flue/pipe,- and on which the aspirator is then mounted.- The adapter, as you say, usually arrives already assembled on the aspirator, so you see a "single block". And yes, I confirm: ️ The Gemi extractor with adapter fits externally onto the flue (pipe). It does not go inside, but embraces the tube from the outside. So in your case:1. The 12 cm tube comes out of the wall.2. Take the vacuum cleaner (which already has the adapter mounted).3. Insert that round “cup” (adapter) over the tube, from the outside.4. Tighten the screws/clamp well so that:- you don't dance,- don't slip off. Everything I explained to you about the support (bracket/shelf on the wall):- remains valid: the aspirator, even if it has the adapter already mounted, must not be hung only on the tube, but it is better that it rests on a bracket fixed to the wall, given the horizontal position.
No. not vertically. To choose the right aspirator you need to measure this:- If the flue is round: → measure the external diameter, i.e. the distance from one side of the pipe to the other, passing through the center (in cm or mm). Example: if the size is 22 cm oversized, choose the 220 mm – 22 cm adapter on the site.- If you see a square or rectangular masonry chimney above: → then you need the width and depth measurements (e.g. 20×20 cm, 30×40 cm). You do not need the height of the tube to choose the size of the aspirator
For round flues, we supply adapters from 10cm up to a maximum of 43cm external diameter. Simply select the extractor with a round base on the site and choose the size of the desired adapter from the drop-down menu based on the external diameter of your flue.
You made the correct choice! If the flue has an external diameter of 150 mm (15 cm), the round base extractor with 150 mm adapter must be selected. This ensures perfect compatibility and easy installation. If you have other doubts about the installation or want advice on which model to choose (basic, professional, stainless steel, copper), just ask me!
For the case (brazier for domestic and occasional use) you can rest assured: both are fine. The choice is above all practical/aesthetic. In general:- Round flue (tube)- It is the simplest and “standard” solution for connecting a vacuum cleaner.- Facilitates the choice of the round base aspirator:- put the round tube- and then you choose the aspirator with an adapter of the same external diameter (e.g. Ø20 cm tube → 200 mm adapter).- It is often preferred when the chimney cap is simple, with a pipe protruding from the roof.- Square / rectangular flue (masonry)- It is usually used if you want a more "traditional" masonry chimney cap.- In that case, for the aspirator, the square-based model with adjustable brackets is used, which cover from approximately 20×20 cm up to 43×43 cm.- If there is a round tube inside the wall, you must close the gap between the tube and the wall and bring the tube flush with the wall, then mount the extractor on the wall. If you don't have particular aesthetic needs, for simplicity's sake I would tell you: > It is more practical to choose a round flue (pipe) and then a round base extractor with an adapter for the diameter of the pipe. To be able to tell you the size of the adapter and the precise type of aspirator (round or square, but at this point we lean towards round), all I need is:1. Approximate height: approximately how many meters from the brazier to the roof?2. How do you think about the exit to the roof:- round tube protruding or- brick chimney with the pipe inside?
When multiple pipes arrive in the chimney pot (for example 3), you must be careful:- The Gemi chimney extractor is designed to extract fumes coming from the duct (or ducts) on which it is installed.- In the case of multiple pipes inside the same chimney pot, the recommended solution is to extend the pipe of the flue that you want to extract (or that needs most), bringing it higher than the others. In this way, the Gemi aspirator can be installed with the round adapter on the highest tube.-
For a flue approximately 8 meters high you have no height problems: Gemi extractors work up to 50 meters of flue, so you are fully within the range. According to company indications:- The basic model extractor is suitable for flues measuring 3 meters or more- The professional model is recommended especially for chimneys shorter than 3 meters or where maximum resistance to temperatures and more power is desired. Summarizing the main models:- Basic model- Suction: 2500 m³/h- Resistance: up to 300 °C- Warranty: 3 years- Suitable for flues from 3 m upwards (like the 8 m)- Professional Model / Steel / Corten / Copper- Suction: 3800 m³/h- Resistance: up to 700 C (even in the event of a chimney fire)- Warranty: from 6 to 10 years depending on the model- Recommended in particular for short pipes (<3 m), or where a more performing and/or aesthetic product is desired. For the case (8 m, thermo fireplace, 25 cm round pipe):- The Base model with 250 mm round adapter is sufficient- However, if you want more power margin, more heat resistance and a longer warranty, you can opt for a professional model (3800 m³/h, 700 C) always with a 250 mm adapter. Just pay attention to one thing: if you often use the vacuum cleaner at maximum speed (6th), both basic and pro can end up sucking up part of the heat as well because they greatly increase combustion. For everyday use, an average speed is usually sufficient, increasing only when you open the door to load wood. If you tell me:- if you use the thermo fireplace every day or only occasionally- if you favor more savings or maximum robustness/durability I can tell you if, in your specific case, it makes more sense to stay on the Basic or go up to the Professional.
If you turn on the thermo fireplace and leave the extractor off, this happens:- The Gemi extractor, when turned off, does not plug the flue. The structure is completely open, therefore:- smoke continues to come out of the barrel normally- you don't risk filling the house with smoke "because of the extractor".- If the power goes out while it is on, the same thing applies:- the engine stops- but the smoke still comes out of the chimney. So you can easily:- turn on the fireplace stove even with the extractor off- decide to turn it on only when needed (for example:- when turned on,- when you open the door to load wood,- in case of wind or poor draft). In your specific case (smoke problem when you open the door):- if you always leave it off, the behavior will be like now: when you open the door it is likely that the smoke will come back into the house;- if you use it only in critical moments:- keep 1–2 during normal operation (or even off if you have no problems),- turn it up to 3–4 before opening the door: this way the smoke is drawn upwards and not into the house.
Thanks for the information about your chimney. I will briefly explain the options available among our fireplace extractors, so you can choose the one that best suits your needs:1. Basic Model- Suction capacity: 2500 m³/h- Resistance up to 300 °C- 3 year warranty- Recommended for standard situations without particular high temperature requirements.2. Professional Model- Suction capacity: 3800 m³/h- Resistance up to 700 °C (even in the event of a fire in the chimney)- 6 year warranty- Ideal for low flues but also perfect for 5 meter flues,
Good afternoon! I will gladly help you with all the information.
For a 30 kW thermo fireplace with insulated flue, the choice of extractor depends mainly on the temperature of the fumes that could pass through it.- The basic model of Gemi extractors resists up to 300 °C, has a suction capacity of 2500 m³/h and is suitable for fireplaces, stoves and thermo fireplaces where temperatures normally do not exceed 300 °C.- The professional, steel and copper models resist up to 700 °C and are recommended in cases of:- Particularly powerful thermo-fireplaces or fireplaces- Flue 3 meters shorter- Possible risk of higher temperatures, or where you want greater safety even in the event of a fire in the chimney. So, if you think that the fumes produced by your thermo fireplace can reach temperatures above 300 °C, or you simply want maximum safety and durability over time, we recommend choosing a model that resists up to 700 °C (professional, steel or copper). If, however, it can be confirmed that the flue gas temperature never exceeds 300°C, even the basic model could be fine. it is advisable to check the technical specifications of your thermo fireplace and, in case of doubt, always opt for greater thermal resistance!
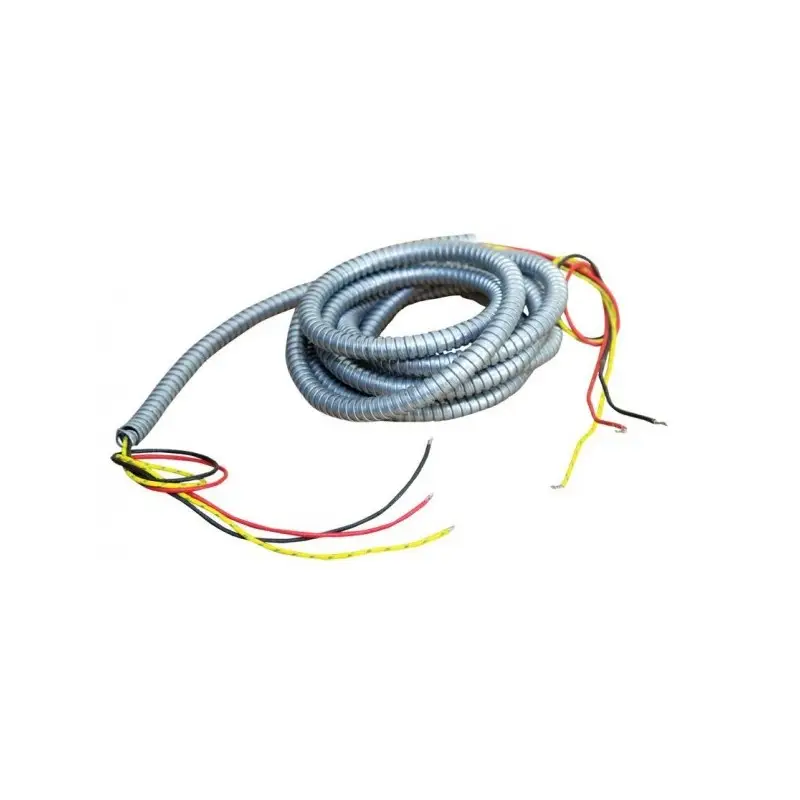
No. Generally it is not necessary to pierce the flue to pass the cable. If you want to pass the extractor cable inside the chimney, you can use an existing space or insert the cable together with the extractor during the installation phase. However, you need to use a special cable resistant to high temperatures (like the one you find on our site), which can be positioned inside the chimney in complete safety. However, if it is not possible to use the existing space and the flue does not have suitable openings, it may be necessary to drill a small hole (usually a few millimetres, sufficient for the passage of the cable) in the wall of the flue. However, in most cases, taking advantage of the junction points or any joints, the hole is not essential. In short:- you can pass the cable inside the chimney.- Need high temperature cable.- Piercing the flue is normally NOT necessary, but it depends on how it is made.
For a barbecue used only occasionally, the Base model is generally sufficient: it is designed specifically for fireplaces, wood ovens, hoods and barbecues, extracts 2500 m³/h, resists up to 300 °C and has a 3-year guarantee. Before confirming this, however, I need some fundamental information:- How is the barbecue flue/chimney made?- Round (diameter in cm)?- Square/rectangular (internal measurements in cm)? Based on this I will tell you whether to focus on:- Base model aspirator (square base, for rods 20x20 cm up to 43x43 cm)- or Round Base model aspirator (for round rods from 12 to 40 cm) Answer only with shape (round/square/rectangular) and internal measurement, so I'll tell you exactly which code/model to take
For a round flue with an external diameter of 10 cm (100 mm), a Gemi smoke extractor with a round base can be used. During the purchase, you will simply have to select in the drop-down menu the size of the adapter corresponding to the diameter of your flue, therefore the 100 mm adapter. Summary:- Outlet type: round- External diameter: 10cm (100mm)- Recommended extractor: round base model with 100 mm adapter. The Gemi extractor is also suitable for kitchen hoods and solves draft, odor and fume problems
Assembly of the Gemi fireplace extractor is do-it-yourself: the intervention of specialized technicians is not necessary. Inside the package you will find everything you need for installation and detailed instructions are included (they are available in all languages).
If you live in a condominium with a shared chimney, it is important to know some things:- The Gemi chimney extractor can also be installed on very high condominium flues: it works perfectly up to 50 meters in height.- Before proceeding with the purchase and installation, it is always advisable to consult the condominium administrator and/or the other condominium owners for authorization, since modifying a common chimney may require the condominium's consent.- The extractor is mounted on the chimney outlet, therefore access to the roof/upper part of the chimney will be needed.- Once installed, the extractor improves the draft and solves smoke problems in the house, often also benefiting the other condominiums who share it.- It is essential to close any spaces between the flue and the brickwork so as not to disperse the suction force.
I will explain the main differences between the two Gemi vacuum cleaner models and help you choose the most suitable one for the BBQ under the gazebo:
Professional model vacuum cleaner- Suction capacity: 3800 m³/h (more powerful)- Temperature resistance: Up to 700 (also suitable in case of fire in the chimney)- Warranty: 6 years- Energy consumption: From 64W to 261W (depending on speed) Recommended if the flue is less than 3 meters or in spaces where there is a greater risk of smoke accumulation, such as barbecues under pergolas/gazebos or other semi-open environments.
Professional model vacuum cleaner- Suction capacity: 3800 m³/h (more powerful)- Temperature resistance: Up to 700 (also suitable in case of fire in the chimney)- Warranty: 6 years- Energy consumption: From 64W to 261W (depending on speed) Recommended if the flue is less than 3 meters or in spaces where there is a greater risk of smoke accumulation, such as barbecues under pergolas/gazebos or other semi-open environments.
No. It is not necessary to dismantle the Gemi aspirator to clean the chimney. For recommended maintenance of the vacuum cleaner:- with the heat off,- a couple of times a week you can bring the regulator to maximum speed for a couple of minutes: in this way the fan and the flue remain clean without having to dismantle everything. For any extraordinary interventions by the chimney sweeper, usually:- you can work from the lower part of the chimney,- or, if the technician prefers to have completely free passage, only the hat/motor can be temporarily dismantled (still a simple, "do it yourself" operation, as per the instructions in the kit).
Yes. You can still mount it even if there is a difference of about 10 cm, but it is much better if the void around it is closed. From our technical indications, in cases where the masonry flue is larger than the base of the extractor, we recommend:- close the spaces/voids between the flue outlet and the wall (or between the flue and chimney pot)- do it with mortar or with a shaped sheet. This serves to:- do not waste the suction force- prevent air from entering laterally and reducing the effectiveness of the draft. So, in your case 52x42 with extractor covering a central part:1. place the extractor on the upper part of the chimney cap and fix it to the 4 corners;2. it is better to close the lateral voids (those ~10 cm) (mortar or sheet metal), so the extraction is concentrated only on the flue. If you describe to me exactly how the chimney above is made (side openings, cap, etc.), more precisely where it is best to close the gaps.
In the square version of the Gemi extractors (43x43 cm plate), the central hole of the plate does not have a single fixed diameter: in fact, the plate is supplied without a predefined central hole or with a smaller hole and pre-cut guides, which can then be easily adapted to the diameter of your flue during installation.
To choose the correct size of the round flue extractor, you need to know the external diameter, not the circumference. To calculate the diameter from the circumference value you can use the formula: > Diameter = Circumference / 3.14 So, for a circumference of 63 cm:- Diameter = 63 / 3.14 ≈ 20 cm You will therefore have to select the 200 mm (20 cm) adapter from the drop-down menu on the site.
Yes. The Gemi fume extractor is also good for a restaurant kitchen hood. From the information available:- it is suitable for restaurants, ovens, takeaways, pizzerias, barbecues and kitchen hoods- it is suitable for extracting greasy fumes and cooking smells, even in professional environments. In your case, therefore, it can be used as an extraction motor for the restaurant hood, as long as the diameter and type of installation are compatible with the flue/smoke expulsion pipe. To help you better:- what diameter does the restaurant hood duct/flue currently have?- is it a kitchen with very intense use (grill, embers, fryers all day) or medium use? In the meantime, I would also like to ask you for a piece of information that will help us with any future needs:
At the moment we do not have a vacuum cleaner with a specific 200x300 mm connection in our catalogue. For rectangular flues like the (200x300 mm), the solution is to use an extractor with a square base (not round), because:- Gemi square-based extractors are fixed with adjustable brackets on square or rectangular flues- They cover sizes from a minimum of 20x20 cm up to a maximum of 43x43 cm. In your case:- The 200x300 mm (20x30 cm) measurement is within the manageable range (minimum 20x20 – maximum 43x43),- Then you can mount a chimney extractor with a square stainless steel base by fixing it with the brackets on the four sides of the chimney. You will not have a dedicated "200x300 mm adapter", but the fixing takes place via the adjustable brackets of the square-based model.
If the flue is round with a diameter of 25 cm, you need to choose the extractor with a round base and select from the drop-down menu the size of the adapter corresponding to the external diameter of the flue, therefore 250 mm (25 cm).
I'll explain everything to you! Regarding the installation of Gemi fireplace extractors:- A specialized technician is not necessary. Assembly is meant to be simple and do-it-yourself.- you can follow a detailed guide and a video tutorial that explains step by step how to install the extractor on any type of chimney. [Installation guide and video tutorial](https://www.gemimarket.it/content/12-guida-all-installation-aspiratori) If you still prefer to get help, you can ask for the support of a trusted electrician, bricklayer or plumber. On average, installation takes about an hour.
Yes. Even for rectangular flues larger than 43x43 cm it is possible to use our chimney extractor with a square base. In this case, simply do not use the adjustable brackets supplied. The base of the extractor is positioned directly on the flue outlet and fixed to the corners: there are already holes on the base for fixing with fisher.
I'll explain how to proceed to mount the basic extractor on your 60x45 cm rectangular flue:1. Do not use the adjustable brackets: The adjustable brackets of the extractor are designed for flues up to 43x43 cm.
you can pass the high temperature resistant cable inside the flue, but this must be done with some care. I'll ask you something first: do you already have the extractor installed on the chimney stack, or does it still need to be mounted? In general, the transition is done like this:1. Choosing the right cable- The Gemi *high temperature resistant* cable (in fiberglass with steel sheath, up to 350) must be used, the specific one for connecting the vacuum cleaner to the speed regulator.- The length is chosen from the product drop-down menu, based on the meters you need.2. Cable routing- The cable starts from the extractor (on the chimney) and goes down inside the flue to the point where you want to position the speed regulator, or near a junction box.- It is suitable to be inside the barrel, because it is resistant to high temperatures; just remember that it is not suitable in case of fire.3. Practical method to pass it (generic indication):- From the chimney, first run a probe/guide wire (or sturdy wire) down to the desired exit point.- Tie the high temperature cable to the guide and then pull from below, making it go up or down along the chosen path.- Avoid excessively sharp bends or points where it could get stuck in the brickwork or in narrowings of the barrel.4. Electrical connections- At the top: connect the resistant cable to the vacuum cleaner.- Bottom: connect the cable to the speed controller.- The first section of cable that comes out of the extractor is already resistant to high temperatures (approximately 80 cm supplied as standard); the additional cable is used to extend this section to the regulator. If you tell me:- indicative height of the barrel (e.g. 4 m, 6 m...)- where you want to put the regulator (ground floor, attic, near the fireplace, etc.) I can suggest how many meters of high temperature cable you should take and the most convenient route.
Thanks for the additional information! For a 20x20 cm square chimney flue measuring 9 meters high, you can choose between these Gemi extractor models with a square base:1. Basic Model- Flow rate: 2500 m³/h- Resistance up to 300 °C- 3 year warranty- Excellent for flues from 3 meters upwards (therefore perfect for the height)2. Professional Model- Flow rate: 3800 m³/h- Resistance up to 700 °C (also suitable in case of high temperatures or flue fires)- 6 year guarantee- Recommended especially for those who want maximum performance and safety3. Stainless steel or Corten model- Flow rate: 3800 m³/h- Resistance up to 700 °C- 8 year guarantee- Corrosion-resistant materials, ideal if the flue is exposed to atmospheric agents4. Professional Copper Model- Flow rate: 3800 m³/h- Resistance up to 700 °C- 10 year guarantee- The top of the range, with stainless steel fan and total painting Which one to choose?- If you are looking for a good quality/price ratio and the kitchen does not develop very high temperatures, the basic model is fine.-
For an external flue with a side greater than 43 cm (as in your case which is 50 cm), you can still install the Gemi smoke extractor by following these instructions:- Gemi electric extractors with square base are equipped with adjustable brackets for fireplaces from 20x20 cm up to 43x43 cm. In your case, the size is higher.- When the flue exceeds 43x43 cm, just DO NOT use the adjustable brackets.- you can place the base of the extractor directly on the mouth of the flue and fix it using the four corners of the extractor; Special holes are already provided for inserting fisher type plugs.- It is important that the surface on which you fix the vacuum cleaner is smooth, to ensure stability and a good seal. If the flue is much larger than the base of the extractor, you can consider reducing the useful area with a sheet metal or masonry frame, so as to be able to fix the motor more stably and improve extraction efficiency. Do you want advice on which model to choose or do you need more technical details?
Thanks for the question, the situation is very common on condominium fireplaces or in any case with multiple flues collected in a single concrete chimney. Yes. It is possible to install the Gemi extractor inside the chimney cap, without the top cap. Before ordering, however, we recommend checking the space available inside the chimney pot:- You need a minimum free height of at least 37 cm and a width of at least 43 cm, since the square base of the extractor measures 43 x 43 cm.- In case of internal installation, the hat can be removed: just indicate this when ordering. Furthermore, due to the situation (two flues inside a single 80x30 rectangular chimney), it is recommended:- Extend the flue to be connected to the extractor (for example using a stainless steel extension), so that the extractor works ONLY on the one you are interested in.- Seal the spaces between the stainless steel flue and the chimney cap structure well (you can use mortar or sheet metal) to avoid suction losses.
In this case, it is always necessary to consider the external diameter of the flue, i.e. the 200 mm (20 cm) one, because the extractor must be installed on the external part of the pipe, not on the internal one. So, if your insulated flue has an external diameter of 200mm, you will need to choose the 20cm (200mm) adapter.
In the case of a round flue with an external diameter of 45 cm, the round base extractor can be used, but it is important to select the correct size adapter. However, normally the adapters available are in standard sizes (such as 40cm, 45cm, 50cm).
For the professional round extractor it is normal to see two (or more) different prices: the price changes based on the diameter of the flue adapter. For example:- for small diameters (e.g. 12 cm, 15 cm) the price is lower- for larger diameters (e.g. 20, 22, 25 cm and more) the price increases. Therefore, if you select a size in the drop-down menu (e.g. "external flue diameter 12 cm") you will see a price; by changing the size (e.g. 25 cm) the system updates the price automatically. If you tell me:- the external diameter of your chimney flue. I will immediately confirm which price applies to your case.
No. There is no need to worry: the Gemi chimney extractor has been designed to prevent the infiltration of rainwater, even in the event of heavy rain or wind.
For a 52x52 cm flue, you can still install the Gemi extractor with a square base, following this logic:- The adjustable brackets reach up to 43x43 cm, so in your case they should not be used.- it is necessary to place the base of the extractor directly on the flue outlet.- There are already holes in the 4 corners of the extractor base: there you can insert fisher type plugs (or equivalent systems) to secure it to the wall. The only important thing is that there is a continuous support surface of at least 40x40 cm: with 52x52 cm you are well within the margin. For safety, it is always advisable to have the assembly and electrical connection done by an electrician.
Yes. For a 20x30 cm rectangular chimney flue you can use a chimney extractor with a square (or rectangular) base.
For the case (stone chimney cap with round pipe Ø150) you are correctly thinking of the model with round adapter. From the technical information available for Gemi vacuum cleaners:- Base of the aspirator (square part): 43 x 43 cm- Height of vacuum cleaner without brackets: 43 cm- Height of aspirator with brackets: approximately 60 cm As regards the model with round tube/adapter (for Ø150 mm barrel):- The round adapter is chosen based on the external diameter of the flue (in your case 150 mm, if the external diameter is actually 150).- Adapters are available for rods from 10cm to 43cm external diameter. So, in summary, the "complete piece" (vacuum cleaner + round adapter) will have:- overall dimensions: 43 x 43 cm- total height above the chimney cap: 43–60 cm depending on assembly and use of brackets. To be very precise with the adapter:- measure the real external diameter of the pipe with the meter (not just the nominal 150)- on the site, in the "for round flue" model, select the adapter corresponding to that diameter. If necessary, I can help you understand whether the basic, professional, steel, corten or copper model is best for you based on:- height of the flue- exposure to rain/salt- type of use of the fireplace.
For the Gemi aspirator this:1. Can electrical wires pass inside the chimney? Yes, it's possible. You have two ways to make the electrical connection:1. External passage to the flue- Use a normal rubberized outdoor cable 3 x 1.5 mm² (FG7 type).- You run it outside the flue up to the speed regulator.- extend the first meter of cable already connected to the vacuum cleaner.2. Internal passage to the flue- In this case it is necessary to use the special Gemi cable resistant to high temperatures (up to 300).- It is tested and certified according to safety regulations.- You can purchase it on the site by selecting the meters you need from the drop-down menu.- it can also be placed inside the flue or fireplace safely. So yes, cables can run inside, but only if you use the specific high-temperature cable.2. Do you have technicians in Sardinia for assembly? No. Gemi does not have dedicated installers in the area and does not directly deal with assembly in Sardinia (or elsewhere).- Assembly of the extractor is done by yourself.- On the site you will find a step-by-step video tutorial for installation on any type of chimney:- Installation guide link: www.gemimarket.it/content/12-guida-all-installation-aspiratori- If you prefer to have someone install it, you can contact:- an electrician- a bricklayer- or a plumber- The approximate installation time is approximately one hour. If you describe to me what type of flue you have (square, round, with internal tube, approximate measurements), I can give you more precise information on the model of extractor and the most suitable type of assembly. Before continuing, would you like to leave me a contact email (optional)? This way, if necessary, I can refer to you more easily for any clarifications.
For the type of use you describe (barbecue in a restaurant, intense use, 12 m of flue, fatty fumes and high temperatures) it is important to focus on a high-performance and high heat resistance model. Based on the information available on our models:1. Why you need a “high-end” model- Professional cooking + grilled meat = very fatty smoke and high temperatures.- Long flue (about 12 m): a lot of extraction capacity is needed.- In these cases it is advisable to use a vacuum cleaner that:- Suction 3800 m³/h- Resists up to 700 °C (even in the event of a chimney fire)- Have an extended warranty.2. Model suitable for the situation (round flue Ø 30 cm) With a 30 cm round flue, among our round models I would like to point out in particular:- Acciaio Tondo model extractor Link: https://www.gemimarket.it/aspiratori/207-1298-aspiratore-in-aiuto-per-cucina-a-legna-8053017261607.html- Material: AISI 304 stainless steel (highly resistant to corrosion and salt, therefore very long-lasting)- Suction power: 3800 m³/h- Resistance: up to 700- Warranty: 8 years- Connection: for round flue from 12 to 40 cm, therefore 30 cm fits perfectly.- Also designed for wood-burning stoves, ovens and restaurants. For a 240 x 110 cm grill under a conical stainless steel hood and for professional use, this is the most suitable model among the round steel ones for kitchens, because it combines:- high suction,- high thermal resistance,- specific material to last over time in a professional environment.3. Alternatives in the range (
Yes, it's possible. For a 40 cm (400 mm) round flue we have the round copper model with three-phase electric extractor, visible here: Round base copper extractor (up to 40 cm)- Copper category link: https://www.gemimarket.it/181-aspiratore-per-camino-modello-rame- Round base product (copper): https://www.gemimarket.it/aspiratori/196-1335-aspiratore-professionale-tondo-con-aspirafumo-elettrico-per-camini-8053017262802.html#/47-diametro_canna_fumaria_esterna-40_cm_400_mm On the site you must:1. Choose the round base copper model.2. In the drop-down menu, select external flue diameter 40 cm (400 mm).3. Choose the three-phase version from the motor options (where indicated). Important: the measurement to consider is the external diameter of the flue, because the adapter fits on the outside; we supply the adapter slightly wider to make it fit perfectly. If you confirm me:- exact external diameter (40 cm),- barrel material (stainless, copper, etc.), I can tell you exactly which item to select in the menu. In the meantime, to be able to follow you better,
To choose between a basic and professional model vacuum cleaner there are 2 main criteria:1. Height and “difficulty” of the chimney2. Temperatures that can be reached (risk of overheating/soot fire), the differences and then I'll tell you when to choose one or the other.
For a chimney flue of approximately 6 meters you can choose both the basic model and the professional model chimney extractor.- Basic model: suction capacity of 2500 m³/h, resists up to 300 °C, with 3 years warranty.- Professional model: recommended especially if the flue is less than 3 metres, but is also fine for higher heights such as. It resists up to 700 °C (even in the event of fire), extracts 3800 m³/h and has a 6-year warranty. Both models are suitable for the need, the choice depends on the level of performance and resistance you prefer.
For a rectangular-shaped chimney flue, we recommend choosing the chimney extractor with a square base. This model is equipped with adjustable brackets that allow fixing to both square and rectangular flues, with sizes ranging from a minimum of 20x20 cm up to a maximum of 43x43 cm.
I understand the fear well, especially after the experience with the other aspirator. From what you describe, it is very likely that the old vacuum cleaner was:- mounted too close to the heat source (immediately after the hood, therefore in a very hot area)- and/or a model not designed to withstand high smoke temperatures (as are those for fireplaces and Gemi-type barbecues).
For a chimney approximately 10 meters high, both the basic model and the professional model are suitable. Both effectively solve the problem of fume extraction. If you want more details on the differences between the two models or help in choosing based on other needs (type of chimney, diameter, etc.),
If there is a power cut and the Gemi extractor turns off, there is no need to worry: the extractor is designed to be completely open even when it is turned off, so it does not block the flue. The smoke will continue to come out of the flue normally without accumulating in the house, just as if the extractor were not there.
I'll explain in detail: The Gemi extractor is equipped with a special protective cap that protects both the aesthetic part of the chimney pot and the engine from atmospheric agents such as rain and wind. This protection prevents water from entering the flue even in the event of heavy rain or strong winds.
I'll explain how to proceed: It is possible to pass the power cable of the chimney smoke extractor both outside and inside the chimney. If you want to pass it inside, you will have to use a special cable resistant to high temperatures (up to 300), which can be purchased separately from our website by selecting the quantity of meters needed. The Gemi aspirator is normally set up with a first section of cable already connected; in general, it is not necessary to drill the chimney flue specifically, unless the installation involves particular passages due to the shape of the chimney or the flue itself. In many cases, in fact, there is already a space for the cable to pass through, or you can use the route of the old cable, or insert the new cable when installing or replacing the extractor. Attention:- Do not remove the original cable from the motor terminal block to replace it with any cable! The one provided is suitable for high temperatures.- If you need an extension, you can connect it using our special cable, to be laid inside the chimney. Do you want the direct link where to buy the high temperature resistant cable? If you wish,
If the flue is round and has an external diameter of 140 mm (14 cm), you must purchase:- the round base aspirator- by choosing the 140 mm – 14 cm adapter from the drop-down menu. The extractor adapter covers the pipe externally, so the measurement to consider is always the external diameter of the flue, not the internal one.
For a chimney flue with an external measurement of 48x48 cm, the chimney extractor with a square base can be installed. Our adjustable brackets cover sizes from 20x20 cm up to a maximum of 43x43 cm. However, in your case, since the measurement is greater than 43x43 cm, installation is still possible but you will have to proceed as follows:- Do not use the adjustable brackets.- Place the base of the extractor directly on the flue outlet.- The four corners of the base of the vacuum cleaner already have holes provided for fixing: you will have to fix the vacuum cleaner with fishers directly on the surface at the four corners.- Make sure that the support surface is at least 40x40 cm, which is already satisfied by your measurement. Note: During the purchase, simply select a model of extractor with a square base (on the site you can choose the one you prefer) and, if there is a space to add notes or communications to the seller during checkout, enter: "Installation on a 48x48 cm flue, without brackets, with direct fixing to the corners."
Yes. It is possible to install the Gemi extractor inside the chimney pot, even in situations where the chimney pot is large and artistically crafted. However, you need to pay attention to some measures:- Internal space required: To install the extractor inside the chimney cap, there must be at least an internal space of 43x43 cm in width and 37 cm in height.- It is important to remove any obstacles or, if necessary, order the aspirator without a hat (so as to insert it more easily).- Before ordering, we recommend carefully checking the dimensions available inside your chimney cap. Here you will find a diagram with all the measurements of the aspirator: [Aspirator dimensions diagram](https://static.gemimarket.it/img/schede/aspiratori/base/misure-aspiratore.jpg)
For barbecues without a flue, the classic Gemi extractor is not suitable, because it is designed to be mounted on the flue and exploit the draft towards the outside. From the available information it appears:- The Gemi aspirator:- it is not an activated carbon filter- it is not a smoke/odour suppressant- serves to reproduce the natural draft of an already existing flue (fireplaces, stoves, ovens, restaurants, barbecues with flue, hoods, etc.). For activated carbon systems without flue (such as some internal filter hoods) I have no Gemi products to offer you in the catalog at the moment.
If the flue has an external lining of particular dimensions (for example, larger than normal because it contains two eternit flues and is lined with a curtain), the choice of extractor depends mainly on the external measurements of the lining where it will be installed. Here are the general rules for choosing:- Gemi extractors with square/rectangular base are equipped with adjustable brackets and adapt to flues from 20x20 cm up to 43x43 cm.- If the outlet is larger than 43x43 cm, you can still install the extractor: just do not use the brackets and fix the base of the extractor directly to the four corners (there are already holes pre-drilled on the base for fixing).- If you have a round flue, the version with round adapter is available, to be chosen based on the external diameter of the flue. What to do in your case:- If the external covering exceeds 43x43 cm, you can still mount the square extractor by fixing it directly to the base, without brackets.- If you have doubts about the size or shape, it is advisable to precisely measure the external part where you want to place the extractor. So I can help you choose the right model or give you a tailor-made solution. Do you want to tell me the exact measurements of the external covering? So I can confirm the compatibility immediately!
The Gemi chimney extractor can be installed either directly on the chimney flue or above the chimney pot, depending on the situation:- If you have a square or rectangular chimney flue with the pipe at the same height as the brickwork, you must first close any gaps between the pipe and the brickwork and then install the extractor directly on the chimney pot brickwork.- If the flue pipe is lower than the wall, it must be brought to the level of the wall before installation.- If the round pipe of the flue goes much higher than the chimney cap, in this case it is recommended to install the round version of the extractor directly on the pipe. Alternatively, the extractor can also be inserted inside the chimney cap, but the dimensions must be evaluated and, if necessary, order the model without the hat.
It is not necessary to specify whether the adapter for the round aspirator must be male or female. The adapters we supply are designed to fit externally to the flue, therefore they are considered "female". The adapter covers the terminal of your flue from the outside. If the chimney cap ends with a female coupling (i.e. the pipe has a free external edge), our adapter will still fit externally, guaranteeing correct installation. you just need to indicate the measurement of the external diameter of your chimney when choosing the adapter.
I'll answer you point by point.1. Routing the electrical cable and connection For the chimney smoke extractor you have two options:1. Cable outside the flue- Use a 3 x 1.5 (FG7) rubberized outdoor cable.- This cable extends the first meter of cable already attached to the vacuum cleaner.- You pass it outside the flue until you reach the speed regulator/switch, which is then connected to the 220 V current.2. Cable inside the flue- In this case it is necessary to use the special Gemi cable resistant to high temperatures (up to 300).- This cable can be purchased separately by selecting the quantity (metres) you need from the drop-down menu.- it can also be positioned inside the flue or fireplace and then brought to the regulator/electrical system. In both cases:- The aspirator connects to the speed regulator.- The regulator must be connected to the 220 V mains and can be installed wherever it is most convenient for you, as long as it is not near heat sources, because it has a transformer inside that heats.2. Mounting brackets (external flue < 43x43 cm) If the flue, seen above, is less than 43x43 cm, you can normally use the adjustable brackets included in the square base extractor kit. In the kit you will find:- 4 large brackets- 4 small brackets- Screws and bolts- Assembly instructions- Speed controller Simplified assembly:1. Position the large brackets- Place the vacuum cleaner upside down.- Place the 4 large brackets on the 4 sides of the vacuum cleaner base.2. Adjust the size- Measure the section of your chimney flue (e.g. 30x30, 33x33, rectangular, etc.).- Using the tape measure, adjust the distance of the brackets based on the size of the rod.- Add about 1 cm more than the actual measurement, so that the aspirator rests well and fits perfectly on the barrel.3. Lock with the small brackets- Use the 4 small brackets to lock the large ones in the chosen position.- the small brackets can be fixed inside or outside the large ones, based on the width of the chimney cap.- Use smaller screws with bolts to secure small and large brackets together.4. Fixing on the chimney- Once the frame has been adjusted, position the extractor above the flue.- Tighten the brackets well so that the vacuum cleaner remains secure. If, however, you have a flue with one side greater than 43 cm and the other less than 43 cm, they can be mounted using the smaller brackets present in the kit, as indicated in our instructions.3. Height of the flue (250–300 cm) the flue of approximately 250/300 cm is not a problem: the Gemi professional extractor fan can be installed at any height, even on flues only 1 meter high. The important thing is that it is fixed correctly on the head of the flue.
At the moment, among the information available, Gemi vacuum cleaners with a square base have adjustable brackets from 20x20 cm up to a maximum of 43x43 cm. For larger flues (e.g. 45x50, 60x60, etc.) the expected installation is this:- adjustable brackets are not used- place the base of the extractor directly on the flue outlet- fix the extractor to the 4 corners, where the holes for the plugs are already present. Therefore:- a model with adjustable brackets up to 55 cm is not available- however, if you have a 55 cm wide flue, in many cases you can still mount the extractor by placing the base and fixing it to the corners, as long as you have a support base of at least 40x40 cm (check the useful internal measurement of the flue). If you tell me:- the exact measurements of the flue (e.g. 55 x ___ cm, internal or external)- if it is made of masonry or stainless steel I will tell you more specifically whether the solution without brackets is suitable for your case. Furthermore, I also ask for a contact email for complete assistance (if you would like to share it).
Yes. I confirm that the professional vacuum cleaner with square base is equipped with adjustable brackets that can be set in both a square and rectangular shape.
For the problem of smoke when it is windy, the most effective solution we can offer you is our electric fireplace extractor (chimney puller / smoke extractor). It is designed precisely for these situations: *"our fireplace extractor is particularly suitable in case of strong winds as it manages to solve the problem of smoke"*. To recommend the right model I only need to understand one thing:- the chimney flue is:1. Round (round tube coming out of the roof)2. Square or rectangular in masonry3. Masonry chimney with a round pipe inside?- In this case: is the pipe flush with the wall or does it protrude far above the chimney? Based on the - If it has a square/rectangular chimney cap with tube at the same height as the brickwork → the space between the tube and the brickwork is closed and the model with an adjustable square base is installed directly on the brickwork.- If the round pipe protrudes a lot above the chimney cap → the round version is used, chosen based on the diameter of the pipe. The installation is do-it-yourself, with videos on our site; in case of difficulty you can still ask for help from an electrician or contact our technicians. If he tells me:1. Shape of the chimney (round/square/rectangular, with or without chimney cap)2. Diameter of the tube, if it is round I will tell you exactly which Gemi model to choose on the site and how to mount it in your specific case. In the meantime, to be able to follow it better,
Yes. You can also mount the Gemi extractor on a chimney with these particular dimensions. the installation:- The fans with a square base have adjustable brackets, ideal for square or rectangular flues from a minimum of 20x20 cm up to a maximum of 43x43 cm.- In your case, the external flue is larger (66.5x65 cm), so you cannot use the standard adjustable brackets. How to proceed in these cases: When the flue is larger than 43x43 cm, the extractor can still be installed:- Simply place the base of the extractor directly on the mouth of the flue.- Fix it with fisher (plugs) in the four corners of the base of the extractor, where special holes are already provided for fixing, without using the adjustable brackets.
The difference between the basic (“normal”) model vacuum cleaner and the professional model is mainly in:1. Maximum temperature- Base: approved up to 300 °C- Professional: approved up to 700 °C → The professional is safe even in the event of a chimney fire.2. Suction power- Base: approximately 2500 m³/h- Professional: approximately 3800 m³/h → The professional aspirates more and is more effective in difficult situations (poor draft, short barrel, returning fumes).3. Flue height- For very short pipes (e.g. 1.5–3 m), professional pipes are recommended, because they better tolerate high temperatures near the fire.- The base is suitable for flues at least 3 m above the heat source.4. Warranty- Base: 3 years- Professional: 6 years - If you have a low flue or significant draft problems, or you want more safety/reliability → professional is better.- If you have a chimney at least 3 meters long and a more "quiet" use → the basic model may be sufficient. If you tell me:- height of the flue- type of stove/fireplace (wood, pellet, thermo fireplace, etc.) which of the two is most suitable for your specific case. In the meantime, to be able to follow you better in the future,
The chimney extractor is specially designed to prevent water infiltration in the event of rain, even heavy rain. The base of the extractor has a rise that prevents rainwater from entering the flue. Furthermore, the Gemi extractor is also suitable in the presence of strong winds, helping to solve smoke problems caused by the wind.
The Gemi extractor is designed to be installed on the chimney stack, therefore outside, at the top of the flue, not inside the room or inside the hood. I'll clarify the cases for you:- Where it is normally mounted- above the chimney pot (on the chimney)- it can be:- with square base for square/rectangular masonry flues- with round adapter for round tubes- Inside the chimney- Yes. It can be mounted inside the chimney cap, but:- must be ordered without hat- it is necessary to check that inside the chimney pot there are at least:- 37cm high- 43 x 43 cm wide (the base is 43 x 43 cm)- In this case the extractor is inserted into the chimney pot itself.- Inside the room or inside the hood- No: the extractor is not installed in the room, nor directly inside the hood above the hearth.- It should always be positioned at the end of the chimney flue, on the roof/chimney stack.- Classic masonry fireplace without insert- Yes. It can also be used on a traditional brick fireplace without an insert: as long as there is a flue that reaches the roof, where the extractor will be mounted. To better advise you on the model (round or square base) I should only understand:- is the flue exiting on the roof round or square/rectangular?- does the round pipe, if there is one, protrude far above the chimney cap or is it more or less flush with the wall?
Yes. For the chimney sweep it is possible to work without problems even with the Gemi aspirator mounted. I'll explain to you in a practical way:- The extractor is installed on the head of the flue, therefore the internal cleaning of the flue (from below or above) can normally be done with rods and a brush.- In many cases the chimney sweep does not need to dismantle the extractor: you can pass the rods through the flue, because the main obstacle is the section of the flue, not the presence of the extraction head at the top.- If you prefer to work with the top completely free, the extractor is still a simple mechanical device, fixed to the flue (on a square base with adjustable brackets or with a round adapter, depending on the model): a chimney sweep or any technician has full possibility of:- unscrew the fixings- raise the suction head- carry out cleaning- reassemble everything following the same fixing brackets/holes. There are no complex electronics to disconnect: just pay attention to the electrical power supply (deactivate the system before intervening).
The fireplace extractor doesn't have to be on all the time. you can safely operate it only in situations where it is needed, for example:- When you open the glass of the thermo fireplace to load wood or clean.- When you notice that there is smoke in the room or you need to strengthen the draft. Even when turned off, the extractor does not in any way hinder the exit of smoke from the chimney. So you can freely decide when to turn it on: it is designed to work efficiently only when needed.
If you have a chimney flue with a round tube with a diameter of 160 mm (16 cm) and a height of approximately 4 metres, we recommend choosing a chimney extractor with a round base. In the drop-down menu on the product page on the site, you will have to select the size of the 160 mm adapter, which corresponds to the external diameter of your flue.
Yes, it's doable. L’aspiratore di fumi Gemi può essere installato anche su canne fumarie collegate a:- domestic kitchen hoods- professional / industrial kitchens- economical kitchens- ovens, pizzerias, restaurants, barbecues, takeaways, it is therefore possible to work even in the presence of a hood with a motor: the extractor is mounted on top of the chimney and helps the draft, improving the evacuation of fumes and odors (including grease).
For this case, the model with a square (rectangular) base is indicated, not the round one. I'll explain why and how to choose it:- You have an external rectangular flue measuring 43x52 cm- Gemi vacuum cleaners with square base have adjustable brackets from 20x20 cm up to 43x43 cm- In your case, having one side (52 cm) larger than 43 cm, we proceed like this:- adjustable brackets are not used- place the base of the extractor directly on the chimney cap- it is fixed to the 4 corners (there are already holes on the base to remove it) So: ️ Choose the "basic model" fireplace extractor with a square base (M/43 series) and install it directly on the rectangular wall by fixing it to the 4 corners
It works great for cheap wood stoves too, it's not just for fireplaces. From our official information: the Gemi extractor is suitable for fireplaces, thermo-fireplaces, stoves, pellet stoves, ovens, rotisseries, pizzerias, barbecues, kitchen hoods, also for restaurants. So the case (wood stove that smokes in the wind) fits perfectly. In your specific case:- the problem is the return of smoke in strong winds → the Gemi extractor is specifically designed to solve smoke problems caused by wind, improving the draft of the chimney.- it is mounted on the roof, on the chimney: it sucks in the smoke that would otherwise return into the house. It is not:- a smoke suppressor (the smoke still escapes into the atmosphere), but:- a system that stabilizes and increases the draft to prevent smoke from blowing back into the house, even in strong winds
Yes. The draft still continues even when the extractor is turned off. The Gemi aspirator is designed to be completely open:- do not plug the flue- does not hinder the normal escape of smoke- even in the event of a power failure the smoke continues to come out of the chimney, it does not fill the house. you can therefore use it only when you need to improve the draft (for example when turning it on, when you lift the stove door or in case of strong wind) and keep it off in other situations. If
Yes. You can easily install one of our extractor fans. the important points based on what you wrote:- Flue material: steel → OK, Gemi extractors are suitable.- External diameter approx. 12–13 cm:- For the Basic and Professional round models there are 12cm and 13cm adapters, so you're covered.- For the round steel model there are 12 cm adapters (not 13).- Very long route (pipe from stove to roof):- It's not a problem: extractors are also good for very long flues, up to around 50 meters high.- Low flue pipes (if it is under 3 metres): in that case we recommend the Professional models, which are resistant up to 700 and work well even with low flues. In your case you are talking about a long route, so even better. To advise you on the most suitable model between Basic and Professional, I would only need two 1. What type of generator do you have? (wood stove, thermo stove, open fireplace, pellet stove, economical cooker, etc.)2. Do you have more problems with smoke in the house when you open the door or with poor draft in general? Based on this, I will show you the specific model (Basic, Professional, Steel, Corten) best suited to your situation, with the correct adapter (12 or 13 cm).
the why. In your case I indicated the Professional model for these main reasons:1. High temperature resistance (up to 700)- It is much safer in the event of a chimney fire.- With an economical stove that works with wood and a long route, temperatures and soot deposits can be important: having an extractor that can withstand up to 700 is an extra guarantee.2. Greater suction power (3800 m³/h)- The professional model has a stronger suction than the basic model (which is 2500 m³/h).- On a long pipe from the kitchen to the roof, the increased power helps to:- improve draft,- reduce smoke and odors that can stagnate,- have a more regular flame.3. Also suitable for “difficult” rods- It is recommended for short or problematic rods, but it is also excellent for very long rods like the.- It has a sturdier construction and a longer warranty than the basic one. - The Basic model is good for simpler situations, with less "demanding" fireplaces/stoves and less critical paths.- The Professional model is designed as a definitive solution for draft/smoke problems, with greater safety and more power margin, so it is the one that best suits your case: economical cooker + steel barrel + long path
For the intended use, we can manage practically all situations without having to make a "custom" vacuum cleaner.1. How Gemi extractors for square/rectangular flues are made. For square or rectangular flues, models with a square base are used:- Basic model (painted steel)- Professional Model- Stainless steel model- Corten Model All these have:- adjustable base from 20×20 cm up to 43×43 cm → therefore they are suitable for square or rectangular rods with an internal side between 20 and 43 cm- include adjustable fixing brackets. If the square/rectangular flue falls within these measurements (almost all domestic flues do), you don't need a special product: simply choose one of the square-based models.2. If the barrel is smaller than 20cm on one side As per our official guidance:- if, for example, you have a 20×15 cm barrel, the 15 cm side must be "enlarged" (with sheet metal, mortar, etc.) up to at least 20 cm- in this way the aspirator with a square base can be fixed with the adjustable brackets. So even in this case you don't need a custom-made extractor: you adapt the mouth of the chimney cap, then mount the standard model with a square base.3. If the flue is larger than 43×43 cm If the masonry chimney cap is larger than 43×43 cm:- the standard aspirator is still mounted,- fixing it using 4 dowels (fisher) on the 4 corners,- without using the internal adjustable brackets. Here too: no tailor-made product, but different assembly.4. What you need to know 1. We do not create "special" measures: our extractors already cover, through adjustments and installation measures:- square/rectangular rods from 20×20 to 43×43 cm- slightly smaller barrels (adjusting the edge)- larger chimney pots (fixing on the 4 corners)2. To choose with confidence:- the ideal thing is to have the chimney flue measured on the fly (internal side in cm) by whoever can climb onto the roof: bricklayer, flue fitter, installer, or a trusted person.- as soon as you have the measurement (e.g. 25×30, 30×30, 40×25), I can confirm 100% the suitable square-based model and how to fix it.
If you do not need a cable resistant to high temperatures (i.e. it is not necessary to pass the cable inside the flue), a standard electrical cable can be used to connect the extractor. Recommended characteristics for an alternative cable:- Type: Outdoor rubberized FG7 cable- Section: 3 x 1.5 mm² (three wires, one for the phase, one for the neutral and one for the earth)- Use: To be passed outside the flue, from the supply point to the speed regulator and the extractor- Insulation: Rubberized sheath for external use, resistant to rain and UV rays. This type of cable is commonly available in electrical equipment shops and is excellent for external installation, as long as it is not exposed to high temperatures such as those present inside the flue.
I understand the problem: I try to be very clear and practical.1. Why they advise you to close the gap When there is:- 100mm round pipe inside a larger masonry chimney cap- and the void remains open between the pipe and the wall, what happens is that:- the aspirator, mounted above, sucks both from the flue and from the surrounding vacuum,- therefore it loses much effectiveness on chimney smoke,- the risk is that you continue to smoke at home, even with the extractor fan on. For this reason, as per official Gemi indications, if:- the pipe is at the same height as the wall → the vacuum is closed and the extractor is mounted on the wall;- if the pipe is lower than a few cm → bring the pipe flush with the wall and then close the gap.2. “Put the barrel directly into the aspirator”: is this foreseen? For fans with a square base (those to be mounted on masonry chimneys):- They are designed to rest and attach to the top of the chimney cap.- They are not designed as a "direct terminal piece" to be inserted only on the 100 pipe, leaving the rest of the chimney cap open. So, in the configuration you describe:- there is no correct and guaranteed assembly in which the 100 barrel enters directly into the aspirator and the surrounding vacuum remains open.- Even if, technically, some home-made solution "could" be done, it would not be a recommended or optimal assembly: the real risk is that the extractor does not solve the smoke problem.3. What is the realistic solution? You only have two paths that really make sense:1. Recommended (best, technical) solution:- Bring the 100 pipe flush with the wall (if it is not already).- Close the gap between the pipe and the masonry (with mortar, sheet metal, plate, etc., also using a plumber/plumber).- Fit a vacuum cleaner with a square base (professional model, given the 90 cm mouth and the marine area).2. “Compromise” solution (not ideal):- Evaluate with the installer the possible creation of a plate/adapter that:- rests on the entire top of the masonry chimney cap,- has a central hole for the 100 mm tube,- and allows you to then fix the Gemi aspirator onto it in a stable manner.-, it is an "indirect" way to close the void using a sheet metal/plate instead of brickwork. But even here, the concept remains: the void must be closed.4. Direct answer to your question > "I can't close the gap between the pipe and the wall. Can't I feed the hose directly into the vacuum cleaner?"- No. It is not a correct or recommended installation to mount the extractor only "in" the 100 pipe, leaving the rest of the chimney open.- To work well, the chimney flue and chimney must be made "a single body", without open side voids.
Yes. It is possible to pass the cable inside the flue / suction pipe, but with some attention. For Gemi aspirators, this double way of connection is provided:1. External passage to the flue- With a normal 3×1.5 mm² rubberized FG7 cable for outdoor use.- The cable runs out of the tube to the speed controller.2. Internal passage to the chimney (as you ask)- In this case, not just any cable is used, but the special Gemi cable resistant to high temperatures (up to 300 °C), sold by the metre.- It can be passed inside the pipe / flue up to the point where you position the regulator.- This cable is tested and certified according to safety regulations specifically for use inside the chimney. So, in your case:-
For a 40x60 cm rectangular chimney flue you can use the chimney extractor with a square base:- The brackets are adjustable from 20x20 cm up to 43x43 cm.- In your case, having a 60 cm side, proceed as follows:- if the usable support part is at least 40x40 cm, you can still mount the extractor without using the brackets, directly fixing the base of the extractor on the four corners (there are already holes for the plugs);- if the useful surface is smaller, it must first be "enlarged"/covered in order to obtain a support base of at least 40x40 cm, then the extractor is mounted. For quick times:- The products you see on the site can be purchased immediately.- In Italy we ship with BRT or GLS; delivery times are indicated during the order (usually very fast, except weekends/holidays).-
For a round flue with an external diameter of 12 cm, you need to choose: round base extractor + 120 mm (12 cm) adapter. On the site, on the round barrel aspirator page, select the size of the adapter corresponding to 120 mm – 12 cm from the drop-down menu. If you want, you can indicate the model you are looking at (or send the link) so I can confirm your choice exactly.
Yes. You can also use our extractor with an old Felici di Prato terracotta stove.
For square or rectangular flues, the extractor with a square base is equipped with adjustable brackets that cover sizes from 20x20 cm up to 43x43 cm. In your case, with a flue of approximately 52x52 cm (therefore greater than 43x43 cm), you can still install the extractor: just do not use the adjustable brackets and fix the base of the extractor directly onto the wall, using the holes already present in the four corners for the fishers.
At the moment, due to the way our Gemi extractors are made, no: it is not foreseen that from the extractor outlet you can reattach another pipe above and then re-enter the flue again. The Gemi flue extractor works like this:- it must be mounted as the final terminal of the smoke duct,- closes the flue / pipe and remains visible, as a motorized chimney cap,- there must be no other pipe above the extractor: the fumes exit directly from the extractor cap. Therefore the configuration you describe: > pipe → Gemi extractor → other pipe → flue is not correct for this type of product. The correct configuration should be: > hood → pipe → flue (if present) → > Gemi extractor as the last element outside (on the chimney cap or on the round end section with adapter)
that's exactly how it is.1. Once the extractor has been mounted on the chimney stack (40x40):- the flue remains open, even when the extractor is off- so the smoke can still go out normally.2. When using the barbecue:- turn on the extractor from the 6-speed regulator- just keep it on speed 1–2 for a natural draw, which:- helps the smoke rise- prevent them from entering the room- if you need to light the fire or there is a lot of smoke, you can increase the speed (up to 6 for "heavier" situations, such as air exchange or lots of embers).3. If the power goes out or you turn it off:- the extractor is completely open, it does not block the flue- the smoke continues to come out of the barrel, only with the "normal" draft of the chimney. So yes: > you assemble everything, when you use the barbecue you turn on the extractor and it helps to suck the smoke upwards, so it doesn't come back into your house.
If you purchase the round flue extractor from our site and select the correct adapter size (for example, 25 cm), the adapter is already included in the package together with the speed regulator. There is no need to purchase it separately: just choose the right size when ordering, and you will receive everything needed for assembly in the package
If the flue has a circular tube with an external diameter of 160 mm, in the drop-down menu of the round base extractor you will have to select the 160 mm adapter- 16 cm.
You have two options for passing the vacuum cleaner's electric cable:1. Passage outside the chimney- you can pass the 3x1.5 mm² rubberized cable outside the round aluminum hood, fixing it along the wall of the square masonry hood until you reach the speed regulator.- It is the simplest solution, especially if you already have free space or a duct available.2. Passage inside the chimney- If you prefer a cleaner result and the cable must not be visible, it can be passed inside the round aluminum hood.- In this case, it is essential to use the cable resistant to high temperatures (up to 300 °C), which can be purchased separately on the Gemi website, so as to guarantee safety and durability over time.- The cable can be inserted between the wall of the round hood and the square masonry one, or directly inside the round hood if there is sufficient space.
For standard use of the Gemi professional vacuum cleaner it is necessary to connect:1. 220V power supply to the controller- The control unit/regulator must be connected to the 220V mains.- It must be installed away from heat sources, because there is a transformer inside.2. Cable from the aspirator to the control unit- A cable runs from the extractor to the regulator.- The cable passage can be:- External, with a 3 x 1.5 mm² cable- Inside the flue, but in this case you need a cable with high resistance to high temperatures, which can be purchased separately. So it's not just "phase-neutral" to the control unit: you also need the connection between the motor (exhaust fan) and the regulator via the cable suitable for the route you choose. If you tell me:- If you want to pass the cable internally or externally- The indicative length you need, I can tell you the most suitable solution among the options on the site.
It's fine even if you use it outside: you don't need to dismantle the extractor every time it rains. From the information available on Gemi vacuum cleaners:- They are designed for roof installation, therefore outdoors.- The base has a special rise to prevent rainwater from entering the flue, even in the event of heavy rain.- They are suitable for hot air/smoke up to 300°C in the basic model (and up to 700°C in the higher models), so structurally they are designed to sit stably above fireplaces, ovens, barbecues, etc. So:- you can leave it mounted on the barbecue outside.- Rain must not enter the flue thanks to the shape of the raised base.- There is no need to cover or disassemble it after each use.
It's great for the situation too. From our technical department: > The fume extractor is also suitable for stoves or economical kitchens. So you can easily mount it on the chimney of the wood stove: it helps to increase the draft and prevent smoke from returning to the house. Two important practical indications:- the extractor must be installed on the roof, on the mouth of the flue- with the 6-speed regulator just keep it on 1–2: it sucks in the smoke naturally, without taking away the heat from the environment. The high speeds (type 6) are only used for air exchange, ignition or ash extraction.
The Base model fireplace extractor (with adapter for round flue, for example 120 mm) weighs approximately 20 kg.
No. It is not prohibited by law to install an electric extractor (such as Gemi extractors) on a masonry chimney that serves a wood-burning thermocooker.
When there are real limitations- The only real regulatory limitation concerns gas systems (UNI 7129 standard), where the use of mechanical extraction devices is prohibited or highly regulated for safety reasons.- In the case of solid fuel (wood, pellets, coal), the use of a vacuum cleaner is perfectly permitted, provided that:- The product is compliant (CE certified and complies with electrical and safety regulations)- The installation is carried out correctly and safely
When there are real limitations- The only real regulatory limitation concerns gas systems (UNI 7129 standard), where the use of mechanical extraction devices is prohibited or highly regulated for safety reasons.- In the case of solid fuel (wood, pellets, coal), the use of a vacuum cleaner is perfectly permitted, provided that:- The product is compliant (CE certified and complies with electrical and safety regulations)- The installation is carried out correctly and safely
Chimney Fans / general
To use our extractors on the kitchen hood with 9 cm hose there are two important points:1. Measure to consider- For round flues you must always consider the external diameter of the pipe, because our adapter covers the pipe externally.- However, our round adapters start from 12cm (120mm) as the minimum size available.2. The 9cm problem- At the moment the adapters for round vacuum cleaners that we supply are only in standard sizes (12, 13, 14, 15, 18, 20, 22, 25, 30, 31, 35, 40 cm depending on the model).- A 9 cm diameter is not included in the available sizes, so I cannot offer you a direct adapter already available in the catalogue. In this case, the best solution is to contact our customer service directly to evaluate:- if a customized solution is possible,- or a reduction/adaptation system (for example, bring the tube from 9 to 12 cm and then use our 12 cm adapter). Unfortunately, I cannot verify or activate customized processes from here, so I have to refer you to customer service to see if there is a practical solution for the specific case.
I cannot confirm this with the available information. Yes, I can tell you that the Round Corten Model Vacuum Cleaner is made of Corten steel, but I have no specific indications if it already comes with the brown shade or if this finish appears over time.
With wall clamps it is sufficient in principle, but the important thing is how it fits:- It must be very firm, without evident oscillations:- If you push the tube lightly with your hand, it should not move visibly.- A small normal metal “spring” is acceptable, but should not oscillate.- Reasons:- The extractor (about 20 kg) goes to the end of the tube: if there is play it is amplified in the upper part.- In windy weather or when switching on/off, a loose hose can:- Vibrate and make noise.- Force joints and clamps over time. Practical advice:1. Check each terminal:- Well fixed to the pipe and wall.- The ideal is at least 2–3 cable ties distributed over the height of the 1.80 m pipe.2. Firmness test:- Hold the tube with your hand at mid-height and move it slightly.- If it hardly moves at all in relation to the wall and doesn't "dance", that's fine.- If you notice that it fluctuates by several millimetres/centimetres, it is advisable:- Add another terminal, or- Strengthen existing ones.
I'll clarify the difference right away. For the Professional Round vacuum cleaner the "list" price in the catalog is indicated as €358.90, but:- the actual price on the site may vary over time (promotions, updates, adjustments)- the price you see on the product page at that moment is always valid, selecting the correct size (in this case diameter 25 cm – 250 mm). In your specific case:- if on one page you see €358.90 and on another €408.00, it is because:- or they are different pages / different variants (e.g. other material or other model)- or the site has updated the price and a page that you had opened before still shows the old value in memory (cache). When in doubt, always consider valid: > The price you see now on the official product sheet when you select "External flue diameter 25 cm (250 mm)" is the right and updated one. If the page you are using to place the order with a diameter of 25 cm shows €408.00, that is the correct price that will be applied to the order (to which any €5.90 mark may be added).
The Gemi aspirator is designed to be connected via the speed regulator supplied, which allows you to select between six different speeds. If you connect the vacuum cleaner directly to 220V without the selector/regulator:- The vacuum cleaner will operate at maximum speed.- It does not burn, because the motor is designed to withstand maximum speed and standard mains voltage (220V).- However, you will lose the possibility of regulating the speed and therefore the suction strength, which can be useful to adapt the use to your needs. yes, you can connect it directly to 220V without a selector and it will work at maximum speed without being damaged. However, for optimal and safer use, the use of the regulator is always recommended.
For a domestic hood, the necessary flow rate is calculated based on the 𝐯𝐨𝐥𝐮𝐦𝐞 𝐝𝐞𝐥𝐥𝐚 𝐜𝐮𝐜𝐢𝐧𝐚, not on the surface of the hood. Typically this rule is used:- 𝐕𝐨𝐥𝐮𝐦𝐞 𝐜𝐮𝐜𝐢𝐧𝐚 (m³) × 𝐫𝐢𝐜𝐚𝐦𝐛𝐢/𝐨𝐫𝐚 = 𝐦³/𝐡 necessary Only that, with the information I have available, I do not have a specific value of m³/h "recommended for domestic hoods", nor official tables comparing hood surface area and flow rate. For this reason, there is no precise "minimum" number in m³/h for the situation. What we know with certainty from the data of our aspirators is:- 𝐌𝐨𝐝𝐞𝐥𝐥𝐨 𝐁𝐚𝐬𝐞: 2500 m³/h- 𝐌𝐨𝐝𝐞𝐥𝐥𝐨 𝐏𝐫𝐨𝐟𝐞𝐬𝐬𝐢𝐨𝐧𝐚𝐥𝐞 / 𝐀𝐜𝐜𝐢𝐚𝐢𝐨 / Power: 3800 m³/h These are very high values compared to normal domestic hoods, precisely because the Gemi extractor was created to solve important draft problems (chimneys, problematic flues, even professional kitchens): then the power is adjusted by the potentiometer according to needs. On the second question:- suction only from the surface of the hood,- but from: room volume, installation height, path and section of the pipe, pressure drops, etc. The surface of the hood helps to "cover" the hob better (less fumes escaping to the sides), but the "strength" with which you remove fumes and odors is linked to the flow rate (m³/h) and how the chimney+hood system works. In summary, with a 120×70 hood:- a Gemi 𝐁𝐚𝐬𝐞 aspirator is already widely sized,- a 𝐏𝐫𝐨𝐟𝐞𝐬𝐬𝐢𝐨𝐧𝐚𝐥𝐞 just gives you more margin and keeps it lower in speed in normal use. If you tell me:- width × length × height of your kitchen, if, in terms of order of magnitude, you are even more "quiet" with the Basic or if it makes sense to push on the Professional just to have more reserve.
Excellent doubt, it is important to do it well to be safe. Since I don't know how your specific installation is done, I'll explain the usual ways and you choose the one that corresponds to your case:1. Safest option: from the electrical panel1. Locate the circuit breaker (circuit breaker/magnetic circuit breaker) that controls the line to which the vacuum cleaner is connected.- It is sometimes labeled as "kitchen", "terrace", "patio outlets", etc.2. Depress the switch (turn it to the off position).3. For greater safety, you can also lower the differential of that sector while you work.4. Check that the extractor does not turn on:- Try to turn it on from the regulator/switch: if it does not respond, there is no power. > This is the safest and most recommended way.2. If the extractor is plugged into an outlet If the cord from the regulator or extractor ends in a visible outlet:1. Turn off the extractor at its regulator/switch.2. Unplug the cord from the wall outlet.3. Make sure the plug is completely pulled out. Here you can also test the regulator: if you turn it on and nothing happens, no power is coming.3. Wall Switch/Regulator In many installations, the exhaust fan is controlled with a speed controller or switch built into the fireplace or grate. Important:- Simply turning off the regulator DOES NOT always guarantee total interruption of power to operate on the internal cables.- Safety remains: lower the automatic into the electrical panel or unplug it, as appropriate.
If you describe to me how your exhaust fan is currently wired (is it plugged into an outlet? Does it have a wall regulator? Do you see the cord going directly into an electrical conduit?), I can tell you exactly what I would do in your case step by step.
If you describe to me how your exhaust fan is currently wired (is it plugged into an outlet? Does it have a wall regulator? Do you see the cord going directly into an electrical conduit?), I can tell you exactly what I would do in your case step by step.
Yes, exactly! you can do the following:
Summary of steps:- Purchase the Gemi high temperature cable of the required length.- Pass the cable through the inside of the extraction/smoke pipe to the socket available behind the old hood.- Connect the regulator and the extractor according to the diagram included in the product (also available on video on the Gemi website).
Summary of steps:- Purchase the Gemi high temperature cable of the required length.- Pass the cable through the inside of the extraction/smoke pipe to the socket available behind the old hood.- Connect the regulator and the extractor according to the diagram included in the product (also available on video on the Gemi website).
From the information in my possession Gemi simply states clearly:- That the extractor cable is special for high temperatures.- That the speed regulator can also be installed recessed into the wall. There is no official indication from Gemi that authorizes or recommends placing a junction box directly on the pipe/smoking joint (where the hot smoke passes), nor details on types of boxes suitable for that area. In normal installations of this type, the junction box is usually placed in an accessible and protected area, and not directly in the hot part of the pipe, to avoid:- Excess temperature on the box and connections.- Electrical safety problems.- Difficulty in future access for maintenance. Since electrical installation rules and the specific conditions of your fireplace come into play here, the most prudent thing to do is:1. Consult an authorized electrician, who will be able to view your installation and decide:- Whether or not it is safe to put it near the pipe.- At what minimum distance from the hot section.- What type of box (temperature, IP, material) is suitable.2.
Yes. The Gemi fume extractor is also suitable for kitchen hoods: from the material I have available it appears that it can be used for:- fireplaces, stoves, wood ovens, barbecues, thermo fireplaces- kitchen hoods- vapors from ovens and kitchens in general. So we can help you re-establish the draft on the drain where you are now having problems (although the obstruction should always be checked by a technician). For the price: at the moment I don't have the updated cost data. I can only confirm that the basic model for fireplaces and hoods is indicated as "Basic Model - M/43 Series - Chimney extractor", but for the precise price I must refer you directly to the product page on the Gemi website (gemimarket.it), where it also varies based on the adapters/dimensions.
For the 220 x 60 cm industrial hood you can easily use a Gemi fume extractor to resolve the draft. From the information available:- the Gemi extractor is also suitable for industrial kitchens and restaurants,- it is suitable for kitchen hoods, ovens, barbecues, restaurants, etc.,- the basic roof model (series M/43, “Chimney extractor”) is designed specifically to extract greasy fumes and cooking vapours. So, in general:- you can use a Gemi roof extractor for chimneys/kitchen hoods, installed on the hood duct;- it is suitable for temperatures up to 300 °C and for fatty fumes typical of kitchens and restaurants. To indicate the most suitable model with precision I only need one more piece of information:- what diameter (or section) does the flue / duct on which the extractor would be mounted have? (e.g. round 15 cm, 20 cm, or rectangular 20x30 cm, etc.) Based on the type and size of the duct (round or square/rectangular) I can tell you:- if a round model with adapter is better,- or a model with a square/adjustable roof base, which easily adapts to rods of various sizes. In the meantime, I can confirm: for an industrial kitchen hood used often, the Gemi extractor is suitable for managing even intense cooking fumes and smells.
and very important for those who evaluate the actual draft! In the square Gemi extractor models with a 43x43 cm plate, the central passage hole (i.e. the opening through which the smoke passes, immediately under the fan) has a single standard size:- The central passage hole in the plate measures approximately 21cm in diameter (210mm).- This opening is round, even in the square versions, because it corresponds to the body of the fan (and is the part that actually sucks in the smoke). you can find the 43x43 cm square plate, but the really open space - i.e. the central one that allows the smoke to pass towards the fan - always remains about 21 cm in diameter. In summary:- Plate: 43x43 cm (rectangular/square)- Central passage hole (useful opening for smoking): approximately 21 cm in diameter
At the moment I have no information on the duration of the price promotions for vacuum cleaners. we recommend that you keep the site monitored or,
Items shipped from Italy by Gemi Elettronica are produced to European and international standards, not specifically to separate "US only" standards. What I can confirm for our products is:- They are certified and comply with the regulations in force for their category.- Our systems (electric vacuum cleaners and electric fences) are designed, manufactured and tested according to the environmental management standard ISO 14001:2015 and a certified quality management system.- Specific products, such as the M43 ELECTRIC VACUUM CLEANER, comply with:- CEI EN 60335-2-80 (safety of domestic electrical appliances and similar)- Low Voltage Directive 2006/95/EC- EMC Directive 2004/108/EC- UNI EN 16475-2:2017 performance/safety of flue gas systems Therefore:- The same product and certifications apply regardless of whether it is shipped to Italy, another EU country or the United States.- We do not have a separate US-only version with a different certification scheme mentioned in the information I have. If you tell me which type of product you are interested in (fireplace extractor or electric fence, and which model if you know it), I can tell you more precisely which standards and certifications apply to that specific item.
For our Gemi smoke extractors for fireplaces and barbecues:- Professional model: it does not have a minimum distance to respect. It can also be installed in fireplaces/fumes 1 meter high from the heat source.- Base Model (Basis / 2500 m³/h): It is recommended to install it in flues at least 3 meters high from the fire/heat source. Namely:- If your duct from the fire to the extractor measures less than 3 m, the professional model is better.- If it measures 3 meters or more, the basic model can be used without problems.
If your exhaust pipe is round with a diameter of 180mm (18cm), to install a suitable smoke extractor (smoke extractor), simply choose a model with a round base and select the adapter corresponding to the size of your pipe, i.e. 180mm. Here's how to install it: 1. Select a round base vacuum cleaner from our site.2. From the drop-down menu, choose the appropriate 180mm (18cm) adapter for your outside diameter.3. Install the exhaust fan on top of the duct, making sure to secure it securely for tightness and safety. Regarding purging or maintenance: - The vacuum cleaner does not require specific purging, but it is advisable to regularly check that there is no accumulation of soot or residue around the vacuum cleaner.- Periodic cleaning of the duct and aspirator is recommended to ensure optimal operation. If you want more installation details or need help choosing the right model, please feel free to let me know your request! Do you need a direct connection to the product suitable for your 180mm conduit?
Yes. The condenser is essential for the correct functioning of the extractor. You cannot connect the aspirator directly to the cables without the capacitor, because it is used to start the engine. The extractor condenser has two wires:- One must be connected to the white cable coming from the motor- The other must be connected with the red cable on the terminal block. If your box does not have a capacitor, it is advisable to get one (450V 6 Microfarads, 8 Microfarads is also fine) and install it as indicated. It is a standard component that can be found in any electrical shop.
Thank you for your message and your interest in our products! We are happy to hear that you would like to purchase a fume extractor during your visit to Como.
For Mexico, the extractor is supplied at 110 V. In general:- 110V: United States, Canada, Mexico and some Japan countries- 220V: Europe and the rest of the world
Here are the consumptions of the Gemi professional vacuum cleaner, expressed in Watts for each of the 6 speeds:- First speed: 64W- Second speed: 87W- Third speed: 110W- Fourth speed: 146W- Fifth speed: 216W- Sixth speed: 261W
At the moment I do not have the diagram with the internal color code of the basic vacuum motor available, so I am not absolutely certain which of the two (red/black) was used as the phase on your specific motor. To be safe, I'll show you the correct method to follow:1. Don't rely only on the color of the motor wires. In vacuum cleaner motors, the colors may not always follow the same domestic standard (brown = phase, blue = neutral). May vary by lot/supplier.2. Safe reference: terminal block / connection diagram- The correct connection is made by looking at the terminal block and the electrical diagram of the speed regulator (where you connect "engine/motor" and "line 220V"), not just the colors.- Two wires come from the engine (red and black) which must be connected to the two "engine/motor" terminals of the regulator.- On the “line 220V” terminals, connect the phase and neutral of the mains (L and N).3. How to proceed (safely)- Have an electrician identify which conductor should go to L (phase) and which to N (neutral) based on the terminal block and capacitor.- In any case, the two motor wires both go to the motor power supply unit: they should never be connected directly to phase/earth etc. without passing through the terminal block/regulator.4. Be careful with the capacitor From our archive:- the capacitor has two cables: one goes to the white cable of the motor and the other to the red cable on the terminal block.- If in the future the vacuum cleaner only buzzes and does not turn, it is almost always the start capacitor that needs to be replaced (450V – 6 µF, 8 µF is also fine). To avoid the risk of incorrect connections (mains voltage, inversions, safety against shocks), we strongly recommend having the connection checked by an electrician with a tester, so that he can definitely identify the phase. If possible, send me a more detailed description of what you see in the terminal block (how many terminals, any abbreviations such as L, N, motor, etc.) and I can guide you step by step on where the two motor wires should be connected in relation to the regulator.
Yes, it's possible. The Gemi extractor can be mounted without the top cap and inserted inside the existing chimney pot, provided that there are minimum spaces:- internal space at least 43 × 43 cm (the base is 43 × 43 cm)- internal height at least 37 cm to contain the entire motor unit: - the aspirator is ordered without the hat- insert it inside the stone chimney cap, fixing it as per the instructions- the external covering of the chimney stack remains the existing one
Yes. with 45×45 cm of internal space and 40 cm of useful height:- the vacuum cleaner fits without problems- there is also the minimum space to be able to do so:- slide upwards- tilt slightly- carry out normal disassembly/maintenance operations (cleaning, checks, possible replacement). The only practical precaution is to provide:- sufficiently free access from above (without covers that are too closed or irons that obstruct the exit of the motor)- fixings (screws/plugs) positioned so that they can be reached with tools. But with 45×45 × 40 h you are in the right size both for internal mounting and for being able to remove it in the future.
Pour the smoke extractor for the Gemi Elettronica stove – Basic model: The appliance has 6 screws, and the various consumption in the screw function: - 1 ᵉ screws: 29 W- 2nd lives: 49 W- 3rd lives: 86 W- 4ᵉ lives: 110 W- 5th life: 130 W- 6th power: 170 W at maximum, the consumption is 170 watts.
then we are talking about professional work use with rotisserie. For this case, only the professional models are indicated, those resistant up to 700 °C and with a 3800 rpm motor, also suitable for catering / continuous use. From the product sheet that I have available, the reference prices are:- Professional model vacuum cleaner (square): €358.90- Professional Round vacuum cleaner: €378.90- Round stainless steel model vacuum cleaner (professional): €429.00- Round Corten model aspirator (professional): €429.00 The round models are the ones you are interested in with the round stainless steel barrel; the choice will be between:- Professional round “standard” (€378.90)- Professional round stainless steel (€429.00) – recommended
For the case it's fine, I'll explain why. The Base Gemi model aspirator is approved for extracting air/fumes up to 300 °C continuously. For a barbecue (also often used, with grilled meat) the following is indicated:- it is designed precisely for fireplaces, stoves, wood ovens, barbecues, kitchen hoods, restaurants etc.- the 300 °C refers to the temperature of the air/fumes that pass through the extractor, not to the direct flame- on barbecues the flame is always lower, while above all hot and fatty fumes arrive: this is part of the intended use of the Basic model. If instead you had:- very short flue (less than 3 metres)- or extremely heavy and continuous use (such as a professional oven always on) then the Professional model would be more suitable (resists up to 700 C, also designed for more critical situations, such as short barrels or risks of overheating).
For the Base model without external electrical box, the connection is done as follows:1. Do not touch the cable near the motor- The section of cable already connected to the extractor is special, resistant to high temperatures.- It must not be disconnected from the motor terminal board and replaced with another cable.2. Extension of the cable from the extractor to the regulator You have two possibilities: Option A – External cable (easiest solution)- Use a normal FG7 rubberized outdoor cable 3 x 1.5 mm².- Connect it to the first meter of cable already present on the aspirator (with adequate terminals/junctions in a workmanlike manner).- Run the cable outside the chimney to the position of the speed regulator (usually near the chimney). Option B – Cable inside the flue-
For the aspirator you can add the high temperature resistant cable with these characteristics:
Features and color- It is a special silicone cable, resistant up to approximately 350 °C- Covered in a flexible steel sheath (metallic/silver look, not the classic colored plastic cable)- Thanks to the steel sheath it can be passed inside the flue- It is used to connect the vacuum cleaner to the speed regulator. With the vacuum cleaner you are already supplied with approximately 80 cm of this cable; if the distance between the extractor and the regulator is greater, it is advisable to add the required length (5, 10, 15 or 20 m). If you tell me:- how many meters do you need approximately- where you plan to place the regulator in the Studio I can suggest which cut (5/10/15/20 m) is most suitable.
Features and color- It is a special silicone cable, resistant up to approximately 350 °C- Covered in a flexible steel sheath (metallic/silver look, not the classic colored plastic cable)- Thanks to the steel sheath it can be passed inside the flue- It is used to connect the vacuum cleaner to the speed regulator. With the vacuum cleaner you are already supplied with approximately 80 cm of this cable; if the distance between the extractor and the regulator is greater, it is advisable to add the required length (5, 10, 15 or 20 m). If you tell me:- how many meters do you need approximately- where you plan to place the regulator in the Studio I can suggest which cut (5/10/15/20 m) is most suitable.
Good question! Yes, you can remove the cap (cap or top cover) supplied with your Gemi smoke extractor to place your current one. The extractor can be installed without the original cap supplied. In fact, you can also order the extractor without a cap if you prefer it straight away.
you can order the extractor without cap to install the current one. To do this, you can leave a specific note during the purchase process on our site, in the comments field of the order, indicating that you want it without the original cap.
I will describe the diagram clearly, so you can orient yourself on the connections with the regulator (potentiometer in a waterproof box) of the professional model. ️ First of all: always work with the cable DISCONNECTED from the 220V. If in doubt, have the work carried out by a qualified electrician.1. Cables from the aspirator (motor) to the regulator A cable suitable for high temperatures comes out of the aspirator motor: it must never be replaced or disconnected from the motor terminal block; it just needs to be extended to the regulator. In the regulator you will find a terminal block with indications similar to:- ENGINE / MOTOR (or engine symbol)- LINE 220V- Ground symbol () The connections are:1. Two wires from engine → governor terminal block, terminal labeled “ENGINE/MOTOR”- Engine wire 1 → “ENGINE/MOTOR” (engine phase)- Engine wire 2 → “ENGINE/MOTOR” (engine neutral)2. Aspirator earth → regulator earth terminal- The yellow/green wire of the aspirator connects together to the system earth.2. 220V power cables to the regulator From the electrical system bring a 3 x 1.5 mm² cable to the regulator:- Phase (generally brown or black) → “LINE 220V” terminal (L)- Neutral (generally blue) → “LINE 220V” terminal (N)- Earth (yellow/green) → combined with the aspirator earth in the central earth terminal. In summary:- “LINE 220V” terminals:- L → phase from the 220V mains- N → neutral from the 220V mains- “ENGINE/MOTOR” terminals:- two wires coming from the vacuum cleaner motor- Earth terminal:- 220V mains earth + extractor earth together3. Type of cable to use To extend the cable from the aspirator to the regulator you can:- Use a 3 x 1.5 mm² rubberized FG7 cable outside the flue, or- Pass the cable inside the flue only using the specific cable resistant to high temperatures (the dedicated Gemi one). It is important not to remove the original motor cable from the terminal block to replace it with another standard cable.4. "Official" wiring diagram The complete wiring diagram (with drawing) is available in the Gemi assembly guide: https://www.gemimarket.it/content/12-guida-all-installation-aspiratori There you will find the drawing of both the extractor connection and the speed regulator.
Yes. In general it is only possible if the boiler board regulates the extractor in a way compatible with this motor. For the Gemi aspirator, from the available documentation it appears that:- works with 6-speed regulator- the expected connection is:- the two wires coming from the aspirator on the “engine motor” terminals- the earth wires together in the central part- the two 220 V power supply wires on the “line 220V” terminals- it is important not to remove the cable from the motor terminal block to replace it with other cables, because the one fitted is special and suitable for high temperatures. What I cannot confirm with certainty is the direct compatibility with an external boiler board, because I do not have a specification that says that it can be controlled directly by that type of electronics. So I would say it like this:- it can be feasible,- but it must be checked that the boiler board provides electrical regulation compatible with the extractor and the speed control. For correct verification, it is recommended to compare these points:1. boiler board control voltage2. type of speed regulation output from the card3. maximum absorption of the extractor at speed 6: 220 V – 1.35 A – 170 W If you want, you can write me the model of the boiler or the card, so I'll tell you if I can compare the data better from what is available.
For the Base model you purchased:- in the packaging you will find extractor, brackets, small parts, speed regulator and special high temperature cable already connected to the motor;- in the information I have available, there is no indication of the presence of a junction box to be fixed near the chimney cap. - the section near the engine uses the special cable supplied;- the connection to the home system (junction box, possible external passage, etc.) is normally made by the electrician, using his own junction box suitable for outdoor/high temperatures. Therefore you (or the electrician) need to provide a junction box to be installed near the chimney pot or in the most suitable place
Yes, we can estimate it quite clearly. For the Gemi aspirator:- Basic model- Speed 1: 29W- Speed 2: 49 W I don't have the separate official detail for the steel model, but consumption is of the same order of magnitude. I'll do the math for you using these values as a reference:
Approximate monthly consumption (30 days)- Speed 1 only (8 h/day): 0.23 kWh × 30 ≈ 7 kWh per month- Speed 2 only (8 h/day): 0.39 kWh × 30 ≈ 12 kWh per month, even on 8 hours a day at speed 1–2, consumption remains very low: it easily falls within those few euros per month (and on average around €10 per year that I had indicated for typical use). If you tell me:- how many months a year do you plan to use it like this,- if you stay at 1 or 2 more often, I can refine the annual estimate in kWh a little further.
Approximate monthly consumption (30 days)- Speed 1 only (8 h/day): 0.23 kWh × 30 ≈ 7 kWh per month- Speed 2 only (8 h/day): 0.39 kWh × 30 ≈ 12 kWh per month, even on 8 hours a day at speed 1–2, consumption remains very low: it easily falls within those few euros per month (and on average around €10 per year that I had indicated for typical use). If you tell me:- how many months a year do you plan to use it like this,- if you stay at 1 or 2 more often, I can refine the annual estimate in kWh a little further.
I confirm that the base of the basic model aspirator is 43 x 43 cm. As regards the external diameter of the fan protection net, from the available data it appears that the motor has a diameter of 16 cm and the suction unit (the fan part) develops above the base, but we have not specified the exact diameter of the protection net in detail.
If the potentiometer (switch/speed controller) light does not come on, it could simply be a problem with the switch itself or with the internal contact. This failure does not necessarily imply damage to the engine, but only to the control circuit. To test the motor: you can power the motor directly at 220V to check its operation, but I recommend maximum attention:- Safety: This type of test involves risks. If you do not have adequate electrical skills, it is strongly recommended that you use a qualified electrician.- Direct connection: Connect only the two motor wires directly to the 220V mains, avoiding passing through the regulator/potentiometer. Before making any connections, check that all devices are unplugged!- Checking the capacitor: If the engine does not start but you only hear a hum, the problem could be the starting capacitor, which often needs to be replaced with a 450V 6μF one, 8μF is also fine. In summary:- you can power the motor directly to test it, but only if you are sure of what you are doing.- Failure of the warning light/switch can often be resolved by simply replacing the component (also available in general electronics stores).- If the engine works with the direct connection, simply replace the switch or regulator.
Thanks for clarifying, now everything is clearer: you only have the 19mm nut exposed and the fan plate/hub, without blades, and you have no access to the rear of the engine. Here are some practical solutions to block the plate/hub and be able to unscrew the nut:1. Grip Pliers (Vise) on the Hub- Get a sturdy grip pliers.- Tighten it as much as possible on the edge of the plate/hub, so that it remains secure.- Place the clamp against a fixed part of the vacuum structure (for example a bracket, the edge of the base or another solid point).- This way, when you try to unscrew the 19mm nut, the pliers will prevent the hub from turning.2. Screwdriver or Iron Bar- If the plate/hub has holes, insert a sturdy screwdriver or an iron rod through one of these holes.- Place the screwdriver against a fixed part of the structure, so the plate cannot rotate while you unscrew the nut.3. Create Friction- If the hub is large enough, you can wrap it with thick cloth or sandpaper to increase friction and try to hold it in place with one hand (using non-slip gloves) while unscrewing the nut with the other.4. Temporary Block- If you have a bench vice, you can clamp the edge of the plate/hub in the vice (if the extractor is removable) and then unscrew the nut.
Our Gemi Elettronica chimney extractor is designed mainly for fireplaces, stoves, wood ovens, kitchen hoods, barbecues, thermo fireplaces and can also be used in restaurants, takeaways and pizzerias to extract fumes, including the "greasy" ones generated by cooking meat on the grill. However, it is not specifically designed for air extraction in environments such as a blind toilet or other closed rooms intended for civil uses.
The 50% offers do not have a fixed expiry date that is the same for all products: the duration can be changed based on the promotion and availability. On the site, when a promo has a specific deadline, it is indicated directly on the product page or in the cart.
Here you need to separate two areas:1. The “construction” part (your square fumeral + plasterboard box).2. The upper part where the Gemi extractor is mounted. The extractor is NOT used to “fill” or seal the space between the internal insulated round tube and the square fumeral construction. You/your builder/installer must address that gap FIRST, and then at the top the extractor is mounted on the final outlet. I'll explain it to you in parts.1. Square construction flue + insulated round tube inside Your idea:- Create a square chimney flue (aligned with the plasterboard box).- Inside bring the insulated round tube, with space around it. Conceptually this is correct, but: > The space between the round tube and the square fumara must be closed/sealed at the top of the fumara, so that the smoke only exits through the tube. Otherwise:- The smoke and draft “escape” through the hole.- The extractor would lose efficiency.
I'll clarify the difference right away. Based on the information I have available:- Basic round vacuum cleaner: €268.90- 5 m high temperature resistant cable: in our archive it appears starting from €30.50 for 5 m, not €25.90 as I indicated before (that was an outdated/correct figure, I apologize). So, taking as a reference:- Aspirator: €268.90- 5 m cable: €30.50- Total products: €299.40 If you see €329.40 in your cart, it is very likely that:- other costs have also been added (e.g. additional service such as GEMI CARE PACK, or a different cable length, or another product item), or- there is a different version / configuration of the aspirator or cable compared to the "basic" one. Unfortunately I can't see the cart directly, so I can't know item by item what you have inside. To understand exactly where the €329.40 comes from, do this:1. Open the cart.2. Look at the product list and write to me:- the full name of each row- the price next to each line3. If you see items like:- “GEMI CARE PACK”- cut cable 10 / 15 / 20 meters- other accessories let me know, so I can tell you what can possibly be removed
No. You cannot put "whatever you want": the capacitor must have very precise values, otherwise you risk:- difficulty or impossibility of starting,- engine overheating,- reduction in life or breakage. For Gemi vacuums, when the motor just hums and doesn't turn, the correct start capacitor is:- 450V- 6 µF (microfarad) 8 µF is also acceptable, but not random values. In the Professional model the capacitor is outside, in the terminal block (not near the fan as in the basic model). So:- always choose a motor capacitor,- with voltage at least 450V AC,- and capacity 6 µF (or 8 µF if you can't find the 6 µF, but don't go beyond or below as you like). If you write to me which capacitor you have installed now (value in µF and voltage in Volts, e.g. 10 µF 400V), I'll tell you if it's OK or if it's better to replace it.
cutting some sheet metal is exactly what is often done in these cases. To answer your question:- The square base of the extractor has adjustable brackets that cover sizes from 20x20 cm up to 43x43 cm.- So, with a 43x43 cm chimney cap you are already at the maximum limit covered by the brackets, and that's fine:- no need to expand further,- you just need to have those 43×43 cm free to be able to place and secure the base well. If the "clean" framework under the sheets is really 43x43 cm, all you need is:1. Cut the sheets enough to:- leave the 43×43 cm compartment free,- allow the vacuum cleaner to rest flat.2. Position the aspirator with square base.3. Adjust the brackets until they cover the 4 sides well (up to a maximum of 43×43 cm).4. Fix everything with the dowels in the designated points. However, if, once the sheets have been removed/cut, you discover that the useful surface is larger than 43x43 cm, let me know (e.g. 45x45 or similar): in that case you would not use the brackets and would fix the base directly to the 4 corners, using the holes already present. If you tell me the exact size of the "clean hole" that remains after cutting the sheets, I will 100% confirm the best type of assembly.
Great question! Yes, it is also possible to lengthen the round tube and attach the extractor directly to it. This option is valid if you prefer to keep the nozzle completely circular. How to do it?- You need to extend the round tube until it sticks out or reaches the proper height to install the extractor.- Next, you can choose a round base extractor and select the adapter based on the outside diameter of the tube.- It is important that the adapter is chosen based on the outside diameter of the round tube, since the adapter is placed on the outside of the tube. What do you need to know?- The exact outside diameter of the round tube (e.g. 15cm, 20cm, etc.).- Adapters are available for hoses from 10cm to 43cm external diameter. Options summary:- If you prefer installation on a square base: use an extractor with a square base.- If you prefer installation on a round tube: lengthen the tube and use an extractor with a round base and adapter of suitable size. Can you tell me the outside diameter of your round tube? Here's how I help you choose the right model and adapter.
Chimney Fans / installation
it is precisely one of the points that creates the most doubts during the installation phase. I summarize how the passage of the cable from the extractor to the house is done and I clarify the issue of the "flying cable".1. Type of cable to be used from the roof towards the inside. There are two possibilities for connecting the chimney extractor:1. EXTERNAL passage to the flue- An outdoor rubberized FG7 cable 3 x 1.5 mm² is used.- It connects to the first section of cable already present on the extractor (the special one resistant to high temperatures, approximately 80 cm long).- This cable must be routed down to the first junction box or directly to the speed regulator, following the roof/walls in an orderly manner (secured with special clips, conduit, etc., not left "loose").2. INTERNAL passage to the flue- In this case a normal 3x1.5 cable is not used, but the special Gemi cable resistant to high temperatures (up to 300), to be purchased by the metre.- This cable can be passed inside the chimney up to the point where it enters the house (for example behind the fireplace or in a junction box), always connected to the regulator. In both cases, the first meter or so of cable that comes out of the extractor does not need to be replaced, because it is a special high-temperature cable.2. Does the cable have to be “flying” on the roof? No. There should not be a loose cable hanging loose on the roof. It's usually done like this:- The special cable (80 cm) comes out of the vacuum motor.- You extend it with:- FG7 3x1.5 cable if you go outside the barrel and then return to the house,- or with the special Gemi high temperature cable if you pass inside the chimney.- The cable is fixed along the route (on the roof, near the pipe, on the facade, etc.) with suitable fixing systems, up to the first junction box or directly to the regulator.3. Connection to the controller To the speed controller terminal block:- The two wires coming from the aspirator go where it says "engine motor".- The two earth wires (system and extractor) must be connected together in the central part.- The two wires from the 220V line go where it says "line 220V". The regulator can be placed in any area of the house, as long as:- is connected to 220V,- is not close to heat sources (due to the internal transformer).
On this specific point I have no official information to show you. In general, however, when the building is restricted by the Superintendence / Fine Arts, any intervention that modifies the external appearance (such as an extractor fan on the roof or chimney) may require authorization.
The Gemi extractor can also be installed horizontally, this is not a problem, but it is important that it is well fixed: it should not be left "leaning" only on the pipe or structure, especially if it seems heavy. From our assembly instructions, these general principles apply:- The vacuum cleaner always runs:- stably anchored to the structure (wall/chimney cap/base)- fixed with screws and bolts to the brackets or to the adjustable base- If you mount it on the wall (vertically) or horizontally:- make sure that the weight is placed on the masonry, not just on the pipe- use plugs/screws suitable for the type of wall to avoid vibrations or sagging over time. In your specific case (horizontal mounting):- yes, it is advisable to fix it to the wall/structure with brackets and screws, do not leave it just "interlocking"- check that:- the brackets are well tightened with screws and nuts- there is no play or movement when you touch it
Yes, of course: the wiring diagram and the assembly guide are available on the site. you can find them here: https://www.gemimarket.it/content/12-guida-all-installation-aspiratori On that page there is the electrical diagram for connecting the extractor and the step-by-step instructions for installation.
Yes. The regulator (or switch) of the fireplace extractor can be recessed inside the wall.
Yes. It is possible to install the Gemi vacuum motor even with a section of pipe positioned horizontally. The extractor can be mounted both vertically and horizontally, and is designed to solve draft problems even in less conventional situations, such as the presence of horizontal sections. However, we recommend paying attention to these aspects:- A horizontal section that is too long can reduce the efficiency of the draft and cause soot deposits.- It is important to provide for periodic inspection and cleaning of the horizontal section.- Installation must always comply with current safety regulations, in particular with regard to the bedroom (where fumes must be absolutely excluded). The motor (chimney puller/aspirator) must always be installed on the upper terminal of the flue, therefore the horizontal passage only serves to connect the chimney/insert to the actual flue where the extractor will then be installed.
In your case, having a square external chimney cap of 30x30 cm and a round internal flue of 20 cm in diameter, it is recommended to install a chimney extractor with a square base. Here's why:- Our extractors with a square base are equipped with adjustable brackets that adapt perfectly to square or rectangular chimney pots, with measurements ranging from a minimum of 20x20 cm up to a maximum of 43x43 cm.- In your case, the extractor can be fixed directly to the external square part of the chimney cap (30x30 cm) using the adjustable brackets supplied. If the internal round pipe is lower than or equal to the external brickwork, simply close the space between the pipe and the brickwork and install the extractor on the upper square part. we therefore recommend one of our models with a square base, choosing between:- Basic model: resists up to 300 °C, 3 year warranty, extraction 2500 m³/h.- Professional model: resists up to 700 °C, 6 year warranty, extraction 3800 m³/h (recommended if the flue is less than 3 metres).- Stainless Steel or Corten model: resistance up to 700 °C, 8 year warranty, suction 3800 m³/h, materials more resistant to corrosion
The fireplace extractor regulator must be connected to 220V power and can be installed in any area of the house, but it is important that it is not placed near heat sources. Inside the regulator there is a transformer that works at high temperatures.
Now the problem is clear, thanks for the clarification. At the moment we do not have affiliated installers or technicians in the area: the Gemi extractor is designed for "do-it-yourself" assembly and maintenance or by relying on a trusted professional in your area. What you can do is contact:- an electrician, or- a bricklayer, or- a plumber These are all figures who normally know how to manage both access to the roof and dismantling/cleaning the extractor without problems. To help them, you can directly view this link with the assembly guide/video (where you can also see how the extractor is made and how to intervene): https://www.gemimarket.it/content/12-guida-all-installation-aspiratori In this way the technician immediately sees how it is fixed and how to operate safely.
No. Generally you don't need complicated changes: in your case it's very simple. You now have:- only steel pipe coming out of the roof- with steel hat/rain cover To assemble the Gemi Professionale Tondo vacuum cleaner you will need:1. Remove the current hat- Remove the existing hat/rain cover fixed on the pipe.- Instead, you will use the Gemi round adapter (12 or 13 cm, depending on the diameter of the tube).2. Insert and fix the adapter on the tube- The adapter is fitted onto the steel tube.- It locks with the fixing screws provided, so that it remains firmly in place.3. Attach the vacuum cleaner to the adapter- The vacuum cleaner already comes with the integrated hat (so you will no longer need the steel hat you have now).- Attaches directly to the adapter with the supplied hardware.4. Electrical connection- The extractor must be connected to the electricity (via the Gemi switch/regulator in the house, or a control point that you set up).- Does not require modifications to the barrel: only passage of the electric cable and connection. So:- no need to cut or remake the barrel,- there is no need to modify the roof,- you just need to remove the old hat and mount the vacuum cleaner with adapter in its place
If the 37 x 37 cm measurements are the external ones, the inside will actually be slightly smaller. Here are the two possible solutions:1. Installation ABOVE the chimney cap- Advantages:- It is the simplest and recommended solution if internal space is limited.- The extractor is fixed directly above the chimney cap, using the adjustable brackets.- It is not necessary to worry too much about the internal measurements, as long as the support base is at least 20x20 cm and does not exceed 43x43 cm.- Recommended if:- The internal space is less than 37x37 cm or the internal height does not reach 37 cm.2. Installation INSIDE the chimney cap- Advantages:- The aspirator is more protected and less visible.- Must be ordered without hat.- Requirements:- The internal space must be at least 43x43 cm in width and 37 cm in height.- If the internal space is less, this solution is not possible. If the internal space of your chimney is less than 37x37 cm, we recommend installing the extractor above the chimney. If, however, it measures at least 37x37 cm even inside and has at least 37 cm of free height, you can also choose internal installation (without hat). If you want, you can indicate the internal measurement and the useful height, so I can confirm the best solution!
When we talk about "useful height" for the internal installation of the extractor, we mean the free vertical space inside the chimney pot, i.e. the distance from the bottom (or from the internal support base) to the upper internal part of the chimney pot, where the extractor should be positioned. It's not just the height of the wall to attach to, but the internal vertical space available to be able to insert the extractor without obstacles.
Chimney Fans / noise/decibel
I will answer your questions about the Gemi fireplace extractor point by point.
2) Does it take heat away from the fireplace? It depends a lot on the speed used.
High speeds (e.g. speed 6)- The sixth speed is very powerful (used for:- air exchange in the environment,- help light the fire,- vacuum ash).- At those powers the air draft is so high that:- increases the burning speed of wood- as a result, a part of the heat is reduced, because the fire burns more quickly and a greater share of the heat is carried away by the fumes.- I don't have an exact percentage number to give you, but the idea is:- at low speeds: negligible heat loss- at maximum speed: you may notice a reduction in heat in the room if you keep it like this for a long time.
Inside the home the noise is very low, especially at low speeds, which are the ones you will use most during normal use of the fireplace. The noise data of the aspirator are these (measured at 3 metres):- 1st speed: 38 dB- 2nd speed: 38 dB- 3rd speed: 41 dB- 4th speed: 53 dB- 5th speed: 56 dB- 6th speed: 59 dB What it means: - At the first 2–3 speeds the noise is comparable to a background murmur, difficult to perceive in the house, especially if the chimney is on the ground floor and the extractor is on the roof.- High speeds (4–6) are more audible, but are generally used:- to facilitate ignition,- to change the air or- to vacuum ash, therefore for short periods. In normal use, with the fireplace lit and the extractor set low/medium, at most you will hear a light background sound in the house, often covered by the noise of the fire itself. If you have other curiosities (consumption, maintenance, duration, etc.) just ask me.
Here is the noise level expressed in decibels for both square vacuum cleaner models (basic and professional) at each speed:- 1st and 2nd speed: 38 dB- 3rd speed: 41 dB- 4th speed: 53 dB- 5th speed: 56 dB- 6th speed: 59 dB
Chimney Fans / model choice
YES. That blue writing/blue film on the metal is normally a protective plastic film used during production and transportation. You should:1. Remove the blue plastic from all accessible metal surfaces (outside and, if present, inside the hood/base).2. Make sure that no pieces remain near the fan blades or air passage, so that they cannot be sucked in or melted.3. Only after having removed the film do you proceed with the final installation and the first ignition.
we sell round chimney extractors (round base electric fans) mounted on round chimney flues. From the Gemi catalogue, the round models involved are:- Base Round model aspirator – standard round chimney extractor- Professional Round vacuum cleaner - more powerful/professional round version- Acciaio Tondo model aspirator - round fan in AISI 304 stainless steel- Round Corten model aspirator - round fan in Corten steel- Professional Round Copper Exhaust Fan – round copper fan (for a copper look) All of these are available with round adapters from 10cm up to 40cm external diameter. On the product page, choose the size of the adapter based on the external diameter of your flue. You wrote:- Outdoor chimney: 12 inches (approx. 30.5 cm)- Internal flue: 8 inches (approximately 20.3 cm) For Gemi fans it is necessary to match the external diameter of the metal flue on which the fan will be fixed. To make sure we tell you the correct adapter size, could you please confirm:1. Is the 12 inch dimension the *outside* diameter of the metal flue where the fan or masonry/track opening will be placed?2. What material is the exposed flue made of (steel pipes, masonry, etc.)? Once confirmed, I can tell you exactly which round model + adapter size to choose from the Gemi range and how it will sit on your chimney.
Yes. It is possible to install the fireplace extractor even on a chimney made only of masonry (without internal pipe).
you can easily leave the extractor on even at speed 5 for many hours: there is no time limit on use, our fireplace extractor can work all day without any problem. However, if you notice that smoke continues to emerge even at high speeds, it is advisable to check some precautions:- Make sure the flue is clean and free of obstructions.- Always keep the fireplace door closed, if present, during combustion.- Check that the natural draft of the chimney is sufficient even without an extractor (cold), because structural problems of the flue can reduce effectiveness.- Try starting with the maximum speed (6) for the first few minutes, then drop to 5 when the draft is stable.
Yes. You can safely use the fireplace even when the smoke extractor is off. When the flue extractor is turned off, it does not block the smoke outlet. It is designed specifically to be able to be turned on only when you actually need it, for example in the presence of strong winds or if you lift the stove door. So, if you don't have smoking problems and want to keep the extractor off, you can use the fireplace without any worries.
you can easily decide to keep it off when you light the fire. The Gemi extractor, when it is turned off, does not block the flue: the fumes can still escape, so you are not obliged to turn it on every time you use the fireplace. Just keep in mind that:- If you have draft or smoke problems in your home, turning on the extractor will improve the draft immediately.- it can also work continuously without problems, if one day you prefer to leave it on all the time. If you tell me what type of problem you have (smoke in the house, poor draft, returning wind, etc.) I can suggest how to best use it in your case.
For a 51 x 51 cm square hood/flue you can still mount our Base model extractor (M/43 series), but there are a couple of important precautions. I'll answer you point by point:1. Maximum dimensions managed by the brackets The aspirator has:- square base 43 x 43 cm- adjustable brackets that normally cover flues from 20 x 20 cm up to approximately 43 x 43 cm In your case, one side is 51 cm, so:- you are wider than the 43 cm of the base- for flues with a side greater than 43 cm, as indicated in the instructions, *you must install the extractor with the smallest brackets present in the kit*, fixing it to the 4 corners of the chimney cap, not resting completely on the entire perimeter. - the extractor remains centered on the hood- it is anchored to the 4 corners via the brackets, which can be placed internal or external based on the space, as indicated in the instructions.2. How assembly takes place in summary Inside the package you will find:- 4 large brackets- 4 small brackets- screws, bolts, speed regulator- paper instructions General procedure:1. Measure the chimney cap (in your case 51 x 51).2. Place the 4 brackets on the sides of the vacuum cleaner.3. Adjust the brackets based on the size of the chimney cap (in your case they will not rest flush on the sides but will be anchored to the 4 corners).4. Fix large brackets + small brackets with screws and bolts.5. Fix the assembly to the chimney cap by tightening the 4 corners. > Note: if one side is greater than 43 cm, as in your case, installation is possible by anchoring the extractor to the 4 corners without the classic use of the perimeter brackets on all sides.3. Space needed if you place it under a chimney cap/chimney cap. If it is necessary to insert it inside a chimney cap or under a chimney cap, it is important to check:- Minimum internal height: 37 cm- Minimum internal width: 43 cm (the base of the extractor is 43 x 43 cm) It is also possible to mount it without a hat, inserting it inside the chimney cap, as long as there is:- at least 37 cm high- 43 cm minimum useful width as per the official measurement chart: https://static.gemimarket.it/img/schede/aspiratori/base/misure-aspiratore.jpg
For our fireplace extractor, the control panel/speed regulator has these measurements:- Height: 9cm- Width: 11cm- Depth: 8 cm So you can evaluate the space needed for installation (e.g. built-in, box, niche, etc.). Do you also need some details on how it should be mounted or the distance from the fireplace?
The problem of the fireplace making smoke when you light the wood is quite common and can have various causes, including insufficient draft in the flue, blocked flue, or damp wood. To definitively solve this problem, you can consider installing a Gemi chimney extractor, which is the ideal solution to help the draft and prevent smoke from entering the house. Here are the main advantages:- Facilitates optimal chimney draft thanks to its powerful motor.- It is very silent and works even at low speeds, so it sucks in the smoke but not the heat.- It adapts to any type of fireplace (open, stoves, thermo fireplaces, wood ovens, BBQ).- Very easy to install even without the help of a technician.- Helps improve wood combustion and reduces soot accumulation by 70%.
HI! It is possible to install the electric cable of the smoke extractor in two ways:1.
At the moment I have no information confirming the availability of a black version of the Pro round extractor (chimney extractor). The Pro round model is mainly available in the standard finish.
For fireplaces with out-of-shape flues such as (53x40 cm), our square-based extractors have adjustable brackets that make them suitable for covering dimensions from 20x20 cm up to 43x43 cm. In your case, having a larger size (53x40 cm), our standard adapter does not directly cover these dimensions.
You don't have to light it every time you make a fire.- When OFF, it does not block the chimney: the extractor, even when it is turned off, lets the smoke out normally, so the chimney continues to draw as it does now.- In the wind the fan turns on its own: it is normal that, when turned off, when there is strong wind the fan turns a little like a whirlwind. It's expected and doesn't cause any problems. So you can use it like this:- if you only light the fire "for company" and you don't have smoke problems → you can leave it off.- when you roast and you know that the fat will drip and smoke → there it is better to turn it on (low speed at the beginning, higher when cooking begins). you only use it when you really need it, it is not mandatory to keep it on every time you make a fire.
I'll explain everything to you in detail!
How is it mounted?- Assembly is DIY and very simple.- You will find detailed instructions in the packaging and you can also see video tutorials on our website.- If the flue is made of round steel and without masonry lining, the round adapter is needed (to be selected at the time of purchase).
How is it mounted?- Assembly is DIY and very simple.- You will find detailed instructions in the packaging and you can also see video tutorials on our website.- If the flue is made of round steel and without masonry lining, the round adapter is needed (to be selected at the time of purchase).
At the moment we do not have a Gemi smoke extractor/fireplace extractor in our catalog with directly wireless speed management (such as integrated Wi‑Fi remote control or wireless radio control). How it works today:- the Gemi vacuum cleaner is supplied with a 6-speed manual speed regulator;- switching on/off and speed adjustment are manual from the regulator;- there is no native automatic ignition. Possible solution with home automation:- the extractor can be connected to the home automation system to manage at least remote switching on and off;- to do this, it is necessary to install a control module compatible with the home automation system (smart relay, Wi‑Fi actuator, etc.) upstream of the controller;- the module must be suitable for 230V voltage and correctly installed by the electrician. This type of solution allows:- turning on/off from the app or Wi‑Fi remote control;- however, the speed is still set using the regulator knob (the element that defines the suction level remains). If he tells me:- what type of home automation system you have (e.g. KNX, BTicino, Alexa/Google with smart relay, etc.), I can give you more targeted information on how to integrate the Gemi extractor with the system.
Yes, it's a situation that can happen and I'll explain why.
you can absolutely size the chimney to fit the extractor instead of the other way around – that's actually a good idea. From what you described (large hood, charcoal grill, three closed sides, pergola, short duct with a bend), you're already in the "difficult draft" category, so it pays to size things correctly from the start.1. Chimney diameter suitable for the extractor Since you have not yet installed the chimney, the safest and most flexible approach is:- Install a round metal flue- Choose a diameter that exactly matches one of the available extractor adapters (standard sizes) you mentioned before, about 20cm. A round chimney flue with an outside diameter of 200mm (20cm) is a very good and common choice for a barbecue of your size and works well with our round chimney fans. So a practical tip is: > Design the flue with an external diameter of 200 mm > and then choose a round Gemi chimney extractor model with a 200 mm adapter. Why 200mm works well in your case:- Large hood (120×120 cm) and large grill- Three sides closed → the smoke tends to stagnate- Short route (~1.5 m total) with a height difference of 90 (horizontal + vertical)- Plan to use a motorized extractor → 200mm is large enough to move a lot of smoke without too much resistance. If you thought about reducing it (e.g. 150mm), it would increase resistance and make the system more sensitive to grease and kinks. With the lens hood you have, staying at 180–200 mm is much more comfortable; 200mm is ideal and aligns with the adapter size we talked about.2. Suggestions for the layout of the chimney (important for the performance of the extractor) Given the configuration of the pergola barbecue:- Try to keep the horizontal section as short as possible (your 50cm is fine; avoid making it too long if you can).- Aim for at least 1m of height difference above the level of the hood (you already have around 100cm – it's acceptable).- Use smooth metal pipes (stainless steel or similar), not corrugated, to reduce resistance.- Make sure there is only one change of direction (from hood to horizontal, then to vertical); avoid extra elbows. The Gemi extractor will greatly compensate for an imperfect flue, but a clean layout always helps and gives more margin on lower speeds.3. Which “family” of extractors is this size intended for? Based on internal information:- For round flues, select the external diameter of the pipe when choosing the extractor.- For barbecues, short ducts and situations with problematic air currents, you should opt for a professional model (~3800 m³/h, 700 C) with the adapter sized for your chimney flue (in your case: 200 mm external). So concretely: > Build a round metal chimney with an external diameter of 200 mm > then choose a Gemi round chimney extractor with 200 mm adapter, preferably the professional model for the best performance on barbecue smoke and short ducts.
Yes, it's possible!
¡Good question! For the Gemi professional hum extractor model, there is no mandatory minimum distance between the base of the fire and the extractor. That is, you can install it without worrying about the height of your vehicle. In exchange,
Yes, the tube where the extractor is positioned can be made of sheet metal. The important thing, according to our indications, is:- That the pipe is metallic and resistant to the typical temperature of fireplace/barbecue fumes.- That the external diameter corresponds to the chosen adapter (in your case 200 mm by 20 cm).- That the hose is well fixed and stable, because the vacuum cleaner has a certain weight and vibrations. With a normal sheet metal pipe for fireplaces/barbecues there is no problem:- The round aspirator is mounted on the tube using the round adapter of the corresponding diameter and tightened with the supplied clamps/screws.
The Gemi chimney extractor (including the standard round steel model) weighs approximately 20 kg. This is the reference weight we use for Gemi chimney extractors, regardless of whether they have a square or round base. Since the pipe is made of 2 mm sheet metal and straight, it is important:- Secure it well with clamps/supports to the structure (wall or fireplace).- Mount the extractor once the pipe is perfectly fixed and stable, since those ~20 kg will go up.
Here is an overview of how the Gemi fireplace extractor is installed:
Video Tutorial and Electrical Diagram You can find the detailed video guide and the electrical diagram at this link: [Gemi aspirator installation guide](https://www.gemimarket.it/content/12-guida-all-installation-aspiratori) If you have a particular shaped chimney or specific needs,
Video Tutorial and Electrical Diagram You can find the detailed video guide and the electrical diagram at this link: [Gemi aspirator installation guide](https://www.gemimarket.it/content/12-guida-all-installation-aspiratori) If you have a particular shaped chimney or specific needs,
I completely understand the situation: it's a very common problem! When the fireplace door is opened, the natural draft often cannot handle the sudden increase in smoke, and consequently some of it enters the house, while with the door closed there are no problems. The ideal solution in these cases is the installation of a Gemi fireplace extractor. This device helps precisely in critical moments such as opening the door:- Just turn on the extractor a few minutes before opening the door to load the wood.- The forced draft ensures that all the smoke is sucked upwards, avoiding any leakage into the house.- It is simple to install (just follow the manual or our video tutorials) and has a 6-speed regulator to adapt to every need. Main advantages:- Definitively solves the problem of smoke in the house when loading wood.- Promotes better and safer combustion.- It is silent and consumes very little electricity.
The Gemi chimney extractor (chimney extractor) is designed to improve chimney draft and help solve problems with smoke returning into the home. However, it is important to note that this device is not a smoke disperser or smoke reducer.
Thanks for the detailed information! For a flue with a rectangular base of 54.5 x 61 cm, our adjustable brackets for square/rectangular base extractors cover sizes from 20x20 cm to 43x43 cm.
I'm going by parts, because you explained the installation very well and we will clarify it point by point. First of all: I can only rely on the technical information we have from Gemi. For general chimney processing/insulation issues (materials such as "PH3", fireproof plasterboard, etc.) I do not have official data, so I cannot give you specific technical advice.
1) Does the extractor act as a cap? With information available from Gemi:- The extractor is installed at the top of the chimney and is designed to:- Protect the exit.- Extract the fumes (it has a casing and a swivel, it is not "open" like a pipe).- In practice it replaces the classic cap: there is no cap + extractor, but only the extractor above.
3) With what material to insulate the stainless steel pipe that passes through the wall? This is where I have a clear limit:- The Gemi information I have available does not indicate which specific materials to use for:- Fill the gap between the double-walled stainless steel tube and the work.- Fire resistance standards of the partition wall, PH3 details, fireproof plasterboard, etc. I know that many installers use specific insulation (rock wool, certified systems, fireproof plates), but this depends on the installer/local regulations, not on the extractor's instructions. So, honestly:- I can't tell you “use PH3”, “use X wool”, “use Y plasterboard” because I don't have this recommendation in the Gemi documentation.- This part must be decided by your authorized installer, adapting to the fire regulations and the solutions he knows and uses. What is consistent with the use of the Gemi aspirator is:- That the passage of the chimney through the wall is well sealed (to avoid draft losses and false air entry).- That the cable passing through the cavity is mechanically protected and does not come into contact with sharp edges or excessive temperatures.
Summary so you can proceed with the installers1. Hat- It is not possible to use the stainless steel cap and mount the Gemi aspirator directly on the top of the external vertical section.- The extractor acts as the final element of the chimney and replaces the cap.2. Wiring- If the cable:- Comes out of the stainless steel tube,- Shares the same hole in the wall but does not fit the chimney,- So according to Gemi, a 3 x 1.5 mm² rubberized cable for outdoor use is sufficient.- The special 300 °C cable is only necessary if it passes inside the chimney.3. Wall passage insulation- Here I have no specific Gemi indications on materials (PH3, fireproof plasterboard, etc.).- This decision must be made by your installer, following local regulations and his professional criteria.4. Suction power in Ø300 with 45 elbow- There is confirmation that the Gemi extractor is suitable for round spiral chimneys Ø300 mm (outer diameter) with the correct adapter.- Your configuration falls within the typical use that Gemi contemplates, but I don't have a fine shooting calculation to guarantee it with numbers.
Yes. You can power the extractor even if you don't have an outlet on the roof: it is not necessary to have electricity at the top of the chimney. I'll answer you in points:1. How to power the vacuum cleaner without a roof socket- The extractor is connected electrically via a cable that goes down to the speed regulator, which in turn connects to a normal 220V socket (at home, near the fireplace or in a convenient point).- So the socket can be inside the house, not on the roof.2. Can the cable be passed inside the chimney?- Yes. The cable can be passed both externally and internally to the flue.- If you pass it outside the flue: → a normal rubberized outdoor cable FG7 3 x 1.5 mm² is fine which extends the first meter already connected to the extractor.- If you want to pass it inside the flue: → you need to use the special cable resistant to high temperatures from Gemi, certified up to 300, specific for this use. → It is an accessory to be purchased separately, choosing the meters you need from the drop-down menu. → It is tested and certified according to safety standards.3. Summarizing the practical solution- Mount the extractor on the flue.- A cable of around 80 cm already comes out of the motor.- Then:- or extend externally with the FG7 3x1.5 cable up to the regulator,- or enter the flue with the Gemi high temperature cable and take it down to the regulator area.- The speed regulator must be connected to a 220V socket and installed away from heat sources (because it has a transformer inside).
Yes. The problem you describe is quite common when two fireplaces are connected to the same flue: the smoke tends to rise and exit the chimney on the upper floor, especially if there is not a good draft.
Here are the answers and some clarifications based on the information available on Gemi products:
2) Air intake under the fireplace VS air intake at the top at the side of the fireplace: do they conflict? No. They are not technically in conflict, but they perform slightly different functions:- Air intake under the firebox: promotes combustion by bringing fresh air directly under the fire.- Air intake at the top right or left next to the fireplace (as also suggested by Gemi technicians): it serves to balance the pressure of the environment and give access to the air at a higher point, helping to further reduce the risk of smoke returning especially when the house is sealed. If, as in your case, the problem disappears with the window open, it means that the chimney is suffering from a lack of air flow into the room, typical of very "hermetic" houses. In many cases, the optimal solution is to combine multiple air vents in different points (under the hearth and at the side of the fireplace) to maximize both the quality of combustion and the stability of the draft, without any conflict between the two vents. Advice: If the smoke persists despite the Gemi extractor (which in any case also works with irregular flues or difficult environments), adding an air vent high up near the fireplace could be the definitive solution, as also suggested by the video tutorials they sent you. The two sockets work in synergy.
2) Air intake under the fireplace VS air intake at the top at the side of the fireplace: do they conflict? No. They are not technically in conflict, but they perform slightly different functions:- Air intake under the firebox: promotes combustion by bringing fresh air directly under the fire.- Air intake at the top right or left next to the fireplace (as also suggested by Gemi technicians): it serves to balance the pressure of the environment and give access to the air at a higher point, helping to further reduce the risk of smoke returning especially when the house is sealed. If, as in your case, the problem disappears with the window open, it means that the chimney is suffering from a lack of air flow into the room, typical of very "hermetic" houses. In many cases, the optimal solution is to combine multiple air vents in different points (under the hearth and at the side of the fireplace) to maximize both the quality of combustion and the stability of the draft, without any conflict between the two vents. Advice: If the smoke persists despite the Gemi extractor (which in any case also works with irregular flues or difficult environments), adding an air vent high up near the fireplace could be the definitive solution, as also suggested by the video tutorials they sent you. The two sockets work in synergy.
To design the kitchen fireplace well, you need to clarify one thing first:- you will use an internal round chimney (steel pipe, e.g. 15–20 cm) that goes up to the roof- or do you want to do everything in brickwork with only a square mouth on top? However, I will give you two practical indications, valid in general for connecting a kitchen to a Gemi extractor on the roof:1. For domestic kitchen use: recommended diameter In the absence of other constraints, for a normal kitchen:- a 150 mm (15 cm) internal round tube works very well- if the kitchen is large or the path is long/winding, 180 mm (18 cm) is better. These diameters:- they are more than adequate to work with a Gemi vacuum cleaner (also professional model 3800 m³/h)- they allow good draft avoiding bottlenecks2. Consistency with the hood output When you choose the new hood (without internal motor or with motor that you will use at minimum):- check the outlet diameter of the hood (often 120 mm, 150 mm, etc.)- if you can, never go lower in diameter along the barrel (better equal or larger) Practical example:- hood with 150 mm outlet → 150 mm internal flue up to the roof → Gemi extractor on the roof with 150 mm round adapter- or hood 120 mm → initial section 120 mm, then rise to 150 mm for the main column up to the roof3. If you build a brick fireplace with an internal pipe. Typical and very practical configuration:- internal: 150 mm (or 180 mm.) round steel tube
As regards how many centimeters/metres to extend the chimney above the roof, I have no specific technical or regulatory indications available. This point (height above ridge, distance from obstacles, etc.) usually follows:- the technical standards (e.g. UNI for flues / smoke exhaust),- the building regulations of your municipality,- and is often assessed by a qualified technician (plumber, heating technician, surveyor, etc.). What, and which is part of the information I have, is just that:- the Gemi professional vacuum cleaner can also be installed on very low pipes (even 1 meter in total height),- and works correctly up to 50 meters of flue. To decide how high to raise the chimney above the roof, we recommend:1. Talk to the technician who supervises the work (bricklayer + designer / installer).2. Check with him the local regulations and the position of the chimney with respect to:- ridge of the roof,- windows,- other buildings. This way you will be sure of:- respect the rules,- avoid backflows of smoke/odours due to wind turbulence.
Yes, it can happen, but it should not depend on the Gemi extractor if it is installed correctly. I'll explain it to you simply:- The Gemi chimney extractor is specifically designed to avoid rainwater infiltration:- it has a rise at the base which prevents water from entering the flue even in case of heavy rain- the motor is above the fan, covered by the motor cover- the hat and the structure protect from wind, rain, birds and rodents. Therefore, in normal conditions, even with heavy rain, the water should not reach the pipe and much less reach the motor of the air fireplace. If you found water:- there could be:- a problem upstream in the flue (cracks, open joints, unsealed connections)- an installation defect or error (e.g. incorrect slopes, missing seals, adapter or base not positioned well)- points where the water runs down the outside of the pipe and manages to enter further down What we recommend doing immediately:1. Have the system checked by a technician (smoker or specialized electrician) to verify:- the state of the flue along the entire route- the connection points between the flue, thermo fireplace and extractor- possible presence of condensation which accumulates and falls2. Do not use the thermo fireplace if you think that water has reached the internal fan motor: water and electricity together can be dangerous, a technical check is needed before turning it back on.
Thanks for all the detailed information! Here are the answers to your doubts:1. Reducing the diameter from 250 mm to 200 mm Reducing the diameter of the chimney flue from 250 mm to 200 mm on the roof is not ideal, but in many cases it does not create insurmountable problems, especially if the reduction is gradual. However, it is important that there are no too abrupt bottlenecks or restrictions that could hinder the draft. The installation of a smoke extractor can compensate for this reduction and significantly improve the draft, helping to solve smoke problems.2. Extractor for 200 mm round flue For a round flue with an external diameter of 200 mm we recommend choosing the round base extractor with 200 mm (20 cm) adapter. you can select this size directly from the drop-down menu on our website.3. Height of the flue With a height of approximately 3.5 metres, the professional model extractor is excellent: it is designed to work even with much higher flues (up to 50 metres), so in your case it will guarantee an excellent result.4. Smoke dispersion problems from the internal pipe The smoke extractor is the ideal solution for solving smoke dispersion problems inside the hood or pipe, even if there are sections that are not perfect or need to be replaced in the future. The extractor creates a forced draft which helps convey all the smoke outwards, preventing it from dispersing into the environment.
The professional model fireplace extractor (resistant up to 700) consumes the following wattages based on the set speed:- First speed: 64W- Second speed: 87W- Third speed: 110W- Fourth speed: 146W- Fifth speed: 216W- Sixth speed: 261 W If you need more information or need help choosing the right model,
For a wood-burning fireplace with a 4.5 meter flue, we recommend the professional model fireplace extractor. This model is particularly suitable for low flues (even under 3 metres), because it is resistant to high temperatures and guarantees excellent extraction even in situations where the height of the flue could create draft problems. you can find more details and purchase the professional model directly on our website:- [Professional model fireplace extractor](https://www.gemimarket.it/aspiratori/70-tiracamino-tirafumo-professionale-aspiratore-per-camino-8053017260167.html)
I completely understand the situation and the need to avoid problems with neighbors due to chimney smoke. However, I must inform you that the Gemi fireplace extractor does not eliminate the smoke coming out of the chimney: the function is to improve the draft and solve the problems of smoke returning into the house, but it is not a smoke abatement.
you can choose two ways to pass the electrical cable of the Gemi fireplace extractor:1. External Passage: you can use an external cable (type 3 x 1.5 mm²) which goes down the outside of the chimney to the inside of the house, where it will then be connected to the network.
For the Gemi extractor you have two correct ways to bring the electricity from the chimney into the house. I'll answer you first, then if you like
For installations in very windy areas, the professional extractor is the most suitable model: it is also designed to solve smoke problems due to strong winds. From what I have available:- the Gemi chimney extractor is expressly indicated "precisely in case of strong winds as it manages to solve the problem of smoke";- there is no "special" assembly system other than the standard one: the base (square or with adapter for round flue) is used, fixed well to the flue with plugs/brackets, as per the assembly instructions. Practical details:- for square/rectangular flues up to 43x43 cm: use the adjustable brackets supplied;- for rods over 43x43 cm: fix the base directly to the 4 corners with dowels (pre-drilled holes), as per the standard procedure. Based on the information I have, there are no specific critical issues related to wind if the installation is carried out correctly (fastenings well tightened and on a solid support).
At the moment I do not have specific data on the exact time it takes for a chimney with the dimensions you indicated (40x40 cm, height 4 meters) and a 95x55 cm open fireplace to fill with smoke. The time can vary greatly depending on several factors such as:- Flue draft- Quantity and type of wood used- Atmospheric conditions (wind, humidity, pressure)- Presence or absence of obstacles or restrictions in the barrel- Ventilation of the environment If you are considering the installation of a fireplace extractor, the extractors in our range are designed to guarantee correct smoke evacuation even in the presence of flues of this size, avoiding internal accumulations of smoke. Do you want to know how a fireplace extractor works or do you need a specific solution for the case?
To maintain the chimenea humus extractor, Gemi recommends something simple:- A couple of times per week (approx.)- With the flame extinguished,- Set the speed regulator to maximum for a couple of minutes. In this way, the fan and the chimenea are kept cleaner, as the quick rotation helps to expel light dust deposits and debris. If you extractor has several years and want a deeper cleaning of the hélice, it is recommended to use a commercial degreaser simply applied on a cloth (always with the team disconnected from the supply). If you tell me which model you have (Base, Pro, Acero Inox, Corten, Cobre, etc.), I can orient you with some more specific advice.
Great question! It is a fundamental detail for installation.
If you have a certified fireplace without masonry - therefore you only have the round flue pipe "exposed" and not embedded in a wall - you can still install the Gemi basic model round extractor directly on the final part of the external pipe of your chimney flue. Here are the main tips:1.
I understand the doubt. Yes: the problem is guaranteed to be resolved. Furthermore, if you are not satisfied, you can still proceed with a free return within 100 days. To better clarify an important point:- the extractor is not a smoke suppressor- the function is to reproduce the natural draft of the chimney, so as to solve the problem of smoke in the fireplace, thermo fireplace, stove, pellet stove, oven, barbecue, industrial hoods, etc. Therefore, in the case of draft problems, it is precisely the product designed for this use. However, there is a useful clarification:- if it is used at the sixth speed, which is usually used to exchange air, help light the fire or suck up ash, the very high flow rate can increase combustion and partially reduce the heat.- In normal use, however, it is used to extract smoke that would otherwise return into the house. If you want, I can help you understand how suitable the case is by asking you 2 practical questions:1. Does smoke always come out or only in certain conditions?2. does it have an open fireplace, a stove or a thermo fireplace?
To connect the electric fireplace extractor, the regulator must be connected to a 220V power socket. However, the regulator must be installed away from heat sources because it contains a transformer. If there is no power outlet near the fireplace, you have two options:1. Bring a cable from the nearest socket: you can run a cable externally using a 3 x 1.5 mm² cable or internally (into the brickwork) using a cable resistant to high temperatures (this type of cable can also be purchased separately).2. Ask an electrician: If you are not familiar with the electrical system, it is advisable to contact an electrician who can install a power outlet near the fireplace or run the cable safely. Regarding the cost:- The high temperature cable, necessary for the internal connection, is sold at €1.22 per metre.
Great question! If your extractor works well at speed 4 but you would like it to work equally well at speed 3 (i.e. producing the same smoke but with less noise and consumption), here are some practical tips to improve the draft and efficiency of your chimney and extractor:
Quick Actions Summary:- Seals all joints perfectly.- Clean the fireplace well.- Let fresh air into the room.- Avoid bends and bottlenecks in the duct.
Quick Actions Summary:- Seals all joints perfectly.- Clean the fireplace well.- Let fresh air into the room.- Avoid bends and bottlenecks in the duct.
Yes, you can continue to use your Gemi extractor, but depending on the final appearance of the chimney, there are two options:1. If you intend to leave only a round metal tube (double, insulated) without working around it- In this case the ideal is to assemble the round chimney model (round) with its adapter to the external diameter of the new pipe.- Your current exhaust fan has a square base for a brick chimney. This model is designed to rest on the square/rectangular mouth and be fixed with the adjustable brackets, not directly on a round tube.- Technically you could look for a homemade solution, but the correct and safe installation is:- Gemi aspirator for round tube- Multiple round adapters for the outer diameter of your new hose (there are adapters from 10cm to 43cm diameter).2. If you keep the work square and the round tube goes inside- In this case the “correct” installation with the square extractor is:- Close the space between the round tube and the square one (with mortar or sheet metal),- To avoid losing suction power,- And continue to use your square vacuum cleaner leaning against the exit of the construction site, as before. From what you say you will eliminate the construction site socket and leave only the double insulated pipe, therefore, to be precise, for a well-done installation it is advisable to switch to the system with a round adapter. If you tell me:- The external diameter of the new double insulated pipe, I will tell you exactly which "round aspirator + adapter" combination would correspond to you on the Gemi website.
you can easily turn off the Gemi extractor even while the fireplace is lit, without any risk of damaging it. The extractor is not damaged if it is turned off and on again while the fireplace is running.
In this case the correct solution is: → Vacuum cleaner with a square base (not the one with a round connection) and I'll explain why based on our installation guidelines:- You have a 35x35cm square masonry chimney cap with a 20cm round stainless steel pipe inside.- In these situations, the recommended procedure is:1. Bring the pipe flush with the wall (if it protrudes a few cm it must be cut flush with the wall).2. Close/fill the void between the pipe and the masonry (with mortar or sheet metal) so as not to disperse the suction force.3. Install the extractor directly on the wall, choosing the model with a square base, also adjustable on rectangular flues. So:- The round model with adapter is not needed.- Yes. The square model, fixed to the wall, is fine; the "reduction" is done by closing the space around the tube, not with a round fitting on top. In addition, the square-based model:- It has adjustable brackets from approximately 20×20 cm up to 43×43 cm, so the 35×35 fits perfectly.- It is already supplied with speed regulator and adjustable brackets for fixing. If you tell me:- how much the stainless steel pipe now protrudes (0 cm / 5 cm / 10 cm...) exactly how it is best to prepare the chimney cap before assembly.
HI! The consumption of the stainless steel chimney extractor is indicated in watts (W) and varies depending on the speed selected. To convert consumption into ampere hours (Ah), the formula is normally used: Current (A) = Power (W) / Voltage (V) According to the information available, the professional steel model has the following consumption as a function of speed:- 1st speed: 64W- 2nd speed: 87W- 3rd speed: 110W- 4th speed: 146W- 5th speed: 216W- 6th speed: 261 W If the extractor operates at 230 V (standard voltage in Spain), the maximum current would be: 261 W / 230 V ≈ 1.14 A Therefore, the maximum consumption of the motor is approximately 1.14 A. To choose the right cable, your electrician can take this value as a reference and apply the usual safety margin. Can I help you with anything else?
The Gemi extractor, even when turned off, does not hinder the normal escape of smoke from the chimney: the smoke continues to come out regularly thanks to the structure of the extractor, which allows the air to circulate. However, when lit, it is particularly useful for improving draft and preventing smoke from stagnating in the home, especially in difficult situations or with chimneys that struggle to draw.
the differences between the various Gemi fireplace extractor models, so you can choose calmly.1. BASIC model- Suction: 2500 m³/h- Temperature resistance: up to 300°C- Warranty: 3 years- It is the "entry level" model, suitable for standard situations without particular draft problems or very high temperatures.2. PROFESSIONAL model- Suction: 3800 m³/h- Temperature resistance: up to 700°C- Warranty: 6 years- Particularly recommended if:- you have a low chimney (even less than 3 metres)- you want more safety even in the event of a soot fire in the barrel- you want more suction power than the basic one3. STEEL model (Aisi 304 stainless steel)- Suction: 3800 m³/h- Temperature resistance: up to 700°C- Warranty: 8 years- Material: entirely in Aisi 304 stainless steel- more resistant to corrosion- ideal in humid areas or near the sea (salt)- Same performance as the professional, but with more "eternal" materials.4. COPPER model (professional copper)- Suction: 3800 m³/h- Temperature resistance: up to 700 °C- Warranty: 10 years- Material: Aisi 304 stainless steel with copper plating, stainless steel fan- It's top of the range:- maximum durability over time- very refined aesthetics (everything painted even at the base)- ideal if the fireplace is very visible and you also want a nice aesthetic result, what really changes?1. Suction power- Base: 2500 m³/h- All others (professional, steel, copper): 3800 m³/h2. Heat resistance- Base: up to 300 °C- Professional / Steel / Copper: up to 700 °C3. Material and durability- Base: galvanized sheet metal, standard use- Professional: galvanized sheet metal but more "robust" in terms of range- Steel: Aisi 304 stainless steel, against corrosion and saltiness- Copper: Aisi 304 stainless steel + copper coating, top aesthetics and maximum durability4. Warranty- Base: 3 years- Professional: 6 years- Steel / Corten: 8 years- Copper: 10 years
you can easily leave it on even if you leave the house, there is no problem for the extractor. Two important points:1. Vacuum cleaner safety- It is designed to work all day without time limits.- Keeping it lit while the fireplace is lit is normal use.2. General common sense- As with any fireplace, it is always best not to leave the fire burning brightly without anyone in the house.- But if you need to go out for a bit while the fireplace is still lit (perhaps low flame/embers), it is better:- leave the extractor on at low speed (1), this helps the draft and reduces the risk of smoke in the house. When you return:- if the fire is still alive, keep it lit at the speed you need;- if everything is now almost extinguished and there is no longer any risk of smoke, you can also turn it off
Nice to hear it. In order to follow it as best as possible,
The fireplace extractor with square base adapts to square or rectangular flues from a minimum of 20x20 cm up to a maximum of 43x43 cm, thanks to the adjustable brackets. If the chimney flue is even larger, the base can still be fixed directly to the four corners (as long as the support base is at least 40x40 cm). Regarding the dimensions:- The base of the aspirator is 43x43 cm- The height is 43 cm without brackets, or 60 cm with brackets. If you need more specific details on measurements, a complete chart can be found directly on our site.
Yes. Our Gemi fireplace extractor is also suitable for your case and works to solve smoke and soot problems from the wood-burning oven. From our archive:- the professional model fireplace extractor is also suitable for wood-fired ovens (pizzeria type)- thanks to the strong suction power, it works without problems even on long flues (even over 30–50 metres)- it has 6 speeds: at the first speeds it sucks in the smoke naturally, without taking away the heat; at high speeds you can use it for:- facilitate ignition- change the air- extract more smoke/soot when needed: - the extractor is mounted at the top of the chimney- sucks in the smoke that would otherwise go out into the atmosphere or come back, also reducing the soot that can bother those living above- reduces the accumulation of soot in the flue by up to 70%. For the wood-fired oven, the professional model is the most suitable. To give you the best advice, I ask you only one thing:- is the oven flue round or square/rectangular? And if you know, what size/diameter does it have (even approximate)? So I'll show you the exact model (square or professional round base) and where to see it on the site.
HI! To recommend the right smoke extractor I would need to know the external diameter of your round chimney.
Thanks for the question!
Where do I connect each of them if I have 5 terminals? Generally the terminal blocks are distributed in this way:- “LINE 220V” terminals: for the two phase and neutral cables of the electrical power supply (L and N).- EARTH CLEM(S): for the earth cables of the extractor and the house.- “MOTOR MOTOR” CLEMAK: for the two cables that go to the vacuum motor. Connect like this:1. Live and Neutral of the house's 220V: go to the two terminals marked *LINE 220V* (on the regulator or on the corresponding terminal).2. Land:- Join (join) the ground wires: the ground wire coming from the house's electrical system (yellow-green) and the ground wire coming from the extractor (also yellow-green or green).- Both are connected to each other at the terminal marked with the earth symbol or “EARTH” on the regulator or on the suction strap. Normally this terminal allows you to tension two cables at the same time, or you can splice them and bring one to the terminal if you have a single terminal. IMPORTANT:- Both the mains and extractor earth must go to the same earth terminal, so that the entire system is protected from shunts.- DO NOT use any of the "motor motor" or 220 V terminals for earthing.- The manufacturer recommends NOT disconnecting the motor cable to join normal cables, as the one supplied is special for high temperatures.
Where do I connect each of them if I have 5 terminals? Generally the terminal blocks are distributed in this way:- “LINE 220V” terminals: for the two phase and neutral cables of the electrical power supply (L and N).- EARTH CLEM(S): for the earth cables of the extractor and the house.- “MOTOR MOTOR” CLEMAK: for the two cables that go to the vacuum motor. Connect like this:1. Live and Neutral of the house's 220V: go to the two terminals marked *LINE 220V* (on the regulator or on the corresponding terminal).2. Land:- Join (join) the ground wires: the ground wire coming from the house's electrical system (yellow-green) and the ground wire coming from the extractor (also yellow-green or green).- Both are connected to each other at the terminal marked with the earth symbol or “EARTH” on the regulator or on the suction strap. Normally this terminal allows you to tension two cables at the same time, or you can splice them and bring one to the terminal if you have a single terminal. IMPORTANT:- Both the mains and extractor earth must go to the same earth terminal, so that the entire system is protected from shunts.- DO NOT use any of the "motor motor" or 220 V terminals for earthing.- The manufacturer recommends NOT disconnecting the motor cable to join normal cables, as the one supplied is special for high temperatures.
To maintain the Gemi fireplace smoke extractor it is not necessary to carry out annual cleaning or special interventions. However, here are some useful tips to always keep it efficient:- Run the regulator at maximum speed (with the heat off) for a couple of minutes a couple of times a week. This keeps the fan and flue clean.- When you clean the fireplace, you can turn on the extractor: the soot will be sucked up without leaving residues.- you can also use the extractor in summer to promote natural air exchange.- The aspirator does not require specific annual maintenance. Thanks to these simple operations, the environment will remain clean and without smoke odors, also reducing the accumulation of soot in the flue.
I'll tell you what I see right now: From the information I have, these models of fireplace extractors/vacuum cleaners appear:- basic model vacuum cleaner (square and round)- professional model vacuum cleaner (square and round)- steel aspirator (square and round)- Corten model aspirator (square and round)- Warranty extension (GEMI CARE PACK)- High temperature resistant cable. A model called "Extractor Plus" is not specifically listed, so I can't see its exact price. Furthermore, I only have prices in euros (€), for example:- Basic aspirator: from €248.90- professional vacuum cleaner: from €358.90- round vacuum cleaners (depending on the diameter): from €399 to €429 Since I currently do not have access to the price of the "Plus" model or the exchange rate, I cannot provide you with a reliable conversion into Colombian pesos.
Yes. If you purchase our high temperature resistant cable, you can easily insert it inside the flue up to the bottom of the fireplace.
Yes. Your problem can be significantly improved with our fireplace extractor. From the type of defect it describes (embers that "die", wood that remains coal and does not finish burning), it is very likely that the draft is not always constant and optimal, especially in the advanced combustion phases. The Gemi aspirator:- has 6 adjustment speeds- allows you to stabilize and optimize the draft in every phase of combustion- promotes more complete combustion of the wood, therefore:- fewer pieces that just remain charred- livelier and more constant embers- better use of heat In our FAQ it is specified that the smoke extractor, thanks to the 6 speeds, guarantees perfect combustion of the wood, definitively solving draft problems. So:- it is not a "smoke suppressant", but- reproduces the correct draft of the flue, effectively improving the quality of the burn and the embers. If you want, tell me:- whether the fireplace is open or closed (with glass),- the shape of the flue (round or square/rectangular) and the diameter/measurements, so I can help you better understand which model from the Gemi line is best suited to your case. Furthermore, if it suits you, you can look directly at the "Base Gemi Tirafumo Tiracamino" model which has already been opened: it is precisely the extractor designed to solve smoke and draft problems such as the.
This is fine: if you confirm to the builder that you want the Gemi square-based chimney extractor, he will take all the right measurements on the roof.
At what speed will you have to use it? For normal use of the fireplace, in your case:- During "normal" fire, to maintain the draft and not suck in the heat:- speed 1–2 is usually used- like this:- smoke is sucked in well- heat is not sucked in- good embers and more complete combustion are maintained- To light the fire or when there is a lot of smoke when starting:- you can use a higher speed (e.g. 4–5–6) for a few minutes- then, once the fire has stabilized, it goes back to 1–2- To vacuum ash or exchange air in the room:- speed 6 is usually used, always for short times. So in daily practice, with a fireplace closed with glass like the, you will almost always use it at 1–2, where consumption is really minimal.
At what speed will you have to use it? For normal use of the fireplace, in your case:- During "normal" fire, to maintain the draft and not suck in the heat:- speed 1–2 is usually used- like this:- smoke is sucked in well- heat is not sucked in- good embers and more complete combustion are maintained- To light the fire or when there is a lot of smoke when starting:- you can use a higher speed (e.g. 4–5–6) for a few minutes- then, once the fire has stabilized, it goes back to 1–2- To vacuum ash or exchange air in the room:- speed 6 is usually used, always for short times. So in daily practice, with a fireplace closed with glass like the, you will almost always use it at 1–2, where consumption is really minimal.
Yes. In most cases you can still install the extractor, but an important clarification must be made. From our technical material:- If there are multiple round flues inside the masonry chimney, you must:1. Extend the flue you are interested in (the one in the chimney that makes smoke).2. Install the extractor with a round adapter based on the external diameter of that flue. The extractor works only on the flue connected to it; therefore:- Choose which pipe to use (usually the chimney one which creates smoke problems).- Get it to the right height and mount the extractor on top. If instead you have:- A round pipe inside a square/rectangular one: the space between the round and square must be closed (with mortar or sheet metal) so as not to disperse the suction, then the extractor is installed. If you tell me:- how many rods are there,- if they are round or square,- and which one is needed for the smoke-producing chimney, I can tell you more precisely how to proceed.
To advise you on the most suitable fireplace extractor, I would need some information on your mother's chimney:1. The shape of the chimney: is it round, square or rectangular?
In this case, round base vacuum cleaners with 180 mm (18 cm) adapter are suitable. the differences between the round models, so you can choose the most suitable one:1. Round basic model- Material: Steel- Temperature resistance: up to 300°C- Air flow: 2500 m³/h- Warranty: 3 years- Suitable if:- you have a chimney with a draft that is not particularly problematic- use the fireplace in a normal way (non-continuous and very intensive)- you don't have a very low flue (the flue is 5 m, so ok)2. Round Professional Model- Material: Steel- Temperature resistance: up to 700 C (even in the event of a chimney fire)- Air flow: 3800 m³/h- Warranty: 6 years- Particularly recommended if:- the flue is low (under 3 metres) or the chimney produces a lot of smoke/returns- make intense use of the fireplace- you want greater safety and durability3. Round Steel Model- Material: AISI 304 stainless steel (resistant to corrosion and saltiness)- Temperature resistance: up to 700 C- Air flow: 3800 m³/h- Warranty: 8 years- It is ideal if the fireplace is in an area exposed to atmospheric agents or in marine areas, or
For a square flue measuring 37.5 x 37.5 cm you can easily choose the smoke extractor model with a square base. This model is equipped with adjustable brackets that adapt perfectly to sizes between 20x20 cm and 43x43 cm, so the size is perfectly within the range.
The problem you describe is very common in fireplaces, especially when you open the door to add wood. The smoke entering the house can be caused by insufficient draft in the chimney or by obstacles or bends that slow down the rise of the smoke. The most effective and definitive solution is to install a chimney smoke extractor (also called smoke extractor). Here are some advantages of the Gemi vacuum cleaner:- Solves the problem of smoking in the home, even with fireplaces that have curves or very long flues (up to 50 metres).- Improves the draft and combustion of the wood, thanks to the 6 adjustable speeds.- It is silent and consumes very little electricity (around 10 euros per year).- It adapts to any type of fireplace or stove (including thermo fireplaces, pellet stoves, barbecues, wood ovens).- Very easy to install, even without specialized technicians. Furthermore, if you have already installed a glass door, you can safely continue to use it: the extractor will still improve the performance of your fireplace, allowing you to open the door without smoke entering the house.
thanks for the fake square sheet metal fireplace 31x31 cm and request of approximately 2000 m³/h. In our fireplace extractors:- Basic model: flow rate 2500 m³/h, resistance up to 300 °C, 3 years warranty- Professional models (steel, copper, etc.): flow rate 3800 m³/h, resistance up to 700 C, warranty from 6 to 10 years depending on the model. You ask for around 2000 m³/h: the model that comes closest, in terms of flow rate, is however the Basic model, which offers 2500 m³/h (slightly higher than what is required, which is an advantage in terms of draft safety).
In summary, what is recommended given that:- you have a 31x31 cm square duct,- a flow rate of approximately 2000 m³/h is needed,- you have no particular requirements for resistance to 700 C, the most suitable product among those in the catalog is: > Chimney extractor with square base – Basic Model >- Flow rate: 2500 m³/h >- Resistance: up to 300 °C >- Warranty: 3 years >- Adjustable brackets for flues from 20x20 cm to 43x43 cm, therefore suitable for your 31x31 cm. If in the future you foresee very high temperatures or a very short flue (less than 3 metres), then you could evaluate a Professional model (always with a square base), but for the data you have provided me, the Base with a square base is the most coherent choice.
In summary, what is recommended given that:- you have a 31x31 cm square duct,- a flow rate of approximately 2000 m³/h is needed,- you have no particular requirements for resistance to 700 C, the most suitable product among those in the catalog is: > Chimney extractor with square base – Basic Model >- Flow rate: 2500 m³/h >- Resistance: up to 300 °C >- Warranty: 3 years >- Adjustable brackets for flues from 20x20 cm to 43x43 cm, therefore suitable for your 31x31 cm. If in the future you foresee very high temperatures or a very short flue (less than 3 metres), then you could evaluate a Professional model (always with a square base), but for the data you have provided me, the Base with a square base is the most coherent choice.
It depends on what type of extractor you choose and how the chimney is made. However, I can immediately give you an idea and direct you to the right model. First I'll ask you something quick:- Is the flue of your fireplace square/rectangular or round?- Do you use it for: open fireplace, pellet stove, thermo fireplace, oven/barbecue?- Is it an internal or external fireplace in an area very exposed to rain/salt? Based on this we choose:- Vacuum cleaner with square base (for rods 20×20 cm up to 43×43 cm, thanks to the adjustable brackets)- Round aspirator (with adapter of the right diameter) Approximate costs I don't have the exact updated prices of each model in this chat, but I can tell you that:- All Gemi models are low consumption (around €10 per year of electricity in normal use)- You have 4 main bands:- Basic model: 2500 m³/h, 3 years warranty, up to 300 °C- Professional model: 3800 m³/h, 6 year guarantee, up to 700 C (also resists flue fire, recommended if the flue is very short, e.g. < 3 m)- Stainless steel model: 3800 m³/h, up to 700 C, 8 year guarantee, ideal for outdoors / salty conditions- Professional copper model: 3800 m³/h, up to 700 C, 10 year guarantee, top of the range also aesthetically To see the precise price of the model best suited to you (basic, pro, steel, copper, round or square) you need to look on the Gemi website in the vacuum cleaners section:- Round models (e.g. those with a diameter of 12 cm, 14 cm, etc.) have a price that changes based on the diameter- The square base models have a single price per model (base/pro/steel/copper) If you tell me:- shape and size of your chimney flue (e.g. 20×15 cm, 30×30 cm, round diameter 15 cm, etc.)- if it is internal or external I'll tell you exactly:1. which model to choose (base/pro/steel/copper, round or square)2. where to look at the exact price on the site.
I can help you! For a short chimney flue (1.5 m) that causes condensation and smoke return problems, the professional model chimney extractor is the most suitable solution. This model is particularly suitable for low flues because it is resistant to high temperatures and guarantees excellent suction even in difficult situations such as.
To maintain the Gemi basic model fireplace extractor, we recommend a few simple operations:- Run the regulator at maximum speed with the heat off for a couple of minutes, a few times a week. In this way the fan and the flue are always kept clean.- Mandatory annual maintenance is not necessary.- For more thorough cleaning (for example of the fan), you can use a normal commercial degreaser.- When you clean the fireplace, turn on the extractor: in this way the soot is sucked up without dispersing into the environment. By regularly using these simple precautions, the smoke extractor will remain efficient and will always guarantee good performance.
Thanks for your request! Yes, you can install your 12 kW Lacunza stove in a chimney where a basic model Gemi extractor is already installed, even if the distance as the crow flies from the chimney to the roof extractor is more than 4 metres. The Gemi extractor is designed to work correctly in chimneys of different heights and can also be installed in pipes up to 1 meter, so a greater distance (as in your case, greater than 4 meters) does not represent a problem for its operation. The main function of the extractor is to reproduce the natural draft of the chimney and promote the efficient evacuation of fumes, regardless of the height of the duct. Recommendations:- Make sure that the installation is airtight and that all joints are well sealed.- Check that the extractor is correctly installed and functioning before turning on the stove.- If you have doubts about the exact compatibility or need specific technical advice for your stove and fireplace model, you can consult a professional installer or contact Gemi technical support. Would you like to know more about the installation or operation of the extractor?
No. It can become a problem if the cable is not the right one. If the cable passes inside the flue, the special cable resistant to high temperatures must be used, which is:- in fibreglass- with steel sheath- resistant up to 350- suitable precisely for connecting the fireplace extractor to the speed regulator. Therefore, for an internal passage in the chimney, this is the correct cable. However, it should be considered that it resists high temperatures, but not in case of fire. If, however, the connection passes outside the flue, a normal 3x1.5 rubberized cable is sufficient. If you want, I can also tell you the correct cable to buy. To help you better,
it can also be managed with the stone above and the nearby one, but a couple of details are needed to advise you on the right solution and not create smoke or clutter problems. First of all, some info:1. The fireplace has a flue:- round- square/rectangular in masonry?2. The stone “communicating with its neighbor” is:- the joint coverage plan?- or a sheet that only covers the chimney?3. Above the roof, does the chimney protrude at least a little (a few cm) or is it flush with the stone/masonry? In general, with our roof vacuum cleaners (M/43 series and derivatives):- For square/rectangular flue: the model with square base is used, which has adjustable brackets for fireplaces from 20x20 cm to 43x43 cm, and for larger sizes it can be fixed directly to the corners with the pre-drilled holes.- If the pipe is flush with the masonry or stone, before installation the gap between the pipe and the masonry is usually closed, then the extractor is fixed on top.- If there is a coplanar with the neighbor, you usually mount the aspirator on your portion of the barrel, making sure that:- does not cover your neighbor's passages or vents- there is enough space for the rotating hat. To advise you on the most suitable model (basic, professional, stainless steel, copper) I would also need to know:- what type of use do you make: wood-burning fireplace, stove, oven, barbecue, thermo fireplace?- if the chimney produces a lot of smoke/smoke returns or it is just to improve the draft- indicative height of the chimney (is it low, like 1–2 metres, or higher?) ️
For the fireplace extractor you have two possibilities for the passage of the cable:1. Outside the chimney (without drilling the roof)- you can run the cable out of the flue to the speed regulator / socket.- In this case, an external rubberized FG7 3 x 1.5 mm² cable is sufficient to extend the first section of cable already connected to the extractor.2. Inside the chimney- you can pass the cable inside the flue or inside the fireplace.- In this case it is necessary to use the special cable resistant to high temperatures (up to 300), to be purchased separately on our website from the drop-down menu by choosing the meters you need.- This cable is certified and compliant with the law for this use. The vacuum cleaner already comes with 80 cm of high temperature resistant cable connected to the motor. If you tell me:- what model of Gemi vacuum cleaner do you have (e.g. Base, etc.)- and where you have a chimney (flat roof, pitched roof, wall, etc.) I can tell you more precisely which cable passage is most convenient in your case. Meanwhile, with regards to your questions:- You are not obliged to drill the roof: you can drill outside along the chimney.- If you pass inside the chimney, you necessarily need our high temperature cable.
For an open grill barbecue with 150mm ducting, suitable Gemi round chimney fans have the following indicative weights (the weight is the same for all diameters, including 150mm):- Round Base Model (Round Base model aspirator, Ø 150 mm): approximately 19.9 kg- Professional Round Model (Professional Round vacuum cleaner, Ø 150 mm): approximately 19.9 kg- Round Steel Model (Round steel model aspirator, Ø 150 mm): approximately 19.9 kg- Round Copper Model (Round Copper model aspirator, Ø 150 mm): approximately 19.9 kg. Therefore, approximately 20 kg of total weight can be considered for the specific 150 mm model. If you tell me which model you are targeting (Basic, Professional, Steel, Copper), I can send you the exact product link for that 150mm version.
you can use the electric fireplace extractor in exactly the situations you described! The extractor is designed to help during lighting, when the flue is not yet hot and it may be difficult to "pull" the smoke, especially in cases such as those with horizontal sections.
For a 20cm diameter round steel flue you will need:- Chimney extractor with round base- In the size drop-down menu you need to choose the 200 mm (20 cm) adapter, based on the external diameter of your pipe. The length of 4 meters is not a problem: from the articles in the archive it appears that our extractors work without difficulty even with much taller flues.
To best advise you on the Gemi extractor, I need some information first of all: can you indicate whether the flue is round or square/rectangular and what size it exactly has (diameter or external sides in cm)? In the meantime, I'll explain the options to you, so you already understand the logic of choice.1. Round flue In this case you need to choose a round base extractor and, from the drop-down menu on the site, select the adapter with the diameter equal to the external diameter of your flue. Example:- round flue Ø 14 cm → choose the adapter 140 mm – 14 cm Round products available (as an example, then choose the correct diameter):- Round basic aspirator for fireplaces: https://www.gemimarket.it/aspiratori/184-1295-aspiratore-base-tondo-con-aspirafumo-elettrico-per-camini-8053017261034.html- Professional round aspirator: https://www.gemimarket.it/aspiratori/185-1310-aspirafumi-professionale-tondo-con-tirafumo-elettrico-8053017261072.html For a fireplace that "always makes a lot of smoke" and with a 12 meter barrel, I would advise you to move towards the professional version (greater suction power).2. Square or rectangular flue In this case the right choice is an extractor with a square base.- Gemi square bases have adjustable brackets that fit rods from 20x20cm up to 43x43cm.- If the barrel is rectangular 20×15 cm, as per our official instructions:- a square base vacuum cleaner is fine- but the 15 cm side must be covered (for example with sheet metal or suitable material) to bring it to at least 20 cm- so you can fix the aspirator with the adjustable brackets. Square basic model link (standard Gemi Tirafumo/Chimney Puller):- https://www.gemimarket.it/aspiratori/36-aspiratore-per-camino-tirafumo-aspirafumo-tiracamino-8012004024793.html Professional version (greater power):- https://www.gemimarket.it/aspiratori/70-tiracamino-tirafumo-professionale-aspiratore-per-camino-8053017260167.html Here too, for a very problematic fireplace, the professional one is preferable.3. “Does it also extract heat?” The Gemi vacuum cleaner has a 6-speed regulator:- Speed 1–2: extracts smoke naturally, without removing heat from the environment.- Speed 6: very powerful (approximately 2500 m³/h for the basic, up to 3800 m³/h for the pro), designed for:- air exchange- facilitate ignition- vacuum ash At this speed you can accelerate the combustion of the wood and therefore reduce the heat a little. For normal use just keep it low (1–2): it eliminates smoke and does not ruin the performance of the fireplace.
Yes, this type of Gemi fume extractor is suitable for a kitchen hood. In our case:- The Gemi smoke extractor can be installed at the hood outlet, in the upper part of the chimney/pipe.- It is suitable for extracting kitchen fumes and odors, even with frequent use.- Does not obstruct the passage of smoke or air even if turned off. The important thing is:1. Know the external diameter of your hood outlet pipe (e.g. 15cm, 20cm, etc.) to choose the correct diameter.2. Install it on top of the chimney/exhaust to the outside, not inside the hood. If you tell me:- the diameter of the pipe,- and whether it is a round tube or a square/rectangular chimney, I will tell you exactly which model and size is best for you.
Yes. In this case the Basic model for €248.90 is fine:- “Chimney extractor – Gemi Basic Model”- Square base version (not the round one) It is the one indicated for:- domestic fireplaces that smoke especially when turned on,- masonry flues,- use with 6-speed regulator (you raise the smoke without taking away too much heat at low speeds).
If you tell me more or less:- how far away is the socket or junction box closest to the chimney,- if the pipe is straight or with curves, I can suggest how many meters of high temperature cable you might need and how to get it as neatly as possible.
If you tell me more or less:- how far away is the socket or junction box closest to the chimney,- if the pipe is straight or with curves, I can suggest how many meters of high temperature cable you might need and how to get it as neatly as possible.
Yes. The basic model fireplace extractor is equipped with a speed regulator. The regulator allows you to set 6 different suction speeds, in order to adapt to different use needs.
First a quick thing, so we can also contact you if necessary:
At the moment I do not have a specific fan for forges with a resistance of 100 Pa and a flow rate of 1000 m³/h available to recommend to you in our shop. In our catalog there are mainly smoke extractors designed for fireplaces, fireplaces, ovens, kitchen hoods and barbecues. If your application is similar and you need a powerful fan to extract smoke or fumes, please
Yes. The high temperature resistant cable can be inserted inside the flue.
At the moment I have no specific information on the wattage of the 30 cm round flue. The flues themselves do not have their own power in watts, as they are simply conduits for the escape of smoke.
The terminal block in a fireplace extractor is the part where the electrical wires are connected to power the motor. In our Gemi vacuum cleaners, the terminal block allows the safe connection of the vacuum cleaner to the home electrical system.
Terminal block differences between models- Base model aspirator: the terminal block is normally located on the outside, to facilitate electrical connection and maintenance.- Professional models, Steel, Corten, Copper: also in these models the terminal block is placed on the outside for convenience of connection. The main difference between the models is not in the terminal block, but in the construction material, resistance to high temperatures, corrosion and the warranty offered.- All models are designed to be practical to install and the external terminal block is a standard to guarantee speed and safety in electrical connections. The position and function of the terminal block is essentially the same in all our fireplace extractor models. What changes between models is the body material, temperature resistance, warranty length and corrosion resistance, but the external terminal block remains a common feature designed to facilitate installation.
Terminal block differences between models- Base model aspirator: the terminal block is normally located on the outside, to facilitate electrical connection and maintenance.- Professional models, Steel, Corten, Copper: also in these models the terminal block is placed on the outside for convenience of connection. The main difference between the models is not in the terminal block, but in the construction material, resistance to high temperatures, corrosion and the warranty offered.- All models are designed to be practical to install and the external terminal block is a standard to guarantee speed and safety in electrical connections. The position and function of the terminal block is essentially the same in all our fireplace extractor models. What changes between models is the body material, temperature resistance, warranty length and corrosion resistance, but the external terminal block remains a common feature designed to facilitate installation.
Here's what's included with the basic model round fireplace extractor:
Not included:- Ceramic Chimney Pieces: The basic model (and all of our chimney extractors) do not include ceramic chimney sections or parts. These products are only extraction units to be installed on existing fireplaces and are not equipped with ceramic or masonry flue elements.
Not included:- Ceramic Chimney Pieces: The basic model (and all of our chimney extractors) do not include ceramic chimney sections or parts. These products are only extraction units to be installed on existing fireplaces and are not equipped with ceramic or masonry flue elements.
The insert (smoke extractor/fireplace extractor) can also be mounted on old flues, including materials such as eternit. However, it is essential to check that the flue is in good enough condition to support the installation and that there are no structural or safety issues due to age or material.
I can help you! Before recommending the best solution, I would need some additional information:1.
Very useful question! Don't worry, in most cases it is not necessary to break anything inside the house to connect the fireplace extractor electrically. Here are all the possible options:
how to do it. To choose the right extractor for your fireplace, it is important to know the exact dimensions of your chimney. Here's what you need to do:- If the flue is round: the external diameter of the flue must be measured. The aspirator adapter will cover the barrel on the outside, so the size needed is the external one.- If the flue is square or rectangular: the external side (width and length) of the flue must be measured. Yes. To get a precise measurement you need to go up and measure directly on the chimney, especially if you don't already have the measurements available. Remember that adapters are only available in standard sizes (for example 14 cm, 15 cm, 18 cm for round ones; from 20x20 cm to 43x43 cm for square/rectangular ones).
thanks for the information. what can be done and then I just ask you for your email (so, if needed, you can write it to customer service with everything ready).1. The right model for 30x30 cm For a 30x30 cm square flue it is necessary to use our extractor with square base (mod. Square base base):- the brackets are adjustable from 20x20 cm to 43x43 cm, so 30x30 is perfectly within the supported sizes- you don't need special adapters, it mounts directly. On the site you must choose:- the fireplace extractor with a square base (not the one with a round base and adapter).2. What can be done with the round one 250 mm You purchased more than a year ago, so:- our free return formula within 100 days is unfortunately no longer applicable- the product is still in the box and never used, so you are better off:- keep it as a spare (if you have or will have in the future a 250 mm round barrel)- or resell it privately (e.g. to installers, acquaintances, etc.) At the moment I have no internal information on exchanges or replacements after such a long time from purchase, so I cannot promise you a direct exchange.3. How to proceed now1. Go to the Gemi website and select:- Chimney extractor mod. Basic- Version with square base2. You normally order it for the 30x30cm barrel
Good question, it's important not to make any mistakes when asking it. For the round base model with adapter:- The adapter comes out of the pipe, i.e. it “hugs” the chimney from the outside.- Therefore, we can say that it works as a feminine piece, not a masculine one.- you must indicate the external diameter of your hose (25 cm) on the site and you will be sent the corresponding adapter, designed to adapt externally to that hose. Namely:- Yes, it comes with the attachment/adapter (if you select it in the measurements menu).- It is not inserted inside the tube, but is positioned outside, adapting to the external diameter. If you confirm that your tube is round with an external diameter of 25cm and that you want the basic model, it would be: electric vacuum cleaner with round base + select 25cm adapter in the product sheet.
I'll answer you point by point.1. What you need to prepare for installation According to our instructions for assembling the Gemi extractor you will need: Tools:- A tape measure (to measure the flue and adjust the brackets/adapters)- Scissors or a cutter (to open the packaging flanges)- A fixed screwdriver- Two keys n. 10- A key number 13 What is already contained in the vacuum cleaner box:- The Gemi aspirator- 4 large squares and 4 small squares (for fixing on square/rectangular fireplaces; in your case with a round tube you will use the corresponding adapter)- Screws and nuts required for assembly- Speed regulator- Assembly instructions Before ordering and assembling:- Check the shape and size of the socket carefully (in your case already confirmed: 25 cm round tube).- If it is just a round steel smoking rod without any work around it, you need to purchase the model for a round smoking rod and select the round adapter of your size.2. Weight of the extractor The Gemi fireplace extractor weighs approximately 20 kg. Here's why it's highly recommended:- Carry out the installation between two people, especially for safety on the roof.- If you don't feel confident, you can ask an electrician, a bricklayer or a plumber for help; The system is designed for "easy/do-it-yourself" assembly, but it is better to be on the safe side.
Yes. The chimney extractor serves precisely to improve the draft and therefore to solve the problem of smoke returning into the environment. To be precise:- it is not a smoke reducer, so the smoke will still continue to come out of the chimney towards the outside;- however it helps to eliminate the problem of smoking inside the house, because it reproduces the natural draft of the chimney. So, if the problem is that the smoke comes out of the chimney and goes into the internal environment, the extractor is designed precisely for this type of situation. If you want, I can also help you understand which model is best suited to your chimney. In this case you can tell me:- whether the barrel is square or round- the measurements- and the type of appliance: fireplace, thermo fireplace, stove, oven, etc.
Yes. You can safely use it only when it is windy or when you have draft problems, and leave it off in other cases. Some useful info:- When switched off, it does not block the chimney: the Gemi extractor, even when switched off, does not hinder the normal escape of smoke. it can be turned on only when needed (strong wind, smoke returning, stove door opening, etc.).- It doesn't get ruined if it stays off: not turning it on all the time doesn't damage it.- It gets dirty like a normal chimney: even if the extractor fan is turned off, the internal part of the flue continues to get dirty normally with smoke and soot. The extractor does not get "dirtier" because it is not turned on; it only requires normal maintenance/periodic checks of the chimney cap. → Yes. You can only use it when there is wind or smoke problems. → When turned off, it allows smoke to escape regularly. → It will not be ruined if it is not turned on continuously; just provide for the normal cleaning of the chimney. If you tell me what type of fireplace/stove you have (open, closed, insert, pizzeria, restaurant, etc.), in which situations it is best to keep it lit to make the most of it.
he understood perfectly! The Gemi fireplace extractor is supplied with approximately 80cm of high temperature resistant cable already connected to the motor. If you need a longer length to reach the control unit or the power socket, you will simply have to splice the purchased cable (the same type, resistant to high temperatures) to the one already present on the vacuum cleaner. I remind you of some important points:- The joint must be made using suitable clamps and, if possible, in the area least exposed to direct heat.- Only use the specific cable for high temperatures (with siliconized steel sheath, like the one you find on our site).- Never use "normal" cables, even just for short stretches inside the flue.
For a round flue with a diameter of 64 cm, a standard adapter is not currently available among those offered for round-based extractors (which usually reach up to 22 cm or slightly more, depending on the model). For such large diameters, the recommended solution is to consider installing an extractor with a square base, which can be fixed directly to the flue without using the adjustable brackets (these reach up to 43x43 cm).
I can only help you for information and assistance relating to Gemi Elettronica (products for electric fences and fireplace extractors, orders, payments, shipments, etc.). The content of the reel you shared concerns football and legal/sporting issues about Juventus, which do not fall within the official information I have available.
I'll confirm it point by point.1. Choice of diameter 140 mm Yes. exactly:- if the external diameter of the flue pipe on the roof is 140 mm, you must purchase the round steel extractor with 140 mm – 14 cm adapter. Then select 140 mm in the drop-down menu.2. Cable: how to use it correctly The vacuum cleaner already comes with 80 cm of high temperature resistant cable connected to the motor. The correct connection is this:- you can pass the cable inside the flue- to do this, you need to use our special high temperature resistant cable (the optional 5 m, 10 m etc.), which:- it is resistant up to 300- it is tested and certified and can also be positioned inside the flue or fireplace Operationally:- it is not necessary to "eliminate" the 80 cm section already present on the engine- normally:1. the 80 cm cable resistant to high temperatures starts from the extractor2. to this you can connect / extend our special high temperature cable to the point you want to reach3. pass the cable inside the flue4. go out to the point in the house where it is most convenient for you (for example, near the smoke outlet, piercing the sealing ring if necessary), to connect it to the speed regulator. Therefore, the concept you describe is correct:- cable that goes down into the flue- exit into the house near the fumes/cladding area, making a hole in the sealing ring if necessary. I only suggest:- to use exclusively our high temperature resistant cable for the section that passes inside the flue- to use a normal 3×1.5 rubberized cable only for the sections external to the flue, if it is necessary to extend it up to the box/regulator. If you tell me at what distance (in metres) you think you have the regulator from the chimney mouth, I will confirm whether the 5 meters are sufficient or whether a larger cut is better.
In the presence of a flue that descends for approximately 6 meters vertically, then has a horizontal section of 2 meters and finally reaches the fogolar hood, the optimal solution is to choose a very powerful extractor, capable of overcoming curves and obstacles, guaranteeing correct draft even in the horizontal sections. The most suitable model for the case is certainly the professional stainless steel chimney extractor. Here's why:- It has a great suction force (3800 m³/h), sufficient to "push" the smoke even in the horizontal sections, which usually slow down the exhaust of the fumes a lot.- Resists high temperatures up to 700, ideal even in case of heavy use or soot fires.- Stainless steel ensures long life and resistance even in the most difficult environments.- can be installed on both round and square flues, simply choosing the correct base/adapter based on your flue. Practical advice: Always position the extractor in the highest part of the chimney, i.e. on the roof. I invite you to choose the version with round adapter or square base based on the shape and size of your chimney, so as to obtain maximum effectiveness
Thanks for the detailed information, Nicola! Here is advice tailored to the situation: The ideal solution to permanently eliminate the problem of smoke from your fireplace is to install a Gemi electric fireplace extractor.
Which model to choose? For a 35x35 cm flue, we recommend the adjustable square base model, which adapts perfectly to sections from 20x20 cm up to 43x43 cm. If the barrel is even wider, just fix it directly without brackets, as explained in the instructions. you can find the recommended model here: [Chimney extractor mod. Gemi Tirafumo Tiracamino Base](https://www.gemimarket.it/aspiratori/36-aspiratore-per-camino-tirafumo-aspirafumo-tiracamino-8012004024793.html)
Which model to choose? For a 35x35 cm flue, we recommend the adjustable square base model, which adapts perfectly to sections from 20x20 cm up to 43x43 cm. If the barrel is even wider, just fix it directly without brackets, as explained in the instructions. you can find the recommended model here: [Chimney extractor mod. Gemi Tirafumo Tiracamino Base](https://www.gemimarket.it/aspiratori/36-aspiratore-per-camino-tirafumo-aspirafumo-tiracamino-8012004024793.html)
Yes, of course: in your case you must always refer to the external diameter of the flue. For round flue pipes, in fact, the extractor should be chosen as follows:- you choose the round base model- in the drop-down menu you select the size of the adapter based on the external diameter of the barrel. In your case:- internal diameter: 180 mm- external diameter: 230 mm → you need the 230 mm adapter (23 cm) Therefore: you need a round base chimney extractor with a 230 mm adapter.
I understand the situation! When the fireplace is off and the extractor fan is also off, the Gemi extractor does not prevent fumes from escaping even when it is turned off, therefore it does not obstruct the flue and the air can circulate normally. However, the fallout of soot associated with intense odor can be caused by the accumulation of residues inside the flue and by the recirculation of air that carries these residues and odors inside. How to prevent the problem:- Regular maintenance: we recommend operating the extractor regulator at maximum speed with the heat off, for a couple of minutes, a couple of times a week. This helps keep both the fan and the flue clean and reduces the presence of soot and bad odors.- Cleaning the chimney: It is important to periodically carry out technical cleaning of the chimney, perhaps by relying on a professional chimney sweep, so as to reduce the accumulation of soot.- Avoid accumulation of ash: Make sure that there is not too much ash residue left in the fireplace after use. Use of chemical products: you can use specific products for cleaning the chimney, but I recommend that you do not use products that are too aggressive or corrosive, especially near the extractor, to avoid damage to seals, fans and electrical components. If you opt for chemical products, always follow the manufacturer's instructions and, if possible, remove the vacuum first (or carefully protect it) during chemical cleaning.
you can purchase a fireplace extractor directly from the official Gemi website, which ships quickly all over the world, including Montenegro. Here's how to do it:1.
Thanks for your request! For round-based smoke extractors, adapters are only available in standard sizes (for example 14 cm, 15 cm, 18 cm, up to a maximum of 43 cm), and you must always choose the size based on the external diameter of your flue.
Yes. It is absolutely possible to use it just as you say. With Gemi vacuum cleaners you can:- Turn it on only when you open the door to load the wood, so you avoid the smoke coming into your face and into the house- Turn off the vacuum cleaner after those 1–2 minutes:- it does not plug the smoke outlet when it is turned off- the fireplace/heating stove continues to fire normally even with the extractor off, many customers use it exactly like this:- they turn it on when they open the thermo stove door- keep it at speed 1–2 to have a natural draft (draws smoke but not heat)- then they turn it off as soon as they close the door.
You asked a very intelligent question, and I confirm that yes, the presence of a hood in the kitchen connected to the outside can certainly influence the chimney draft. Here's why:- “Depression” effect: When the hood is on (or even just the pipe open), it sucks air from the room and expels it towards the outside. In a "closed" house this can create a depression (i.e. a slight lack of air), and the air tries to return from other points - for example from the chimney flue or from any other openings.- Chimney extractor: When you increase the speed of the extractor, the air draft in the chimney increases, and if the room is not well ventilated there could be a sort of "competition" between the hood and extractor for the intake and exhaust of the air.- Side effect: If air starts to come out of the hood when the extractor is at high speed, it could be due to this depression: the air drawn by the extractor finds the easiest way to enter from the hood (which faces the outside) and therefore a movement of air is created towards the inside through the hood. RECOMMENDED SOLUTION:- When you light both the fireplace and the hood, try leaving a window in the room slightly open. In this way you increase air exchange and reduce depression.- Use the smoke extractor and hood separately if possible, or adjust the speed of the extractor based on the needs and ventilation conditions in the room. This phenomenon is quite common in environments where multiple ventilation systems (fireplace, kitchen hood, extractor fans) are connected to insufficiently ventilated rooms, especially in very insulated houses.
Yes. It is a fairly common situation and is not necessarily a sign of a malfunction of the extractor or fireplace. Here's why it can happen:- Invisible smoke: Even when the flue and extractor function correctly, a very small quantity of smoke or residual vapors can escape into the internal environment without being visible, but perceptible to the sense of smell. The nose is much more sensitive than the eye, especially to combustion odors, even in very low concentrations.- Microdraughts: Often these minimal residues arrive in the room through very small cracks around the stove door, imperfect closures or moments of opening/adding wood.- Air exchange: Non-optimal ventilation in the room can retain the smell for a few minutes (without the actual smoke being visible), before dispersing it completely. Is this normal?- Yes. It is a situation that is often found in fireplaces, especially in those installed in very insulated or well-sealed houses. As long as there is no visible smoke in the environment or persistent discomfort, it is generally not a serious problem.- The Gemi system is designed to limit these phenomena to a minimum, but sometimes slight traces of odor may persist, especially in certain environmental conditions (high pressure days, wind, temperature changes, etc.). What can be done:- Air the room regularly, especially after adding wood or when you notice odors.- Check that fireplace doors and flaps are properly closed.- Keep the extractor a little higher when greater fume evacuation is needed.- Check, if possible, the condition of the seals and closures. If you have doubts or notice that the smell persists even after many hours, or if the situation worsens, please let me know so that we can check any adjustments together!
The high temperature resistant cable for the fireplace extractor is sold in lengths of 5, 10, 15 or 20 metres. You cannot purchase a custom quantity other than these denominations.- Price:- 5 metres: €30.50- To find out the cost for longer cuts (10, 15, 20 metres), you can select the desired length directly on the site. Consider: the price refers to the cut, not to the single metre. If you need, for example, 8 metres, you will need to purchase the 10 meter cut. Do you want me to help you choose the right cut?
For a bread oven + barbecue that produces a lot of smoke, you need a powerful smoke extractor (smoke extractor) with high temperature resistance and strong suction. From our range:1. Base model – M/43 Series- Suitable for: fireplaces, stoves, wood ovens, kitchen hoods, barbecues, thermo fireplaces.- Maximum temperature: 300°C- Suction capacity: approximately 2500 m³/h- Typical use: domestic fireplaces or moderate use.- Works well with many barbecues/ovens, but for very heavy or professional use there are better choices.2. Professional model- Recommended when:- The flue/chimney is short (under 3 m), or- There is very intense smoke production (frequent use, a lot of grease, such as barbecues and ovens).- Maximum temperature: up to 700 C (even in the event of a chimney fire).- Suction capacity: approximately 3800 m³/h (much more powerful than the basic model).- Intended use: ideal for demanding situations, restaurants, pizzerias, intensive use of barbecues/ovens.3. Professional stainless steel (AISI 304 stainless steel)- Same suction: approximately 3800 m³/h, 700 C.- Extra: built to resist corrosion and saltiness (perfect near the sea or in aggressive environments).- The best choice if the fireplace is exposed outside in a humid/marine environment.4. Professional copper model- Same performance: 3800 m³/h, 700 C.- Stainless steel fan, fully painted exterior (base included).- Chosen mainly for aesthetics (exposed chimneys on the roofs, designer installations), in addition to professional performance.
To finalize the choice, two details would be enough:1. Approximate height of the chimney/flue (from the appliance outlet to the top): is it less than 3m or more?2. Is the flue round or square/rectangular and do you know its diameter or lateral dimensions? With this I can confirm the most suitable *professional* model and the type of base/adapter you will need.
To finalize the choice, two details would be enough:1. Approximate height of the chimney/flue (from the appliance outlet to the top): is it less than 3m or more?2. Is the flue round or square/rectangular and do you know its diameter or lateral dimensions? With this I can confirm the most suitable *professional* model and the type of base/adapter you will need.
A high temperature resistant cable, 80 cm long, is supplied with the fireplace extractor. If the distance between the extractor and the speed regulator (or power socket) is greater than 80 cm, we recommend purchasing our special high temperature resistant cable separately, selecting the necessary length from the drop-down menu on the product page.
To mount the Gemi extractor inside the chimney (not above), these minimum internal measurements are needed:- Internal width/depth: at least 43 x 43 cm- Free internal height: at least 37 cm With these measurements the extractor with a square base enters and works correctly inside the chimney pot. In your case (70 x 45) in terms of external dimensions you are well within the limits; you just need to check that you have at least 43 x 43 cm free space and 37 cm high inside.
Yes. The smoke extractor can also be mounted with a 1.5 m high chimney. For such low heights, the professional model chimney extractor is recommended, because:- it is suitable for any chimney height- it is more resistant to high temperatures, which is important when the barrel is very short
you can easily contact the professionals in your area: you don't need "Gemi authorized" installers, a normal construction or plant engineering figure is enough. In the province of Vibo Valentia you can search for:- an electrician- or a bricklayer- or a plumber / thermo-plumber To tell the professional:- which must be equipped with an electric extractor for roof chimneys, with a square base for chimney caps measuring 30x30 cm,- that the internal stainless steel tube must be brought flush with the wall and the gap between the tube and blocks must be closed,- that the extractor must be fixed with the adjustable brackets on the chimney cap and connected to the electricity with a speed regulator switch in the house
If the chimney flue is round and made of stainless steel with a diameter of 300 mm, the chimney extractor can be installed directly on the round pipe using the model with a round base and the adapter suitable for the diameter of 300 mm. The masonry base is only necessary if the flue is square or rectangular, or if the round pipe is inside a masonry structure (for example, a square chimney) and the pipe is at the same level as the masonry or lower.
The Base Gemi Tirafumo model fireplace extractor is specifically designed for the extraction of fumes from fireplaces, stoves, wood-burning ovens, kitchen hoods, barbecues and thermo fireplaces. It is made to operate with clean air up to 300 °C, with a self-cleaning galvanized steel impeller and an asynchronous motor that requires no maintenance. However, it does not appear from the official information that it is designed for the ventilation of technical rooms with electrical equipment (such as inverters and batteries of photovoltaic systems) - the installation is designed for roof expulsion, not for the circulation or cooling of air inside closed rooms for reasons of temperatures and electrical safety. - Technically it can extract warm, clean air, but it is NOT certified nor designed as a ventilation/cooling system for technical rooms with delicate electrical components.- Using the vacuum cleaner in contexts other than those recommended could invalidate any guarantees or not guarantee the safety of the electrical system/installation.
the A2 smoke extractor can be used on both square and rectangular fireplaces. The square-based A2 model comes with adjustable brackets that:- can be set to square or rectangular shape- cover sizes from 20x20 cm up to 43x43 cm If your flue is:- from 20x20 to 43x43 cm (square or rectangular) → it can be fixed normally using the adjustable brackets- larger than 43x43 cm → you can install it by placing the base directly on the fireplace outlet and fixing it to the 4 corners (there are already holes in the base for this) If you tell me the exact dimensions of your fireplace, I can confirm the best way to mount your A2.
Yes. You can pass the electric cable inside the chimney to power the chimney extractor. In this case, however, it is essential to use a special cable resistant to high temperatures (up to 300), which can be purchased separately in our shop by selecting the quantity of meters you need from the drop-down menu. This cable is tested and certified according to safety regulations.
Here's how you can manage the passage of the cable from the extractor (on the chimney) to the chimney: You have two possibilities:1. Passage outside the flue: the electric cable can be passed outside the flue, fixing it along the route until it reaches the fireplace and the speed regulator. In this case, you can use a normal 3x1.5 mm² outdoor rubberized cable.2. Internal passage to the chimney: If you prefer, you can pass the cable inside the chimney. In this case it is essential to use a special cable resistant to high temperatures (up to 300 °C), also available on our website. This cable is specially designed to withstand the internal conditions of the chimney. Note:- The cable supplied with the vacuum cleaner is 80 cm long.-
Yes, it can be done, but with some important precautions. For our fireplace/fireplace extractors:- The electric cable can be passed:- outside the flue- or inside the flue1. If you pass the cable next to the round pipe (inside the square chimney cap) This is the case: round pipe inside, square masonry outside, and you want to run the cable out into the external square. In this case you can:- Run the cable in the space between the round tube and the square wall- Let it out in the area of the square chimney, where you will then mount the extractor. But BE CAREFUL about the type of cable, because there are high temperatures there:- If the cable passes inside or very close to the flue, our special high temperature resistant cable, certified up to 300 °C, must be used, which:- it is designed specifically to be inside or in contact with the flue/chimney- it must be purchased separately, choosing the meters you need2. If instead the cable does not enter the flue and runs right outside If you were able to:- exit with the cable immediately outside the wall- and then go down the wall/exterior of the house to the point where you have electricity, then you can use a simple FG7 rubberized 3x1.5 mm² outdoor cable, continuing the first meter already connected to the extractor.3. Speed controller: where to put it Remember that:- The aspirator regulator must be:- connected to a 220V socket- installed far from heat sources (because it has an internal transformer) So, in your case without power on the roof:1. Take the cable from the vacuum cleaner:- inside the barrel / in the space next to the round tube (with high temperature cable)- or outside along the wall (with FG7 outdoor cable)2. You get to the point where you have electricity in your house3. Connect the speed controller there, in a convenient location (living room, near the fireplace, etc.)
For a round flue with an external diameter of 21 cm you will need:1. Select the vacuum cleaner with a round base on the website (like the one you were looking at: "Round steel model vacuum cleaner").2. In the size drop-down menu, choose the 21 cm / 210 mm adapter. Our adapters fit externally onto the flue and are supplied slightly wider to fit your 21cm diameter well
you can easily leave the fireplace lit even with the extractor off. The fireplace extractor does not close the flue outlet, so the smoke will still continue to come out normally even if the extractor is turned off. you can turn on the extractor only when you need to improve the draft or extract smoke in particular situations (for example if there is a lot of wind, or if you open the stove door).
I'll explain how you can make the electrical connection, considering that you have the possibility of having the electricity supply in the attic near the chimney. Electrical connection of the fireplace extractor:1. Recommended three-core cable: a three-core rubberized FG7 outdoor cable 3 x 1.5 mm² can be used. It is resistant and suitable for both outdoors and for passages near moderate heat sources.2. Extension of the cable: From the vacuum cleaner already equipped with a first meter of special cable (resistant to high temperatures), the connection can be extended with the three-pole cable by taking it from the motor to the position where you intend to install the regulator. Important: Avoid disconnecting the original cable from the motor terminal block. That first meter is essential because it resists the high temperatures of the flue area.3. Connection to the control unit/regulator: Bring the three-core cable to the regulator.- Connect the wires coming from the aspirator to the "engine motor" terminals on the speed regulator.- The two earth wires (one from the system earth and one from the extractor) must be connected together in the central section of the regulator.- The two wires coming from the power supply (220V) must be inserted where indicated "line 220V".4. Installation of the regulator: The regulator can be fixed either to the wall or, if you prefer, recessed into the wall as long as it remains away from heat sources.5. Turning on: Now you can turn on the vacuum cleaner using the regulator and choose the desired speed. Note:- It is essential to only use the cable suitable for high temperatures near the flue (the first section supplied by the extractor), then you can continue the line with a normal three-core cable.- If you want to pass the cable inside the flue, we recommend considering a specific cable for high temperatures, which can be purchased separately on our website by selecting the necessary length.
If the external male hose is 13 cm in diameter, you must choose the 13 cm (130 mm) adapter for the red base hum extractor. Important points:- For chimenea always close the outside of the tube.- The extractor adapter “slips” on the outside of the tube, so it must coincide with the external diameter. Can you confirm that the 13 cm you have on average are of the external diameter? Y,
For maintenance and cleaning of the Gemi aspirator it is not necessary to completely dismantle it. Here are some practical indications:- Ordinary cleaning: you can simply use a commercial degreaser and a cloth to clean the fan and accessible parts, without removing the entire extractor from the chimney.- Keep the fan efficient: once a week, with the fireplace off, you can turn on the extractor fan at maximum speed (speed 6) for a few minutes. This helps keep the fan and flue cleaner, limiting the build-up of residue.- Visual inspection: every now and then check that no debris or soot has accumulated on the blades or in the upper grille. Total disassembly is not necessary, but if you find any major anomalies (fan blocking, persistent bad odors or abnormal noise) it is recommended to have the installation checked by a technician.
Thank you so much for describing your situation in detail! I confirm that the electric fireplace extractor from Gemi Elettronica is a solution designed specifically to solve problems like the one you have described: bad odors and presence of smoke, even if only perceptible to the sense of smell during lighting or in particular conditions such as external wind or bends in the flue. This is why our vacuum cleaner could really help you:- The Gemi smoke extractor is designed to improve the draft in every type of flue, including thermo fireplaces and multi-fuel models.- With the 6 adjustable speeds, it allows you to adapt the suction power to different needs, easily taking control of smoke and odors already at low speeds (1-2), without altering the combustion or "sucking" away the heat.- It is particularly effective in the presence of curves, pressure differences due to wind, or flues that are not perfectly linear, situations which often cause odor/smoke returns.- One of the main reasons why many of our customers choose the aspirator is precisely the definitive resolution of the problems of smell or smoke when turned on, as in your case. When I receive the measurements of the final part of your chimney, I will be able to guide you in choosing the right model and any adapters. This way you can purchase the product that is most compatible with your situation. If you have any further questions, I am at your complete disposal! When you are ready, feel free to send me the photos and measurements, so I can help you choose the best model for you.
Yes. Gemi fireplace extractors are compatible with round flues with a diameter of 160 mm. you can choose the model with a round base and select the adapter of the correct size (in this case 160 mm) directly on the site, always considering the external diameter of your flue.
Yes, exactly: it's really adjustable. For Gemi vacuum cleaners with square base:- the basic structure covers rods up to approximately 43x43 cm;- they are equipped with adjustable brackets that can be tightened or widened to adapt to rods:- square or rectangular- from a minimum of 20×20 cm- up to a maximum of 43×43 cm. So:- the same square-based model is suitable for all rods with dimensions between 20x20 cm and 43x43 cm, both square and rectangular.- If you change chimney/flue in the future (but stay within that size range), you will be able to reuse the same extractor by adjusting the brackets. If the joint falls within these measurements, you can easily purchase the square base model (e.g. the "Base Gemi Tirafumo model" that you opened) without needing a special model. When you manage to have the rod measured (even just indicatively: 25×25, 30×25, etc.), write me the measurement and I will immediately confirm the most suitable assembly.
A small deviation at the beginning of the flue, as often happens in fireplaces, does not represent a problem for the functioning of the Gemi chimney extractor. The extractor is installed on the end part of the chimney flue (on the chimney cap) and its function is to create a suction force that "pulls" the smoke outwards, even in the presence of curves or slight deviations in the flue.
In the event of a power outage, your house won't fill up with smoke. The Gemi aspirator is:- completely open internally, it does not act as a cap on the flue- even when switched off (or without power) it allows the smoke to pass normally upwards. Therefore, if the power goes out while it is in operation:- the extractor stops turning, but- the flue remains free and continues to discharge smoke like a traditional fireplace without extractor. At most you may have a slightly less effective draft (as before installing it), but there is no risk of the extractor blocking the smoke.
Yes. It is possible to install the Gemi extractor directly inside the chimney cap, but it is important to check first that there is the necessary space. Here's what you need to consider:- The internal space of the chimney pot must be at least 43x43 cm on the side and 37 cm in height (these are the minimum dimensions to be able to insert the extractor inside).- In this case, you can order the extractor without the top cap, so as to be able to insert it directly into the chimney cap.- Before purchasing, we recommend carefully measuring the inside of the chimney cap to ensure there is adequate space. I also leave you the diagram of the complete measurements of the Gemi extractor, so you can check it directly: [Gemi extractor measurement diagram](https://static.gemimarket.it/img/schede/aspiratori/base/misure-aspiratore.jpg) If instead you need to position the extractor at the mouth of the flue (therefore lower than the head of the chimney), you still need to evaluate the space and position to secure it safely: Gemi generally offers solutions for installation at the top, but internal installation is practicable if the space conditions indicated are met.
Yes, in a structure like yours, the Gemi extractor is designed specifically to solve this type of smoke problem. According to available information:- The Gemi extractor is not a "filter" or a smoke blower, but rather a system that reproduces and enhances the natural draft of the chimney so that the smoke rises correctly.- It is indicated for:- Fireplaces- Thermo fireplaces- Wood/pellet stoves- Ovens, barbecues, etc. On complicated routes:- Elbows and changes of direction (like your L with two 45° angles) are one of the most common causes of bad shots.- The extractor is installed in the upper part of the pipe/chimney and thanks to its power it is able to compensate for these draft losses.- Our material means that there is no problem with suction even with very long chimneys (more than 50 m), so a total height of about 6 m is not a limit. So, with your 6 meter flue with two 45 bends, yes: the Gemi extractor is designed to solve the problem of fumes, as long as:1. That it is installed correctly in the chimney outlet.2. There are no serious construction defects (very small sections, caps, obstructions, etc.). Just keep in mind that:- The smoke will continue to come out of the chimney (it doesn't eliminate it, it just improves the draft).- What needs to be solved is that the smoke does not go out towards the paellero / use area.
In the round Gemi models the 250 mm adapter is not sold separately, it is included in the extractor itself when choosing the diameter. For your specific case:- Product: Pro Round Smoke Extractor- Diameter option: “Chimney external diameter: 25 cm – 250 mm”- Current price of this combination (vacuum cleaner + 250 mm adapter): €408.90 incl. VAT. That is, those €408.90 already include:- The professional round vacuum cleaner (3800 m³/h, up to 700 ºC)- The 250mm Round Tube Adapter If at some point you just want a loose adapter (without extractor), at this time I have no separate price information for a stand-alone adapter; In that specific case we recommend contacting Gemi customer service directly to see if they can provide it separately.
The wire that goes from the fireplace extractor motor to the control unit, if installed inside the flue, must be a special cable, resistant to high temperatures. This cable, available on our website, is made of fiberglass covered with a steel sheath and resists up to 350 °C.
At the moment there are no 50% discounts on our products and it is not possible to apply discounts, not even for resellers or installers. The price of the Base model fireplace extractor is €248.90 as indicated on the site.
Regarding the speed selector problem: in the first few days it is normal for the fireplace extractor to work correctly only at speed 6, while at lower speeds it may have difficulty starting. This happens because, during the initial phase, a special grease is applied to the fan to keep it lubricated over time, and the motor needs more effort to turn.
Thanks for the information on the measurements of your chimney flue. For a round chimney flue with an external diameter of 250 mm (25 cm), you need to choose a chimney extractor with a round base and select the 25 cm adapter from the drop-down menu on the site. The adapter is supplied slightly wider to perfectly fit the external diameter of your chimney - the measurement to consider is always the external one. As for the model, here is a brief description of the main options with a round base:- Base Tondo model aspirator: flow rate up to 2500 m³/h, resistant to 300 °C, 3-year warranty.- Professional Round vacuum cleaner: flow rate up to 3800 m³/h, resistant to 700 C, 6-year warranty. Recommended for high temperatures or flues less than 3 meters.- Round stainless steel model aspirator: flow rate up to 3800 m³/h, made of AISI 304 stainless steel, resistance to corrosion and high temperatures (up to 700 C), 8-year warranty.- Round Corten model aspirator: ideal for marine environments, corten material, resists up to 700 C, 8 year guarantee. All these models are available with 25cm adapter. you can see the options and choose the one you prefer directly on our site.
so we clarify everything. For Gemi fireplace extractors:- Yes. The speed regulator is already included in the kit.- Yes. The extractor's electric cable is included (the one that comes out of the motor and must be extended to the regulator). By purchasing the fireplace/barbecue extractor you will receive:- Complete vacuum cleaner- Speed controller with ON/OFF switch- Adjustable brackets (for square-based models like the ones I have shown you)- Cable already connected to the engine, suitable for high temperatures, to be extended to the regulator. You will only have to:- bring the cable to the point where you will install the regulator near the fireplace/barbecue- connect 220V + earth power to the regulator.
Thanks for all the information you provided! To help you as best as possible, I will answer you precisely following the characteristics described:- Flue length: 15 meters is not a problem, Gemi extractors work perfectly even on very long flues (up to over 50 metres).- Block dimensions 45 cm: I imagine that the outlet of your chimney flue is rectangular or square and large in size (for example approximately 45x45 cm). Model tip:- For flues with large dimensions such as the, you must choose the model with a square base.- The Gemi professional model with square base has adjustable brackets that adapt from 20x20 cm up to 43x43 cm.- In your case, having a 45x45 cm chimney flue (therefore larger than the brackets), you can simply fix the base of the Gemi extractor directly onto the 4 corners of the chimney cap without using the brackets (the fixing holes are already provided). Advantages:- The professional model is resistant to high temperatures and also ideal for large fireplaces or very long pipes.- Perfectly suitable for ensuring good extraction and solving draft problems even with large mouth fireplaces!
For a round flue with a diameter of 25 cm (250 mm), we recommend a round base extractor, choosing the size of the adapter from the drop-down menu equal to the external diameter of your flue, therefore 250 mm (25 cm). Here are the main types you can choose from (all available with 250 mm adapter):1. Basic Model- Suction power: 2500 m³/h- Resistance: up to 300 °C- Warranty: 3 years- Suitable for standard use.2. Professional Model- Suction power: 3800 m³/h- Resistance: up to 700 °C (also perfect in case of fire in the flue and for low flues)- Warranty: 6 years- More suitable if you often use the barbecue/fireplace or the chimney is less than 3 meters.3. Stainless Steel Model- Material: AISI 304 stainless steel (high resistance to corrosion and saltiness)- Suction power: 3800 m³/h- Resistance: up to 700 °C- Warranty: 8 years4. Corten or Copper model- Corten model: corten steel, resistant up to 700 °C, 8 years warranty, 3800 m³/h- Copper model: superior aesthetics, resistant up to 700 °C, 10 year guarantee, 3800 m³/h All these models are ideal for both fireplaces and barbecues with fatty smoke, therefore also perfect for use! you can see all the available models and select the size in the drop-down menu directly on the product page [here](https://www.gemimarket.it/aspiratori/184-1114-aspiratore-base-tondo-con-aspirafumo-elettrico-per-camini-8053017261034.html).
Yes. Our fireplace extractors were created specifically for cases like this and, from what you describe, they could be a very suitable solution. what they can do in your case:- the main problem is insufficient draft: as soon as you light it, the smoke does not rise into the steel pipe but returns into the house and puts out the fire.- The Gemi extractor is mounted at the top of the chimney flue (on the chimney, even if the pipe is outside the house) and creates a forced draft that "helps" or completely replaces the natural draft.- Also works with:- handmade open fireplaces- high or external flues- situations in which the chimney never worked well from the start
To better help you choose the most suitable model and any accessories, I ask you just two things:1. What shape and size does the chimney/steel pipe outlet on the roof have? (round or square/rectangular, and approximate measurement in cm)2. Do you prefer to use it only during startup and at critical moments, or do you plan to leave it on often? With this information I can tell you exactly if and how our extractors adapt to your fireplace and give you more targeted advice.
To better help you choose the most suitable model and any accessories, I ask you just two things:1. What shape and size does the chimney/steel pipe outlet on the roof have? (round or square/rectangular, and approximate measurement in cm)2. Do you prefer to use it only during startup and at critical moments, or do you plan to leave it on often? With this information I can tell you exactly if and how our extractors adapt to your fireplace and give you more targeted advice.
In a case like this (two 100 mm flues coming out of the same chimney) there are some possible solutions, but first you need to understand the configuration well to choose the right extractor. I'll ask you a few quick questions first, so I can give you a precise indication:1. Do the two flues serve the same fireplace or two different fireplaces/appliances?2. The 100 rods are:- inside a larger masonry chimney (square/rectangular)?- or do they come out free, only the two metal tubes visible?3. Is one of the two pipes the "active" one in the fireplace that smokes the most, or are both used?
What do I ask you to recommend the model? To be able to tell you in a concrete way whether it is better:- a round model on a single 100 mm barrel,- or a square-based model on the masonry chimney cap, I need this information:- Internal or external measurement of the masonry chimney cap (if any): e.g. 30x40cm, 40x40cm, etc.- If the 100 mm pipes protrude much beyond the wall or are more or less flush. Reply me with:- if the two flues serve the same or different chimneys,- if you have a masonry chimney cap (and the measurements),- if at least one of the two pipes can be extended. So I'll tell you exactly:- whether to take the round model (and which adapter diameter),- or the square-based model and how to fix it.
What do I ask you to recommend the model? To be able to tell you in a concrete way whether it is better:- a round model on a single 100 mm barrel,- or a square-based model on the masonry chimney cap, I need this information:- Internal or external measurement of the masonry chimney cap (if any): e.g. 30x40cm, 40x40cm, etc.- If the 100 mm pipes protrude much beyond the wall or are more or less flush. Reply me with:- if the two flues serve the same or different chimneys,- if you have a masonry chimney cap (and the measurements),- if at least one of the two pipes can be extended. So I'll tell you exactly:- whether to take the round model (and which adapter diameter),- or the square-based model and how to fix it.
If the flue is round, you need to select the round base extractor model. What exactly to do:1.
I will answer you in parts: how to pass the cable and how the speed problem is going.1. How to pass the cable downwards For the chimney/smoke extractor there are two possible ways, according to our manual:1. Cable outside the tube (simpler)- Use a 3 x 1.5 mm² outdoor rubber cable (type FG7).- The extractor is already supplied with its first section of cable.- From that cable, extend it outside the tube, going down the face or through the hole present, until you reach:- to the speed switch/regulator,- and from there to the 230V power supply.- Secures with cable ties or staples suitable for outdoors.2. Cable inside the pipe/chimney- Only in this case it is possible to use our special cable resistant to high temperatures (up to 300 °C), which can be purchased separately by the meter.- That cable can enter the pipe or the “chimney”, going down to the point where you want to put the regulator/switch.- It is the cleanest aesthetic option if the route is internal. In your case (domestic kitchen, vertical pipe less than 2m):- Technically you can:- Lower the cable out of the tube (it's easier to do it yourself), or- If the pipe is hidden in a branch or hole, use the high temperature resistant cable inside. Important: If you are not used to working with electricity, the safest thing is to physically run the cable (fix it, pass it wherever you want) and have an electrician make the final connection to the switch/regulator and to the mains.2. Extractor speed According to our manual:- The electric fireplace extractor is equipped with a 6-speed regulator.- Normally it works like this:- Speed 1–2:- Gentle and natural suction.- Ideal for continuous use in the flue/normal extraction, without "sucking" heat into the chimney.- High speeds (5–6):- Maximum suction power.- Used for:- they favor the lighting of the fire,- carry out a rapid exchange of air,- vacuum ash, etc.- In the kitchen it would be equivalent to maximum extraction when there is a lot of smoke/steam. Very important during the first days of use:- We recommend always setting the vacuum cleaner on speed 6 at the beginning, because:- Has grease around the propeller to keep it lubricated over time.- That fat means you need more strength to turn at first.- After a few days of operation, the lower speeds can now be used without problems. Applied to your kitchen:- For normal cooking: → you can use the low/medium speed.- If there is a lot of smoke or you want to evacuate quickly: → go up to high speed (5–6).- The first few days: → use it longer at high speeds to "stretch" the engine and distribute the grease well.
The square base fireplace extractor is equipped with adjustable brackets that can be adapted to both square and rectangular flues. The supported sizes range from a minimum of 20x20 cm up to a maximum of 43x43 cm.
For a chimney flue measuring 40x60 cm (rectangular), we recommend choosing the Gemi chimney extractor model with square base. Here's why:- The fans with a square base are equipped with adjustable brackets and can be fixed to both square and rectangular flues, with measurements ranging from a minimum of 20x20 cm to a maximum of 43x43 cm.- In your case, you have a side 60 cm long, therefore greater than 43 cm. There's no problem! Simply do not use the brackets: you can place the base of the extractor directly on the flue outlet and fix it to the 4 corners, where there are already holes prepared for the fisher type plugs.- It is important to ensure that the support base is at least 40x40 cm to ensure stability
Orders / invoice
Orders / general
I'll show you the full price of the professional round model smoke extractor, seeing as you visited that product page just now. The price may vary based on the size of the adapter you select.- The basic price for the Professional Round Fume Extractor starts from €429.00.- If you choose a larger size for the adapter (for example 20 cm, 22 cm, 25 cm, etc.), the price may increase (for example to €459.00 or more for larger sizes). we recommend selecting the desired size directly on the [product page](https://www.gemimarket.it/aspiratori/185-1119-aspirafumi-professionale-tondo-con-tirafumo-elettrico-8053017261072.html#/diametro_canna_fumaria_esterna-14_cm_140_mm) to view the exact price. If you tell me the diameter of your chimney flue, I can help you find the correct price! Do you want to proceed with the order or do you need other information?
I completely understand what you mean, especially with an order of around €300. At the moment, however, I do not have the possibility to generate or apply additional discount codes: the prices and any promotions are only those already active on the site at the moment, and I cannot create personalized conditions or make exceptions. What you can do is:- check whether there are any automatic promos on the site already applied to the products you are interested in;- subscribe to the newsletter to be notified when discount campaigns or special offers start. If you tell me which products you are purchasing, I can at least help you verify that they are the most suitable for your use (fence, vacuum cleaner, accessories, etc.) so you can be sure that you spend those €300 well. In the meantime, if you like,
Yes. The no entry symbol on the handle most likely indicates that it cannot be purchased at the moment, so it is most likely sold out / not available at the moment. On our site, when a product cannot be ordered, it generally happens that:- you cannot click on the purchase button,- or icons appear that prevent you from adding it to the cart. Unfortunately, in these cases:- I can't force the purchase,- nor can I propose alternative handles not present in the catalogue. However, I confirm that:- you can still proceed with the order of all the rest of the material (wire, insulators, etc.),- and purchase the handles as soon as they become available on the site
I confirm that there are no discounts for resellers or for purchases in large quantities: the prices are always those indicated on our website. So even if you purchase 1000 insulators, the price remains €0.13 each, sold in packs of 100 pieces.
At the moment the possibility of purchasing the 5 meter springs individually does not appear in the materials available to me: only the 8 m springs are indicated as a loose product, while the 5 m springs only appear within the gate kits. So:- 8 m spring → can be purchased individually- 5 m spring → only present in kits, not as a separate single item
For round flues, our adapters are available for diameters from 10cm up to a maximum of 43cm (430mm). If your flue has an external diameter of 450mm (45cm), unfortunately we do not have a standard adapter available directly from the site.
No problem!
I understand the curiosity! The price of products on Amazon can vary for various reasons which do not always depend on the parent company or manufacturer. Here are some possible explanations:- Price management by third-party retailers: On Amazon, both the direct manufacturer and other independent retailers often sell products, which may offer temporary offers or discounts, or have different commercial strategies.- Promotions or inventories: it may happen that the copper model is on promotion or on sale by a specific seller, while the corten model is not.- Expedited shipping costs included or excluded: Sometimes the price difference is reflected in the shipping conditions or additional services.- Amazon fees and policies: The fees Amazon charges sellers can lead to price differences between different platforms. On our website the prices are always aligned with the official Gemi price list and reflect the technical specifications and quality of each material. If you have found a very marked difference and want to be sure that the product is original or want a guarantee and direct assistance, the advice is to purchase directly from [our official website](https://www.gemimarket.it), where you always have a 10-year guarantee on the copper model and dedicated assistance. If you want, you can send me the Amazon link and I can help you better understand the price differences or verify that it is the original product!
Orders / payment/cash on delivery
For the price of the fireplace extractor with a diameter of 21 cm, we recommend visiting our website directly, where you can select the exact size of your chimney flue and view the updated price based on the diameter chosen. On the site you will find all the available models and their prices.
I'll answer point by point:1. “Universal” measures- If we talk about the Gemi chimney extractor:- For round flue: it is chosen based on the external diameter of the pipe. The adapter fits externally, so the external measurement is needed, not the internal one.- For square/rectangular chimney cap: the model with square base has adjustable brackets from 20x20 cm up to 43x43 cm. Even if the chimney cap is rectangular (e.g. 30x40), it is fine if it falls within these measurements. If the barrel is larger than 43x43, it can still be assembled by fixing the base to the 4 corners with the dowels. So it's not exactly "universal", but it covers most standard sizes. Just check that the measurement falls within these limits or, in the round, choose the right diameter.2. Odor problem when you turn on and have no glass- The Gemi chimney extractor is designed specifically for:- Improve draft- Reduce smoke and odors entering the home- Works even in strong winds- In many cases, even without glass, the extractor helps to resolve odors and smoke due to bad draft. Resolution of the problem is guaranteed: if you are not satisfied, you can return it for free within 100 days.3. Cash on delivery- Yes. It is possible to pay cash on delivery:- In Italy: cash on delivery with a supplement of €5.90, you need the precise amount because the courier does not give change.- In EU countries it is possible to pay on delivery, with a variable cost based on the country. If you tell me:- if you have a round flue or square/rectangular chimney cap- the external measurement (diameter or sides in cm) exactly which version of the extractor is right for you. In the meantime, to follow you better, I also ask you:
you can purchase the Base model aspirator with square base directly from the site and select cash on delivery. Payment on delivery (cash only) involves an additional cost of €5.90. Remember that it is necessary to have the exact amount because couriers do not give change.
it can be solved like this:1. Close the checkout (or cart) page/tab completely.2. Empty your cart if the order is still "pending" on the site.3. Start the order again from scratch, putting the products back in the cart and selecting the payment method again.4. If you use card/PayPal/Klarna:- Make sure there are no blocks on the card/app (security notifications, limits, etc.).- Enter your data and PIN / 3D Secure code carefully again. Even if he doesn't make you pay anymore, the best thing is:- try another payment method (e.g. from card to PayPal, or cash on delivery if available),- or contact your bank or payment method support (it may have temporarily blocked your attempt). In order to help you better, following our procedures,
No problem! you can also pay in cash on delivery (cash on delivery) without any problem, even for delivery on the island of Ischia. Costs and methods for the mark:- The service has an additional cost of €5.90.- Payment must be made in cash directly to the courier (it is advisable to prepare the exact amount because couriers do not give change).- Just select "Payment on delivery" when you complete the order on the site.
you can make the return without problems, and the shipping costs for the return are covered by us: you will not have to pay anything for returning the products. To help you as best as possible, I ask you just one thing before explaining step by step:-
The price of the Base model vacuum cleaner starts from €248.90. The high temperature resistant cable is also included in the price: it is supplied with the vacuum cleaner and has a length of 80 cm. If you need a longer cable, the special high temperature resistant cable (in different cuts) can also be purchased separately. Do you need more information on the models or do you want to know something about payment and shipping methods?
For delivery to Sassari (and all of Italy) shipping takes 2-3 working days from the moment the order is entrusted to the courier. Weekends and holidays may be postponed by 1 day.
Compatibility with the chimney You write to me:- Steel flue- Round- Diameter 250 mm- Height 7 meters For the Gemi fireplace extractor:- Height is not a problem: Gemi extractors are suitable for up to 50 meters of flue- With a 250 mm round steel flue, you need to choose the round model with the adapter of the corresponding diameter (on the site you will find the round model with selection of the external diameter of your flue). Therefore: yes, for a Ø 250 mm round flue 7 m high, the Gemi round extractor is suitable; the choice between the Basic, Professional, Inox, Copper model depends only on how "difficult" the draft is and the use you make of it (a lot of fire, high temperatures, aesthetics, proximity to the sea, etc.).
Compatibility with the chimney You write to me:- Steel flue- Round- Diameter 250 mm- Height 7 meters For the Gemi fireplace extractor:- Height is not a problem: Gemi extractors are suitable for up to 50 meters of flue- With a 250 mm round steel flue, you need to choose the round model with the adapter of the corresponding diameter (on the site you will find the round model with selection of the external diameter of your flue). Therefore: yes, for a Ø 250 mm round flue 7 m high, the Gemi round extractor is suitable; the choice between the Basic, Professional, Inox, Copper model depends only on how "difficult" the draft is and the use you make of it (a lot of fire, high temperatures, aesthetics, proximity to the sea, etc.).
it can be purchased both ways, but with some important differences.1. Online purchase (recommended for this type of system) For complete systems such as (energizer, wire, insulators, HV cable, etc.) the normal route is:- place the order directly from the site: https://www.gemimarket.it/- you can choose:- payment by card, PayPal, bank transfer or cash on delivery (cash on delivery, in Italy with a supplement of €5.90),- we ship from the production site in Basilicata (not from Milan).2. Purchase "directly from you in Milan" The Gemi Elettronica headquarters in: > Viale Monza 347, 20126 Milan (MI) is the registered/administrative headquarters, not a retail shop with a warehouse open to the public. From the information I have:- the only real physical point is in Basilicata,- for the rest of the world (including Italy outside of there) purchases are made from the site, with home shipping. So:- it is not expected to go to Viale Monza in Milan to place and collect the order like in a shop,- the order must be placed online, and the goods will be sent to your home
Yes. I confirm: when purchasing the fireplace extractor, the speed regulator/variator is included in the order. In particular:- for square-based vacuum cleaners: the speed regulator + adjustable fixing brackets are always included;- for round vacuum cleaners: the speed regulator + round adapter is always included based on the size chosen. Therefore, having ordered a copper finish vacuum cleaner, the speed variator is already included in the package, there is no need to purchase it separately.
- Delivery to Croatia typically occurs within 4–6 working days of shipment.- Shipping is already express, there are no faster options.- Bear in mind that weekends and holidays can take a little longer. Regarding the Gemi Elettronica company:- Registered office: in Milan, in Viale Monza 347- Production site and warehouse: in Basilicata (Southern Italy)- Parcels are sent from Basilicata directly to your home. If necessary, I can also summarize all the costs associated with cash on delivery for Croatia.
Yes. You can pay in cash directly to the courier by choosing cash on delivery on our website. In Italy, the service has an additional cost of €5.90. However, I remind you that the courier requires the exact amount in cash, since change cannot be given.
If you order the €358 vacuum cleaner online, shipping generally takes place within the times indicated when ordering on the site, taking into account that there may be small delays on weekends or during holidays. As regards payment, you can choose between different methods:- Cash on delivery (cash on delivery): has an additional cost of €5.90 and you need to have the exact amount because the courier does not give change.- Credit card (Visa, Mastercard, Maestro, AmEx, etc.)- PayPal- Bank transfer (shipping starts the working day after crediting, if the transfer is instant the time is shortened)- Payment in installments via Klarna or PayPal (3 installments)
Yes, you can easily pay on delivery in cash. For Italy:- cash on delivery (cash on delivery) is available- has an additional cost of €5.90- the courier wants cash on delivery (he doesn't give change) Cash on delivery is possible in all European Union countries, but the cost varies from country to country. When you place your order on the site, simply select: > Cash on delivery (cash on delivery) If you like,
Good evening! I'm sorry for the difficulty you're having. In order to help you as best as possible, could you tell me the email address you used during the order? Furthermore, if you can specify what type of problem you are having (for example payment error, address problems, or other), I will help you find a solution!
It is not necessary to send the bank transfer receipt: once the credit has been received, the order will be processed automatically.
si può pagare in entrambi i modi:1. Bank transfer- Yes. It is possible to pay by bank transfer.- Once the bank transfer has been made, the order is shipped after crediting (instant bank transfers allow shipping as early as the next working day).2. Cash on delivery (cash to the courier)- Yes. You can pay cash on delivery.- In Italy the cash on delivery has an additional cost of €5.90.- The courier only accepts cash and you need to have the exact amount (it does not give change). Credit card and payment in 3 installments with Klarna or PayPal are also available. If you tell me:- what diameter does the flue have?- if it is round or square I can directly show you the link to the most suitable professional chimney puller to put in your cart. Would you also like to leave me a reference email (so we stay aligned in case of other questions about the order)?
I'll go by points, so you have everything clear.1. Complete diagram of the fence system against wild boars
Main links1. Electrifier- Connect the energizer to the 220V socket.- Red clamp → goes to the fence wire (via cable with pliers supplied).- Black clamp (earth) → goes to earth (stake).2. Grounding- 3 x 1 meter galvanized pegs- Each stake:- 80 cm underground, 20 cm above ground- Distance between pegs: approximately 3 meters apart- Connect them together with the yellow-green cable and bring this cable to the black terminal (earth) of the energizer.- Choose an area of moist soil, preferably with some vegetation.3. Electric wire/cord- Type: 6 mm² wire specific for wild animals/boars.- Perimeter length: 350–400 m- you need at least 1 roll of 500 m (you have margin for climbs, corners, junctions).
If you write to me what exactly you plan to put in your cart (energizer model + number of wire spools), I can help you do a final "technical" check before ordering.
At the moment we have no resellers: Gemi products can be purchased directly from our website. you can order online and receive everything at home or wherever is most convenient for you (we ship throughout Italy), also paying:- as a guest (without registration)- by bank transfer, card, PayPal, cash on delivery, etc. If necessary, I can guide you step by step to complete the order from the site with the energizer and the 6 mm coil you have chosen.
For payment and delivery it works like this: You can pay with:- Credit/debit card (Visa, Mastercard, Maestro, AmEx, etc.)- ️ PayPal- Bank transfer (shipping starts after credit; with instant bank transfer we ship the next working day)- Cash on delivery (cash on delivery) in Italy- pay in cash to the courier- additional cost: €5.90- you need to have the precise amount because the courier doesn't give change- Payment in installments:- with Klarna or PayPal you can pay in 3 interest-free installments- moreover it is possible to pay in 3/6/9/12 installments with Sequra using any bank or postal card- in this case there is a small interest for payments in 6/9/12 installments, which varies based on the order total. 𝐓𝐄𝐌𝐏𝐈 𝐃𝐈 𝐂𝐎𝐍𝐒𝐄𝐆𝐍𝐀- In Italy delivery takes approximately 2-3 working days- For abroad: approximately 4–6 working days- Shipping is already express, there are no additional "super fast" options- Times may only be longer for weekends or holidays. If you like,
you can buy directly from us without any problem, even if the company is in Croatia. It is not necessary to contact a local retailer: you can order via our website or contact us directly in Milan.
Orders / payment/installments
you can also purchase the fireplace extractor by paying in convenient interest-free instalments. On our website, during the purchase phase, simply select "Klarna" or "Paypal" as your payment method: this way you can split the amount into 3 interest-free installments. It is not necessary to make special requests: simply choose the installment payment method you prefer directly at checkout.
There are currently no specific discount codes available for the first purchase. we recommend subscribing to our newsletter to stay updated on any future promotions or special offers. As for paying in three interest-free installments, you can do so by choosing one of these options when checking out on our site:- Klarna: select payment with Klarna and you can split the amount into 3 interest-free instalments.- PayPal: PayPal also offers the possibility of paying in 3 interest-free installments, if the account is enabled for this option. Simply add the product to the cart, go to the checkout and choose the payment method you prefer from those available.
You can currently find discounted prices on some models of fireplace fans on our site. Unfortunately I have no information for exactly how long the discount will last: it is recommended to take advantage of the opportunity while the prices are displayed on the web, because all visible products are available to order at that price.
I am unable to provide real-time exchange rates, but I can give you an approximate value using a recent average. The exchange rate between the US dollar (USD) and the euro (EUR) was approximately 1 USD ≈ 0.92 EUR. Let's calculate a quote:- $501.60 × 0.92 ≈ €461.47 So, the approximate total in euros is €461.47. Please note:- The exact amount you receive may differ slightly due to your bank's exchange rate and possible transfer fees/fees.- To ensure that the correct amount is received and that your order is processed without delay, we recommend that you check the final value in euros with your bank at the time of the transfer.
Orders / shipping
it is indeed a "delicate" point of the fence.1. Arrival with the wire at the insulator of the wooden post When you arrive with the fixed wire at the post where the gate with the springs starts:- Yes, you can:- reach the insulator with the wire,- make a turn and a knot to block it,- so that the thread "ends" there and remains taut. The important thing is:- do not make too many tight turns which crush the thread and ruin it,- the wire must remain firmly on the insulator. At that point the wire may not continue any further: the continuity of the current will depend on how you connect the handle/spring.2. How do I connect the gate (springs) to the wire You usually have:- on one side: fixed wire that reaches the insulator on the pole,- on the other side of the passage: another fixed wire on the opposite pole,- in the middle: spring + gate handle. The correct connection is:1. Side A of the gate- The fixed wire reaches the insulator on the pole.- From there, with a piece of common thread, colleagues:- the fixed wire (or the knot on the insulator),- to the hook/irons where the spring handle attaches.- Thus the current passes from the fixed wire → to the hook → to the handle → to the spring.2. Side B of the gate- Same thing: from the fixed wire of the other pole bring a small piece of wire to the point where you hook the other end (or directly to the spring, if so provided). When the gate is closed, the current makes a complete turn, also passing through the spring.3. What NOT to do- Do not leave the wire “touching” the wood without an insulator.- Do not wrap the wire with tight dead turns around the pole or insulator: one pass is enough and then the knot, otherwise you increase the risk of dispersion.- Do not leave connections "just resting": the contact must be very tight.
— 100-piece iron pole insulators cost €13.00. For shipping, this:- in Italy delivery takes place with BRT or GLS- delivery times are those indicated at the time of the order- there may be delays due to weekends or holidays. If you are referring to the shipping cost, I do not have a fixed amount indicated here because it may depend on the order
Shipping to Argentina, including San Isidro, takes approximately 4-6 business days from the time your order ships. Please note that this deadline does not include possible delays due to weekends or public holidays. Do you want to receive information on shipping costs or available payment methods?
how shipments work:- Shipments to Italy are free for orders over €99.- If the order is less than €99, the shipping cost is €9.90.- There are no additional costs for delivery to islands such as Ischia. In your case, with an indicative total of approximately €132.80, shipping to Ischia will be completely free.
The insulators must be mounted one every 5 meters of fence. For a distance of 17 meters:- 17 ÷ 5 = 3.4 You will therefore have to fit 4 insulators (always rounding up to cover the entire distance). The typical layout will be:- 1 at the beginning- 1 approximately at 5 metres- 1 approximately at 10 metres- 1 approximately at 15 meters So, 4 isolators allow you to start, cover the distance and get to the end of the 17 meters. Remember: the insulators are sold in packs of 100 pieces each.
In case of replacement of the vacuum cleaner under warranty, the times may vary based on:- Rapid confirmation of the defect by assistance- Immediate availability of the replacement product (usually what is on the site is ready for shipping)- Courier logistics times On average: If the defect is confirmed immediately and the replacement model is available, shipping usually takes place within 24-48 working hours of confirmation. Couriers normally take 1-2 working days for delivery in Italy. So, from service confirmation, you can expect to receive your new vacuum generally in 2-4 business days. In particular cases (holidays, remote areas, or courier delays) it may take a few days longer, but assistance will keep you updated on every stage. For any particular emergency or urgency, it is always advisable to clearly report it to assistance so as to speed up the procedure as much as possible.
No problem! If you order a Base model vacuum cleaner from Sardinia, delivery generally takes 2-3 working days. Please note that there may be small delays if there are holidays or weekends.
Kay. Free shipping for orders over €99 is available for all European Union countries.
For delivery to Sassari (or province), orders are delivered in 2–3 working days throughout Italy, via express courier (BRT or GLS). Please note that weekends and holidays may extend the time slightly.
For orders to Sassari (and all of Italy) delivery takes place in 2-3 working days from when the package is entrusted to the courier. So if you order it today:- the package is prepared and entrusted to the courier as soon as possible,- and will arrive to you approximately within 2–3 working days (excluding Saturdays, Sundays and holidays). If
If you are waiting for delivery verification or tracking updates after placing your order:- In Italy, the package should arrive within 2 or 3 working days from the shipping date.- For international orders, delivery usually takes 4 to 6 business days. If after this period you have not received any tracking information or delivery confirmation, it is a good idea to check your email (including your spam folder) or contact customer support for an update.
you can return the purchased product and obtain a refund, respecting the right of withdrawal provided for online purchases. You usually have 14 days from receiving the product to request a return and refund.
so e.g. You can buy the product, try it calmly, and if for any reason you are not satisfied, you can return it within 100 days of purchasing it, even if the product has been used.
Our only physical store is in Italy (Basilicata), but you can purchase the products directly from our site and receive them at your address in Bosnia. You don't have to be a business to buy - anyone can order from our online store and we ship internationally.
I don't have access to the automatic calculation of deadlines by postcode/address, so I can't give you a different exact number for Barcelona, Manresa or Monistrol de Calders. What I can tell you, based on our general information, is:- For Spain (including Catalonia) shipping is via fast courier.- The exact estimated delivery time is indicated on the site when ordering, after entering the shipping address (be it the city of Barcelona, Manresa or Monistrol de Calders). In practice between these three destinations the difference is usually minimal or non-existent (they are all very close peninsular destinations), but the only "official" information I can give you is what you will see:1. Adding products to your cart on the website.2. Entering the shipping address (Barcelona / Manresa / Monistrol de Calders).3. Looking at the estimated date that the system will show you before confirming the payment.
In order to give you precise information on shipping the ash vacuum cleaner to the Azienda Agricola Ferronio in Scandriglia, I would need the order number or the email with which the purchase was made. Can you provide me with one of these details? So I can immediately check the status of the shipment!
In Finland, delivery usually takes around 4-6 working days from the time your order is shipped. Weekends and holidays may result in a slight delay, but the shipping method is already express - no faster options are available. If you want, tell me which product you are interested in and I can help you with all the details before ordering.
If you place your order today or tomorrow, delivery to Pisa takes place in 2-3 working days. Considering that today is Monday, you will receive the order approximately by Thursday or Friday, except for any delays due to holidays or the courier.
At this time, I am unable to provide exact import rates or tariffs for shipments to the United States. Import duties and taxes may vary based on product type, value and local US customs policies. Generally, when you order a product outside the United States (for example from the Gemi website), the shipping carrier or US customs may apply import duties, taxes and handling charges upon arrival. These fees are usually calculated based on the value and classification of the product and are paid by the recipient. To obtain more precise information for your order, we recommend:- Check with your local customs office or visit the official US Customs and Border Protection (CBP) website.- Contact the courier used to ship your order, as they can often provide a quote or directions.- Review of the checkout process on Gemi's US website, as estimated import costs are sometimes displayed. If you have more questions or need assistance with the ordering process, that's it
Orders are generally processed and shipped within the same or next business day after your order is placed. You will receive a shipping confirmation email with tracking details as soon as your package ships. If you placed your order today, it is likely to ship today (if placed early in the day) or the next business day. Please note that shipments are not processed on weekends or holidays.
With fast shipping, delivery generally occurs within the times indicated in the order, considering that weekends and holidays may cause a few days' delay. However, I do not have visibility on the exact day for the address: you will see it clearly summarized in the cart before confirming. To help you better (also in case you want advice on which pegs to take),
At the moment it is not possible to have faster shipping than the one you see indicated on the site: our shipping is already unique and express for the whole world, there are no additional "super-fast" options. If the system indicates delivery between Friday and Monday, it means that:- Friday is the first scheduled working day,- but I can't guarantee you 100% that it will arrive *by* Friday, because it depends on the actual times of the courier (between Friday and Monday). So:- if it is mandatory for you to have them by Friday, I cannot give you an absolute guarantee;- if you can afford for them to arrive on Saturday/Monday too, then the timing shown is fine. If you tell me the exact day of the race, I will help you understand better if the times are reasonable or too tight.
Good morning! Yes, you can also use the fume extractor for the kitchen. The Gemi fume extractor is suitable for extracting vapors and fumes from both domestic and industrial kitchens, including ovens and kitchen hoods. It is an effective solution for eliminating odors and keeping the environment cleaner. Want more details on specific models or have other questions?
At the moment I do not have the possibility to see the exact departure date of the package, but I confirm that shipping generally takes place within 2/3 working days from order confirmation for Italy. You will receive an email with tracking as soon as the package is handed over to the courier. If you notice delays beyond these times, we recommend contacting customer support for further checks. Thanks again and have a good day too!
Yes. For 50 meters it can be fine, but with some care. What you want to do is:- start from one side,- pass a single wire inside all 3 insulators of each pole (low → medium → high → low of the next pole, etc.),- reach the end and tie a single closing knot. make a single “snake” that goes up and down. It works, but you need to consider these points:1. From the electrical side- It's like having a single long wire that goes all the way around: the current passes through it, so yes, it's working.- If the thread breaks or breaks in one place, however:- you risk leaving sections downstream of the break "off".2. From the practical side (tension and adjustments)- Pulling a single wire that goes up/down between many insulators is more inconvenient:- when you roll, all levels move together,- if you only need to adjust the central or top thread, it becomes complicated.- If in the future:- you only want to raise/lower one level,- or modify the gate on a single wire,- with the unique snake you are very close.3. Maintenance- If a section becomes worn or damaged (e.g. a wire halfway up the fence):- with 3 independent lines, you only change that piece.- with a single snake, you may have to open and redo long stretches. For 50 meters, however, it is not "wrong"
I can help you verify the shipment, but I cannot directly change the delivery point: this requires intervention from the courier or our customer service. First things first,
it is very likely possible. Our standard shipping is already express:- Italy: delivery in 2–3 working days- Rest of the world (including Romania): delivery in 4–6 working days There are no extra “fast shipping” options because the default service is already express. Since you will need the product next week, this should be fine as long as the order is placed promptly and there are no courier delays (weekends and holidays can slow things down a bit). If you tell me:- Which country and city you are in- Which product(s) you want to order I can give you a more precise indication (always indicative, it is not a guaranteed delivery date).
It is not sent via regular mail; Shipping is carried out via courier. Delivery times:- Spain / Italy: normally 2–3 working days- Rest of the world: 4–6 working days For both Las Rozas (Madrid) and A Biqueira, Laxe (A Coruña), being destinations in Spain, the approximate deadline is 2–3 working days, always according to the period indicated at the time of the order. You must also take into account possible delays due to weekends or public holidays. Shipping costs:- If the order exceeds €99, shipping is free in Spain.- If it does not exceed €99.90, €9.90 shipping costs will be added.
you can order on gemimarket.it and receive your products in Croatia! Here are some important details:- Shipping to Croatia is available from the Italian website ([gemimarket.it](https://gemimarket.it/)).- you can choose the payment method you prefer (credit card, PayPal, bank transfer or cash on delivery).- For Croatia, cash on delivery is available, but the fee is €29.00.- If there are products on the Italian site that you do not see on the Croatian site, you can order them directly from the Italian site and select Croatia as the shipping country during checkout.
Understanding the temperature that can be reached in the chimney pot area is not always easy without specific tools, but I can give you some practical indications:- Typical temperature: In most domestic installations, the temperature of the fumes at the exit of the flue (i.e. where the extractor fan is mounted) generally tends to be much lower than the temperature immediately after combustion. For a traditional wood-burning fireplace, we are often below 200-250 C at the chimney, but it all depends on how the fireplace is used, the draft and the insulation of the flue.- Bend and length: A pipe 6-7 meters long, with a 45 and a 90 bend, helps the smoke dissipate heat before reaching the chimney, further lowering the final temperature.- When to choose 700 °C: Models that resist 700 °C are recommended especially in particular situations:- Very short flue (less than 3 metres), with the risk of the heat rising very quickly without dispersing.- Higher safety needs, such as in the case of very intense combustion or risk of "flare-ups" in the barrel.- Need for greater durability and resistance over time.- Presence of stoves or fireplaces that produce particularly hot fumes or rapid temperature changes. In your specific case: Having a chimney of approximately 6-7 meters with several bends, the temperature at the chimney will rarely exceed 300 °C during normal use. So the basic model should be more than sufficient for most home situations
If the vacuum cleaner breaks down and you have activated the GEMI CARE PACK service (warranty extension):- A courier will come to collect the product directly from your home for free.- The product will be repaired or replaced (if necessary).- Return shipping to you is free.- The overall time to receive the repaired or replaced product at home is approximately 7-10 days from reporting the problem. This service is designed specifically to guarantee speed and zero worries in the event of a breakdown! Do you also want to know how reporting works or other information?
For pricing in Canadian dollars, check the specific product page on the Canadian site you were visiting (e.g. gemimarket.ca). What I can tell you based on our rules is:- Each site uses its own national currency. Since you are on the Canadian site, the prices you see are in CAD.- The "base rate" (base price) for the fireplace extractor will be exactly the amount indicated on the product page in CAD, before adding:- shipping (calculated at checkout to your Ontario address) e- any optional accessories you may add. I don't have a fixed CAD amount, I can quote you here, but if you tell me what exact model name you see (e.g. "Professional Steel Model", "Premium Steel", etc.), I can walk you through what affects the final cost and what you actually need versus what is optional.
Let's go, let's go! Thank you for choosing us all these years. At the moment there are no dedicated coupons or discounts, not even for the first purchase or for subsequent orders, and I cannot manually apply either discount codes or free shipping: the prices and any promotions are always only those indicated on the site. however, we recommend:- subscribe to the Gemi newsletter (if you have not already done so), so as to receive any future promotions or special offers;- check directly on the site, before confirming the order, whether automatic promos are active on certain products or carts.
At the moment it is not possible to add products to an order already placed directly from the site.
Shipping times are those indicated at the time of ordering. Please note that there may be possible delays due to weekends or holidays. If you want, I can also help you with the electric fence kit: in general it consists of an energizer, conductor wire, insulators and accessories for the passage, and can be modified according to your needs. To continue,
Here is how to proceed to bring the control unit (speed regulator) near the chimney:- The cable that connects the aspirator to the control unit can be routed in two ways:1. Outside the flue: In this case a normal 3x1.5 mm² rubberized cable is used.2. Inside the chimney: If you prefer to pass the cable inside the chimney, it is necessary to use a special cable resistant to high temperatures (up to 300 °C), which can be purchased separately on our website.- Connection: The aspirator wires must be connected to the terminal board of the control unit following the instructions ("engine motor" for the motor wires, "line 220V" for the power supply, and the earth wires in the central part).- Positioning: The control unit is usually installed near the fireplace, in a point that is easy to reach, but away from direct heat sources. Do you want the direct link to the special high temperature resistant cable? Or do you need more details on the connection?
You reasoned perfectly: if the extractor motor (the one mounted on the roof) was faulty, the button or light on the control unit (speed regulator) should still come on when power comes on. If, however, the button/warning light on the control unit does not light up at all, the problem is almost certainly downstream of the engine, that is:- on nutrition,- on the cable,- on the switch,- or on the control unit itself. Therefore, if the power arrives and the motor is not shorted, the control unit should still show signs of life (the light comes on, it makes a "click", etc.), even if the motor is broken. the reasoning is correct: the fact that the control unit does not turn on indicates that the problem is in the control unit (or its button/switch), and not in the motor on the roof.
For the connection from the energizer to the fence, in the instructions I have:- the Gemi high voltage cable is 3 mm,- can also be used for more than 100 m,- but it is recommended for 30–40 m. For a 4mm cable, I don't have a meter limit specifically stated. What is indicated is that:- you can also use a simple copper cable,- thickness is not essential,- it is important that the cable is well insulated and, if it passes on the ground or underground, inside a polyethylene tube to avoid dispersions. So, conservatively, the only precise reference I can give you is this:- as a feeder stretch, the recommended measurement remains approximately 30–40 metres,- furthermore, the material I have does not give me a precise value for 4 mm.
You are absolutely right to ask for clarification. The insulators cost €0.13 each, therefore:- 100 pieces x €0.13 = €13.00 However, as per the shipping conditions, shipping is free only for orders over €99.00 (throughout the European Union, including Italy). If the cart amount does not exceed €99.90, the system adds €9.90 in shipping costs: this is what you are seeing when ordering. So:- Order from €13.00 → €9.90 shipping applies- Order over €99.00 → free shipping
Yes, it can be done, but with some important attention. For the Gemi aspirator you have two possibilities:1. External passage to the flue- you can run the cable down outside the flue to the socket/regulator.- In this case a normal rubberized FG7 cable 3 x 1.5 mm² is fine.2. Internal passage in the flue-
For shipments to Kansas (USA):- Shipping costs: for orders under €99.90 there is a shipping cost of €9.90. If your order exceeds €99.90, shipping is free.- Delivery Time: Delivery to the United States typically takes 4 to 6 business days. If you wish, I can also provide information on payment options or anything else you may need! If you're ready to proceed, that's it
Yes, of course, you can easily order the product by indicating the address of your relatives in Split. During checkout, simply enter the shipping address you prefer: this way the package will be delivered directly there. Can I help you with other details about the order or payment methods?
Yes. If you take the B12 energizer (the battery-powered one), it can also work on 220V current. I'll explain it to you simply:- The B12 can be powered:- with 12V battery (12V car battery, 40Ah recommended)- or with the 220V home network, using the power supply supplied in the package. How to use it at 220V:- in the B12 package you will find a 220V → 12V transformer/power supply- connect the transformer plug to the home socket- insert the transformer jack into the same input where you would connect the battery cable ("12V battery" or "solar panel" input on the energizer) Important attention:- the B12 cannot be used on battery and 220V at the same time → you use it either on battery or 220V, but not both together (it does not automatically switch from one to the other if the power goes out). So, for the case:- if you take B12, you can use it now at 220V- and if one day you want to take it to a place without electricity, just connect it to a 12V battery
Yes, the purchase and shipping to Argentina are coordinated directly from the site and with the seller. With the information I have available:- it can be purchased from Argentina through the Gemi website.- The products you see on the web are available for sale.- The system shows you the costs and shipping options during the purchase process, depending on the address entered. The usual thing would be:1. Go to the Gemi website.2. Add the extractor we have seen to the cart (square base 3800 m³/h – 700 C, professional or stainless steel).3. When paying, indicate your address in Argentina.4. The system shows you the total price with the shipping and payment methods available for your country. If, once you have obtained the final quote on the site, you want us to examine the contents of your cart together (to verify that you have chosen the right model), you can copy the full names of the products you receive here and we will see it.
In Italy delivery generally takes place in 2-3 working days. However, considering the holiday period, there may be possible delays due to courier closures or high loads, especially around Christmas and New Year.
At the moment I have no information on physical retailers in Vicenza where you can purchase the Gemi 220V 50Hz max 250W control unit. However, you can purchase all Gemi products directly from the official website [gemimarket.it](https://www.gemimarket.it/), with shipping throughout Italy.
It happens because of this rule:- Shipping is free only if the total order exceeds €99.00/99.90- If the cart does not reach that threshold, the shipping cost is automatically added (€9.90 in many cases in Italy / EU, except for specific exceptions by country or category). So it can happen that:- on the general page or in the advertisement you see "free transport" (valid above a certain threshold),- but in the checkout, if the order is under €99.90, you will see the shipping costs appear.
you can easily reorder tomorrow too! There is no problem placing a new order at any time, even before receiving or rejecting the package with the wrong product. You will not be refused the correct order: Each order is treated individually, so you can proceed with a new purchase of the right model whenever you want. Rejecting the wrong package does not block or interfere with other orders you place. How to do it:- Feel free to place your new order for the square base vacuum cleaner whenever you like, even today, tomorrow or in the next few days.- When you receive the wrong package, just do not accept it from the courier or, if you prefer, collect it and then return it by exercising your right of withdrawal.
For Alcora (Castellón), the deadlines are:- In Spain (rest of the world for us): 4-6 working days from order placement/payment confirmation.- Please note that weekends and holidays do not count and may slightly delay delivery. There is no "faster shipping" option: shipping is already express to all countries. If you tell me which payment method you used (card, PayPal, bank transfer, cash on delivery), I can explain when the deadline starts in your case.
At the moment I don't have information on physical retailers in Policoro or in other cities, so I can't point you to a specific store in the area. However, I can tell you that Gemi insulators are available in packs of 100 pieces on our official website:- Insulators for wooden poles: https://www.gemimarket.it/recinto-elettrico/27-isolatori-pali-in-legno-recinto-elettrico-per-animali-8053017260655.html- Insulators for iron poles: https://www.gemimarket.it/recinto-elettrico/40-isolatori-per-recinto-elettrico-per-pali-in-ferro-8053017260662.html
Yes. A tester that measures up to 10,000 V is fine. I'll explain why in a practical way:- For most animals (even difficult ones such as wild boars) approximately 9,000 V is sufficient.- The "extra strong" energizer which reaches up to 15,000 V delivers that no-load voltage; on the real fence (with wire, splices, dispersions, grass etc.) the actual tension will be lower.- A tester up to 10,000 V still allows you to check whether the fence is working correctly (e.g. 7,000–9,000 V depending on use). So:- If you are only interested in checking that the fence is "healthy" and sufficient for the animal: 10,000 V is sufficient.-
After sales / warranty/returns
Here is a clear comparison between Steel Square Fan and Pro Square Fan:
Square Fan Pro- Material: Made of galvanized sheet metal.- Advantages:- Excellent resistance to high temperatures (up to 700 °C).- Reliable and robust for most standard applications.- Performance: Suction power of 3800 m³/h.- Warranty: 6 years. Both fans have the same motor, suction power and temperature resistance. The main difference is the material and warranty:- The Steel model is the best
Square Fan Pro- Material: Made of galvanized sheet metal.- Advantages:- Excellent resistance to high temperatures (up to 700 °C).- Reliable and robust for most standard applications.- Performance: Suction power of 3800 m³/h.- Warranty: 6 years. Both fans have the same motor, suction power and temperature resistance. The main difference is the material and warranty:- The Steel model is the best
I'll answer you point by point.1. Basic model: is it suitable for your case? Yes. For the use you describe, the basic model is fine:- use the fireplace only occasionally- use it to cook grilled/grilled meat- the chimney is low (3 metres) From our information:- the Gemi chimney extractor is also ideal for ovens, rotisseries, pizzerias, barbecues, restaurants, therefore perfect for greasy fumes from meat;- for even higher flue heights (e.g. 10 m) the basic model is already sufficient; with 3 m you have no problem;- the extractor has 6 speeds, so you can adjust the draft and also obtain better wood combustion
I understand the question! At the moment, our devices such as the B/12 Energizer and the E/220 Extra Strong are offered at discounted prices mainly for promotional reasons.
The "Pro square" smokestack that you see for sale at €599 refers to the professional model with a square base. According to available information, professional models are available in different versions:- Professional (standard): Made of galvanized sheet metal, resists up to 700 °C, 6-year warranty, extraction 3800 m³/h.- Professional Steel: Made entirely of stainless steel (Inox Aisi 304), 8 year guarantee, also resistant up to 700 °C, extraction 3800 m³/h.- Professional Copper: Made of stainless steel (Inox Aisi 304) with copper plating, 10 year guarantee, resists up to 700 °C, extraction 3800 m³/h. The price for the copper version is generally higher because it is top of the range, with a 10-year warranty and a copper finish for improved aesthetics. At $599, the model shown is most likely the standard "Professional" version (galvanized steel), not the copper version. The copper version usually costs more due to the high-quality materials and finish.
Perfect and very common question when putting up an electric fence!
Here's how to make a splice between two wires from different coils:1. When you reach the end of the first spool thread (whether 120, 200 or any size):- Strip a few centimeters of plastic sheath well on both ends (the end of the first thread and the beginning of the second).- Twist the metal conductors firmly: make a few tight turns or a small knot (procedure also recommended by Gemi!).- For greater safety, you can also use a conductive clamp for electric fence wire (optional accessory, not essential).- Insulate the exposed metal part well from the elements (you can use insulating tape
Here's how to make a splice between two wires from different coils:1. When you reach the end of the first spool thread (whether 120, 200 or any size):- Strip a few centimeters of plastic sheath well on both ends (the end of the first thread and the beginning of the second).- Twist the metal conductors firmly: make a few tight turns or a small knot (procedure also recommended by Gemi!).- For greater safety, you can also use a conductive clamp for electric fence wire (optional accessory, not essential).- Insulate the exposed metal part well from the elements (you can use insulating tape
If the stove base cap is not right for your environment, you can return it without problems, even if it has been used or is dirty. You have up to 100 days from the date of purchase to return the product and we will refund the full amount paid. The return shipping costs are paid by us (Gemi Elettronica), so you do not have to pay anything to send the product back.
Yes! Here's a clear breakdown based on available information:1. Motor differences- Basic model:- It has a different, smaller engine.- Suction capacity: 2500 m³/h- Resists up to 300 °C.- Warranty: 3 years.- Professional Models, Steel, Corten, Copper:- All use the same high-performance engine.- Suction capacity: 3800 m³/h- Resists up to 700 °C.- Higher warranty: varies by model.2. Main differences: construction material and durability- Professional:- Made of galvanized sheet metal.- Resists up to 700 °C.- Warranty: 6 years.- Steel:- Made entirely of Aisi 304 stainless steel for greater resistance to corrosion and salt.- Resists up to 700 °C.- Warranty: 8 years.- Corten:- Made of Corten steel (special steel resistant to atmospheric agents for superior durability outdoors).- Resists up to 700 °C.- Warranty: 8 years.- Copper:- Made of Aisi 304 stainless steel with copper finish/plating.- Resists up to 700 °C.- Warranty: 10 years.- Model with top aesthetics, with entirely painted exterior, including the base.
For the Base Gemi model aspirator you have:- 3 years official guarantee- Estimated technical life: in the absence of defects and with normal use, it can work for many years beyond the warranty, but in our official documents only the following are indicated:- 3 year warranty for the Base model- and the possibility to purchase
Here is a clear comparison between the Professional Corten Round and Professional Copper Round fireplace extractor models:
Professional round copper- Maximum temperature: 700°C (1292F)- Suction power: 3800 m³/h- Warranty: 10 years- Material: Made entirely of Aisi 304 stainless steel with copper plating and fully painted exterior (including the base). Stainless steel fan for maximum resistance to corrosion and salt.- Best for: maximum durability, superior corrosion resistance, high-end aesthetics (elegant copper finish) and the longest warranty. Ideal for those looking for both performance and a premium look.
Summary table | Model | Material | Warranty | Appearance | Ideal for | |----------------------|----------------------|----------|----------------------------|--------------------------------| | Pro Corten Round | Corten steel | 8 years | Rustic/Industrial | Harsh climates, rustic appearance | | Pro Round Copper | Steel + Copper | 10 years | Elegant/Premium | Maximum durability, premium finish |
For warranty assistance you need to contact our customer service directly: we take care of the repairs and revisions of the products. All products have a guarantee, in particular:- Basic model vacuum cleaner: up to 3 years- Professional model vacuum cleaner: up to 6 years- Steel or corten model aspirator: up to 8 years- Copper model aspirator: up to 10 years- Electric fence energizers: 3 years To help you as best as possible I ask you:1. What product did you purchase (model and type, e.g. basic vacuum cleaner, energizer, etc.)?2. How long have you bought it?3. What problem are you experiencing exactly? Furthermore,
Here is a clear comparison between the basic model and the professional (pro) model fireplace fans:
Professional model (Pro):- Suction capacity: 3800 m³/h (strongest suction)- Maximum Temperature Resistance: Up to 700 °C (also resists in the event of a chimney fire)- Warranty: 6 years- Recommended Use: Excellent for fireplaces less than 3 meters high or where greater heat resistance is required (e.g. strong and frequent fires, lower fireplaces). In short: the pro model is more powerful, withstands much higher temperatures and comes with a longer warranty. It is also the recommended choice if you have a short chimney or need more robust performance. If you want information on other models (such as steel, corten or copper versions), that's it
Professional model (Pro):- Suction capacity: 3800 m³/h (strongest suction)- Maximum Temperature Resistance: Up to 700 °C (also resists in the event of a chimney fire)- Warranty: 6 years- Recommended Use: Excellent for fireplaces less than 3 meters high or where greater heat resistance is required (e.g. strong and frequent fires, lower fireplaces). In short: the pro model is more powerful, withstands much higher temperatures and comes with a longer warranty. It is also the recommended choice if you have a short chimney or need more robust performance. If you want information on other models (such as steel, corten or copper versions), that's it
Yes. You can return the material even if it is partially or totally used. Our policy includes:- Return within 100 days from the date of purchase- Even if the product has been used and, in the case of vacuum cleaners, even if it is dirty with soot- The entire sum paid at the time of purchase will be refunded. To best manage the case, we recommend:- indicate the order number- specify what you want to return
Yes. You can make a total return of the product even in the event of an error in the purchase. There are no costs to bear: the shipping costs for returns are completely covered by us, so you will not have to pay anything for the return, even if the product has been used or dirty with soot. You have up to 100 days from the date of purchase to make the return and you will receive a full refund of the amount paid.
Gemi offers different models of fume extractors, each with different extraction capacities:- Basic model: Extracts 2,500 m³/h, with 3 year warranty and resistance up to 300 °C.- Professional model: Aspirates 3,800 m³/h, with 6 years of guarantee and resistance up to 700 °C (recommended for chimneys smaller than 3 metres).- Steel Model: Extracts 3,800 m³/h, made of Aisi 304 stainless steel, with 8 years warranty and resistance up to 700 °C.- Professional copper model: Aspirates 3,800 m³/h, with 10 year warranty and resistance up to 700 °C, equipped with stainless steel fan and aesthetic external painting. If you have more specific needs or questions about which model fits your fireplace,
For a 12" round fireplace (approximately 30cm in diameter) and looking for the *best* model with the longest warranty, here's how it works with Gemi fireplace extractors.1. Fan models and guarantees From the Gemi range (all are suitable for fireplaces, choose based on performance and guarantee):- Basic model- Suction: 2500 m³/hour- Maximum temperature: 300°C- Warranty: 3 years- Professional model- Suction: 3800 m³/hour- Maximum temperature: 700 °C (even in case of chimney fire)- Warranty: 6 years- Also recommended if the flue is less than 3 metres- Steel model (AISI 304 stainless steel)- Suction: 3800 m³/hour- Maximum temperature: 700°C- Constructed from stainless steel for high corrosion/salt resistance- Warranty: 8 years- Professional copper model (top of the range)- Suction: 3800 m³/hour- Maximum temperature: 700°C- Stainless steel fan + completely painted externally for aesthetics- Warranty: 10 years (this is the longest) So, for "best model and warranty", the Professional copper model is the best choice. If you prefer something that is still very durable but not the absolute best, the Steel (Inox) model is the second best in terms of longevity and resistance.2. Assembly of the 12" round fireplace Gemi supplies adapters for round flues from 10 cm to 43 cm. For your 12" round flue (~30cm outside diameter):- You would choose a Gemi vacuum cleaner with a round base,- When ordering, select the adapter size that matches the outside diameter of your 12" hose (approximately 30cm). This will allow the unit to securely attach to the round top of the chimney.3. Clear recommendation for your case Given what you asked:- Best model + best guarantee for a 12" round fireplace → professional Gemi fireplace extractor in copper, round base, with the appropriate round adapter for an external diameter of ~30 cm (12"). If you want, tell me:- Approximate height of the chimney (total length of the chimney) e- If you are exposed to corrosion/salt (e.g. coastal area), I can confirm whether I would push more towards professional copper or consider steel (stainless) as a better value for your situation.
For an 11" round flue (approximately 28 cm), we recommend choosing one of Gemi's round fireplace fans in the version sized for an external diameter of approximately 28-30 cm. Gemi offers 4 main models of fireplace extractors in its catalog (all available in the round versions sized based on the diameter of the flue):1. Base model – M/43 Series- Suction: 2500 m³/hour- Maximum temperature: 300°C- Warranty: 3 years- Suitable for: standard fireplaces, stoves, ovens, barbecues, hoods and thermo fireplaces with normal operating temperature.2. Professional model- Suction: 3800 m³/hour- Maximum temperature: 700°C- Warranty: 6 years- Especially recommended if:- The flue is short (under ~3 metres) or has draft problems- Very hot fires or large quantities of wood are often burned- You want a stronger, more long-lasting solution3. Steel model (AISI 304 stainless steel)- Suction: 3800 m³/hour- Maximum temperature: 700°C- Warranty: 8 years- Made entirely of stainless steel for maximum corrosion resistance (ideal for adverse weather conditions, coastal areas or if aesthetics and durability are priorities).4. Professional copper model- Suction: 3800 m³/hour- Maximum temperature: 700°C- Warranty: 10 years- Top of the line: Stainless steel fan, fully painted copper finish for a premium look and long life.
Great observation! In fact, free returns within 100 days are advertised on the Gemi website. Our policy states that you can purchase the product, try it and, if you are not satisfied, return it within 100 days from the date of purchase, even if the product has been used and is dirty with soot. In this case, you will be refunded the entire amount paid during the purchase. Therefore, compared to the 14 days required by law, Gemi offers a much longer return guarantee, precisely to give you complete peace of mind in trying the product without risk. To recap:- you can return the product within 100 days of purchase.- Even if the product has been used and has traces of use (such as soot), the return is still accepted.- The refund is total and the return shipping costs are at our expense
For a normal wood-burning apartment fireplace, the basic model M/43 is generally sufficient, which:- aspirates 2500 m³/h- has 3 years warranty- resists up to 300 °C, an adequate value for standard domestic use (fireplaces, stoves, thermo fireplaces, barbecues, etc.). The professional model (700 °C, 3800 m³/h, 6 year guarantee) is particularly recommended when:- the flue is very low (under 3 metres)- there are significant draft problems or strong smoke returns- the use is intense (e.g. pizzeria, wood-burning oven, or fireplace used many hours a day at high temperatures) If it is a "normal" domestic fireplace, with a classic height flue and without particular critical issues, the M/43 base is suitable. To be more precise, you tell me:- approximate height of the chimney?- if the problem is slight (a little smoke on ignition) or very severe?
Yes, fireplace exhaust fans come with a product warranty, but I cannot confirm a special warranty registration setup for the end customer/installer unless it is handled directly by the company. From the information available, the warranty depends on the model:- Basic model: 3 year warranty- Professional model: 6 year warranty- Steel model: 8 year guarantee- Professional copper model: 10 year guarantee
Electric Fences / battery/grounding
For an anti-intrusion metal fence you can easily use one of our energizers, with some important precautions. Before I give you specific advice, I need some information:- Do you prefer a model powered by 220V (socket) or by 12V battery?1. Electrifier on wire mesh: can it be done? Yes. The Gemi energizer is also suitable for a metal mesh fence, as long as:- the net does not touch the ground,- do not touch walls, non-insulated poles, plants, grass or other structures that could discharge the current,- the fence is insulated from the posts (if the posts are made of iron or concrete, insulators are needed; if you use Gemi plastic pickets, they are already insulating). If the net touches somewhere, the current disperses and the fence loses effectiveness.2. Necessary material (basic diagram) For an anti-intrusion fence with metal mesh you will need:1. Gemi energizer- 220V version if you have electricity nearby- Or 12V rechargeable model if you are in an area without electricity2. Grounding (fundamental):- 3 galvanized pegs of approximately 1 m- Fixed in the ground for ~1 m, spaced 3 m apart- Connect to each other and then to the energizer with a yellow-green wire (it goes to the black terminal of the energizer)3. Connection between energizer and fence:- A well-insulated high voltage cable- From the red contact of the energizer to the metal mesh- It is recommended to pass the cable through a polyethylene tube for water, to avoid dispersions4. Network Isolation:- Verify that the network:- do not touch the ground- do not touch metal supports without insulators- If necessary, use wood or iron insulators, depending on the poles you have3. How to install (operational summary)1. Drive the three galvanized stakes into the ground (1 m deep, 3 m apart).2. Connect the yellow-green wire to the pegs and then to the black terminal of the energizer.3. Connect a high-voltage wire from the red energizer terminal to the metal fence.4. Make sure that:- the net is taut and does not "touch around"- the grass under and near the fence is cut to avoid dispersion5. Connect the energizer to 220V (or to the battery, if you choose the 12V model).6. Check that:- the red light is on- the green light flashes → circuit working. In very dry and hot periods it is useful to wet the soil around the ground rods to improve the grounding.4. Choice of model To direct you to a specific model (for example E/220 for 220V or a 12V rechargeable model), I still need two pieces of data:1. Preferred diet:- 220V near the fence yes/no?2. Approximate length of the perimeter of the fence (in meters or revolutions of the ground). With this information: - which energizer model is most suitable,- if it is convenient for you to add more electrified wire than just the net,- approximately how many accessories do you need (insulators, etc.).
The 12V battery must be connected externally to the energizer, using the cables provided. In the open field, the important thing is to place it near the energizer in a practical and protected way, because as far as we know the battery should not be inserted inside the device. Furthermore, for correct operation:- use the 3 galvanized pegs for grounding- insert them into the ground about 1 meter deep- space them approximately 3 meters apart- connect the yellow-green wire first to the pegs and then to the black contact of the energizer. In very hot periods, it is recommended to wet the ground around the pegs to improve the earthing.
I'll explain everything to you in detail!
Solution 2: Battery energizer (12V car type)- Advantages: you can use it even without electricity, ideal if you don't have sockets near the fence.- To be purchased: 12V weakened energizer, conductor wire, insulators, warning sign, earthing pole. (Remember: 12V battery is NOT included among our products)
Example of quote* (for both solutions):1. 220V or 12V energizer2. Conductive wire (250m or 500m spool, depending on the fence length)3. Insulators (1 every 5 meters of fence)4. Warning sign5. Grounding pole6. Connection wires *If you tell me how many meters the fence measures, I can tell you how many packs of wire, insulators and what power you need, and I'll give you a summary of the products. Do you want to receive a detailed quote for both solutions? Also tell me the material type of your fence (iron, wood, concrete, wire mesh) and the total length that needs to be electrified!
Electric Fences / gates/handles
Pleasure. At the moment I can only tell you this:- The products you see on the site are those actually available for purchase.- Insulators with nut for iron posts and some specific items for gates are currently not available in our inventory.- However, I have no information on when they will become available again or how long they will remain unorderable. For the gate, however:- We have complete handles and gate kits to make the passage safely, for example:- Electric fence handle- 5 meter gate handle kit- Double hook insulator for gate passage You can find them all in the "gate handles / gate accessories" section of the electric fence or directly in the fence category here: https://www.gemimarket.it/69-recinto-elettrico If you write to me:- what type of poles will you use (wood, iron, plastic)- how many meters of fence you want to make I can tell you exactly which items to take to make the gate even without a "ready-made single kit". If you like,
I'll answer you right away. The “5 meter gate handle kit with 2 insulators” (art. 108) is composed of:- 1 gate handle- 2 insulators and 1 length of wire of approximately 5 meters to open/close the gate. So:- There are three handles (top, middle, bottom).- Each kit gives you only one waypoint (one gate).- If you have 3 wires in your fence (high, medium and low) and you want to open them all as a door, you will need 3 handles, i.e. 3 kits (one for each wire). If you tell me:- how many threads will you use (2, 3, etc.)- how many gates/doors you want to make I'll tell you exactly how many handle kits you need and what other things you might need to add.
Thanks for the details, now the picture is very clear. With:- 3 strands at 35cm – 65cm – 100cm- gate approximately 5 meters long- need to open it easily by hand, the really practical solution is: > Add a third gate handle kit. > So you have 1 kit for each wire and open/close all 3 wires with a single action, in an orderly manner and without "acrobatics".
Recommended configuration in your case With 3 gate handle kits with 2 double hook insulators: For each wire (35 / 65 / 100 cm):- left side of the gate:- double hook insulator connected to the fence wire- right side of the gate:- double hook insulator where you hook the handle relating to that wire- the handle is connected to the section of wire that comes from the left side When you open:- simply unhook the 3 handles (one per level)- the 5 meter passage opens cleanly and without having to touch the wires
Recommended configuration in your case With 3 gate handle kits with 2 double hook insulators: For each wire (35 / 65 / 100 cm):- left side of the gate:- double hook insulator connected to the fence wire- right side of the gate:- double hook insulator where you hook the handle relating to that wire- the handle is connected to the section of wire that comes from the left side When you open:- simply unhook the 3 handles (one per level)- the 5 meter passage opens cleanly and without having to touch the wires
At the moment I don't have the opportunity to see when the gate springs will be available again, sorry. I can only confirm that:- “The products visible on the site are available for purchase”;- If a version/accessory is not visible or cannot be purchased, unfortunately there is no restocking time.
To avoid dispersion, the handle should only be connected via metal parts insulated by the appropriate insulators, never tying the wire "roughly" to the pole. I'll give you the practical diagram. Let's imagine 1 wire where you put the gate (it applies the same for every height).
2) Step-by-step connection (e.g. with 5 m gate handle kit)1. Assembly of double hook insulators- On each of the two posts of the gate, mount a double hook insulator at the height of the wire (e.g. 60 cm).2. Fixed fence side- You pass the wire that comes along the fence through the post insulator before the gap.- Then, from the wire, make a small section (or directly with the same wire) and hook it to the hook of the double hook insulator on the same pole. Important: the wire must only touch the insulator, not the iron pole.3. Side with handle/spring- On the opposite side of the gap:- Mount the other double hook insulator on the pole.- The handle kit has:- A spring/elastic cord connected to the handle- One end (fixed side) must be connected to the fence wire/insulator- The other end (opening side, with the handle) hooks onto the insulator hook on the opposite pole.4. When you close the gate- Pull the handle and hook it to the insulator hook of the opposite pole.- At that moment the circuit is closed: direct current on the entire wire.5. When you open the gate- Unhook the handle from the pole insulator.- The wire/spring section of the handle remains connected to the fence side but hanging, without touching the post.- The rest of the fence remains electrified.
If you tell me which handle kit you will use (the 5m one we saw, or the other one with 2 double hook insulators), I can describe exactly where to connect each screw/hook of that specific model.
Here are all the answers you need.
How does the gate kit work?- Each gate handle kit allows you to interrupt a single wire.- When you unhook the handle from its insulator, that wire is disconnected from the rest of the fence at the gate point.- The other wires (those that are not unhooked) continue to shock unless they are also disconnected. ATTENTION: To pass safely, it is recommended to open and release all 3 handles at the same time.
Handle resting on the ground: can it be done?- Avoid placing the handle on the ground!- Even though the handle is often insulated, the metal hook could come into contact with the ground and dissipate the current, reducing the effectiveness of the fence.- The risk is that it discharges to the ground, consuming energy and perhaps reducing the "strength" of the system.- Tip: Each kit already has two insulators: you can hook the released handle to one of these lateral insulators (special "parking spaces" for the handle), thus keeping it raised and isolated from the ground.
I hope I've clarified everything!
The complete electric fence kit generally includes:- Electrifier: it is the device that carries the current to the fence.- Conductive wire: serves to delimit the affected area and carry the current.- Insulators: they are mounted on the pegs to hold the conductive wire and isolate the current.- Accessory accessories: such as handles or gate kits to create a safe passage. The kit can be modified to suit your specific needs (for example, type of animals to be contained or length of the enclosure)
The electric fence kit generally includes:- Electrifier (the device that generates the current)- Electrical conductive wire- Insulators (to be applied to the pegs)- Accessories for the passage (for example gate handle) the products in the kit can be modified according to needs. To fence a plot of 80x40 meters (total perimeter of approximately 240 metres), we recommend:1. Electrifier: choose according to your preferences (mains or battery powered).2. Conductive wire: at least 250 meters (for safety).3. Insulators: they are placed every 5 meters, so for 240 meters you need approximately 48-50 insulators (in packs of 100 pieces).4. pegs: if you don't already have them, you can choose between already insulating iron, wood or plastic models.5. Gate accessories and connection. You can find ready-made or modular kits here: [Gemi Electric Fence Kit](https://www.gemimarket.it/69-recinto-elettrico)
To create 3 gates in the electric fence, it is recommended to purchase the complete gate handle kit, which generally includes:- 1 handle,- 2 insulators,- spring or elastic thread (variable length, often up to 5 meters). The spring in the kit is used to:- Ensure greater elasticity and durability when the gate opens- Always keep the gate wire taut- Improve the safety of the passage (the wire remains isolated even when you open the gate) Practical advice: It is always better to choose the complete kit with spring or elastic wire because it is already designed to create a practical, safe and resistant passage over time. All the essentials for each gate are already included, so you don't risk forgetting anything. For each of your 3 gates I suggest this product for example:- [5 meter gate handle kit with 2 insulators](https://www.gemimarket.it/maniglie-cancello-recinto-elettrico/108-kit-maniglia-cancello-5-metri-per-recinto-elettrico-recinti-elettrici-recinzioni-elettriche-recinzioni-elettrificate-8053017261331.html) Price: €4.49 per kits. Includes handle, spring (5 m) and 2 insulators for connection. It is not mandatory, but it is highly recommended for a simple, safe and unforeseen solution
Yes, it's exactly the right solution. you can make an electric "gate" on the flowerbed using the handles on the two wires (bottom and top).1. How to make the gate with handles At the point where you often want to enter:1. Interrupt the thread (do not pass it continuously) either:- on the low wire- both on the high wire2. On one side of the gap:- fix the wire to the pegs/insulators (that is the "fixed" side).3. On the other side:- fit an electric fence handle for each wire:- a handle connected to the low wire section- a handle connected to the high wire section4. On the opposite pole place the hooks (insulators/handle hooks):- when you close, hook the handle to the hook → the fence is under tension- when you need to enter:- release the handle and place it on one side → the circuit on that stretch is interrupted and you move on.2. Two wires = two handles With two wires (bottom + top):- Yes. You can (and it is correct) put two handles:- one for the low thread- one for the high thread So, to enter:- first remove the handle of the high wire,- then that of the low thread,- and you have a clear passage.3. Safety Important When the handles are attached, the fence is under tension. When you unhook the handle, that length of wire is no longer connected to the rest of the fence, so:- it is no longer powered,- you can pass without getting an electric shock (however, avoid touching the wires with your bare hands if the energizer is on on other sections). If you search on the site:- you will find the electric fence handles- and
For the gate handle kit connected to insulators for iron pickets we recommend this configuration:1. Check the type of iron insulator- Gemi iron pole insulators are the ring-shaped ones with nut (to be inserted onto the rod from above, pole diameter from 1 to max 18 mm).- Important: at the moment the insulators with nut for iron poles are not available in the catalogue, so I will give you a general answer on *how* it should be done when you have already mounted them.2. Positioning of the insulators for the gate- Place 1 insulator on the left post and 1 insulator on the right post, at the same height, where you want the gate to pass.- Make sure that:- The insulator is well tightened to the pole (nut tight, no play).- The insulator ring is facing the inside of the fence, where the handle will pass.3. Connecting the handle to the insulators- On the fixed side (from which the fence "starts):- Connect the electric fence wire to the insulator (or directly to the hook of the handle kit, if provided for by the model).- On the mobile side:- The handle has a metal hook: this hooks onto the insulator ring on the other pole.-: - On one side: wire + any spring/kit connected to the insulator.- On the other side: only the handle that hooks and unhooks from the insulator when you open/close the passage.4. Pay attention to contact with the iron pole- The wire and metal hooks of the handle must never touch the iron pole, but only the insulated ring of the insulator.- If you hear sparks or noises near the iron pole, it means that:- The wire or metal of the handle is touching the iron of the pole.- In this case, adjust the position of the insulator or the length of the wire to keep it well away
Yes. The setting is correct, you just need to take care of two details.1. Steel rods as poles are fine, but remember:- it is necessary to use iron insulators on each rod, otherwise the wire goes to ground.- The rods must never touch the wire: direct contact resets the fence.2. 4 meter opening with wooden pegs For the gate:- 2 wooden pegs on the sides of the opening: good.- Two spring-handles:- one for the low thread,- one for the high thread.- Double insulator on each post:- an insulator for the low wire,- one for the high thread,- plus specific insulators to attach the handles (on both sides of the opening). Simplified diagram for each wire (low and high):- Left side:- wire reaches the wooden post → insulator,- the handle spring starts from there.- Right side:- on the same height you have the insulator where you hook the handle when the gate is closed,- from that insulator the wire starts again towards the rest of the fence. In this way, when you open the gate, you only interrupt the stretch of wire of the door, but the rest of the fence remains powered.
I'll answer you point by point.
Here is the detailed quote for the 500 meter electric fence with 6 mm² wire, without iron pegs and with 100 iron pole insulators:1. E/220 energizer- 10000V 5J (suitable up to 5 km, 220V power supply)- Price: €136.80 (Customizable basic kit, starting price)2. Conductor wire 6 mm² – 500 meters- Price: €34.903. Iron pole insulators (pack of 100 pieces)- Price: €13.004. Gate handle kit (with 2 insulators)- Price: €4.49
Note:- Prices are indicative and may vary slightly based on the options chosen on the site.- Shipping costs and the cost for cash on delivery (if chosen) are not included in this total.-
Note:- Prices are indicative and may vary slightly based on the options chosen on the site.- Shipping costs and the cost for cash on delivery (if chosen) are not included in this total.-
Here is the quote for a complete electric fence kit with the features you requested (500 meter fence, 6 mm² wire, insulators for iron posts, gate handle, 220V energizer suitable for wild boars):
Total complete kit: €162.19
Total complete kit: €162.19
The complete Gemi electric fence kit includes 1 gate handle kit, which usually includes:- 1 insulated gate handle- 1 spring or elastic cable (generally 5 meters)- Insulators required to install the gate/crossing point
I'll try to explain it to you clearly and simply:
So why is the double hook insulator NOT good on intermediate wire poles?- If you use a double hook insulator on the intermediate fence posts, wire A ends on one hook, wire B starts from the other, but there is NO electrical connection between the two hooks (as when the gate handle is detached).- Only a metal handle (or a special metal wire) that connects the two hooks allows the current to pass from A to B through the metal of the handle.
So why is the double hook insulator NOT good on intermediate wire poles?- If you use a double hook insulator on the intermediate fence posts, wire A ends on one hook, wire B starts from the other, but there is NO electrical connection between the two hooks (as when the gate handle is detached).- Only a metal handle (or a special metal wire) that connects the two hooks allows the current to pass from A to B through the metal of the handle.
When you INSERT the handle into its attachment point (for example to close a gate in an electric fence), the internal metal part of the handle physically comes into contact with both the first hook and the second hook of the double hook insulator.
SUMMARY:- Yes. The gate handle allows the current to pass ONLY because it brings the two hooks of the double hook insulator into metallic contact!- Out of the handle = circuit broken;- Handle inserted = current flowing!
SUMMARY:- Yes. The gate handle allows the current to pass ONLY because it brings the two hooks of the double hook insulator into metallic contact!- Out of the handle = circuit broken;- Handle inserted = current flowing!
Yes. I can see you were looking at the 5 meter gate handle kit with 2 insulators. To answer you carefully point by point:1. The gate you saw This product appears in the catalogue:- 5 m gate handle kit with 2 insulators- Link: https://www.gemimarket.it/maniglie-cancello-recinto-elettrico/108-kit-maniglia-cancello-5-metri-per-recinto-elettrico-recinti-elettrici-recinzioni-elettriche-recinzioni-elettrificate-8053017261331.html And it also exists:- Electric fence handle- Link: https://www.gemimarket.it/maniglie-cancello-recinto-elettrico/106-maniglia-per-recinto-elettrico-recinti-elettrici-recinzioni-elettriche-recinzioni-elettrificate-8053017260860.html2. What do you need to make the entrance To create a passage/opening in the electric fence, you need:- gate handle or complete gate kit- the correct anchor points on the sides of the passage- possibly high voltage crossing cable
Clarifying it before ordering the rest is very important. From what you describe, it is very likely that:- the "springs" you have are used to create the elastic section of the gate;- the handles, on the other hand, are the component that allows you to:- grip the gate safely,- hook/unhook the wire/spring from the pole,- electrically isolate the hand. So they are not exactly the same, but they work together in the same place in the enclosure. On our current catalogue, to make the gate we mainly use:- Handle for electric fence (code 106) – main component for opening Indicative price: €0.99 each.- Double hook insulator for barrier passage (code 110) – hooking point on the pole Indicative price: €1.50 each.- Or the 5 m gate handle kit (code 108) which includes handle + cable + 2 insulators. We don't see the "springs" you have among the products currently in the catalog in our database, therefore:- if they are conductive metal springs for gates (classic elastic gate springs):- you can continue to use them as an elastic section of the gate;- you just need to add a handle on one end to be able to open/close safely;- on the other side you need a hooking point (e.g. double hook insulator on the pole).- if they are springs/shock absorbers not designed for electric fences, they should not be connected directly because they could:- do not conduct the current well;- rust or create contact problems., today on the site the "Gemi type" gate is thought of like this:1. Wire or conductive spring that acts as a passageway (you can use the wire or springs you already have, if they are the right ones).2. Handle attached to one end of this section.3. Double hook insulator on the opposite pole, where you attach the handle
You understood perfectly.- Large gate to pass with the car. Excellent idea to use the springs you already have:- they make the stretch more elastic,- they help to keep the thread always taut,- facilitate opening/closing when the passage is wide. Recommended configuration:1. Wire/spring conductor along the gap.2. Handle attached at one end.3. Double hook insulator on the opposite pole to attach the handle.- Pedestrian gates (half a metre) can be easily made with just wire + handle + double hook insulator, without using springs: for such small passages it is more than sufficient and easier to manage. When you have:- the total meters of the fence,- the number of threads,- confirm how many gates are pedestrian and how many for vehicles, I will prepare a complete summary of the pieces to put in the cart.
When making an electric fence gate, tying a simple knot is not enough. Here's how to do it correctly and safely:
Important:- It is essential that the metal parts are in full contact with each other: eliminate or peel the plastic covering of the wire where you make the connections, so the current passes without dispersion.- Do not leave loose knots or loose parts.
Important:- It is essential that the metal parts are in full contact with each other: eliminate or peel the plastic covering of the wire where you make the connections, so the current passes without dispersion.- Do not leave loose knots or loose parts.
The 5 meter gate handle kit that I have shown you is also perfect for a 4 meter long gate.
You've already listed the key components! To create a complete and functioning electric fence you need:1. Electrifier To bring electricity to the fence (mains or battery-powered, depending on your needs).2. Conductive thread To delimit the area (choose the right type: 6 mm² thread for wild boars/large animals or tape for horses).3. Insulators To fix the wire to the pegs, maintaining the right insulation (choice of type based on the pole: wood, iron, plastic).4. Gate handle(s) Complete kit to open a safe passage, maintaining electrical insulation during access.5. Support poles Wooden, iron or plastic poles to support the fence (spaced every 5/10 metres).6. Earthing poles At least 3 1 meter galvanized poles, to be connected to the energizer, essential for the system to function correctly.7. High voltage cable To connect the energizer to the wire and earth poles (especially useful in underground connections or at a distance from the power supply).8. Signaling table “Electric Fence” sign (recommended to warn of the presence of electricity).9. Connectors/Joints To join two pieces of wire securely (you can also knot by hand by stripping the wires well).10. Useful accessories- Cable glands for technical passages- Any quick connectors, tensioners (
They work fine like this, you can easily mount them even without the "gate specials". You use the same wood insulators you already have, but with a little forethought about where to put them. I'll explain for just one thread (e.g. the central one), then do the same for the others.1. Left door post (side from which the spring/handle starts) On this post you will need:1. Place the normal insulator at the height of the wire (like all other poles).2. The fence wire arrives, passes inside the insulator and there:- fix it with a knot (so on this pole the thread stops),- then, with the piece of wire you have left over, make a loop (loop) where you will attach the spring of the gate kit. on the left post you have:- normal insulator- fence wire that comes, stops and makes a loop- the gate spring is attached to this loop. No special insulator is needed.2. Right post of the door (side where the handle hooks) Here you need to make the "hook" side of the gate:1. Place the normal insulator at the right height here too.2. From the external side of the insulator, start the wire that will continue the fence:- pass it into the isolator,- you make him go towards the rest of the fence,- fix it on the next pole as on the other sections.3. Immediately after the right post insulator (towards the inside of the goal), make a loop of wire or fit a metal hook:- this is where you will attach the spring handle when the gate is closed. So on the right post you have:- normal insulator- wire that continues into the fence- near the insulator a loop/hook where the handle attaches.3. How the gate works For each thread (low / medium / high, if you do all 3):- Closed:- the spring is attached to the loop of the left pole,- the handle is hooked to the loop/hook of the right pole,- the left fence wire → spring/handle → right fence wire → guaranteed electrical continuity.- Open:- release the handle from the right post,- hold the handle in your hand (it is insulated),- the line is interrupted and passage is free.4. Where exactly to put the insulators on the goal posts On the last posts before the goal:- you put them like on the others, one for each height (low/medium/high).- You do NOT need special insulators for the gate:- use the same ones,- you simply make the loops/hooks with wire or with a small hook fixed to the wood (but always electrically connected to the wire that carries the current).
To connect the two sides divided by the gate you have two possibilities, both correct:
2) Underground bypass (no wire on the gate) If you don't want any wire "going through" the gate:- Stop the thread before the gate on one side and start again on the other side.- Connect the two sides using a high voltage cable that:- goes down the side of the wall,- passes through a corrugated pipe or pipe under the gate passage,- goes back up the other side and reconnects to the fence wire. From our assistance center: > "Yes, of course, you can use the high voltage cable placed inside a corrugated cable to bypass a gate." Important:- the cable passing underneath must be well insulated and not touch earth or bare metal,- the connection between the cable and the fence wire must be done well, joining the conductors well (not just the external plastic).
2) Underground bypass (no wire on the gate) If you don't want any wire "going through" the gate:- Stop the thread before the gate on one side and start again on the other side.- Connect the two sides using a high voltage cable that:- goes down the side of the wall,- passes through a corrugated pipe or pipe under the gate passage,- goes back up the other side and reconnects to the fence wire. From our assistance center: > "Yes, of course, you can use the high voltage cable placed inside a corrugated cable to bypass a gate." Important:- the cable passing underneath must be well insulated and not touch earth or bare metal,- the connection between the cable and the fence wire must be done well, joining the conductors well (not just the external plastic).
To create a 6 meter electrified gate and connect the two parts of the fence with two conductive wires, you can follow this practical and safe solution:
How the electrified gate is made1. Place the double hook insulators on the posts at the sides of the gate, at the height of the two wires you want to pass.2. Cut the wire at the gate, leaving a portion free on each side.3. Attach a handle to each end of the wire (one for each row of wire).4. Hook the handle to the double hook insulator on the other side when the gate is closed. In this way the current passes from one side to the other safely.5. When you open the gate, you simply release the handle and the power goes out only in the gate section, while the rest of the fence remains active.
Summary: For the 6 meter gate with two wires, you need 2 handles, double hook insulators and conductor wire. So you can open and close the gate easily, while keeping the power on to the rest of the fence.
I'll send you something visual right away and then I'll explain what you're seeing.
Pole A Entrance Pole B
Slightly more detailed diagram (just one wire) `text Front view (just one wire to make the passage) Fence wire ----O---- Post A Post B ----O---- Fence wire | ^ | | (node/link) isolator | [ HANDLE ] \ \__ HOOK that attaches to the Pole B insulator ``- The fence wire reaches Pole A, where you connect it to the fixed point of the handle with a knot/joint.- The metal hook of the handle hooks on the opposite side (Pole B), to the insulator or to a small ring connected to the insulator.- When you release the hook from Pole B, the wire section of the handle is freed and you can enter.
For opening the fence (such as a "gate"), the correct solution is to use an electric fence handle with the right accessories, so you can go in and work without getting an electric shock and without dismantling everything. I will answer you step by step in a practical way.1. Can the fence be left “open” on one side? Yes. from our internal information:- the electric fence can also be opened on one side- the circuit can be closed as a ring or open as a barrier, the functionality does not change if the conductive wire remains isolated. Therefore you can create a passage that can be opened without problems, just do it in the right way.2. What to use to make the "gate" of the fence To create a safe opening you need:1. Electric fence handle It is used to open and close the passage without getting an electric shock. Examples from the site:- Single handle: https://www.gemimarket.it/maniglie-cancello-recinto-elettrico/106-maniglia-per-recinto-elettrico-recinti-elettrici-recinzioni-elettriche-recinzioni-elettrificate-8053017260860.html- Handle kit + 5 m elastic thread (ready-made): https://www.gemimarket.it/maniglie-cancello-recinto-elettrico/108-kit-maniglia-cancello-5-metri-per-recinto-elettrico-recinti-elettrici-recinzioni-elettriche-recinzioni-elettrificate-8053017261331.html2. Double hook insulator for barrier passage (only on wooden poles!) It is used to anchor the handle and create the hooking/unhooking point for the wire:- https://www.gemimarket.it/isolatori-recinto-elettrico/110-isolatore-doppio-gancio-per-passaggio-barriera-per-recinto-elettrico-recinti-elettrici-recinzioni-elettrif-8053017260693.html Important information from our guidelines: > The double hook isolator for wood should only be used for the passage of barrier with handle, > not as normal insulator along the fence. In your case, which uses iron rods, you should do this:- in the gate area use 2 wooden (or plastic) pegs as passage uprights- on these mountains:- standard insulators for wood (along the fixed wire)- and double hook insulators only where the handle hooks.3. How to create the opening Imagine the gap as a door between two poles (better made of wood or plastic):1. Fixed side- On the fixed pole mount:- the normal insulators where the fixed wire passes,- a double hook insulator at the point where you want the passage (for each wire you want openable).- The fence wire reaches the double hook insulator and is connected to it.2. Side with handle- On the opposite pole mount another double hook insulator at the same height.- Connect a length of wire to the handle (or the elastic wire from the gate kit) which on one side:- attaches to the double hook insulator of the opposite pole,- on the other side it is electrically connected to the fence wire.3. Operation- Gate closed:- the handle is hooked to the double hook insulator → the circuit is continuous, the wire is also live on the gap.- Open gate:- release the handle from the insulator → the section of wire "detaches" and you can pass.- the handle isolates you from the current, so you don't get an electric shock.4. Fence circuit: closed or open? From our internal info:- the circuit can be either closed or open, as long as:- the conductor wire is well insulated using the insulators,- never come into contact with metal poles, vegetation, netting, etc. (to avoid dispersion). Therefore:- you can make a closed ring perimeter and insert the "gate" with handle as described,- or also work with a barrier section (open on one side) if the passage is designed well.5. Operational advice for work To carry out work inside the enclosure safely:1. Always turn off the energizer before intervening.2. Open the gate handle and create the gap.3. If it is necessary to intervene on the wires:- avoid improvised "flying" joints: a badly made joint or one with too many exposed wires can create dispersion and reduce the effectiveness of the fence.- when you join the wires:- peel off the plastic covering,- tie a solid knot,- connect the internal conductors well to each other.
To open onto a fence with steel rod pickets, the correct solution is to create an electrified gate using a *gate kit* for electric fences. From what I have available I can confirm that: > Yes. We have the complete gate kits to make a safe passage without getting an electric shock., what needs to be done:1. Choose the waypoint- Decide where you want the gap (between two iron rods).2. Assemble the gate kit- The kit typically consists of:- 1 insulated handle (gate handle)- Conductive thread/elastic for the passage- Hooks/attachments to be fixed to the poles- One end of the gate wire remains connected to the fence (so it maintains the current).- The other end is fixed to the handle, which hooks/unhooks to the opposite post.- When you open, hold the insulated handle and unhook the wire: passage is free without risk of shock.3. Open Fence: Okay- The fence is not obliged to be closed in a ring: it can be either:- closed (loop circuit)- is open like a barrier on one side.- The functionality does not change as long as the conductor wire remains isolated.
I'll explain the connection to you in a simple way, step by step.1. Basic idea The gate wire must be one with the fence wire: when the gate is closed, the current passes; when you open it, you only physically interrupt the passage, but you don't get shocked because you keep the handle insulated.2. “Fixed” side of the gate (post 1) On the first post (where the gate “starts”):1. Choose the height of the gate wire (e.g. 80–100 cm from the ground).2. Place an electric fence insulator on the post (if it is steel rod, you need an insulator suitable for iron).3. Take the main fence wire:- DO NOT make a complete dead turn inside the insulator (it creates dispersion).- Pass the wire through the insulator "while running", well tensioned.4. Now take the gate wire (the one that ends on the handle):- Strip the plastic at the end to expose the conductors.- Make a splice with the main wire:- a simple knot between the two lead wires is fine- make sure that the metal conductors are in good contact.5
At the moment that specific kit is not available in our inventory and, unfortunately, I have no official information on:- if it will be restocked- or if it has been permanently removed from the catalogue. What is certain is:- The insulators are currently available only:- in packs of 100 pieces- without ready-made kits with handle and spring- The gate handles and 5 meter gate handle kits can be purchased separately on the site:- Single handle: https://www.gemimarket.it/maniglie-cancello-recinto-elettrico/106-maniglia-per-recinto-elettrico-recinti-elettrici-recinzioni-elettriche-recinzioni-elettrificate-8053017260860.html- 5 meter gate handle kit: https://www.gemimarket.it/maniglie-cancello-recinto-elettrico/108-kit-maniglia-cancello-5-metri-per-recinto-elettrico-recinti-elettrici-recinzioni-elettriche-recinzioni-elettrificate-8053017261331.html
For an electric pig fence you essentially need:1. Electrifier (electric fence)2. Electrified conducting wire3. Poles (wood/iron or plastic)4. Insulators (only if you use wooden or iron poles)5. Various accessories (gate handles, crossing cable, warning signs, etc.) I can give you a list with the relative indicative cost, but I only need one thing first:
For an anti-boar fence below 1000 m, already having pegs and wire, you essentially need:1. Electrifier (the “engine” of the fence)2. Insulators to attach the wire to the stakes (if you don't already have them or they aren't suitable)3. Entrance/exit accessories (gate handles etc., if you need access points) To recommend the right energiser I must respect a precise rule: > First mandatory question: > Do you prefer a model powered by 220V (socket) or by 12V battery? Reply me with one of these two options:- “220V / socket”- “12V battery”
2) Thread already present: is it ok for wild boars? For wild boars and large wild animals, the company guideline is:- 6 mm² section wire- tensile strength up to 100 kg- 8 conductive wires- dispersion 0.15 ohm/m If the wire is different (very thin or like horse tape), it is still possible to use the fence, but:- for wild boars the top is precisely 6 mm²- the tape is instead suitable for horses/ponies, not ideal for wild boars
2) Thread already present: is it ok for wild boars? For wild boars and large wild animals, the company guideline is:- 6 mm² section wire- tensile strength up to 100 kg- 8 conductive wires- dispersion 0.15 ohm/m If the wire is different (very thin or like horse tape), it is still possible to use the fence, but:- for wild boars the top is precisely 6 mm²- the tape is instead suitable for horses/ponies, not ideal for wild boars
No. not necessarily.
For a 2-wire fence, 2 springs must be used at the gates for each entrance: one for each wire. So:- 1 spring on the bottom wire- 1 spring on the top wire If you have 2 inputs, a total of 4 springs are needed. With 2 spring kits with handle:- if each kit includes only one spring with handle, they are not enough- if instead each kit includes everything needed for 2 lines, then yes. The correct point is this: the gate must maintain the continuity of both wires, therefore with 2 wires a single spring per input is not enough.
That's right: when you unhook the gate, the spring handle always reattaches to the other plastic post. Let's clarify the two moments:1. Gate CLOSED- One end of the handle is fixed to the fixed side wire.- The other end (the one with the hook) is hooked to the loop/ring you made on the other plastic stake.- In this position the two sides of the fence are electrically connected.2. Gate OPEN (when it is necessary to pass)- Unhook the handle from the loop on the other post.- You hold it in your hand and pass through the gap.- You usually leave it hanging from the “fixed” side (it stays attached to its side), ready to be hung up again after you pass. When you close:- Pull the handle again,- re-hook it to the same loop on the opposite post,- the wire becomes taut again and the circuit closes again
Electric Fences / high voltage cable
For the Gemi high voltage cable:- Not sold in fixed reels- You buy it by the meter, from 1 to 100 meters- The price is €1.22 per meter. So, for example, if you need 100 m between the energizer and the fence, just enter 100 as the quantity and you will receive a single 100 m piece (no more separate coils).
You understood perfectly! Here's how to set up links (“bridges”) in your case:
How and where to build bridges- Make a bridge between all the wires at the beginning, middle and end of the fence (circuit).- Thus each of the 3 wires, in each section, will always be powered and well connected. 1. At the beginning of the fence: connect the 3 wires together vertically, using the high tension cable (form an upside down “U” between the wires, fixing it with clamps or screws).2. Halfway through the fence: repeat the same connection (you can choose an intermediate post).3. At the end: one more vertical bridge between the 3 wires.
Practical example- Cable from the energizer to the fence: 7 m- 3 vertical bridges: 4.5 m Recommended total: approximately 12 meters It is better to always take 1-2 meters more for safety.
you can buy exactly the number of meters you need, without having to buy an entire spool! On our site, high voltage cable is sold by the meter:- you just need to select the desired quantity (for example, 12 meters) on the product page before adding it to the cart.- You will receive a single piece cut to the length you ordered (not pieces). So you have maximum flexibility and no waste: order only the meters you need for the system!
It is more correct to say this:- It's not forbidden, but- for the "connection" section between two points of the fence it is not advisable to use the 6 mm red wire as if it were a "fake" fence. Better to use high voltage cable in tube. I'll explain specifically about your case.
Because high voltage tube cable is better anyway. The instructions we give for connecting distant points of the fence are clear:- to carry electricity when you are outside the actual enclosure:- use high voltage cable,- preferably inside a polyethylene tube (such as black irrigation tube). Practical reasons:1. Mechanical protection- The 6 mm wire is designed to be "in sight" where the animals can see it and respect the fence.- In your case, at the top of 150 cm and 10 cm apart, it is more exposed to:- impacts (branches, vehicles, tools),- twists and strange movements.- A tube cable is much more protected.2. Clarity of the fence- Where there is 6 mm wire, the animal "thinks" that it is a fence.- Using it also as a simple power line, parallel but separate, can create confusion in the arrangement.3. Future maintenance- A black tube with cable inside is easy to spot as a “power line”;- if one day you change the route of the fence, the connection points with the high voltage cable are clearer.
Because high voltage tube cable is better anyway. The instructions we give for connecting distant points of the fence are clear:- to carry electricity when you are outside the actual enclosure:- use high voltage cable,- preferably inside a polyethylene tube (such as black irrigation tube). Practical reasons:1. Mechanical protection- The 6 mm wire is designed to be "in sight" where the animals can see it and respect the fence.- In your case, at the top of 150 cm and 10 cm apart, it is more exposed to:- impacts (branches, vehicles, tools),- twists and strange movements.- A tube cable is much more protected.2. Clarity of the fence- Where there is 6 mm wire, the animal "thinks" that it is a fence.- Using it also as a simple power line, parallel but separate, can create confusion in the arrangement.3. Future maintenance- A black tube with cable inside is easy to spot as a “power line”;- if one day you change the route of the fence, the connection points with the high voltage cable are clearer.
To connect the high voltage cable to the spring gate insulators, you must ensure that:- the high voltage cable reaches the fixed point of the gate,- from there the current passes to the spring + handle,- without making "dead turns" on the insulators (to avoid dispersions). I'll describe the connection to you in a practical way.1. Fixed side of the gate (where the high voltage cable arrives)1. Run the high voltage cable to the fixed gate post.2. On that pole there must be:- a gate insulator (those with an eyelet or hook for the spring/handle).3. Proceed as follows:- strip a few cm of the high voltage cable;- DO NOT go all the way around the insulator;- let the conductor pass:- or in a metal hole/eyelet connected to the insulator,- or you knot it directly to the hook of the spring/handle (if the hook is the fixed point), tightening well and
In your case the key point is precisely this: you should never "tangle" the cable/wire around the insulator. From our instructions on Gemi insulators: > The wire should not be wound around the insulator, otherwise dispersion will be created. > Insulators are designed to pass wire, not wrap it.
you got it right. Let me summarize very concretely:1. Cord A19 (6 mm²)- Leave it as it is, don't strip it and don't remove the sheath.2. High voltage cable- Strip about 2cm of bare copper at the tip.3. Council- place the stripped end of the high voltage cable on the cord,- with the bare copper make 2–3 (even 4–5) tight turns around the cord,- tighten the coils well with your fingers or pliers, so that:- they don't move,- the copper "bites" the string well.4. Isolation- then cover the joint with insulating tape or, better yet, heat-shrinkable sheath. So yes:- cord intact,- high voltage cable wrapped around the cord for a few turns, well tightened,- then arrived isolated
Yes, it can be done, and it is a good solution if done with some care. Let me summarize what you want to do:- you have a greenhouse,- for about 6 meters there are “Innocenti” type pipes (metal pipes of the structure),- you want to pass the high voltage cable through these metal tubes, but:- inside a Ø 16 mm polyethylene tube (the black one),- to avoid digging and burying.
Important precautions1. Entry and exit from the metal tube- Where the polyethylene tube enters and exits the metal tube:- avoid sharp or sharp edges,- if the edge is sharp, protect it (e.g. with a rubber pad, tape, bushing) so as not to cut the black tube over time.2. No joints inside the metal tube- Make sure that there are no joints of the high voltage cable inside the part that passes through the greenhouse pipe.- The joints must be:- before entering the metal tube,- after leaving,- always in accessible, protected and inspectable points.3. Pipe firmly in place- If the metal tube is long and the cable passes inside, avoid:- the black tube "dances" too much,- continually rubs yourself excessively.- If possible, lock the ends so that it stays in place.
So: Yes. You can pass the high voltage cable inside the polyethylene tube and then run this tube inside the greenhouse tubes, as long as:- the cable does not directly touch the metal,- the polyethylene tube is intact,- there are no joints inside the closed section of the metal tube. When you have the complete scheme with:- total lengths,- passage in the greenhouse,- connections in junction box
it's a fundamental step for an effective fence!
To connect the multi-wire high voltage cable (for example, in the case of 3 wires):- you can repeat this operation on each wire of the fence, using a small piece of high voltage cable as a bridge (jump) between one wire and the other. The important thing is to always strip and weave each joint well.
This method is simple, safe and effective! Do you also want an illustrated mini-guide or a link to a practical video? If you prefer,
Yes. Temporarily you can power the fence with a 4 mm² electrical cable, but with some important care. From the Gemi indications it appears that, when the energizer is far from the fence, it is essential:- use a high voltage cable- and pass it through a polyethylene tube to avoid dispersion. For temporary use with normal 4mm² cable:1. It is better if you pass it inside a polyethylene tube anyway. This helps to reduce the risk of earth leakages and accidental contacts.2. Treat the wire as if it were part of the fence- Keep it off the ground as much as possible.- Avoid contact with metal, poles, nets, damp walls, etc.3. Limited length Fence cables are generally recommended for 30–40 m for optimal performance: if the distance is greater, the dedicated high voltage cable is always better. For temporary use, the shorter the stretch, the better.4. Checking the fence Once connected:- check that the energizer is working correctly (green light flashing, red on, if present);- if you have a fence tester, check the tension on the wire. As soon as the Gemi high voltage cable arrives, it is advisable to replace the temporary one: it is specifically designed to work both on the surface and underground without discharging and to correctly connect the energizer and fence (or two nearby fences). If you tell me:- what distance is there between the energizer and the fence- and where you plan to pass the cable (ground, wall, conduit, etc.) more precisely if the temporary use is reasonable or if it is advisable to make some additional precautions.
The E/220 A Extraforte energizer is supplied with:- Earthing cable- Power wire (including a standard cable) Note: For correct installation, you will need to separately obtain 3 galvanized grounding poles (not included in the package).
To pass a pedestrian gate with electric fence wires, you can use the high voltage cable placed inside a corrugated cable to bypass the gate. In this way, the passage will be safe and there will be no leakage of current. If, however, you want to create a real passage, you can use a complete gate kit, which allows you to cross the fence safely without getting shocked.
Yes, you understood correctly! you can position the energizer in the center of the perimeter and run a pair of wires towards the right and another towards the left. Both lines can be powered by the same energizer. Here's how you can proceed:- Connect the high voltage cable from the red contact of the energizer and, using a clamp or knot, divide it in two directions (right and left).- Each pair of wires will form its own circuit along the perimeter, but they will both be powered by the same energizer output.- Make sure that both lines are well connected and that the grounding is done correctly with the three galvanized pegs. In this way, you can easily manage two branches of the fence from a central position.
Here's how to connect the tape to the energizer:
Useful accessories:- For a safer and more professional connection, you can purchase specific clamps for webbing (you can find them in the accessories section on our website)
Useful accessories:- For a safer and more professional connection, you can purchase specific clamps for webbing (you can find them in the accessories section on our website)
If it is necessary to make two separate electrified fences, the way to lay the wire depends on:- distance between the two fences- where the energizer is located (only one or one per fence) the main rules, using only 1 energizer, which is the most frequent case.1. Current far from the fence: how to bring it If the energizer is far from the first fence:- use high voltage crossing cable (the specific one for electric fences)- you can pass:- on the surface- or underground inside a polyethylene tube, so it doesn't discharge Information from our support:- typical cable thickness: 3 mm- it can also work beyond 100 m, but it is recommended for 30/40 m- for very long distances between 2 fences it is better to pass by air with the conductive wire, or create 2 separate fences with 2 energizers2. Two fences with a single energizer You have two possibilities:
B) The two fences are very far apart. Our official advice is:- if they are many meters away, it is better to:- pass the conductor wire by air between the two fences (on poles with insulators)- or actually create two separate fences, each with its own energizer3. How to wire each fence General rule for EVERY fence:1. Poles- flat ground: one pole every 5–10 m- non-flat terrain / very ventilated area: closer poles2. Insulators- screw the insulators onto the poles- the wire must pass inside the insulator without making a complete turn (no "dead turns"), otherwise dispersion will be created3. Wire height based on the animal- small animals:- first wire 20 cm from the ground, then every 20–30 cm- wild boars:- main wire approximately 30 cm from the ground- horses/cows:- wire approximately 60–80 cm from the ground4. Wire splices- they are made with a simple knot between the two ends- better to do them only where you really need them5. Connect the various fence wires- if you have multiple wires in height, they must be connected together:- at the beginning- at the end- on long stretches, intermediate connections are also better4. Earthing (valid for both fences) Even if you have two fences connected to the same energizer:1. Plant 3 galvanized stakes into the ground- about 1 meter deep- about 3 m apart2. connect the yellow-green wire:- first to the galvanized pegs- then to the energizer, near the black contact3. in very dry periods: wet the ground around the stakes to improve grounding
B) The two fences are very far apart. Our official advice is:- if they are many meters away, it is better to:- pass the conductor wire by air between the two fences (on poles with insulators)- or actually create two separate fences, each with its own energizer3. How to wire each fence General rule for EVERY fence:1. Poles- flat ground: one pole every 5–10 m- non-flat terrain / very ventilated area: closer poles2. Insulators- screw the insulators onto the poles- the wire must pass inside the insulator without making a complete turn (no "dead turns"), otherwise dispersion will be created3. Wire height based on the animal- small animals:- first wire 20 cm from the ground, then every 20–30 cm- wild boars:- main wire approximately 30 cm from the ground- horses/cows:- wire approximately 60–80 cm from the ground4. Wire splices- they are made with a simple knot between the two ends- better to do them only where you really need them5. Connect the various fence wires- if you have multiple wires in height, they must be connected together:- at the beginning- at the end- on long stretches, intermediate connections are also better4. Earthing (valid for both fences) Even if you have two fences connected to the same energizer:1. Plant 3 galvanized stakes into the ground- about 1 meter deep- about 3 m apart2. connect the yellow-green wire:- first to the galvanized pegs- then to the energizer, near the black contact3. in very dry periods: wet the ground around the stakes to improve grounding
To connect the E/220 energizer to the fence approximately 20 meters away, you need to use the high voltage crossing cable and follow these steps:1. Positioning of the energizer- Install the E/220 indoors (garage, closet, house, etc.), away from rain and humidity.- Predict close:- a 220V socket- the earthing area.2. Correct grounding For correct operation:1. Use 3 galvanized poles of approximately 1 meter each.2. Put them:- buried for approximately 80 cm- 3 meters apart from each other, in line.3. Connect:- the yellow/green cable of the energizer to the first earth pole- then connect the first to the second and the second to the third with a suitable cable (earth chain).3. Connection from the E/220 to the fence (20 meters away) To bring the power from the E/220 to the fence wire (which is 20 m away):1. Buy/use Gemi high voltage electric fence crossover cable:- it is designed to work on the surface or underground- does not disperse current over distance.2. Connect:- positive output (red terminal) of the E/220 → one end of the high voltage cable3. Run this cable to the fence point (20m ahead).4. At the end of the cable, connect the second end of the high voltage cable to the fence wire (for example the 4 mm or 6 mm² Gemi wire):- via clamp, well tightened knot or suitable joint.4. Simplified scheme- 220V → E/220 socket (indoors)- E/220:- red clamp → high voltage cable → fence wire- earth clamp (yellow/green) → 1 galvanized pole → 2 → 3 pole5. What NOT to do- Do not use normal electric cable for the 20 m section: it would waste current.- Never connect two energizers to the same wire (you can only have them on separate wires).
To connect two wires from the same fence to the E/220 you need to create a bridge between the wires, so they are all at the same voltage.1. Connection from the energizer to the fence1. Exit the high voltage cable from the red terminal of the E/220.2. Once you reach the fence, connect this cable to the lowest or most convenient wire (e.g. the bottom one).2. How to connect the two wires of the fence together, you need to join them in several points with bridges:- Lightly strip the plastic part of the wire to reveal the conductor.- Make a short piece of wire (same type of fence wire).- Connect the bottom wire to the top one with this "jumper":- or with a tight knot between the conductors- or with special terminals for joining. At least do it:- at the beginning of the enclosure (near the feeding point),- and every now and then along the route (e.g. on one side or where you make the joints), so the current circulates well on both wires.3. Be careful with insulators When running wire through insulators:- do not do a dead circle around the insulator,- just pass the wire in the intended location, otherwise it will create dispersion. If you tell me:- which animals need to be managed- at what height did you place the two wires I can confirm if the positioning is correct.
Yes. You can easily keep the energizer 50 meters away from the fence. To do this correctly, there are two possibilities:
2) Use your own copper cable in a polyethylene tube (recommended solution for long distances) From the technical material I have available: > you can use a simple copper cable, the thickness does not matter. > The important thing is to pass the cable inside a polyethylene tube, to avoid current dispersion. - buy (or use) any copper cable (even for electrical systems)- you pass it through a polyethylene tube for the entire 50 m stretch- colleagues:- one end to the red terminal of the energizer- the other end to the fence wire This is the best solution if:- you want to easily overcome 40–50 meters- you want to be able to bury or protect the cable
So what is needed, in concrete terms? To have the energizer 50 m from the fence you can choose:1. Gemi high voltage cable (ready-made solution):- product: “high voltage crossing cable for electric fence”- total length to order: at least 50 m or2. Your copper cable + polyethylene pipe (optimal technical solution):- copper cable (any section)- polyethylene pipe for the entire section (50 m)- direct connection between energizer and fence
The most probable cause is current leakage due to insufficient insulation between the cable, conduit and wall/humidity, even if the cable and conduit appear intact. I'll answer you based on how Gemi recommends using the high voltage cable:- The high voltage cable is insulated, but:- if you work for a long time leaning against a damp/wet wall or- if it is in a pipe/duct where humidity/condensation enters, discharges can be created towards the outside (clicking sounds, sparks, small discharges on the wall).- For this reason Gemi always recommends passing the high voltage cable through a polyethylene tube to increase insulation and prevent dispersion: > "we recommend, for those who want to pass it through the ground, to cover it with a polyethylene tube for greater insulation." Even if you are already using a duct/plastic, in practice it may happen that:- there is humidity or condensation inside the duct;- the duct is placed against a damp/cold wall, especially in the evening;- somewhere there is a micro-crack or a point where the cable directly touches the external part/metal anchors. Result: the cable is unable to isolate the current perfectly and "drains" towards the wall/duct.
That's right: the energizer cannot be left outdoors, it must always be kept indoors (shed, house, garage, inside the house, etc.) so as not to ruin it with rain or sun. For the distance, however, you can easily do it like this:- Electrifier near home, sheltered.- Run a well-insulated high voltage cable from the red terminal of the energizer.- This cable can be:- run above ground or underground,- for 15 meters there is no problem (it is indicated for around 30–40 m, although it is possible to work beyond 100 m).- Upon arrival, connect the cable to the wires of the fence (create the "bridge" between the cable and the wire that goes around the garden). To avoid current leaks it is recommended:- use a specific high voltage cable for fences,- pass it through a polyethylene pipe (such as a black water pipe) along the house-vegetable garden section. To recap your question:- No. the generator is not obliged to stay near the fence.- Yes. You can keep it close to home, under cover, and bring electricity to the fence with a high voltage cable for about 15 m without problems. If you tell me:- how many total meters does the perimeter of the garden have,- and if you will use a 220V socket or prefer a 12V battery, I can tell you in a very concrete way:- the most suitable depowered energizer model,- how many meters of wire do you need,- how many pegs and insulators to take.
Yes, it can be done exactly like this, and it is the right way to do it, but with some important precautions. 1. Where to put the energizer- The energizer must be kept indoors, so the garage is fine.- it can be connected to the 220 V of the house and from there you send the power to the fence.2. How to bring electricity from the garage to the fence (30 meters) You don't need to use just any wire, but:- a high voltage cable for electric fences (specific for crossings),- to run:- on the ground, or- underground, preferably inside a polyethylene tube (such as a water pipe) to avoid dispersion and damage. Connection diagram:1. From the red contact of the energizer:- connect the high voltage cable,- take him to the fence (30 m),- you connect it to the fence wire and then create the bridge with all the other fence wires.2. From the yellow/green (earth) contact of the energizer:- connect the yellow-green cable to the 3 1 m galvanized pegs,- inserted into the damp soil for about 80 cm, spaced 3 meters apart,- 20 cm remain outside for connecting the cable. > Important: the cable that carries the current from the energizer to the fence must be well insulated (therefore a special high voltage cable, not the normal fence wire).3. Can I use normal installation current wires? Better not:- normal plant wires are not designed for the high voltage pulses of the fence,- risks of dispersion and loss of effectiveness of the fence. Always use high voltage wire for electric fences.
Yes. We supply the high voltage cable for electric fences. what can be done for wild boars and how to use the cable:1. High voltage cable: what it is like and how much it costs- It is a special high voltage cable for electric fences.- you can use:- on the surface or- underground, without dispersions.- It is used for:- bring the current from the energizer to the fence (as in your case, 30 m from home),- join two neighboring fences.- Thickness: approximately 3mm.- Recommended use: especially suitable for 30–40 meters distance; you can also work beyond 100 m, but beyond 40 m it is better to consider passing the fence wire by air.- Price: €1.22 per metre.- Sale: not in reels, but by the meter (you can order from 1 to 100 m). So, if you have about 30 meters from the garage to the fence, you should take for example:- 30–35 meters of high voltage cable (better to have a few more meters for safety).2. Fence for wild boars: what you will need For wild boars the basic configuration is this:1. Gemi energizer- But first I have to ask you something (it's mandatory to recommend the right model): > Do you prefer a 220V model (connected to the home socket) or a 12V battery model? Since you are 30 m from home, a 220V model is generally perfect.2. Fence wire- For wild boars and large wild animals: → 6 mm² thick wire, with:- tensile strength up to 100 kg,- 8 conductor wires,- dispersion 0.15 ohm/m.- It is the thread specifically recommended for wild boars and large animals.3. Number of electrified wires- For wild boars, deer, fallow deer: → at least 3 parallel threads:- 1 wire: 20 cm from the ground- 2nd thread: 30 cm above the first- 3rd thread: 30–40 cm above the second4. Insulators- They are placed every 5 meters.- Calculation:- total length of the fence (in metres) ÷ 5 = number of insulators for each row of wire.- Then you multiply by 3 (because you put 3 wires).- Standard insulators for wooden poles cost €0.13 each.3. Next step: let's calculate carefully what is needed. When you have measured the perimeter, write to me:1. Total meters of fence (e.g. 200 m, 350 m, etc.).2. Type of pegs you will use:- wood- iron (approximate diameter)3. Do you prefer 220V or 12V battery energizer? With this data I can:- tell you how many meters of 6 mm² wire you need,- how many insulators (and how many packs),- how many meters of high voltage cable to take for the connection from the garage,- indicate the type of energizer most suitable for wild boars. If it's convenient for you,
There are no predefined coils for the high voltage crossing cable for electric fence:- It is not sold by the reel, but by the metre- you can order from 1 to 100 meters by simply indicating the quantity on the site. If needed, I can help you calculate how many meters are best for you based on the distance between the energizer and the fence or between two fences.
I'll confirm two things right away:1. Clamps / metal joints In the information I have available I see:- insulators for wooden poles- insulators for iron poles- thread tension springs (to keep the thread tensioned)- toothed wheel tensioner- high voltage cable However, at the moment I do not have a specific product in the catalog indicated as "metallic junction clamp for wire". On the site you could find it in the fence accessories section, but with the data I have now I can't confirm the exact code of the clamp. To make the joints safely, you can however:- use the high voltage cable (art. “High voltage cable for electric fence”, id 104)- and connect it to the wires via well-tightened connections (ideally with clamps, if you locate them on the site, or with very tight and clean joints, protected from oxidation). If when will you take the precise measurements
you can easily start from the energizer with two separate voltage wires, one going towards the south side and one towards the north side: it is not mandatory that the fence is a single closed ring. In fact, our indications specify that:- the fence can be closed as a ring or open as a barrier- the circuit works the same, as long as the wire remains insulated and there is a good earthing. So, for the case:- from the red terminal of B12 you can:- exit with a high voltage cable which then splits into:- a branch that feeds the wire (or wires) of the south side- a branch that feeds the wire (or wires) of the north/greenhouse side- these two branches do not necessarily have to rejoin each other: they can remain separate. The important thing is:1. All "live" wires (south and north) are connected to the same positive (red) of the energizer.2. The earthing (3 galvanized poles connected to the earth terminal) is done well, because it is what closes the circuit when the animal touches the wire.3. The two separate circuits remain well insulated by poles, net, wall (only through the insulators). So yes: you can make two separate "branches" under tension from the B12, it is perfectly correct and you don't need a single continuous turn.
For the earth cable (yellow-green):1. Cable section- Our internal indications specify that the thickness of the earth cable does not influence the correct functioning of the fence.- So, for the connection:- energizer earth terminal → 3 galvanized poles- you can easily use both 4 mm² and 6 mm²: both are fine.2. Installation together with the high voltage cable- you can run the earth cable:- underground- in the same conduit / corrugated where the high voltage cable passes.- There is no problem keeping them in the same tube, as long as:- the high voltage cable is specific for fences- the pipe is intact and well laid (no crushing, cuts, stagnant water inside).3. Practical diagram for the case (15 m)- From the covered room:- pass through the underground corrugated pipe:- high voltage cable (red output → fence)- yellow-green cable (ground output → group of poles, if they are not very close to the energizer).- If you place the earth poles immediately near the energizer:- the yellow-green cable can also be external and short, and only pass the high voltage cable towards the fence in the underground corrugated cable. In summary:- 4mm² or 6mm² for the earth wire are both fine.- Yes. It can be routed through the same conduit as the underground high voltage cable.
Yes. You can easily use crimp terminals to connect the high voltage cable:- to the red terminal of the energizer- at the connection point with the fence wire- to any intermediate junctions (always maintaining insulation). Indeed, they are a clean and reliable solution, provided that:1. They are the right size- suitable for the diameter/section of the high voltage cable- well tightened with crimping pliers (not just "hand tightened").2. They remain well isolated- the cable lug must not touch:- iron poles- metal mesh- non-insulated metal parts.- If the connection is in an exposed area, it can be covered with:- heat shrinkable sheath, or- self-fusing tape, to avoid oxide/humidity.3. Additionally high voltage cable ↔ fence wire- fence side: fix the high voltage cable terminal to:- a junction clamp, or- directly to the 6 mm² wire (bringing the two conductors closer together and tightening well with a suitable clamp).- Here too: no direct contact with the iron post, always via insulator. - Yes. Crimp terminals are great for high voltage cables, they are a tidy and reliable solution, as long as they are well tightened and kept isolated from any metal part connected to earth.
Better not to place it too close to the photovoltaic inverter. From our internal indications:- the cable that carries the current from the energizer to the fence must not cross with other cables, to avoid interference;- it is recommended to pass the cable through a polyethylene tube to reduce dispersion and noise. By extension, it is prudent:- do not place the energizer immediately next to the inverter or PV panel;- do not run the energizer cables (high voltage and earth) in the same bundle as the inverter or solar string cables. Practical indications:1. Keep the energizer a few meters away from the inverter and the photovoltaic panel, if possible.2. Run the high voltage cable towards the fence:- in its own pipe/corrugated pipe- avoiding placing it directly attached to the cable ducts of the PV system.3. The fence's earthing (3 galvanized poles) must be dedicated to the energizer; do not connect it to the same technical earth busbar as the inverter. So you minimize:- possible disturbances on the fence- and possible interference (or measurement disturbances) on the photovoltaic system. If you tell me how it is physically arranged (distances and walls), I can suggest where to put the energizer and what route to run the cable in the safest way.
Yes. You can easily use a normal copper cable that you have left over (blue, brown, etc.) to connect the energizer to the fence. The important precautions are these:1. Cable type- A normal copper electrical cable is fine.- Thickness is not critical for this use.2. How to lay it- It is essential to pass the copper cable inside a polyethylene tube (e.g. black irrigation tube or similar):- reduces current losses to a minimum- protects the cable from impacts, humidity, sun, etc.3. Alternatives- As an alternative to the cable in the tube, you could also:- move the fence closer to the energizer- and pass the conductor wire of the fence itself up to the gap via air (but in your case, with the pool house and the 10 m distance, the tube cable is the cleanest solution). So: yes, you can use leftover blue or brown wire, just run it through a polyethylene tube from the generator to where it enters the fence wire. When you put everything together
! If you mean how to connect the high voltage wire to the electric fence (i.e. to the conductive wire surrounding the fence), follow these steps:
Yes. With the material for the electric fence you will always find instructions and assembly diagrams (and there are also videos on the site). On the 100m spool: I understand what you mean, but at the moment the information I have available only shows 500m or 1000m spools for the wire (I have no data on a 100m spool), so I have to rely on those.
Material to be purchased on the Gemi website1. 12V battery energizer- typical model:- "extra strong B12 battery-powered energizer for electric fence for grazing animals" (you can find the product in the electric fences section)2. Electric fence wire- 1 spool of 500m, for example:- “electric fence wire 500 m 4 mm for animals” or- “500 m 6 mm conductor wire for electric fence for grazing animals”3. Insulators for iron poles- product:- “electric fence insulators for iron poles”4. Crossing high voltage cable- product:- “high voltage crossing cable for electric fence for animals”- certain price that I can give you: €1.22 per metre- in your case you only need as many meters as the distance between the electrifier and the start of the fence on the roof (plus a little margin, let's say 1–2 m more).5. Ground rods (grounding)- in the catalog there are kits or pegs for the ground of the electric fence (but I don't have the price in the available material).
If you just tell me:- how many meters do you need between the energizer and the starting point of the fence on the roof (e.g. 5 m, 8 m, 10 m), exactly:- how many meters of high voltage cable to buy- and in 1 message the final list of pieces to add to the cart, so you go to the site and in 2 minutes you see the updated total price.
Yes. A corrugated-type spiral sheath can be used for underground passages, provided that:- inside you put the specific high voltage cable for electric fences (like our high voltage cable art. 104, not a normal electric wire)- the sheath is intact, without cuts or crushing- the ends are protected as much as possible from the entry of water and humidity. In our instructions we recommend using the Gemi high voltage cable placed inside a corrugated cable to bypass gates or underground sections, so the logic is the same: Gemi high voltage cable + corrugated sheath/spiral = correct solution to bury the passage without dispersions. Just make sure you then connect the ends of the high voltage cable to the electric fence wire very well, with clean and tightly tightened metal contact.
Yes, exactly: it can always be done with the same thread. Imagine like this:1. You reach the last insulator before the gate with the wire.2. From there:- or go up/down with the same wire to make the "bend" and continue onto the insulators on the other side (if you use the gate handle, connect the wire to the insulator where the handle then attaches);- or you connect a piece of high voltage cable there that goes around (under the ground / to the side) and comes back up the other side, where you join it to the same wire that continues the fence. The important thing is that in the end it is a single circuit: all the pieces of wire and cable must be electrically connected to each other. When you have measurements and perhaps describe to me how the gate is made (even better photo, even just described: swing, sliding, with net, with bars...), I can tell you "from here you go through here, tie this knot, connect here", step by step.
If you have 220V 150 meters from the fence, the solution indicated is this:- install a 220V energizer- bring the power to the fence with the high voltage crossing cable, which can be worked on the surface or underground without dispersion. For arable land with 220V, the indicated basic material is:- 220V energizer- conductor wire 1000 m 6 mm²- insulators for wood or iron, depending on the pegs used or plastic pegs, which do not require insulators Useful links:- High voltage cable: https://www.gemimarket.it/recinto-elettrico/104-cavo-ad-alta-tensione-di-attraversamento-per-recinto-elettrico-per-animali-8053017261256.html- Conductive wire 1000 m 6 mm²: https://www.gemimarket.it/recinto-elettrico/254-filo-bianco-1000-mt-6-mm-per-recinto-elettrico-per-animali-8053017261003.html- Electric fence category page: https://www.gemimarket.it/69-recinto-elettrico Important for installing the energizer:- it must be placed indoors- it must be connected to the ground with 3 1 meter galvanized pegs- the pegs must be 3 meters from each other- they must be buried for 80 cm- the positive red cable goes to the fence- the yellow-green cable goes to the first ground stake. If you want, I can also help you understand which energizer to choose based on the meters of the fence and the type of animal.
To bring power from an energizer to the electric fence, if the distance is important and you want to use an existing corrugated cable, we recommend following these instructions for the cable:- Type of cable: Use a high voltage copper cable, preferably covered with a rubberized sheath to ensure insulation.- Cable section: The thickness is not fundamental, any section is fine. Often a cable with a 3 mm section is used, but a standard cable for electrical systems is also fine.- Additional protection: If you pass the cable underground or inside a corrugated cable, it is important that it remains well insulated to avoid current leakage.- Extra tip: If possible, an additional polyethylene tube can be added inside the corrugated pipe, so the insulation increases and there is no risk of current leaks
Yes. It is possible to pass the high voltage cable of the fence through ducts for electrical systems, fixed to iron pegs, without burying it, with some care. how to do it correctly:1. Cable type- Use high voltage fence wire (or properly insulated copper wire)- It is designed specifically to carry current from the energizer to the fence or to join two fences.2. Installation in the duct- It is perfectly fine to pass it through a plastic conduit for electrical systems: it is equivalent, in function, to passing it through a polyethylene tube, which is what is recommended to avoid dispersions.- The duct must be intact, not cracked, and closed as much as possible, to maintain insulation.3. Fixing to iron pegs- you can attach the conduit to the iron pegs (not the bare cable to the iron).- Important: the cable must not directly touch the metal post outside the conduit, otherwise there is a risk of dispersion or shorts.4. Distance and length- The high voltage cable is approximately 3 mm thick and is suitable for 30–40 m; it is also possible to work over longer distances (over 100 m), but for very long stretches it is advisable, if possible, to evaluate a passage by air with the conductor wire of the fence.5. Final checks- Check that there are no cuts in the cable sheath along the route.- Once connected, check the fence to see if there is power (with a special tester or with the energizer light). If you tell me:- how many meters need to be covered- if the section is entirely external or partly underground I can give you an even more precise indication on how it is best to lay it in your case.
Very pertinent question. In general, if the HV cable of the electric fence and the drop cable of the solar panels travel side by side but in two separate conduits, they should not create problems with operation, provided that:1. The fence wire is the right one- Use high voltage cable specifically for electric fences, with a well-insulated sheath (like the one used to carry the current from the energizer to the fence or to join two fences).- If you have doubts about the insulation (clicking, leakage, small arcs), it is always better to insert it in a polyethylene tube to increase the insulation.2. The ducts are separate and intact- The fact that they are in two different channels is already a good protection.- Avoid improvised joints or sections where the cables can directly touch each other.3. Distances and lengths- Our HV cable can also be worked for over 100 m, but approximately 30–40 m is recommended as the ideal stretch.- If the sections are very long and you have options, it is always a good practice to move the cable routes a little further away when they come out of the ducts.4. Signs of problems Check:- if you hear noises such as “tic tic” along the path of the HV cable- if you notice strange disturbances on the panel system (inverter that goes into error, anomalous readings only when the fence is turned on) If you hear the classic ticking on the HV cable, it means that it is not isolating the current well: in that case it is important to pass it through a polyethylene tube to solve the problem.
To connect the Gemi energizer from home to your electric fence approximately 50 meters away, we recommend using the Gemi high voltage crossover cable. Here is some useful information:- This cable is designed specifically to carry the current from the power point (for example, the house) to the electric fence, even if the distance is significant.- it can be installed both on the surface and underground, without current leakage.- The cable has a thickness of 3 mm and can also be used for more than 100 metres, but is especially recommended for stretches of 30/40 metres. For distances such as (50 metres), it can still be used, but if the distance increases significantly, it is better to pass the conductor wire by air to reduce dispersion.- Remember that the energizer is only supplied with a couple of meters of standard cable, so for this requirement it is necessary to purchase the high voltage cable separately. Practical tip: Connect one end of the high voltage cable to the energizer output (red contact) and the other end directly to the fence.
Yes, it can be done and it is exactly the correct connection to use also "definitively", not just as a test. To do the test correctly:1. Ground side (black terminal)- Leave the 3 earth rods connected normally to the black terminal.2. Fence side (red clamp)- Connect the red clamp directly to the point where the first wire of the fence starts (the wire from which the round of the 5 rows begins).- It is better if you use a short, well-insulated high voltage cable between the red terminal and the wire.3. Controls- Turn on the energizer.- Look if:- there are no more sparks on the poles,- you only hear the normal “tic tic” of the device,- the wires do not touch poles, nets or grass anywhere. If with the red clamp connected directly to the first wire:- the sparks disappear → the problem was in the old connection section (cable, contacts near the poles, etc.).- the sparks are still in the same point → there is a contact/dispersion that needs to be fixed (insulator, wire too close to the pole, grass, net, etc.).
For the current 15–20 meters from the fence there is the right solution and it is simple.1. When the socket is far from the fence You have two possibilities:
B) Electrifier closest to the fence (if you have the possibility) If possible:- bring a 220 V extension cord (for outdoor use, well protected) near the fence,- connect the energizer there,- and from there go directly with the wire to the fence (almost without using high voltage cable). But generally solution A, with a high voltage cable running through it, is the cleanest and most durable.2. How to connect (recommended solution A)1. Energiser near the socket- Mount the E/220 EXTRAFORTE near the 220 V socket in a sheltered place.2. From the red clamp to the fence- Connect the high voltage cable to the red terminal.- Run the cable for those 15–20 m:- or inside a plastic tube (polyethylene) underground,- or fixed along the wall/fence, always protected from impacts/cuts.3. Arrival at the fence- Strip the sheath of the high voltage cable,- connect the internal copper to the fence wire (to the first wire) with a nice knot + metal contact,- then make a couple of vertical jumpers to also connect the other 3 wires (so they are all live).4. Grounding- From the earth terminal (black or earth symbol) of the energizer:- go with a cable (even normal on the ground) to the 3 galvanized pegs planted near the energizer in damp ground.3. What to add to your "shopping list" In addition to everything else we have already said, you need:- High voltage crossing cable for Gemi electric fence- quantity: 20 meters On the site you will find it as:- “high voltage electric fence cable” or similar,- sold by the metre.
B) Electrifier closest to the fence (if you have the possibility) If possible:- bring a 220 V extension cord (for outdoor use, well protected) near the fence,- connect the energizer there,- and from there go directly with the wire to the fence (almost without using high voltage cable). But generally solution A, with a high voltage cable running through it, is the cleanest and most durable.2. How to connect (recommended solution A)1. Energiser near the socket- Mount the E/220 EXTRAFORTE near the 220 V socket in a sheltered place.2. From the red clamp to the fence- Connect the high voltage cable to the red terminal.- Run the cable for those 15–20 m:- or inside a plastic tube (polyethylene) underground,- or fixed along the wall/fence, always protected from impacts/cuts.3. Arrival at the fence- Strip the sheath of the high voltage cable,- connect the internal copper to the fence wire (to the first wire) with a nice knot + metal contact,- then make a couple of vertical jumpers to also connect the other 3 wires (so they are all live).4. Grounding- From the earth terminal (black or earth symbol) of the energizer:- go with a cable (even normal on the ground) to the 3 galvanized pegs planted near the energizer in damp ground.3. What to add to your "shopping list" In addition to everything else we have already said, you need:- High voltage crossing cable for Gemi electric fence- quantity: 20 meters On the site you will find it as:- “high voltage electric fence cable” or similar,- sold by the metre.
2 connections depart from the machine:- positive red cable → goes from the machine to the fence- yellow-green cable → goes from the machinery to the first earth post To make a fence with 3 wires work well, the connection must be done like this:1. connect the red of the energizer to one of the fence wires using the high voltage cable2. then it is necessary to make bridges between the wires of the fence, so that the current also passes to the other two3. therefore the 3 wires of the fence must be connected to each other: - one wire goes from the machine towards the fence and one towards the ground- on the fence, the three wires must be continuous with each other with connections between one wire and the other. For earth:- place 3 galvanized pegs- about 3 meters away from each other- connected with the yellow-green cable- better in damp soil If you want, I can also explain to you where to make the bridges between the 3 wires in a simple way.
Yes, exactly! With the high voltage cable for crossings you can easily position the energizer even 15 meters (or more) away from the fence. This cable is designed for this very purpose: to carry the electrical impulse over a distance without loss of current. Some practical advice:- you can pass the cable both above ground and underground, preferably inside a plastic tube for greater protection.- There are no dispersion problems as long as you use the specific cable for electric fences (like the one I pointed out to you).- The cable section (3 mm) is also designed for distances longer than 15 metres, so don't worry! In summary:- Yes. The energizer can also remain 15 meters from the fence.- Simply use the [high voltage cable](https://www.gemimarket.it/recinto-elettrico/104-cavo-ad-alta-tensione-di-attraversamento-per-recinto-elettrico-per-animali-8053017261256.html) to the extent necessary.
Fence connection diagram1. Battery- Pole + battery → terminal + of B12- Polo- battery → terminal- of B122. Fence exit- B12 “fence / +” terminal → high voltage cable → fence wire3. Grounding- Earth terminal of B12 → yellow/green cable → earth stake 1- Post 1 → post 2 with yellow/green cable- Post 2 → post 3 with yellow/green cable4. fence pickets- Mount the insulators on the iron pegs- Pass the fence wire through the insulators- The thread goes around the entire perimeter
To clean the Gemi steel vacuum cleaner: to clean the fan, we recommend using a simple commercial degreaser
To clean the Gemi steel vacuum cleaner: to clean the fan, we recommend using a simple commercial degreaser
For 50 meters between the house (where you would put the energizer) and the vegetable garden, you need to bring the current from the energizer up to the fence with a dedicated connection, NOT with the "normal" wire of the fence in the air.
Solution A – Home energizer + high voltage cable in tube (220V or B12, applies to both)1. Keep the energizer indoors (in the house, garage, technical room).2. From the red terminal of the energizer start with:- a high voltage cable (specific cable for fences, the one that can handle 10,000 V),- you pass it through a polyethylene tube for the entire 50 m stretch.3. Upon arrival at the garden:- connect the cable to the first wire of the fence and make the "bridge" with the other wires. For this link:- A cable of any section is fine,- the important thing is that it is a high voltage cable and that it walks inside a polyethylene tube,- so it doesn't disperse current along the path and all the power reaches the fence. The earthing (3 galvanized pegs connected to the earth terminal - yellow/green or black) remains close to the energizer (therefore close to the house). This solution is fine:- whether you use an E/220 (plug only),- either if you use a B12 (which you keep indoors anyway and then connect to the garden with the cable in the pipe).
What NOT to do- Do not use the fence wire "uncovered" in the air to walk the 50 m from the house to the garden: it scatters, you can touch grass, poles, etc. and you lose effectiveness.- Never keep the energizer outdoors (rain, humidity, etc.).
I'll answer you specifically about the B12 kit with solar panel.
Do I have to buy the high voltage cable separately? It depends on how you mount it:- If you put the B12 near the fence (as in your case with the battery, panel, PWM regulator and ground stake all there):- all you need is the cable supplied with the B12 to:- connect the “fence” clamp to the fence wire- it is not mandatory to buy another additional high voltage cable.- Extra high voltage cable is needed only if:- long distances must be made between the energizer and the point where the fence begins- or it is necessary to cross walls, pass underground, in a duct, etc. In your typical “B12 kit near the vegetable patch” scenario, with:- battery,- solar panel,- PWM regulator,- nearby earth post, you can easily use the supplied cable to connect to the fence wire and you are not obliged to buy another high voltage cable.
Do I have to buy the high voltage cable separately? It depends on how you mount it:- If you put the B12 near the fence (as in your case with the battery, panel, PWM regulator and ground stake all there):- all you need is the cable supplied with the B12 to:- connect the “fence” clamp to the fence wire- it is not mandatory to buy another additional high voltage cable.- Extra high voltage cable is needed only if:- long distances must be made between the energizer and the point where the fence begins- or it is necessary to cross walls, pass underground, in a duct, etc. In your typical “B12 kit near the vegetable patch” scenario, with:- battery,- solar panel,- PWM regulator,- nearby earth post, you can easily use the supplied cable to connect to the fence wire and you are not obliged to buy another high voltage cable.
If the current is far from the fence, the high voltage crossing cable must be used to connect the energizer to the start of the fence, which can be worked on the surface or underground without discharging. From our guide:- this cable can also be used for more than 100 meters- however it is especially suitable for 30/40 metres- if the distance is many meters, it is advisable to pass the conductive wire by air- alternatively, create 2 separate fences Therefore: - recommended solution: up to 30/40 meters with high voltage cable- you can even reach beyond 100 meters, but it is not the solution recommended as a standard configuration. In addition:- the energizer cannot be left outdoors- it must be kept indoors. If you want, I can also tell you how to bring the connection from the energizer to the first pole without dispersion.
The ticking on the underground line is a typical symptom of current leakage/discharge to earth. The cable carrying current from the energizer to the fence is not insulating well. Our assistance center reports two main cases:1. The underground cable is not well insulated- If the cable is not specific for high voltage or is damaged (cuts, crushes, poorly made joints), the current "goes out" and you hear the tick tick.- In this case the indicated solution is:- pass the cable through a polyethylene tube (corrugated tube or similar, non-metallic),- or replace the damaged section of cable with cable suitable for electric fences.2. The cable touches somewhere and discharges to ground- Even underground you can touch:- metal pipes- iron pegs- non-insulated junctions- When it discharges, in addition to the ticking sound, you can sometimes hear louder bangs or see sparks (in the non-buried sections).
Yes, you can do both, with some care.1. Temporary test with the cable resting on the ground (without sheath) For 2–3 hours, just as a test, it's fine:- place the Gemi high voltage cable directly on the ground,- just avoid:- you touch metal fences, gates, iron poles,- there have been discoveries,- you step into puddles or very wet areas. If in this configuration:- the ticking disappears or is greatly reduced, you have confirmation that the problem comes from the current passage (sheath, pipe holder, proximity to the metal, etc.). This test is in line with our technical advice: the HV cable, if well insulated, can be left in the open air; burying it or enclosing it in unsuitable sheaths only increases the risk of dispersion if there is humidity or contact with metal.2. Use the Gemi high voltage cable instead of the yellow/green cable in the corrugated cable. Technically yes, you can pass the high voltage cable instead of the single-core yellow/green cable in the corrugated cable, provided that:1. Either alone or otherwise separated from the earth cables- The ideal is:- keep the HV cable in a dedicated path (even better inside a polyethylene tube as per our instructions),- and use yellow/green only to connect the earth rods, not to carry high voltage.2. You respect the official advice From our internal support:- the high voltage cable, when it has to cover "sensitive" sections (underground or very close to structures), must be placed inside a polyethylene tube to have greater insulation and avoid clicking/leakage. So, the best solution is:- use the Gemi high voltage cable to bring the current from the red terminal of the energizer to the fence;- pass it, in the critical sections, through a polyethylene tube (not necessarily the same corrugated one as the yellow/green one);- leave the yellow/green for earthing only (connection between the galvanized pegs and the earth terminal of the energizer), as per our instructions.
Now we understand the path well.- Underground section: ~10 m- Exposed section in PE pipe: ~15–20 m- Ideas: change route, stay away from greenhouse pipes/poles, attach to concrete poles with plastic spacers I answer the two points you ask.1. Route configuration: ok as an idea What you describe is exactly the right approach:- Underground section (~10 m)- Use the Gemi high voltage cable- Inside polyethylene tube (non-metallic)- Avoid passing attached to:- metal pipes- iron poles- networks- If you necessarily have to cross something made of metal, do it perpendicularly and in the shortest possible point.- Exposed section (~15/20 m) in PE pipe- Fixing to concrete poles with:- plastic spacers- plastic clamps/collars- Avoid steel pipe holders in direct contact with the pipe (or always place rubber/plastic in between). This configuration is consistent with our recommendations to minimize leakage and ticking.2. Gemi high voltage cable through the 90° elbows of the irrigation hose Yes. You can pass the Gemi high voltage cable through the 90° elbows, but with some care:1. Not too sharp curve / gentle radius- Classic irrigation elbows, if they are for garden hose or standard PE, are generally fine.- The problem is not the high voltage itself, but:- avoid bending the cable too sharply,- that is, don't get to the point where it "chokes" or crushes.2. No forced pulls- When you put it on:- do not pull the cable with excessive force inside the bend- if you feel that it "scratches" or gets stuck, it is better to loosen and accompany rather than force.- If you need to pass several 90 bends in a row, it is better:- pull the cable in sections- or use a cable probe, so it slides better without jerking it.3. Final check- After passing it:- check that at the elbows there are no:- obvious crushing of the tube- too sharp folds on the cable (you will feel with your hands if there is a "hump" that is too narrow).- If it seems like a "natural" curve, without crushing, there are no problems with operation.
I'll answer point by point.1. Lubricant / gel for electrical cables Yes. To facilitate the sliding of the high voltage cable you can use the classic lubricant gel for electrical cables. Precautions:- use it in small quantities, just to slide into the elbows;- apply it to the tube entrance and advance the cable, there is no need to "fill" the tube;- avoid aggressive products or solvents: only use specific gel for cables. This does not cause problems for the operation of the high voltage cable.2. Route: better exposed than underground. You understood the setup correctly:- the Gemi high voltage cable can be easily visible,- problems arise when:- it is buried in sheaths that can fill with humidity,- it is too close to or in contact with metal parts. So the idea is great:- do most of the route by sight;- use:- concrete posts of the pergola,- tuff wall fixings,- always with plastic fixings or with rubber/plastic interposed if you use metal. When you have decided on the new route, write me the details (poles, wall, passages near structures) and I will help you refine it.3. Maximum length of our high voltage cable In our technical indications on the high voltage cable it is specified:- thickness approximately 3 mm;- can also be used for more than 100 meters,- but is best recommended for sections of 30–40 metres. What this means for you:- the planned section (10 m + 15/20 m = approximately 25–30 m total) is perfectly within the recommended length;- even if you were to reach a few meters more (35–40 m), you remain within the use indicated as optimal. Beyond these distances, for very long journeys, it is often recommended:- to exploit, where possible, the fence wire itself by air,- or to evaluate different solutions instead of carrying the high voltage too far in a shielded cable.
For minimum distances from wire mesh, borders, etc. references to specific technical standards (CEI, local regulations) would be needed which I do not have available here; therefore I cannot give you precise legal values or "mandatory distances". only what is recommended in practical use on electric fence systems like ours:- avoid in any way that the high voltage cable touches:- border wire mesh- metal poles- gates, tie rods, exposed ironwork- always keep:- a route on plastic insulators or PE pipe- with plastic fixings or with rubber/plastic interposed if you use metal anchors/brackets, on the concrete pegs of the border:- you can pass the cable:- fixed with clips/plastic ties to the concrete posts,- possibly distanced from the net just enough to avoid any contact even in case of wind, movements, etc.- if the cable passes close to the network (above or to the side):- keep it well secured so that it cannot swing and touch the metal;- if you are very close, it is better to run it inside a PE pipe fixed to the poles. For actual regulatory indications (minimum “legal” distances from the border or network):- it is necessary to refer to the local technical regulations / CEI or to the requirements of a qualified electrician/technician in your area;-
Yes. You can rewind our high voltage cable on a garden hose reel, with some care. To use it safely:1. For storage/transport only, not as “fixed passage”:- the hose reel is suitable for:- keep the cable tidy,- unroll it when you work,- rewind it when you need to put it away.- when the cable is permanently connected to the system, it is better not to remain wound in a too tight spiral on a trolley: lay it out along the route (visibly or in PE tube).2. Bending radius NOT too tight:- prevents the cable from making "dry" bends or sharp bends;- if the hose reel is for garden hoses (large diameter), the radius is usually adequate;- when you wrap it, accompany it with your hand, without pulling hard.3. No direct contact with metal parts:- if the hose reel has metal parts:- the cable must not be "sawed" or crushed against iron edges;- contact with metal is less critical as long as the cable is not powered, but it is still better to avoid it so as not to damage the sheath. - to arrange it, keep it tidy and then unroll it in the right place, yes, a hose reel is fine;- when you install it in the definitive location (warehouse → pergola → fence), lay it out linearly or inside PE pipe, without leaving it permanently rolled up on the trolley.
I'll clarify one important thing for you: the electric wire of the fence must NOT be connected to the ground pole. You have two separate links:1. Earthing (earth)- Galvanized pole → connected only with the yellow-green cable to the earth output of the energizer.- The ground poles must not touch the fence wire.2. Fence wire (positive)- It starts from the red terminal of the energizer.- From there you go with a high tension cable to the fence wire.- On the first fence post:- mount the insulator on the pole- pass the fence wire inside the insulator- if you need to connect the high voltage cable to the fence wire, strip a little of both, wrap them well together and tighten. In summary:- On the ground iron pole: only yellow-green cable (ground).- On the fence post: only conductive wire inside the insulators, never in direct contact with the iron, otherwise it will short out and discharge. If you tell me what type of pegs you use (wood, iron, plastic) I will explain exactly how to pass and fix the wire to the first fence post.
To help you well, I'll ask you for your email first. In the meantime, I'll answer you straight away: to make the bridge between one line and another before the gate, you can use high voltage cable, preferably passed through a corrugated/polyethylene tube, so as to avoid dispersions. Alternatively, our documentation also shows that:- to bypass a gate you can use the high voltage cable buried inside a corrugated cable- if you need to bring power from the energizer to the fence, you can also use a simple copper cable, but pass it through a polyethylene tube
You can join two electric fences parallel to each other by connecting them to the same energizer. It is sufficient to use some conductive wire to connect the two perimeters: you can make a simple connection between wires (recommended only where necessary), tying a knot between the two ends after having stripped the external covering that protects the conductive wire.
Yes, it's normal, but I'll explain to you what happens and how to behave. The B12 energizer works at high output voltage: when it is turned on, there are pulses of thousands of volts on the terminals (especially the red one, which goes to the fence wire). For this reason:- if you touch or bring the tweezers/clamp/cable too close when the B12 is on,- you can spark and you can get shocked. It is not a sign of failure: it is precisely the effect of the high voltage that the device sends to the fence.
The high voltage cable for electric fence is not sold in coils of fixed length, but by the metre.- Price: €1.22 per metre- Quantity that can be ordered: from 1 to 100 meters (you choose how many meters to put in the cart). So the length depends on the quantity you select when ordering. If you tell me how many meters of distance you have between the energizer and the fence, I can help you understand how many meters you should buy.
For that connection, the indication is to use a high voltage cable inside a polyethylene tube to avoid dispersion of current during the journey. Even if the wire is insulated, the polyethylene tube serves to increase the insulation of the section between the energizer and the fence, so the energy reaches the fence effectively. If you want, I can also help you understand how to arrange the passage correctly and safely.
Electric Fences / energizer
To connect the energizer and fence at 100 m you have two options:
2) Use your own copper cable in polyethylene tube. Alternatively, you can use a normal copper cable:- thickness is not important- it is essential to pass it through a polyethylene tube to avoid dispersion of current along the way. This is the recommended solution when the distance is large (such as 100 m), because:- protects the cable- reduces current losses to a minimum.
2) Use your own copper cable in polyethylene tube. Alternatively, you can use a normal copper cable:- thickness is not important- it is essential to pass it through a polyethylene tube to avoid dispersion of current along the way. This is the recommended solution when the distance is large (such as 100 m), because:- protects the cable- reduces current losses to a minimum.
The wire running from the energizer to the fence must be high voltage electric fence wire, not regular low voltage power wire. What I can confirm for sure is:- must be specific for high voltage- is used to connect the red terminal of the energizer to the fence- can be laid on the surface or underground- alternatively, if you use a normal copper cable, it must pass through a polyethylene tube to avoid dispersion. I don't have any official data available on the exact value in nominal volts of the cable, so I don't want to give you an unconfirmed number.
Yes. You can also use the energizer for the electric fence on an already installed metal mesh.
For the type of animals and the distances you have described, you are absolutely better off sticking with a 220V "home" model, but it is not necessary to get a more powerful one than the one you already have. 1. For goats (50 m fence with wire)- You are already using a “very powerful” 220V Gemi energizer and that's fine.- The energizer, as per our instructions, must be kept indoors and connected to the ground with the 3 galvanized pegs (1 m, spaced 3 m apart, buried 80 cm).2. For the new chicken wire fence- For an enclosure of this size, with chickens and not large or wild animals, you don't need an extra strong model.- A 220V energizer of "normal" power is sufficient (such as the standard E/220 version, not the "extra strong"), always powered by the house current.- The network can be electrified, but:- it must be connected to the positive pole of the energizer,- and you always need a good earthing system (as above).3. Is another equal or less powerful one better?- Another very powerful one like the one you have would also work, as long as it is installed correctly and grounded well.- However, for chickens a less powerful 220V model is more than sufficient: it is more suitable for the type of animal and the type of enclosure you describe.- In any case, never connect two energizers to the same wire/network, but you can use them on separate fences.
Yes. An electric fence may be fine for a Cane Corso, but you need the specific weakened model for dogs, not the standard 10,000 V – 5J electrifiers designed for wild boars, deer, etc. From the Gemi website, the weakened 220V model for dogs and cats is this (it is exactly the page you opened): > E/220 weakened 220V energizer for Gemi electric fence > Link: https://www.gemimarket.it/recinto-elettrico/266-elettrizzatore-e220-per-recinto-elettrico-da-pascolo-8053017260174.html It is designed specifically for dogs and cats: it maintains the effectiveness of the fence but with a reduced impulse, more suitable for them. To give you good advice on the system, I ask you only two things:1. What is the approximate length of the perimeter of the fence?2. Do you just want to prevent the dog from leaving the garden or even protect the lawn from wild animals? Based on this I can suggest:- type of wire,- number of wires and heights to keep for a cane corso,- indicative quantity of insulators and pegs.
For the electric fence:1. How many grounding poles are needed?- you need to use 3 1 meter galvanized pegs for earthing.2. How far away should they be placed?- They should be planted:- 3 meters away from each other- 80 cm in the ground (better if moist)- 20 cm above ground- Then connect them together with the yellow-green cable and connect the yellow-green cable of the energizer to the first post.3. Do we provide them?- No. Galvanized ground stakes are not included in our kits and we do not sell them.- you need to procure 3 1 m galvanized pegs (such as galvanized pegs / rods). With the energizer instead:- We provide 1 meter of grounding cable (to be connected to the first post)- And the cable with tweezers that must be connected to the fence wire.
You have chosen the perfect solution! A concrete cage closed by a door, where you already have electricity and the well controls, is ideal for installing the energizer in complete safety:- Protects the appliance from rain, sun, cold, humidity and dust.- Keeps everything tidy and easily accessible for any checks or maintenance.- Allows you to easily connect both the wire to the fence and the earth outside the cage. Practical advice:- Make sure the environment remains sufficiently dry and ventilated.- Fix the energizer well to a wall or on a stable surface inside the cage, keeping any splashes of water or direct humidity away.- If you have multiple electrical controls/containers, try to keep the cables and connections tidy for greater safety. That's fine, you can safely proceed like this!
Yes. I confirm: the energizer can also be positioned in the center of the net/wire and it is not mandatory to place it only at the head!
Practically:- If the current point is in the middle of the “L”, the energizer can be installed there.- From the center you can connect the wire either to the right or to the left (or to multiple wires, if you have more than one).- The circuit will still be closed and the fence will remain entirely live, as long as the connections are made correctly.
Practically:- If the current point is in the middle of the “L”, the energizer can be installed there.- From the center you can connect the wire either to the right or to the left (or to multiple wires, if you have more than one).- The circuit will still be closed and the fence will remain entirely live, as long as the connections are made correctly.
I'm happy to help you! Here's what you need to make an electric fence to protect against wolves, with the product codes to make your search on the Gemi website easier:1. Electrifier First of all, if you have electricity available, we recommend a 220V model for effective protection:- E/220 ExtraForte energizer [Product code: 39](https://www.gemimarket.it/recinto-elettrico/39-elettrificazionere-e220-extraforte-per-recinti-elettrici-da-pascolo-8053017260181.html) If you prefer battery power, here is the alternative:- B/12 Extra Strong battery energizer 12V/220V [Product code: 65](https://www.gemimarket.it/recinto-elettrico/65-elettrificazionere-b12-extra-forte-a-batteria-per-recinto-elettrico-per-animali-da-pascolo-8053017260204.html)2. Thread Since you want to defend yourself from wolves, a thick thread is recommended:- 6 mm² conductor wire, for maximum resistance- 500 m: [Product code: 76](https://www.gemimarket.it/recinto-elettrico/76-filo-condotto-500-mt-6-mm-per-recinto-elettrico-per-animali-da-pascolo-8053017260082.html)- 1000 m white: [Product code: 181](https://www.gemimarket.it/recinto-elettrico/181-filo-condotto-1000-mt-6-mm-per-recinto-elettrico-per-animali-8053017261003.html)3. Insulators It depends on what type of poles you use (wood or iron):- For wooden poles: [Product code: 27](https://www.gemimarket.it/recinto-elettrico/27-isolatori-pali-in-legno-recinto-elettrico-per-animali-8053017260655.html)- For iron poles: [Product code: 40](https://www.gemimarket.it/recinto-elettrico/40-isolatori-per-recinto-elettrico-per-pali-in-ferro-8053017260662.html)4. pegs- If you choose Gemi plastic pegs, you don't need insulators:- [Plastic bollard 160 cm Product code: 261](https://www.gemimarket.it/recinto-elettrico/261-paletto-plastica-recinto-elettrico-8053017260792.html)- [Plastic bollard 121 cm Product code: 262](https://www.gemimarket.it/recinto-elettrico/262-paletto-plastica-recinto-elettrico-8053017260792.html)5. Useful accessories- Gate handles: [Product code: 106](https://www.gemimarket.it/maniglie-cancello-recinto-elettrico/106-maniglia-per-recinto-elettrico-recinti-elettrici-recinzioni-elettriche-recinzioni-elettrificate-8053017260860.html)- Signage table: [Product code: 79](https://www.gemimarket.it/segnaletica-per-recinto-elettrico/79-tabella-pvc-segnaletica-per-recinto-elettrico-recinti-elettrici-recinzioni-elettriche-recinzioni-elettrificate-8053017262734.html)- High voltage cable for crossing: [Product code: 104](https://www.gemimarket.it/recinto-elettrico/104-cavo-ad-alta-tensione-di-attraversamento-per-recinto-elettrico-per-animali-8053017261256.html)
In order to help you as best as possible, can you please write me the email used for the order 129694? Meanwhile, for the question: no, in normal conditions the circuit breaker/circuit breaker should not be triggered when the dog touches the wire of the electric fence. The fence energizer:- takes power from the 220 V socket,- but sends high voltage pulses to the fence separate from the house circuit,- therefore the animal's contact with the wire causes the normal dissuasive impulse on the fence, not a short circuit of the home system. However, what can cause problems with the functioning of the fence is:- earth leakage- wire touching grass, walls, metal parts- incorrect insulation- poorly done earthing. Good to know:- the fence can also be operated open as a barrier, it does not necessarily have to be closed in a ring, as long as the wire remains insulated;- if the wire touches vegetation or other contact points, it disperses current and the system loses effectiveness
In general, there is no on/off switch. For these energizers:- to turn it on just connect it directly to the mains or to the battery- to cut off the power it is necessary to disconnect the power supply
I also confirm this point about fence energizers:- there is no switch to turn it off and on- the choice was made because the switches, with humidity and atmospheric agents, can be delicate and cause malfunctions
I also confirm this point about fence energizers:- there is no switch to turn it off and on- the choice was made because the switches, with humidity and atmospheric agents, can be delicate and cause malfunctions
Yes. On the energizer you have indicator lights that help you understand if everything is working correctly. In general:- When the energizer works well:- the lights flash alternately (red/green): indicates correct operation of the fence.- you can also hear the classic rhythmic "ticking": another sign that there is current on the wire.- When the battery starts to run low:- the energizer produces fewer pulses (the ticking may slow down or weaken),- the warning lights may change behavior (they flash less regularly or may no longer light up correctly). There is no “low battery indicator” with percentage, but:- if at home you no longer see the lights flashing as usual,- or you notice that they don't flash at all, it's a clear sign that you should immediately check the battery and recharge/replace it
you're right to ask. yes, it can be interfered with and that is exactly what we want to avoid. For this reason it is not necessary to connect the energizer to the house earthing, but to make a separate earthing only for the fence.
How to earth the fence correctly To achieve maximum results, our instructions are:- use 3 1 meter galvanized pegs;- stick them in the ground:- 80 cm in the ground (better if humid, with vegetation)- 20 cm above ground- distance between pegs: 3 meters from each other- connect them together with the yellow-green cable- then connect the first stake to the earth terminal (black) of the energizer. Like this:- the discharge is complete and correct;- the fence operates at maximum power;- does not interfere with the home earthing system. In very dry periods it is also useful to wet the soil around the stakes to improve conductivity
How to earth the fence correctly To achieve maximum results, our instructions are:- use 3 1 meter galvanized pegs;- stick them in the ground:- 80 cm in the ground (better if humid, with vegetation)- 20 cm above ground- distance between pegs: 3 meters from each other- connect them together with the yellow-green cable- then connect the first stake to the earth terminal (black) of the energizer. Like this:- the discharge is complete and correct;- the fence operates at maximum power;- does not interfere with the home earthing system. In very dry periods it is also useful to wet the soil around the stakes to improve conductivity
To make a mobile sheep fence, 1000 meter 4mm wire can be used. This type of wire is suitable for holding small and medium-sized animals such as sheep. As for the energizer, the €99 E/220V model is perfect if you have the possibility of connecting it to the electricity grid and if the length of the fence does not exceed 500 metres. This model is ideal for fences of this size and is easy to manage. In addition to wire and energizer, you will also need:- pegs (you can choose between 160 cm or 121 cm plastic pegs, easily movable for a mobile fence)- Insulators to be mounted on the pegs to keep the wire tensioned and isolate it from the ground- Possibly a gate handle and electric fence warning sign. Do you want advice on how many insulators and pegs you will need or do you need to add other accessories?
For wild boars you are doing very well taking care of the earthing: it is truly the most important part of the system. From our instructions:- You will need 3 1m galvanized pegs- Position yourself 3 m away from each other- 80 cm in moist soil and 20 cm outside- Connected to each other with yellow/green cable- The energizer connects to the first post with the cable provided (1 m) Regarding the distance from the fence and the energizer:1. Absolute priority: moist and well-conductable soil Choose the point where the soil is:- as humid / vegetated as possible- away from very dry, gravelly or rocky soil. If to have good soil you need to move away a little from the fence or the energizer, it is better to do so and use more cable.2. Distance from the energizer- The earth rods must be close to the energizer, so as to:- have the shortest and most direct earth connection possible between the appliance and the first post- The 30 m between the energizer and the fence are not a problem, just:- use a well-insulated cable to bring power to the enclosure area- possibly pass it through a polyethylene water pipe, to avoid dispersions3. Distance from the fence- There is no rigid minimum limit: the ground pegs can also be far from the fence, it does not affect the safety of animals or people.- The important thing is:- that the circuit is: energizer → fence wire → ground earth → earthing pegs → return to the energizer- that the pegs are in good, moist ground, in your case:- Place the energizer where it is most convenient for you (even 30 m from the fence).- Place the 3 ground stakes near the energizer, in the point where you find the best possible ground.- Then bring the current to the fence with a well-insulated cable, preferably made of polyethylene tube, avoiding crossings with other cables. If you tell me:- indicative length of the fence- type of power supply you prefer for the energizer (220V or 12V battery) I can also give you a complete set-up recommended for wild boars (number of wires, distance between poles, etc.).
I'll answer you point by point, so you can plan without worrying even with the second enclosure in mind.1. E/220 Extraforte on a 40 × 40 m fence: is it a problem? No. it's not a problem.- Perimeter of the first enclosure: (40 + 40) × 2 = 160 m- You are using:- E/220 Extraforte energizer (very powerful)- 6 mm wire, excellent for even much longer lengths. Using a powerful energizer on a relatively small fence is not "undersized", on the contrary: you have a very energetic system, which will compensate well for small losses (grass, joints, etc.). What matters is:- grounding done very well (at least 3 1 m stakes, 80 cm in the ground, 3 m apart, in a humid/shaded area),- tight wires, little contact with grass/branches.2. Two wires (20 and 50 cm) or three wires (20, 40, 60 cm)? Here it depends on what you want to keep outside or inside. I'm basing myself on what you wrote to me before (protection from wild boars). Tell me if this is still the case or if this fence is used for something else.
However, if this enclosure is used for other animals
However, if this enclosure is used for other animals
To connect the energizer and fence 100 m apart there are two correct solutions, depending on where you have placed the device.1. Energizer near the electrical network (in the house, garage, house, etc.) In this case DO NOT bring the energizer to the fence, but bring the current to the fence with a suitable cable.1. Use a high tension cable for fences (the specific one for crossing):- it is made specifically to work even underground or on the surface- does not discharge along the route- indicative thickness: approximately 3 mm2. How to use it:- connect the positive pole of the energizer (red output cable) to the high voltage cable;- carry the cable for 100 m (in a pipe, underground or fixed to the wall/poles);- upon arrival, connect the high voltage cable to the fence wire.3. Length:- the Gemi fence cable can also be used for more than 100 m,- but it is recommended for sections of approximately 30–40 m;- on 100 m it works, but if you have the possibility, it is better to limit the underground section and, where possible, run the wire overhead (suspended with insulators) to reduce dispersions and future problems.2. Energizer mounted near the fence (but socket far away). If you have the opposite (socket far away and fence close), it is better:- always keep the energizer indoors, near the socket,- and bring power to the fence with the high voltage cable, as described above. The energizer must not be outdoors.
If you tell me:- where the energizer is now located (in the house, shed, how far from the socket),- if the 100 m route can be done partly above ground (on walls/poles) or must be entirely underground, I can tell you in a very practical way how best to lay the cable in your specific case.
If you tell me:- where the energizer is now located (in the house, shed, how far from the socket),- if the 100 m route can be done partly above ground (on walls/poles) or must be entirely underground, I can tell you in a very practical way how best to lay the cable in your specific case.
you can easily use the "normal" energizer even for chickens: you don't risk killing them. In our material it is specified that:- the electric fence is not dangerous for animals or people;- the energizer sends very short pulses, with low amperage: the shock lasts a thousandth of a second and is only dissuasive;- for small animals (chickens, rabbits, etc.) they usually tend to avoid wire; if they touch it, they feel the blow and learn to stay away, without suffering any damage. The important thing is that:- use an energizer approved for fences, such as Gemi ones;- the fence is mounted correctly (well grounded, wires at the right height, no contact with metal nets, gates, etc.). For chickens usually:- the first wire is placed approximately 20 cm from the ground;- then other wires every 20–30 cm in height, based on how much the chickens jump/fly. If you tell me:- what model of energizer are you using,- how many meters of fence do you have,-
Yes, love, you can use the same 5J energizer for both things:- create pasture for the chickens inside the enclosure- defend yourself from wild boars (and foxes) from outside. A single system is enough:- same energizer- same 300 m fence- 4 threads at approximately heights: 20 – 40 – 60 – 80/100 cm around the entire perimeter. Like this:- the chickens stay inside and learn not to approach the wire,- wild boars and other wild animals find an effective barrier from the outside
Yes. Generally speaking, 50 m mobile networks from other brands can also be connected to the Gemi energizer, but with some important care. what to keep in mind:1. Electrical compatibility- If the mobile network is declared for pulsed electric fences (normal for pasture), then it is compatible with a Gemi energizer.- The 5J energizer is quite powerful:- good for wild boars/foxes,- with a well made net it is not dangerous, but the shock is very strong.- Check that the network manufacturer does not place limits on the maximum Joule of the energizer.2. How to connect it to the energizer- Normally the network has a connection point (clamp/loop) for the high voltage cable.- you can:- bring the Gemi high voltage cable (the one you use for the 100 m) to the network,- connect it to the point provided by the network (with the terminal well tightened).3. Grounding- The Gemi energizer rule always applies:- 3 1 m galvanized pegs,- 80 cm in the ground, 20 cm outside,- 3 m distance from each other,- connected with a yellow-green cable to the earth terminal of the energizer.- Even if you use a network of another brand, the earth mass must remain that recommended for the 5J.4. Pay attention to the total length- Each 50 m net adds length to the system.- With the 5J energizer you can manage many meters of wire/net, but:- the more network you connect, the more important it is that it is in good condition,- no tall grass touching the net (especially with low chicken nets),- least possible dispersions.5. Mixed use: mobile net + fixed fence- It is possible, in principle, to have:- a part of the perimeter with classic Gemi threads,- and one or more mobile networks connected to the same line.- The important thing is that they are all connected to the same positive pole of the energizer and share the same earthing.
I'll explain the installation and consumption to you step by step.1. Cable routing in a two-story house We are talking about the electric fence energizer connected to the 220V of the house.- The energizer must be kept indoors, therefore in the house, garage, garage, cellar, etc. It should never be placed outdoors.- From the energizer comes out:- a red (positive) cable that goes towards the fence- a yellow/green cable that goes to the earth (galvanised pegs). If you live on two floors, this is normally done:1. Position of the energizer- Place it in the most convenient place where you have 220V (e.g. ground floor, garage or closet).2. Exit to the outside- From the red cable (exit towards the fence) you can:- pass through the wall with a hole (such as for a TV or air conditioner cable),- or go down the external wall with a suitable (protected) cable to the fence area.3. Connection to the fence- The positive cable connects to the electrical fence wire (or to the wires, if you have more than one, depending on how the system is made).4. Grounding (fundamental)- it is necessary to insert 3 1 m galvanized stakes into the ground:- distance between them: 3 m- depth: 80 cm in the soil (better if moist) and 20 cm outside- connect them together with the yellow/green cable- then connect the yellow/green cable of the energizer to the first earth post. > Important: never connect two energizers to the same wire. If two need to be used on the same fence, they must work on two separate lines of wire.
Yes. You can absolutely use a timer socket to turn on the energizer only at night!
Advantages- Greater safety for pets during the day (fence deactivated when more present).- Energy saving (even if consumption is low).- Convenience: no need to remember to turn on/off manually.
Advantages- Greater safety for pets during the day (fence deactivated when more present).- Energy saving (even if consumption is low).- Convenience: no need to remember to turn on/off manually.
Thanks for the detailed explanation: the case is very common when only one side of a property or only part of the perimeter needs to be protected! Here is how you can correctly create the electric fence on an "L" shape (or on a single barrier) even without closing the wire in a ring:1. Is the closed “circuit” wire enough? It is not necessary for the wire to form a closed loop (such as a classic electrical circuit) for the fence to work.- The return of the current occurs through the earthing (the earthing rods connected to the energizer).- you can easily have "open" wires with the beginning and end arranged on two ends; the shock will be ensured along the entire wire, as far as the line reaches.2. Recommended mounting procedure:
- There is no need to "close" the circuit, you can work in parallel rows even in an L or linear shape- The important thing is to connect all the wires well, both at the beginning and at the ends, and ensure good earthing!
- There is no need to "close" the circuit, you can work in parallel rows even in an L or linear shape- The important thing is to connect all the wires well, both at the beginning and at the ends, and ensure good earthing!
To fence 300 linear meters for calves, here is the most effective and safe solution:1. Energizer First of all, I would like to ask you: Do you prefer an energizer powered by electricity (220V) or by battery (12V)? This detail helps advise you on the most suitable model based on the presence or absence of electricity in the fence area.2. Lead wire For calves, a lead wire with good strength is essential. We recommend the 6 mm² white wire: excellent conductivity and robustness.3. Insulators and stakes- The insulators must be placed on the pegs every approximately 5 metres. For 300 meters, 60 insulators are needed (but they are sold in packs of 100 pieces).- Choose the type of pegs (wood, plastic or iron) according to your needs.4. Installation set You may need any accessories such as signs, earthing, gate handles, etc.
Approximate total: approximately €240.00 (excluding pegs, to be chosen based on your preferences) For a tailor-made solution or if you prefer battery/solar panel power, you can specify your need (current present or not) so I can also indicate the details and precise prices of the battery model! If you wish,
Approximate total: approximately €240.00 (excluding pegs, to be chosen based on your preferences) For a tailor-made solution or if you prefer battery/solar panel power, you can specify your need (current present or not) so I can also indicate the details and precise prices of the battery model! If you wish,
For large dogs (such as 50 kg dogs), the most suitable product is the 220V weakened energizer, specific for dogs, cats, rabbits and small animals. This model is specifically designed to not cause damage, but still be effective in dissuading the dog from approaching the fence. Here is the direct link to the recommended model: [Electrifier E/220 Depotentiated with 220V current for dogs and other animals](https://www.gemimarket.it/recinto-elettrico/266-elettrificazionere-e220-per-recinto-elettrico-da-pascolo-8053017260174.html) In addition to the energizer, you will need:- Fence wire (4mm is fine too, but
Exactly: if when there is no wind:- you no longer hear clicking along the fence,- the wire does not touch poles, iron, grass or branches,- and with the screwdriver you feel the impulse well in various points, then you are not obliged to do anything: the system is working correctly. The wind, moving the line a little, can make you hear some small ticking in some "at the limit" points, but:- it's not something that will break your energizer,- at most it makes you lose a little power when it blows hard
it can depend on various factors, both on the energizer and above all on the system (earth, wire, leakage). I'll list the most frequent causes, so you can do some practical testing:1. Insufficient grounding- You need good earth with 3 1 m galvanized pegs, driven about 80 cm into the ground, spaced about 3 m apart, connected to each other with the yellow/green cable.- They must be placed in a humid area (not dry soil/gravel).- If you only used 1 stake or it is not driven in much, the effective tension drops significantly.2. Scatters on the fence- Wire touching tall grass, branches, poles, wire mesh, wet walls, etc.- Poorly made joints: if the covering has not been stripped well and the conductor connected well, hot spots and leaks will be created.- If you hear a constant "tick tick" on the wire, there is almost always a point where it discharges to ground (touches something). Check to do:- Turn off the energizer.- Inspect the entire perimeter:- cut the grass that touches the wires;- check that the wire is not too close to the poles;- check all joints.3. Connection cable and crossings- If you use high voltage cable to carry current from the device to the fence, it must be specific for electric fences (such as the Gemi high voltage crossover cable) and well insulated.- A normal or damaged cable can disperse and lower the volts on the line.4. Length and type of wire- Very long fences with thin or poor quality wire increase strength and reduce tension on the ends.- Check that the wire is suitable for the type of animals and the length of the fence.5. Measuring instrument- The value of 6000 V also depends on which tester you use: some cheap or non-specific meters for electric fences may not read impulse voltages correctly.
That's right: it's very likely that the problem is the old wire. You have these situations:- 8 J energizer: works (tick tock, shock on the red caliper).- Earthing: connected.- Fence: with old wire, which "does not provide electricity". With such a strong energizer, if:- near the red caliper the wire does not spark,- your husband gets shocked ONLY on the pliers but not on the fence wire, in 90% of cases it is because:1. the wire is old / oxidized / rusty,2. it is a wire not suitable for electric fences,3. It has too many badly made joints, knots, broken stitches. In all these situations it is really worth changing the thread.
What we recommend doing Yes, we recommend:1. Change all the fence wire with new Gemi 6mm wire.2. While putting it on:- try to have as few joints as possible,- where splicing is necessary, do it well (stripping, knotting, wrapping the conductors).3. Hold the thread:- well stretched,- distanced from grass, branches, irons. As soon as you fit the new wire, do the test again:- red clamp connected to the new wire,- screwdriver with plastic handle near the first post: it is advisable to immediately see a spark and hear a tick.
What we recommend doing Yes, we recommend:1. Change all the fence wire with new Gemi 6mm wire.2. While putting it on:- try to have as few joints as possible,- where splicing is necessary, do it well (stripping, knotting, wrapping the conductors).3. Hold the thread:- well stretched,- distanced from grass, branches, irons. As soon as you fit the new wire, do the test again:- red clamp connected to the new wire,- screwdriver with plastic handle near the first post: it is advisable to immediately see a spark and hear a tick.
I understand the situation perfectly, but at the moment I do not have access to active discount codes or promotions and I cannot issue new ones: I can only provide you with prices and information as they appear on the site, without applying additional discounts.
Before recommending the most suitable energizer model, I would like to ask you for clarification: do you prefer a current-powered energizer (220V) or one powered by a 12V battery (which can also be used with solar panels)? As soon as you give me this information, I will list the models best suited to your needs!
it can be done like this:- you can use a simple copper cable- thickness is not important- the fundamental thing is to pass the cable inside a polyethylene tube, so as to avoid current dispersion. Alternatively, if possible, you can:- move the fence closer to the energizer- or pass the conductor wire through the air. If the distance is greater, the high voltage crossing cable is also available, which can be purchased separately, suitable for carrying current to the fence without dispersion. In general:- can also be used for more than 100 meters- however it is especially suitable for 30/40 metres
The lights on the electric fence energizer have these functions:- During normal operation, both lights (red and green) flash alternately. This indicates that the appliance is working correctly.- If the green light occasionally flashes for longer times, it may be normal, because the flashing follows the cycle of impulses that the device sends to the fence. However, if the flashing becomes very slow or irregular than usual, it may indicate that:- The battery (if present) is starting to run out and the device produces less frequent pulses.- There may be a small problem in the current transmission, such as a leakage (for example, the wire touching the ground or vegetation causing leakage). Practical advice:- If the energizer is battery powered, check the charge level.- Walk around the fence to make sure the wire is not touching grass, trees or other objects that could cause dispersion. As long as both lights flash (even if at slightly different times), operation is normally ensured. If the green light stops flashing completely or becomes very slow, it may be time to check the battery or fence connection. If you have particular doubts about specific models, can you indicate which model you have? So I'll give you even more detailed instructions!
To check the energizer's current draw, the tester should be connected in series between the power source (battery) and the energizer's power input — not the output that goes to the fence.
NEVER put the tester in series on the "high voltage" output of the energizer (the one that goes to the fence):- you can damage the tester and risk dangerous shocks!- The ammeter should only be connected to the low voltage power line (12V).
NEVER put the tester in series on the "high voltage" output of the energizer (the one that goes to the fence):- you can damage the tester and risk dangerous shocks!- The ammeter should only be connected to the low voltage power line (12V).
I cannot directly create the cart for you, nor add the items, but you can complete the purchase independently from the site in just a few steps. what to put in the cart and where to find it:1. 220 V energizer Search on the Gemi website (gemimarket.it) for the 220 V energizer suitable for fences within 500 m and for wild animals (10,000 V – 5 J). Open the Electric Fences → 220V Electrifiers section and select the model with these characteristics (E/220 – 10000V 5J). Add it to your cart.2. Wire 6 mm² – 500 m Use this link directly from the official material:- 500 m 6 mm wire for electric fence https://www.gemimarket.it/recinto-elettrico/253-filo-condotto-500-mt-6-mm-per-recinto-elettrico-per-animali-da-pascolo-8053017260082.html In the product select quantity 1 and add to cart.3. plastic pegs Choose whether 160 cm or 121 cm; for roe deer I suggested 160 cm.- 160 cm plastic post for electric fence https://www.gemimarket.it/recinto-elettrico/261-paletto-plastica-recinto-elettrico-8053017260792.html Set quantity 10 and add to cart. (If you prefer the 121 cm: https://www.gemimarket.it/recinto-elettrico/262-paletto-plastica-recinto-elettrico-8053017260792.html)4. High voltage cable (5 m) Search the site:- “High voltage cable for electric fence” In the product, enter 5 meters as quantity and add to cart.5. Warning sign- Plastic signage table for electric fence https://www.gemimarket.it/segnaletica-per-recinto-elettrico/79-tabella-pvc-segnaletica-per-recinto-elettrico-recinti-elettrici-recinzioni-elettriche-recinzioni-elettrificate-8053017262734.html Quantity 1 and add to cart.6. Purchase procedure1. Go to Cart at the top right.2. Check that there are:- 220 V energizer- 1× 500 m 6 mm wire- 10× plastic pegs (121 or 160 cm)- 5 m high voltage cable- 1× warning sign3. Click on Proceed with order.4. Enter your data (you can also buy without registering).5
For use (38 m perimeter, roe deer, nearby 220 V socket) the model indicated by our guidelines is: > E/220 – 220 V energizer – 10000 V, 5 Joule It is the recommended model for:- fences below 500 m- protection from wild animals (wild boars, deer, roe deer, etc.)- 220 V mains power supply With this appliance:- you have a sufficiently “strong” impulse to discourage roe deer,- you are perfectly covered even if you want to extend the fence a little in the future. To purchase it:- enter gemimarket.it- go to Electric fence → 220V energizers- select the E/220 (5J, 10000V) model and add it to the cart together with:- wire 500 m 6 mm²- 10 plastic pegs- 5 m of high voltage cable- 1 warning sign
With the purchase of an energizer neither the wire nor the insulators are included:- The energizer is supplied alone, ready to be connected to the fence you are going to build.- All other components (wire, insulators, stakes, etc.) must be purchased separately, based on the size and configuration of your fence.
For 10 meters you can easily connect the energizer to the fence, but it is better to use the right material to avoid dispersions. I'm just asking you a quick question so I can answer you precisely: - Are you thinking of placing the energizer in the house/garage (indoors) and the fence is outside, right? In any case, here's how to do it correctly.1. Cable to use between the energizer and the fence (10 m) You have two possibilities:
B) Your copper cable, inside a polyethylene tube (alternative solution) From the technical info I have:- you can also use your own simple copper cable- The thickness is not critical, practically any "normal" implant section is fine- The important thing is:- pass it through a polyethylene tube (corrugated/sheath type)- this avoids dispersions in the ground or on damp surfaces. Therefore for 10 m you can:- put the cable in a polyethylene tube if you run it on the ground/under the ground or near walls/humidity- connect one head to the energizer, the other to the fence wire2. When the high voltage cable is necessarily needed It is mandatory or highly recommended to use the high voltage cable (our type ID 104) when:- the distance is quite long (tens of metres)- or the section passes:- underground- in very humid areas- in contact with structures where a normal cable could discharge. For 10 m, you can:- use the high voltage cable (“clean” and definitive solution), or- your own cable inside a polyethylene tube.3. Practical connection (summary)1. Place the energizer near the 220 V socket, indoors.2. From the fence terminal (+) of the energizer:- connect the high voltage cable (or polyethylene tube cable).3. Bring this cable to the point where the electric fence begins.4. There you connect it to the fence wire (one of the two wires, which is then connected to the other in several places).5. The earth always remains close to the energizer:- 3 1m galvanized pegs, 80cm into the ground, spaced 3m apart, connected to each other and to the earth terminal.
B) Your copper cable, inside a polyethylene tube (alternative solution) From the technical info I have:- you can also use your own simple copper cable- The thickness is not critical, practically any "normal" implant section is fine- The important thing is:- pass it through a polyethylene tube (corrugated/sheath type)- this avoids dispersions in the ground or on damp surfaces. Therefore for 10 m you can:- put the cable in a polyethylene tube if you run it on the ground/under the ground or near walls/humidity- connect one head to the energizer, the other to the fence wire2. When the high voltage cable is necessarily needed It is mandatory or highly recommended to use the high voltage cable (our type ID 104) when:- the distance is quite long (tens of metres)- or the section passes:- underground- in very humid areas- in contact with structures where a normal cable could discharge. For 10 m, you can:- use the high voltage cable (“clean” and definitive solution), or- your own cable inside a polyethylene tube.3. Practical connection (summary)1. Place the energizer near the 220 V socket, indoors.2. From the fence terminal (+) of the energizer:- connect the high voltage cable (or polyethylene tube cable).3. Bring this cable to the point where the electric fence begins.4. There you connect it to the fence wire (one of the two wires, which is then connected to the other in several places).5. The earth always remains close to the energizer:- 3 1m galvanized pegs, 80cm into the ground, spaced 3m apart, connected to each other and to the earth terminal.
you can easily keep the energizer indoors and do the earthing even a little far away, if you only have concrete nearby.1. Earthed distance from the energizer The important rules are:- The earth must be in the "real" ground, preferably moist (grass, bare earth, not concrete/asphalt).- The 3 1m galvanized pegs go:- buried 80 cm in the ground- spaced 3 m apart- connected to each other with the yellow/green cable- From the first post, bring the cable to the earth terminal of the energizer. If you only have a concrete floor under the energizer, you can:- go out with an earth cable (yellow/green or similar) and go 10–15 meters away to the first point of free ground;- the important thing is that:- the cable is not damaged,- is well connected and protected (e.g. on the wall or inside a duct). Therefore: there is no "very rigid" distance limit, it is more important to have:- good soil (better moist/grassy),- 3 pegs firmly planted and connected to each other. If you need to run 5, 10 or 15 meters of cable to get to the ground, that's fine.2. Practical scheme in your case- Electrifier: indoors, close to 220 V.- Earth cable:- comes out of the energizer,- runs along the concrete section (on the wall, in the duct, at the edge of the wall),- get to the point where you can hammer the stakes into the ground.- ground stakes:- 3 x 1 m galvanized pegs- 80 cm in the ground, 20 cm outside- 3 m distance between one post and another- all connected to each other with cable- the cable that returns to the energizer starts from the first post.3. Connection to the fence (to recap)- From the “fence / positive output” terminal of the energizer:- carry a high voltage cable or polyethylene tube cable the ~10 m to the fence.- you connect it to your low wire, which is connected to the high wire at various points.
Yes, you can put the energizer in the house and have the fence far away, but some important rules must be respected.1. Position of the energizer- The energizer cannot be left outdoors: it must be kept indoors, therefore in the house, in the garage, in a shed, etc.- From there you can bring the electricity to the fence.2. Earthing (fundamental) To obtain the correct discharge:- Use 3 1 meter galvanized stakes in the ground.- Put them:- 3 meters away from each other- 80 cm in the ground (possibly moist) and 20 cm outside- Connect them together with the yellow-green cable, then connect this cable to the earth terminal of the energizer (yellow-green/black).3. Connection to the distant fence- From the red terminal of the energizer you need to exit with a high voltage cable, not with the normal fence wire.- This cable:- you can even walk several meters (tens of metres) before arriving at the fence- if possible it goes inside a polyethylene tube to avoid dispersion of current along the way.- When you get to the fence, connect the wire to the fence wire and bridge the other wires, if you have more than one.4. Watch out for these mistakes- Never connect two energizers to the same wire: the impulses cancel each other out and create problems.- the same energizer can be used for two fences, even distant ones, but on two separate wire lines, never on the same wire. If you tell me more or less:- how many meters away would the fence be from the house- and if you already have the ground rods, exactly how to route the cables in your case.
1. 40mm webbing: You can use 40mm webbing for horse fence. It is perfect for this type of animal because it is clearly visible and suitable for horse fences. If the webbing is wider than 30 mm, you can bend it slightly to fit it through the insulators, as indicated in our instructions.2. Recommended energizer: For a 100 meter fence on one side only and for medium-sized horses, you have two options based on where you want to get the power:- If you have 220V power near the fence: the E/220 model is recommended- 10000V 5J, which is perfect for fences up to 500 meters and ensures good power and safety for horses.- If you prefer a battery-powered model (for example you don't have electricity nearby): you can opt for the B12 model, which works with a 12V car battery (at least 40Ah recommended). The autonomy is approximately 6 days if the enclosure is well insulated. Summary of material needed:- Electrifier (choose between E/220 or B12 based on the available current)- 40mm webbing (already purchased, that's fine!)- Insulators suitable for webbing (already purchased)- pegs (already purchased)- Grounding connections (essential for operation)
Yes. You can easily use another cable if the one supplied does not reach the fence. From our internal indications:- a simple copper cable can be used to carry the current from the energizer to the fence wire.- Thickness is not critical.- However, it is important that the cable is passed through a polyethylene/corrugated tube, especially if:- goes underground,- or near walls/humid areas, to avoid current leakage. Alternatively:- you can also bring the fence closer to the energizer and pass the conductor wire directly by air to the point where the fence begins. So: if the connection cable supplied is short, extend it with your own copper cable (better protected in corrugated) and then connect to the fence wire.
The rhythmic noise is most likely normal “ticking” of the pulses, but it may also indicate a small dispersion. I'll explain the two main possibilities:1. Tick tic in the fence wire- The energizer sends pulses at regular intervals, so it is normal to hear a rhythmic ticking when you bring something metallic close to the wire.- However, if you hear it with the naked ear in some places, it could mean that:- the wire is too close to a post, grass, shrubs, hedges- or there is a point where it discharges to ground (small sparks or micro-arcs).- In this case the fence disperses current and works less well.2. Tick tick from the cable that carries current to the outside (high voltage cable)- If the noise comes from the cable that carries the current from the energizer to the fence, it may mean that the cable is not insulating well.- In that case it must be inserted inside a polyethylene tube to improve insulation and the noise/dispersion problem is solved.
You were right to ask, I'll clarify straight away. In your specific case we have chosen together:- 220V POWER SUPPLY (socket) therefore: no battery, no generator set in the estimate. The product I included is: > Electric fence kit for wild boars 220V Inside this kit there is already:- the 220V energizer (what you call a "power supply")- with the cable to connect it to the power socket. How do you give tension?1. secure the energizer to a shelter (e.g. in a room, house, shed).2. connect the energizer plug to the 220V socket.3. From the red terminal of the energizer go to the fence wire.4. From the black clamp go to the ground (the ground rods in the ground). So:- no battery needed (this is only used with 12V B12 type models)- you don't need a generator, unless you have no 220V socket available. The quote I gave you already includes:1. 220V wild boar electric fence kit → inside there is the 220V energizer (the "machine" that transforms the 220V into pulses for the wire)2. 6 plastic pegs 160 cm
I'll answer you in two parts: 1) complete list for the 15 m wild boar fence 2) alternative if you don't have 230V nearby1. Complete list for the 15 m fence – wild boars – with 230V For the 15 meter fence, wild boars, 3 wires, with 230V socket available:- 1 × 220V extra-strong energizer 220V model, suitable for up to several km of fence and also suitable for wild animals.- 1 × Lead wire 500 m – 6 mm² (for large animals / wild boars) For example: Lead wire 500 m 6 mm – grazing animals.- 1 × Bag of Post Insulators (100 pieces) Standard insulators for wood or iron, depending on the posts you use. You will use about 9 of them, the rest remains as a spare.- Fence posts At least 3 posts (start, middle, end) – better 4–5
To check that the fence is under tension you can do this:1. “Screwdriver” method (as per Gemi instructions) This is the simplest check:1. Turn on the energizer.2. Take a screwdriver with an insulated (plastic) handle.3. Bring the tip of the screwdriver close to the fence wire, without touching it completely:- stay 1–2 mm away.4. If the fence is under tension, it is recommended:- hear a ticking sound (the spark strikes in pulses),- maybe see a small spark, especially in the dark. If you hear a regular “tac tac tac”, the fence is supplying power.2. Check along the fence If you hear the ticking near the energizer, but not at the end of the fence:- there could be dispersion:- wire touching hedges, tall grass, poles without insulator, wire mesh, etc.- check that:- the wire never touches plants, hedges, earth or metal,- the insulators are intact,- there are no badly tied knots with rusty or broken threads.3. Check the earthing If the blow feels "weak":- recheck the ground poles:- well planted (about 80 cm in the ground),- soil that is not too dry (if it is dry, wetting the area a little helps),- connections between the poles well tightened
Yes. In principle you can use the same 12V 40Ah battery for both the pump and the fence energizer, but there are some important points to evaluate. First I ask you something (as required by our procedures):
𝐒ì. If the current is far from the fence, you can bring it to the fence using the 𝐜𝐚𝐯𝐨 𝐚𝐝 𝐚𝐥𝐭𝐚 𝐭𝐞𝐧𝐬𝐢𝐨𝐧𝐞 𝐝𝐢 𝐚𝐭𝐭𝐫𝐚𝐯𝐞𝐫𝐬𝐚𝐦𝐞𝐧𝐭𝐨, which can be worked 𝐢𝐧 𝐬𝐮𝐩𝐞𝐫𝐟𝐢𝐜𝐢𝐞 or Download without downloading. What I can confirm is:- the cable is 3 mm thick- can also be used for more than 100 m- however, it is less important especially for 30/40 m. For very long distances between the energizer and the fence:- it is advisable to pass the conductor thread 𝐯𝐢𝐚 𝐚𝐞𝐫𝐞𝐚- otherwise create separate 𝐝𝐮𝐞 𝐫𝐞𝐜𝐢𝐧𝐳𝐢𝐨𝐧𝐢 In addition:- the energizer is supplied with only a couple of meters of standard cable- for longer distances you need to purchase the high voltage cable separately And another important thing:- 𝐚𝐥𝐥’𝐚𝐩𝐞𝐫𝐭𝐨- it must be kept 𝐚𝐥 𝐜𝐨𝐩𝐞𝐫𝐭𝐨 to avoid damage from bad weather. If you want, I can help you evaluate 𝐬𝐞 the distance is part of correct use of the high voltage cable.
To protect yourself from wild boars, we recommend a complete electric fence kit specifically for large animals such as wild boars. Here's what you need for an electric fence suitable for wild boars:- Gemi energizer (brings electricity to the fence; 100% Made in Italy)- 6 mm² thick conductive wire (ideal for wild boars and large animals, resists up to 100kg, with low dispersion)- Insulators to screw onto the pegs to hold the wire- pegs to fix the insulators and support the wire. Recommended wire arrangement: At least 3 parallel wires at different heights:- First wire: 20 cm from the ground- Second thread: 30 cm from the first- Third wire: 30/40 cm from the second recommended kit, we recommend our "Complete electric fence kit" which includes everything you need: energizer, electrical grid, insulators, wire, etc. you can see the product here: [Complete kit for electric fence- Wild boars](https://www.gemimarket.it/recinto-elettrico/215-kit-completo-per-recinto-elettrico-recinzione-elettrica-rete-elettrica-elettrificazionere-isolatori-filo-cinghiali-mucche-galline-8053017261478.html) Attention: For the wire, always choose the 6 mm² wire for wild boars, NOT the webbing (which is specific for horses). Do you want to receive advice on choosing the model best suited to your needs (for example if you prefer a mains or battery energiser)? Furthermore,
For horses, the information base shows that tape is more suitable than wire.
Wire compatible with the energizer If you want to use wire instead, this is also compatible:- Conductive wire 1000 m 6 mm² for electric fence €67.90 Link: https://checkout.gemimarket.it/recinto-elettrico/181-filo-condotto-1000-mt-6-mm-per-recinto-elettrico-per-animali-8053017261003.html For horses, however, the ribbon is preferable between the two. If you want, I can also tell you how many meters you need based on the length of the fence.
Wire compatible with the energizer If you want to use wire instead, this is also compatible:- Conductive wire 1000 m 6 mm² for electric fence €67.90 Link: https://checkout.gemimarket.it/recinto-elettrico/181-filo-condotto-1000-mt-6-mm-per-recinto-elettrico-per-animali-8053017261003.html For horses, however, the ribbon is preferable between the two. If you want, I can also tell you how many meters you need based on the length of the fence.
To protect the citrus grove from wild boars (or other wild animals), the most effective and legal solution is the electric fence. First I'll ask you something, so I can give you good advice:- Do you prefer an energizer powered by 220V (home socket) or with a 12V battery? In the meantime, what is needed and how should it be done.1. What you need for the electric fence For a complete electrified fence you need:1. Electrifier (220V or 12V battery)2. wooden, iron or plastic pegs3. Electric fence wire- For wild animals (wild boars, deer, fallow deer) it is important to use good section wire, e.g. 4–6 mm- On our site you will find various threads, for example:- White thread 500 m – 4 mm- White thread 1000 m – 4 or 6 mm- Wire 500 or 1000 m – 2.2 mm4. Insulators for wood or iron, to be placed on the pegs5. Handles with double hook insulators for gates/passages6. Electric fence warning table (mandatory by law) If desired, there are also complete kits for electric fences for wild boars and other animals, already with electrifier, wire and accessories.2. How to arrange the wires against wild boars To avoid the entry of wild animals such as wild boars, deer and fallow deer, we recommend:- At least 3 parallel wires:1. 1 wire about 20cm from the ground2. 2 thread 30cm above the first3. 3 wire 30–40 cm above the second. In this way the animal, attempting to pass or push the net, touches the wire and is repelled by the electrical impulse (it is not dangerous, but annoying).3. Legality and safety- The Gemi electric fence complies with the law and is not dangerous for people or animals.- The energizer emits intermittent pulses at low amperage, designed specifically to distance and not injure.4. Net + electric fence If you already have a net that wild boars break through:- you can keep the existing network and place the electrified wires outside, in front of the network, at the indicated heights.- So when the animal pushes to break through, it first touches the electrical wires and moves away.
For the extra-strong B12, a single earthen stake is not enough, even if the fence is "only" 70 meters long. To have the full power of the energizer, it is necessary to ground it with 3 1 meter galvanized pegs, like this:- 3 x 1 m galvanized pegs- distance between them: 3 meters- driven into the ground for 80 cm (in damp soil, preferably with vegetation)- 20 cm above ground- connect to each other with the yellow-green cable, then from the first stake go to the earth terminal of the energizer. With a single stake the discharge is much weaker and the animals could cross the fence.
Here is some useful information about installing an electric fence kit:
What does the kit include?- Electrifier- Common thread- Isolators- Connection accessories If necessary, you can modify the components of the kit according to your needs.
What does the kit include?- Electrifier- Common thread- Isolators- Connection accessories If necessary, you can modify the components of the kit according to your needs.
The "tick tick" you hear does not depend on whether the energizer is Extra Strong or normal: it is typical of the functioning of the electric fence. From our technical material:- If you hear a ticking on the fence wire, it means that:- the cable does not isolate the current well- or the fence wire touches somewhere and discharges to earth (grass, poles, etc.) In correct conditions:- the energizer (both Extrastrong and normal) emits only the classic periodic impulse, but it is not advisable to hear strong ticks on the wire or see sparks. To reduce/eliminate the noise you need to check the fence, not change the model:1. Check the entire perimeter- Check that the wire does not touch posts, nets, gates, tall grass, etc.- If it discharges, you will actually hear the “tick tick” and sometimes you will see sparks.2. If the power cable ticks on its own- It means it doesn't insulate well.- In this case it must be inserted inside a polyethylene tube to insulate it better.3. If it discharges onto iron pegs (noise + sparks)- The wire is too close to the pole.- you need to use the correct insulator and mount it like this:- first screw the nut onto the pole,- then insert the insulator,- and screw it "in reverse" to lock it well and keep the thread away from the iron. So:- Switching to the normal model does not guarantee that the noise will disappear.- It is much more likely to be solved by fixing the insulation of the wire and cables. If you tell me:- what type of wire do you use where you hear the ticking (power cord or fence wire),- if you also see sparks or just noise, I can tell you exactly what to check step by step.
For a mobile electric fence for two large donkeys you need a small "complete system". I'll list what to buy and then, if you want, I'll also give you a concrete example of quantity.1. Electrifier (the "engine" of the fence) First important question: Do you want to power it with 220V (home socket) or with 12V battery (car battery type)?- If you have a power socket near the fence: you are better off with a 220V model (E/220 series).- If the fence is in the middle of the ground, away from electricity: a 12V battery model (B12 series) is better. For the B12 a 12V car battery is always recommended.
Yes. You can do everything directly from the Gemi website: www.gemimarket.it Then enter the “Electric fence” section to find:- 220V energizer,- thread,- insulators for wood and iron,- ground stakes, etc. A few quick notes on what you wrote to me:1. Distance between poles at 3 metres- For wild boars it is even better than the recommended 4–5 m: the fence is sturdier and the wire remains tighter and more stable, especially with snow and uneven ground.- Just remember to put insulators on each pole (for each wire).2. Area most at risk The idea of evaluating the most critical area is very good. There you can:- thicken the poles a little more,- better control the height of the wires,- keep the area clean from branches and grass to reduce dispersion.
For an electric fence connected to the current (220V) you can take these data as a reference:- Average energizer absorption: 6 W- Consumption considered 24 hours a day: approximately €0.0432 per day This value derives from:- 6 W × 24 h = 144 Wh = 0.144 kWh- 0.144 kWh × 0.30 €/kWh ≈ 0.0432 € per day For 30 days:- €0.0432 × 30 ≈ €1.30 So, keeping it on 24 hours a day for a month, the cost is approximately €1.30 in total.
For the second fence you can absolutely use a battery-powered energizer, but I'll clarify in what sense "it's good" and for what. One quick thing first: for the new chicken energizer, would you prefer:- something that always remains fixed in the same point, or- something more mobile, to be moved where needed? In the meantime, I'll answer you on the main points.1. Second chicken run: battery energizer yes or no? Yes. A 12V battery-powered energizer is fine as a second device for the chicken pen, especially if:- the enclosure is not huge (e.g. a chicken coop-type area, not hundreds of meters),- you want to have freedom of position, even far from a 220V socket. The internal indications I have say:- For 12V Gemi models, a 12V car battery is always recommended.- There are also versions with solar panel (always 12V), convenient for enclosures such as chicken coops or mobile fences.2. Presence of wild boars and wolves: is battery power enough? An important thing should be distinguished here:- The "strength" of the blow depends on the Joules and the quality of the energizer, not on whether it is 220V or 12V.- The Gemi battery-powered models are however "extra strong" and are also designed for:- wild boars,- large wild animals. From the information I have:- The 6 mm² wire is specific for wild boars and large animals, with high tensile strength and low dispersion.- Gemi electric fences are designed precisely as a deterrent for:- wild boars,- deer,- foxes etc. So, if you choose a good 12V Gemi model, not a small “garden” model, and use:- adequate wire (better 6 mm² on the sides "exposed" towards the game),- grounding done well (3 galvanized pegs, 1 m in the ground, spaced apart), then a battery-powered energizer is absolutely suitable even in an area with wild boars and wolves.3. Practical strategy for your home Since:- you already have an excellent 220V Gemi energizer that "works very well as a deterrent",- you use it for goats on a 50m fence,- you want to make a second chicken pen, in an area with wild boars and wolves, a very sensible solution is:1. Leave the 220V where it is, dedicated to the main goat enclosure.2. For chickens:- install the other network you have,- add 1–2 electrified wires (especially towards the outside, at boar height and perhaps a little higher),- use a Gemi 12V battery energizer, preferably:- “extra strong” model (not a small one with just a few Joules),- if possible with solar panel
To connect the energizer to the fence, when they are not nearby, it is always recommended to use a high voltage cable specific for electric fences, inserted inside a polyethylene tube. Even if copper is a good conductor, the normal 2.5 mm² copper cable used for domestic electrical systems is not suitable: it is not designed to withstand high discharges and above all, if it remains exposed or touches grass, it leaks current. Recommended solution:- Use a high voltage cable for electric fences, like the one available in our catalog (for example [this model](https://www.gemimarket.it/recinto-elettrico/104-cavo-ad-alta-tensione-di-attraversamento-per-recinto-elettrico-per-animali-8053017261256.html)).- Always pass the cable inside a polyethylene tube to completely isolate the path, avoiding any type of dispersion due to contact with grass or ground. This solution guarantees the safe passage of the current from the energizer to the fence, without losses on the grass, even at distances greater than the one you indicated.
To connect the E/220 energizer to the electric fence, you need to use our high voltage cable, specific for electric fences. Here are the precise directions:- The recommended cable is copper covered with an insulating sheath (rubberized), with a thickness of approximately 3 mm.- This cable is designed to connect the energizer to the fence wire even over distances greater than 30/40 meters without risk of current leakage.- If the cable must pass underground or over long stretches, it is recommended to insert it in a polyethylene tube to further improve insulation and safety.- The high voltage cable is purchased separately, based on the length needed. Note: In the E/220 energizer package we already provide a standard cable for basic connections (a few metres). If you need to make a longer connection, you need to purchase the high voltage cable separately.
you are at the right point of the work: now let's see step-by-step how to install the wire and how to properly ground it.1. Where do I start with the wire and how do I spin it Objective: make a continuous ring with the 3 wires around the fence, without unnecessary cuts.
Step 2 – Laying out the wire (for each height) For the first wire (e.g. the one at 25 cm):1. Attach one end of the wire to the first insulator on the starting pole.- you can tie a simple knot and tighten it well.-
Step 2 – Laying out the wire (for each height) For the first wire (e.g. the one at 25 cm):1. Attach one end of the wire to the first insulator on the starting pole.- you can tie a simple knot and tighten it well.-
The galvanized earthing poles are simply galvanized iron pegs, about 1 meter long, which must be inserted vertically into the ground. The ground cable (usually yellow-green) of the energizer connects to one of these poles via a clamp. Why do we need 3 poles and not just one? Grounding is essential for the correct functioning of the electric fence: it guarantees that the electric discharge is powerful and constant throughout the fence. Using just one post is often not enough, especially if the fence is long or the ground is not perfectly moist. With 3 galvanized poles positioned like this:- Approximately 1 meter long each- Inserted into the ground for at least 80 cm (better if the ground is moist)- Approximately 3 meters apart- Connected to each other with the earth cable, and then connected to the energizer. Advantages:- Current leakage is minimal.- The effectiveness of the electrical impulses on the wires is maximum (more safety and better protection).- You do not risk that the fence will not work properly in dry periods or on low-moisture soils. If I only used 1 pole:- The power reaching the wires would be very reduced.- Animals could overcome the barrier more easily. It's a small difference in cost and effort, but crucial for a reliable fence!
Yes, we can estimate it quite precisely. For the kit you saw (with 220V energizer for electric fences):- The 220V energizer absorbs approximately 6 Watts when switched on.- If you keep it on 24 hours a day:1. Daily consumption- 6 W × 24 h = 144 Wh = 0.144 kWh per day- With an average energy cost of approximately €0.30/kWh:- 0.144 kWh × 0.30 €/kWh = 0.0432 € per day2. Monthly consumption (30 days)- €0.0432 × 30 ≈ €1.30 per month3. Annual consumption (just for reference)- €0.0432 × 365 ≈ €15.80 per year Therefore, approximately €1.3 per month if you always keep it on day and night, using an energy cost of €0.30/kWh.
I can reassure you: our fence energizers, like the E220, are specifically designed for the safety of both people and animals and comply with all legal regulations. The operation of electric fences is not based on a "continuous" voltage like a normal socket (for example 24V), but on high voltage pulses (for example 10,000 Volts), however at very low intensity (a few milliamps) and for a fraction of a second.
I'll answer you by staying on practical points, without going into complicated theory. the technician advised you against the "live wire/grounded wire" alternation because, in 90% of real cases, if you have good classic earthing and a well-made fence, that type of scheme does not bring concrete advantages, but:- complicates the work- increases the risk of connection errors- makes maintenance more difficult.1. How an electric fence “normally” works In our internal instructions, the recommended scheme is always this:- The energizer has:- a RED output → fence wire(s).- a BLACK / YELLOW-GREEN output → dedicated earthing (galvanised poles) When the animal touches the wire:- the body is at "ground" potential (because it stands with its feet on the ground)- the current passes from the wire → animal → ground → galvanized earth poles → returns to the energizer. For this to work well you need:- 3 x 1m galvanized stakes, 3m apart, 80cm in damp ground, 20cm outside- yellow-green cable that connects them to each other and to the energizer (exactly as explained in your knowledge base). If this grounding is done well, the fence already works at its maximum intended effectiveness.2. What does it mean to "ground" wires at the top? When you start bringing the mass (earth) to the fence wires too (alternating voltage/earth), you are in fact:- replicating the earth on the wires- creating a more complex positive/negative network. Practical problems:1. More complexity, same yield (almost always)- If the earth with the poles is done well, the animal still closes the circuit by touching just one live wire and the ground.- Adding wires connected to ground, in many cases, does not appreciably increase the "knock".2. Risk of connection errors- All it takes is one point where you accidentally connect a "voltage" wire to an "earth" wire (e.g. terminal, junction, crossover) and:- practically short the energizer output- the fence stops working properly or works poorly.- With the simple system (all "live" wires and earth only on the poles) this risk is much lower.3. More splices, more dispersion possibilities- Every “ground” wire you run along the fence is another chance to:- unwanted contact- arrived poorly- point where humidity/oxide infiltrates.- Our guidelines place great emphasis on limiting dispersions (grass, faulty joints, contact with poles, etc.).4. Difficulty in maintenance- When there is a problem, with a simple scheme (all positive wires, earth only on the poles) it is easier:- detach a piece- understand where there is dispersion- With alternating positive/ground along the entire fence, each check becomes more complicated (you always have to distinguish which wires are which, remember all the connections, etc.).3. Why simplicity is better for you (wild boars, B12, arid soil) In your specific case:- use a B12 (rugged model, dual fuel)- relatively short enclosures (3×30 m + greenhouse)- make a good earthing with 3 galvanized poles as per our instructions- keep the soil near the ground stakes wet in drier periods. In these conditions, the configuration that the technician probably considers most sensible is:- All “live” wires (voltage) connected to the red terminal- Earthing only on galvanized poles, well done, as per our recommendations. Advantages:- simpler installation- less risk of errors and shorts- easier to diagnose if one day something goes wrong- same practical effectiveness if the earth is made to perfection.4. When it makes sense to think of “ground” wires The idea of alternating positive/ground on the wires can make sense:- in extreme conditions of very dry soil and very long systems- where it is very difficult to guarantee good "land" (large pastures, kilometers of fence, stony terrain). But even there, in our company guidelines, the priority always remains:- correct earthing with multiple galvanized pegs- use of the high voltage cable to connect the energizer well to the fence- reduction of dispersions (touching grass, joints, etc.). For a system like the one, the technician has probably told you "it's useless work" precisely because, for what needs to be done, the part that makes the difference is:- land done well- right thread (6 mm²)- fence pulled well and without dispersions not the complexity of alternating wires
Perfect setup, I'd say. Let me summarize what you will do and how it integrates with the indications we have:1. Dedicated line from the house panel to the energizer- Excellent choice:- no "sensitive" loads on the same socket/strip- lower risk of disturbances to other users.- Just make sure that:- the line is protected in the panel (thermic/differential as per the system standard)- the earth of the house remains that of the domestic system, separated from the earth of the fence (which will be with the 3 galvanized poles).2. Corrugates dedicated only for the energizer- Perfect:- a corrugated cable for the 230 V that powers the energizer- a corrugated cable (or the same section but physically separated from the other systems) for the high voltage cable that goes to the fence.- Important:- do not let these corrugated cables "hug" the inverter or network/signal cable ducts for long stretches.3. Distance 1–1.5 m from the photovoltaic inverter- Much better than the 60cm before.- At 1–1.5 m:- you are already in a prudent distance zone to reduce possible interference- however, check that the cables:- do not rest on the PV ducts- I only cross any signal cables at 90, not in close parallel.4. Earthing of the energizer- I only remember the fundamental part for good functioning:- 3 x 1 m galvanized pegs- 3 m distance from each other- 80 cm in the ground (wet) and 20 cm outside- connected to each other with a yellow-green cable- and from there to the earth terminal of the energizer.- Do not connect these poles directly to the earth bar of the home system: it is the "functional earth" of the fence. With this setting:- reduce the risk of disturbances on the home network and the inverter to almost zero- you have a clean and easily inspectable path- the fence will work best
you can safely use both 4mm² and 6mm² wire in the same electric fence, even if they are of different thicknesses. It is possible to join different types of conductive wires, but the advice is, if possible, to use the same type of wire (for example all Gemi) to maintain the optimal quality and effectiveness of the fence.
The battery can be recharged, it is not disposable and there is no fixed limit to the number of recharges. For Gemi battery energizers (like the B/12):- a 12V car battery of approximately 40Ah is recommended;- autonomy with a well-made enclosure (without large losses) is around 6 days for a 40Ah;- when it runs out, you recharge it and use it again. You don't need to replace it every time it runs out. As long as the battery is in good condition (holds a charge and is not damaged), you can recharge it many times. When with charging you notice that:- it downloads much faster than usual, or- it's difficult to charge, so it may be time to replace it.
For the situation, with the house adjacent to the vegetable garden and wild boars, the most logical choice is: Better to use a 220V home energizer, not a battery one. I'll explain to you in a very practical way:
What is needed, complete, for the anti-boar fence I will summarize everything based on the data you gave me:- Two rectangles:- 2 × 25 m → perimeter 54 m- 17 × 11 m → perimeter 56 m- Total perimeter: 110 m- Animal to keep away: wild boars- Power supply: 220V home
2) Conductive wire (for wild boars) For wild boars, according to our guidelines: always 6 mm² wire.- You need 3 wires around the perimeter.- Meters of wire: 110 m × 3 = 330 m With margin (corners, slopes, joints): consider approximately 350 m. All you need is:- 1 spool of 500 m – 6 mm – 100 kg → you will have ~150 m of spare, always useful for any expansions or repairs.
4) Grounding (fundamental for effectiveness)- 3 galvanized stakes driven into the ground at a depth of approximately 1 m, spaced approximately 3 m apart.- Connect them to each other and then to the energizer:- Use a yellow-green thread.- Connect the pegs → black terminal of the energizer.- In summer, with dry soil, it is useful to wet the ground around the pegs to improve grounding.
6) Heights of the 3 wires for wild boars Practical indications:- 1 wire: approximately 30 cm from the ground- 2nd wire: 60 cm from the ground- 3 wire: 90 cm from the ground (approximately) This way you can intercept the boars' muzzle and body well when they approach.
You explained very well, you didn't create any confusion. I will answer you in a very practical way, adapted to your case: L-shaped fence, 5 m gap on the front, 108 m in total, poles every 4 m, 3 insulators per pole. I'll answer the two key questions:1. Where to start with the thread (bottom or top)?2. Should each lap be broken up or should it be continuous?1. Where to start with the thread? it is advisable to always start from the central wire (the one approximately 50 cm from the ground), because:- will be the one connected directly to the red terminal of the energizer,- from there make the bridges to the low wire and the high wire. The heights you have now with insulators 25 cm apart, if the first is 25 cm from the ground, are perfect:- low thread: 25 cm- medium thread: 50 cm- high wire: 75 cm So the plan is:1. Consider the medium thread (50cm) as the “main thread”.2. Begin to lay the medium thread along the entire perimeter first.3. Then lay out the low thread and the high thread following the same path.2. Broken or continuous turns? The thread should NOT be broken on each side. Each thread (low, medium, high) must:- start from a point,- go all the way around the fence (the entire “L”, 108 m in total),- return close to the starting point,- and there join the beginning and the end. So:- Low wire = a single closed loop around the fence- Medium thread = a single closed loop- High wire = a single closed ring The only "interruptions" you will have are at the point of the 5 m gate, where you will then make a fixed part + an opening part (temporarily with lengths of wire, in the future with springs).3. How to start, step by step on your L-shaped fence with 5m gate
b) First thread: the middle thread (50 cm)1. Attach the middle wire to the central insulator of P1 (the one about 50cm from the ground).2. From there, don't go through the gate yet:- start going in the direction the rest of the fence starts (following the “L”), passing over all the subsequent posts.3. Go all the way around the 108 m, until you return to the other side of the gap, on pole P2.4. On pole P2, stop the wire for now (you don't have it "back through" the gap yet). The idea is:- between P1 and P2, the gap section (5 m) will be managed with a separate piece of wire, which opens/closes., the middle wire will be:- a large almost closed ring, with "interrupted" only at the 5 m gap,- but you will close it electrically thanks to the part of the wire that will act as a gate. Then you will do the same thing for low and high wire.
b) First thread: the middle thread (50 cm)1. Attach the middle wire to the central insulator of P1 (the one about 50cm from the ground).2. From there, don't go through the gate yet:- start going in the direction the rest of the fence starts (following the “L”), passing over all the subsequent posts.3. Go all the way around the 108 m, until you return to the other side of the gap, on pole P2.4. On pole P2, stop the wire for now (you don't have it "back through" the gap yet). The idea is:- between P1 and P2, the gap section (5 m) will be managed with a separate piece of wire, which opens/closes., the middle wire will be:- a large almost closed ring, with "interrupted" only at the 5 m gap,- but you will close it electrically thanks to the part of the wire that will act as a gate. Then you will do the same thing for low and high wire.
What you are saying is very serious: a goat being attacked and "almost dead" is NOT normal for an electric fence for animals, which must be dissuasive, not lethal. From what you describe:- before:- he was shocked, bleated and broke away → normal behavior- time:- very close, almost continuous impulses- a goat that was attached and could not detach itself → abnormal and potentially dangerous behavior This suggests that the energizer is no longer working with regular and short pulses, as it should, but has a serious defect on the circuit that manages the discharge.1. What to do IMMEDIATELY (important) For the safety of the animals, we recommend:1. Immediately turn off the energizer and disconnect the plug/battery.2. Do not use it again until checked by a technician.3. Contact support again and clearly specify:- that the device now:- sends impulses without pauses, very close together- caused an incident where a goat was attacked and dying- expressly ask for an in-depth technical check or replacement. An electric fence for animals, by law, must:- give short pulses, at low amperage,- be dissuasive, not dangerous. What happened to your goat is not part of the normal behavior of a properly functioning system.2. Can close pulses be a problem? Yes. if the impulses:- they are too close together- or the circuit is faulty and no longer respects the discharge/pause times then the animal can:- not being able to detach yourself immediately- suffer much heavier electrical stress than normal. Therefore, with such a symptom (burst impulses) and such a serious episode, it is prudent to consider the device dangerous until it is checked or replaced.3. Can I continue to use it until I buy another one? No. the advice is:- do not use it on the fence anymore, given that:- already almost killed an animal- manifests clearly anomalous functioning. Until you have a new, perfectly functioning energizer, it is better to:- leave the enclosure without power- or use another safe energizer (if you have a spare one that you know works regularly).4. How to move now ()1. Turn off and unplug your current energizer immediately.2. Contact assistance again, explaining the episode with the goat:- underlines that these are not just close impulses, but a concrete danger for the animal's life.3. To enlarge the pasture / continue using the goat net:- get a new energizer, NOT depowered, suitable for grazing animals (goats, sheep etc.),- NEVER connect two energizers to the same wire.
lo 6 mm²: it is exactly the right thickness for wild boars, roe deer, deer and large game. It has low dispersion and holds up well to the kilometers of enclosure you have. For the tester instead:
What to use then You need a specific tester for electric fences, made specifically for:- light voltages up to 8–10–15 kV- work with impulses- guarantee operator safety. If you don't have it:- as a basic check you can:- bring a blade of long grass closer to the handler: you should hear the classic "tic" and small sudden snaps on the grass- use a neon light bulb for fences if you already have one (specific accessory). If you confirm the exact model of the energizer (e.g. E/220, B12, etc.), also the voltage value that it is recommended to expect on the wire in normal conditions.
What to use then You need a specific tester for electric fences, made specifically for:- light voltages up to 8–10–15 kV- work with impulses- guarantee operator safety. If you don't have it:- as a basic check you can:- bring a blade of long grass closer to the handler: you should hear the classic "tic" and small sudden snaps on the grass- use a neon light bulb for fences if you already have one (specific accessory). If you confirm the exact model of the energizer (e.g. E/220, B12, etc.), also the voltage value that it is recommended to expect on the wire in normal conditions.
Yes. The grass that touches the wires does just that: it lands on the ground and greatly reduces the shock that the animal feels. From what you write:- the energizer "gives trumps" → therefore the system works- but the porcupine passes anyway → it means that little current reaches the wires or he touches little/only once and runs away without learning. I'll give you some practical tips based on how we recommend using the enclosure for small animals/porcupines:1. Grass under the wire- It is necessary to prevent the grass from touching the wires: each wire that rests on grass, plants or bushes acts as a "path to the ground" and discharges energy.- If possible, try to keep at least the corridor under the wires clean, especially the lowest one (the one 10 cm).2. Wire heights for small animals / porcupine- For small animals in general we recommend:- first wire 20 cm from the ground- then other threads every 20–30 cm- For the porcupine we also have a specific note:- the first wire must be placed at least 15 cm from the ground, without letting it touch the grass.- In your case: 10 – 20 – 30 cm:- if there is grass 10 cm away that it often touches, that wire is probably discharging a lot.3. Grounding (fundamental) If you haven't already done it this way, it's very important:- 3 1 meter galvanized stakes, placed in the ground at about 80 cm deep,- spaced 3 meters apart,- connected to each other with the yellow-green cable,- connected to the earth terminal (the one near the black) of the energizer. Poor grounding causes the animal to hear much less than what the device can provide.4. How to check if the fence is “drained” by grass A home test (without professional tools):- Turn off the energizer.- Detach/lift the grass from the blades as much as possible.- Turn it back on and try to touch the wire with a piece of dry wood, or with the back of your hand by approaching it very slowly: if you feel a clear difference compared to before, it's a sign that the grass was really eating up the current.5. Possible adjustments for the porcupine- Keep the first thread around 15–20 cm but well away from the grass.- Keep 2–3 total wires, all tight and without contact with branches, uninsulated stakes, grass, etc.- Check that all the wires are connected to each other (jumpers) and well connected to the cable coming from the energizer.
For grounding you will need 3 1 meter galvanized pegs. this with certainty:- the ground stake is not included with the kit/energizer- for correct earthing, 3 1 m galvanized poles must be used- they must be positioned 3 meters away from each other- 80 cm are inserted into the ground and 20 cm remain outside- it is better to place them in moist soil- they must be connected with a yellow-green cable. In addition:- only 1 meter of cable is supplied with the fence to connect to the first post- the grounding cable is not sold separately; a normal yellow-green cable can be used
To protect chickens from predators, it is essential to choose a suitable energizer and position the fence correctly, so as to ensure effective tension on the wire.
I'll explain step by step how to connect the 3 wires of the fence to the energizer, also using a normal electric cable as you wrote.1. Connect the 3 wires of the fence together Objective: make sure that all 3 wires (low, medium, high) are connected together, so they all take the current from the energizer. Choose a pole near the energizer and do this:1. At that point, on the 3 threads:- strip the plastic of the wire for 2–3 cm (only the section needed to connect).2. Cut 2–3 short lengths of the same thread (or another thread).3. Connect:- low thread ↔ medium thread- medium wire ↔ high wire by twisting the conductors well together (metal on metal, no plastic in between). In the end the 3 wires must be in electrical continuity, as if they were a single line: `High wire Medium wire all connected to each other Low wire ` it can be done without clamps, just by twisting the metal well.2. From the fence to the energizer (FENCE terminal) Now you need to bring the current from the energizer to that point where you connected the 3 wires.
Practical connection1. From the red clamp / FENCE of the energizer:- connect the cable (high voltage).2. Bring this cable to the pole where you connected the 3 wires.3. At that point:- strip the cable,- twist it around the fence wire (on the stripped part),- tighten tightly, so that there is good metal-to-metal contact. Diagram: ` [ELECTRIFIER] | (FENCE terminal- red) | High voltage cable | point where the 3 wires of the fence are connected to each other | High/Medium/Low Thread ``3. Connect the EARTH (fundamental) In addition to the fence, the earth must also be well connected:1. Plant 3 x 1m galvanized stakes into the ground- spaced approximately 3 meters apart,- approximately 80 cm in the ground (wet) and 20 cm outside.2. Connect them together with a cable (yellow/green type).3. From one of the pegs bring a cable to the EARTH (black) terminal of the energizer. Only with good soil will the shock on donkeys be effective.4. Do you have the clamps? In the instructions and guidelines I have here, every single accessory in the catalog is not listed in detail, so I cannot confirm from the data I have whether specific wire/cable clamps are for sale on the site. What I can confirm is that, according to our internal technical instructions:- for the wire splices and connections between the 3 wires,- it is absolutely accepted to simply make the connection:- stripping,- tying a knot,- twisting the conductors tightly. So everything can be done even without dedicated terminals, following this procedure.5. the "classic electric cable" Let me summarize how to use it best:- If the distance between the energizer and the fence is short, you can use it, but:- peel it only at the ends,- prevent it from touching bare ground, metal poles, etc.,- it is better if you pass it through a small plastic tube (such as a polyethylene water pipe), as recommended for the high voltage cable.- If the distance is longer, as our internal instructions are written, it is recommended:- high voltage cable + polyethylene tube to avoid dispersions.
Practical connection1. From the red clamp / FENCE of the energizer:- connect the cable (high voltage).2. Bring this cable to the pole where you connected the 3 wires.3. At that point:- strip the cable,- twist it around the fence wire (on the stripped part),- tighten tightly, so that there is good metal-to-metal contact. Diagram: ` [ELECTRIFIER] | (FENCE terminal- red) | High voltage cable | point where the 3 wires of the fence are connected to each other | High/Medium/Low Thread ``3. Connect the EARTH (fundamental) In addition to the fence, the earth must also be well connected:1. Plant 3 x 1m galvanized stakes into the ground- spaced approximately 3 meters apart,- approximately 80 cm in the ground (wet) and 20 cm outside.2. Connect them together with a cable (yellow/green type).3. From one of the pegs bring a cable to the EARTH (black) terminal of the energizer. Only with good soil will the shock on donkeys be effective.4. Do you have the clamps? In the instructions and guidelines I have here, every single accessory in the catalog is not listed in detail, so I cannot confirm from the data I have whether specific wire/cable clamps are for sale on the site. What I can confirm is that, according to our internal technical instructions:- for the wire splices and connections between the 3 wires,- it is absolutely accepted to simply make the connection:- stripping,- tying a knot,- twisting the conductors tightly. So everything can be done even without dedicated terminals, following this procedure.5. the "classic electric cable" Let me summarize how to use it best:- If the distance between the energizer and the fence is short, you can use it, but:- peel it only at the ends,- prevent it from touching bare ground, metal poles, etc.,- it is better if you pass it through a small plastic tube (such as a polyethylene water pipe), as recommended for the high voltage cable.- If the distance is longer, as our internal instructions are written, it is recommended:- high voltage cable + polyethylene tube to avoid dispersions.
To correctly connect the energizer to the fence and earth, follow these steps.1. First thing: earthing (fundamental)1. Obtain 3 1 meter galvanized stakes.2. Stick them into the ground:- depth: approximately 80 cm in the soil (better if moist)- about 20 cm remain outside3. Distance between pegs: approximately 3 meters apart.4. Use a yellow-green cable:- connect the 3 galvanized pegs together (in series)- then connect the yellow-green cable to the earth terminal of the energizer (usually near the black contact or indicated with the earth symbol). > Without good earthing the fence works poorly or does not work at all.2. Electrifier connection → fence wires1. You will find on the energizer:- a red (positive) contact → goes to the fence- a yellow-green/black (earth) contact → goes to the earth rods2. From the red terminal of the energizer:- run a high voltage cable up to the fence wire.- if the distance is long, pass this cable through a polyethylene tube to avoid current leakage.3. Arrived at the fence:- connect the cable to the fence wire and possibly create a bridge with the other fence wires (so that all wire levels are connected to each other).3. Operation check- Connect the energizer to the power supply (220V or battery, depending on the model).- When:- the red light is steady e- the green light flashes, it means the circuit is working.4. Useful tips- In very hot periods, wet the ground around the ground rods: it improves the grounding.- Keep the grass short under the fence wires: the grass in contact with the wire disperses the current.- If you need to splice the fence wires, first:- strip the plastic covering,- twist the conductors together well (not just lay them down). If you tell me:- what model of Gemi energizer do you have (e.g. B/12, E/220, etc.)- and if the energizer is far away or close to the fence I can describe the connection "wire by wire" for your specific case.
Yes. An excessive voltage drop in the electric fence can also be caused by the breakage (or damage) of one or more conductor wires. However, there are also other common causes that can result in this problem:
What can be done:- Visually check the entire perimeter of the fence to look for places where the wire is broken, stripped or touching objects that can cause dispersion.- Check the joints: They must be well made, without plastic covering the conductors.- Check the grounding: The pegs must be well inserted (at least 80 cm into the ground, moist soil).- Cut the grass and remove any branches or objects touching the wire.- Test the fence in sections: If possible, isolate one section of the fence at a time to identify where leakage or loss of voltage occurs. If the problem persists after these checks, there could actually be a broken internal wire or a problem with the energizer.
What can be done:- Visually check the entire perimeter of the fence to look for places where the wire is broken, stripped or touching objects that can cause dispersion.- Check the joints: They must be well made, without plastic covering the conductors.- Check the grounding: The pegs must be well inserted (at least 80 cm into the ground, moist soil).- Cut the grass and remove any branches or objects touching the wire.- Test the fence in sections: If possible, isolate one section of the fence at a time to identify where leakage or loss of voltage occurs. If the problem persists after these checks, there could actually be a broken internal wire or a problem with the energizer.
Yes. You can also connect to the second output of the energizer when you return to the starting point, but it is not necessary for the fence to be "powered" from two sides to work well. I'll explain the two options in a simple way:1. Classic connection (most used)- From the red exit of the energizer, start with the wire and complete the circle (1 km) until you return to the starting point.- The wire is powered from a single point but, being a closed loop, the current is distributed along the entire perimeter.- This solution, if the earthing is done well and there are no dispersions (grass, branches, damaged wires), is already more than sufficient.2. Also connect to the second output If the energizer has a second positive output (for example a "strong" output and a "lower voltage"), in general you can:- Connect the fence wire to the first positive output where it starts.- When the wire, closing the circle, returns close to the energizer, a second connection can be made to the fence from the second positive output, so as to have power from two different points of the same ring. This can help a little if:- You have a very long perimeter.- You have some dispersion and want to improve voltage distribution. The important thing is:- Never connect positive output and ground output (red and black) together.- Always check that the fence does not short out (wire touching posts, ground, wire mesh, etc.). If you tell me the exact model of your energizer (brand and type of outputs: for example “output 1 strong, output 2 weak”), more precisely how it is best to use that second output.
At the moment I have no information on the restock times of the 12V 7.2 Ah battery for electric fence. The products visible on the site are those available for purchase.
Yes. It is possible to connect two fences to the same energizer, even if they are separated from each other. From our official indications:- it is possible to power two fences, even distant ones, using the same energizer;- it is never necessary to connect two energizers to the same wire, but in your case you only want one energizer, so that's fine. For fences with poultry netting and "weakened" energizer, I'll give you just two practical precautions (valid in general):1. Path of the connection between the two fences- If the distance is not huge, connect the second fence with a high voltage crossing cable, which can be passed:- by air, on poles;- or underground, inside a sheath/pipe, without dispersions.- Avoid unnecessary joints and knots: every joint is a potential leakage point.2. Correct connection to the energizer- Red cable (+) from the energizer output to the first fence (conductive network).- From the first fence, make a bridge with the high tension cable to the second fence.- Yellow-green cable (earth) to earthing rods (3 x 1 m galvanized rods, 3 m apart, 80 cm in damp ground). If you tell me:- the indicative length of the two fences (metres of total net),- the distance between the two fences,- if you have 220 V power nearby or prefer a 12 V battery, whether one of our weakened models is suitable for your specific case and how to connect it in the most efficient way.
Yes. You can create a system even with only two "L" shaped sides for about 80 metres. It is not mandatory to close the "ring" fence. To give you more useful information, however, I need to understand better:1. What animals do you want to contain/keep out? (e.g. dogs, horses, wild boars, deer, etc.)2. How many wires do you plan to put? (e.g. 2, 3 or more wires)3. Do you prefer a 220V or 12V battery energizer? With this information I can:- advise you on the most suitable type of energizer,- tell you how many meters of wire you need,- calculate the number of insulators and poles for the 80 m “L” section.
I'll go in order and also give you an assembly "simulation" so you can imagine everything in the field.1. Battery: is a 120 Ah ok? Yes. For the B/12:- it is 12V, therefore:- 40 Ah, 60 Ah, 100 Ah, 120 Ah... they are all fine, as long as they are 12V.- A 120 Ah simply gives you:- more autonomy between one charge and another- no problem for the energizer (it's not "too much", it's just more capacious). So: ok to use a 120 Ah.2. Distance between iron poles (pickets) To have a stable and well-tensioned fence, the practical rule (which we also use in official calculations) is: > 1 pole every 5 meters Therefore:- recommended distance: 5 m- 7 m you can go on very linear sections without slopes, but with 5 m you have:- tighter wires- less “bellies” of the wire if the cows push- 15 m: too much for an electric fence with cattle, the wire would become soft. I therefore confirm: pole every 5 m is the best choice for the case (cows + double wire).3. 500 m / 1000 m wire: can it be cut? What to do with the surplus? Yes, you can easily cut the excess thread.- It is normal, in a plant, to cut:- to close a lot- to make derivations- for passages/gates Better to cut where needed, rather than:- leave a skein of wire rolled up and connected to the fence:- it would just be "extra length" that is not needed- the total length increases, i.e. the dispersion slightly (even if with 6 mm² it is little). If you have a few dozen meters left over on a reel, you should:- keep it aside for:- future repairs- any extensions4. Positioning B/12: 10–20 m from the fence, a little hidden. It's perfect. I'll explain a simple scheme to connect everything.
4.2 Earthing From the earth terminal (yellow/green or black) of the B/12:1. Connect the supplied cable to the ground rods (made of galvanized iron).2. Put the pegs:- fixed well into the ground (even 1 m inside)- in a humid area, if possible- better 2–3 pegs connected in series (one behind the other with the cable).5. How to connect multiple lots to a single B/12 Let's imagine:- Lot 1 fence- Lot 2 fence- A single B/12 which must be able to power both (maybe sometimes just one, sometimes both).
5.2 Scheme with the possibility of EXCLUDING a lot To manage the lots independently, all you need to do is:1. Have a junction point (for example near the B/12 or a gate) where:- the wire going to Lot 1 is connected- the wire going to Lot 2 is connected2. Use:- or a small fence disconnector/switch- or simple clamps/bolts where you can:- physically disconnect the wire that powers a lot. So you can:- always keep both active, or- exclude one of the two lots when it is not needed, simply:- unhooking the wire of that lot from the feeding point.6. Management of gates (2 gates in your case) For each gate/passage:1. The fence wire must not be interrupted in a “dead” way:- it must be passed through an insulated handle. Basic scheme:- On one side of the gate:- the wire reaches the fixed hook (double hook insulator fixed to the pole).- On the other side:- there is the handle connected to the wire of the rest of the fence.- When you close the handle on the hook:- the current passes from one side of the gate to the other.- When you release it:- the gate can be physically opened- that section is "interrupted" but the rest of the fence remains under tension (if you have passed the line intelligently, perhaps with a return on the other side). Useful product:- Handle with 2 double hook insulators for electric fence passage. If you have 2 gates:- you will need 2 handle kits + double hook insulators (one for each gate).7. Complete assembly simulation (practical summary) Imagine starting from scratch.
Step 2 – Grounding- Plant 2–3 earth stakes in the ground (in a row, 2–3 m apart).- Connect them together with the yellow/green cable.- Connect the last peg to the earth terminal of the B/12.
Step 4 – Mounting insulators- On each pole:- 2 insulators (for the 2 wires)- one about 60 cm from the ground- one at 80–90 cm
Step 6 – Connecting wires together- In several places (especially at the beginning of the enclosure, near the feed):- connect the upper and lower threads with small vertical lengths of thread- so that the entire system is a single circuit.
Step 8 – Connection between lots- From the Lot 1 circuit:- make a shunt (a cable) that carries current to the Lotto wire2.-
It will work very well like this too, in fact: you did exactly the right thing. In the electric fence it is correct:- have the 4 rows of wire connected to each other,- make a "continuous turn" with a single thread without cutting it,- or, if you use separate wires, jumper them (connect them together) at the beginning and at the end. The important thing is that:1. All the rows are electrically connected to each other (as you did with the single lap).2. The wire coming from the energizer (red terminal) is connected to at least one of the rows, preferably at the point from which the loop starts, so the current is distributed across all.3. The wires do not touch:- pegs (only in insulators),- earth,- tall grass, plants, hedges. So: there is no need to cut the thread at each row, the continuous loop system is fine.
It happens because in those points the wire is discharging towards ground (poles or other nearby contacts), so it is not normal operation: there is dispersion. The most probable causes, especially at the start/end line pegs, are:1. Wire too close to the stake iron- The insulator could be:- badly assembled,- moved,- cracked or punctured.- If the wire, when under tension, touches the iron or a screw, the current jumps with sparks and "tic tic".2. Moisture / dirt on the insulators- If the insulator is wet, very dirty, or has micro-cracks, a small leak may be created towards the pole.- At night or in high humidity the sparks are more visible.3. Distance too small at a joint point- Often at the beginning/end of the fence there are:- knots,- wire joints,- connections with the high voltage cable coming from the energizer.- If these parts are too close to the pole or a piece of metal (hooks, screws, fences), the current discharges there.4. Connections made with unsuitable material- If you have used clamps, rusty wire, or “flying” contacts near the pole, arcing can be created.
For Border Collies that jump the fence, the electric fence can work very well, but it must be set up correctly. First of all two important points:1. Type of dog energizer For dogs, the standard model (10,000 V – 5J) should not be used, but:- the WEATHERED model specific for dogs, which you can find in our catalog on the site. It is specifically designed to be safe for the dog but still dissuasive.2. Height and number of wires The Border Collie is agile and jumps: it is advisable to make several wires at different heights, especially near the net he already has. you can take these heights as a reference (similar to the Labrador, but being more of a jumper it is better to arrive a little higher and denser in the "jumping" area):- 1 wire: 20 cm from the ground- 2 wire: 40 cm from the ground- 3 wire: 60 cm from the ground- 4 wire: 80 cm from the ground- Possible 5th wire: 100 cm from the ground (1 meter), useful to discourage jumping over the net or between the net and the wire. Nobody forbids you to put even 4-5 wires: the more "grid" he sees, the less he will be tempted to try the jump.3. Positioning in relation to the metal mesh- Place the wires inside the garden, a few cm away from the metal mesh, fixed to special insulators on the poles (to avoid wire-mesh-earth contact).- It is important that the wire does not touch the net, metal poles, plants or tall grass, otherwise it disperses current.4. Safety for the dog- Our electric fence, especially in the weakened version for dogs, gives a very short shock (thousandth of a second): it is only a strong annoyance/dissuasion, it does not cause damage.- The dog generally learns very quickly and avoids the wire without touching it again.5. Other practical advice- At least 3 galvanized earthing stakes, approximately 1 meter long, driven into the ground and spaced approximately 3 m apart.- Keep the grass low under the wire, so as not to waste energy.- For short lengths (normal gardens) a common electric fence wire is sufficient; You don't need huge poles or special steel wires, it's the quality energizer that makes the difference. To be able to advise you even more precisely, I only need one piece of information:- Approximately how many meters of perimeter must be fenced? So I can tell you better:- how many spools of thread are needed,- approximately how many insulators to use (remember: one insulator every 5 meters for each line of wire),- and the most suitable configuration for the case. In the meantime, if you like,
There is no need to worry: the sensation of a strong "shock" is normal when you touch a part connected to the energizer. This happens because the E/220 energizer emits a very high voltage (E/220 EXTRAFORTE model: 8 Joules – E220 model: 5 Joules), generating electrical impulses specially designed to be clearly felt by animals and as an effective deterrent.
You've got a perfect idea: – a single wire, kept well insulated from the balustrade (1–2 cm distance with insulators is fine) – battery-powered energizer, turned on until the animals learn not to climb. I answer the important question about people.1. People and security: can they rely on it? An electric fence like ours is not dangerous for healthy people, but it is still an annoying shock, especially if taken on the hands or sensitive parts. It depends on where you put the wire:- If the wire is:- a few centimeters above the level of the balustrade, in the area where people normally rest their hands or torso → it is very likely that someone will touch it and get an electric shock.- If instead:- you place it a little further inside than the external edge, or a little lower or higher than the point where people normally lean → people can continue to look out without touching it easily. So: yes, people will be able to continue to look out, but the position and height of the wire must be carefully studied so that:- animals touch it when they try to climb,- people normally don't (or in any case only if they touch it with their fingers or voluntarily).2. Some practical attention is recommended:1. Highly visible thread Use a clear or highly visible thread, so that:- let's be clear that there is something there- no one sticks their hands in "blindly".2. Height and position- If the balustrade is, for example, 90–100 cm high:- place the wire just above the surface where hens and peacocks would climb (10–15 cm), but perhaps moved a little towards the inside, not exactly on the edge where people put their hands.- Thus, when the bird climbs or tries to climb, it hits the wire; those who look out leaning frontally on the balustrade generally do not touch it.3. Reporting- If it is an area where guests or people who don't know about the wire pass by, it is always good practice to put up a notice/tag of an electric fence, even a handmade one.3. Continuous use and battery Keeping it on all the time for a period is a good idea: animals learn quickly and then it is often enough to keep it on only at certain times. For the battery:- you use it during the day,- you recharge it at night with the night socket you have nearby, as you wrote. With the battery-powered B12 model and a good 12 V car battery, with only 30 m of wire, consumption is very low
For an electric fence of about 50 meters you need this basic material:1. Electrifier (control unit)- Do you have 220V power near the fence or do you prefer 12V battery (e.g. car battery)?- With 50 meters any Gemi model is good in terms of power: the choice depends only on the power supply you prefer.2. Fence wire- For 50 meters you only need a 500 m reel (this is the minimum standard format).- If you need protection from wild boars, deer or wild animals: 6 mm² wire is recommended, suitable for large animals (withstands up to 100 kg of traction, 8 conductive wires, low dispersion).- If it is for horses, the ribbon is more suitable; for other animals the thread is fine.3. Fence posts- you can use:- Gemi plastic pegs (like the 121 cm or 160 cm ones): they are already insulating, so no additional insulators are needed.- Or wooden/iron pegs (in this case insulators are needed).- Distance between posts: generally every 5–10 meters if the ground is flat; closer together if it is sloping or very windy.- For 50 m, consider approximately 6–10 poles, depending on how the ground is made and if you make curves/corners.4. Insulators (only if wooden or iron poles)- They are used to prevent the wire from touching the pole.- For 50 m, if you place a pole every ~5 m, about 10–12 insulators are enough (1 per pole, for a single wire).- If you run multiple wires in height, you multiply the number of insulators by the number of wires.5. Ground rods (grounding)- At least 3 galvanized stakes to be driven into the ground (about 1 m deep), about 3 m apart.- Connect them to each other and then to the energizer with a yellow-green earth cable.- In very dry periods it is useful to wet the ground around the ground stakes.6. High voltage cable connection- It is used to connect the "fence" output of the energizer to the fence wire, especially if the control unit is not actually attached to the fence.- It is a specific cable that does not disperse current even if buried or passed through a pipe.7. Various accessories (if necessary)- A switch or joint to interrupt the current at one point of the fence (optional).- Gate handles if you need to create an opening passage.
Shall I prepare a precise list for you? To complete the answer properly I need 3 pieces of information:1. What animals do you want to keep outside (or inside)?2. Do you have 220V power near the fence or do you prefer 12V battery?3. Will you use plastic or wood/iron pegs? With these answers I will make you a detailed list of the pieces to purchase (with recommended quantities).
Shall I prepare a precise list for you? To complete the answer properly I need 3 pieces of information:1. What animals do you want to keep outside (or inside)?2. Do you have 220V power near the fence or do you prefer 12V battery?3. Will you use plastic or wood/iron pegs? With these answers I will make you a detailed list of the pieces to purchase (with recommended quantities).
I'll help you choose everything you need in a simple way. First a quick question (I need it to give you the right advice on the energizer):- How many meters is the fence in total (perimeter)?- Do you confirm that you will use fixed 220V current (no battery)? In the meantime, I'll answer what you ask.1. Electrifier For what you describe (chickens to be protected from foxes, martens, weasels, etc.) and having 220V, the choice of the extra-strong E/220 current energizer is correct. It really serves to bring current to the fence. Included with the mains model you already have:- earthing cable- cable with tweezers for connection to the fence wire2. Insulators for T-shaped iron poles If you have iron poles, you need to use insulators for iron poles. On the site you can find them as:- Insulators for electric fence for iron poles Reference link: https://www.gemimarket.it/recinto-elettrico/40-isolatori-per-recinto-elettrico-per-pali-in-ferro-8053017260662.html
I'll answer you point by point, so you can evaluate carefully.1. Use with dogs and cats: the weakened model is needed From the information available:- The normal Gemi energizers (10000V – 5J) are designed for wild and large animals (wild boars, deer, etc.).- For dogs, cats, rabbits and chickens, the REDUCED model, specific for these animals, is expressly recommended. So: if the enclosure must contain dogs (and perhaps also protect house cats), the standard model (both 2J and 5J) is not ideal: it is not dangerous in a medical sense, but it is too strong in terms of experience for them. For dogs/cats, the specific weakened version is recommended.2. What about predators / ungulates? the problem is "double":- keep dogs inside- keep predators and ungulates (wild boars, etc.) out. With the data I have, the rule is:- for dogs/cats → weakened model- for ungulates and large animals → 6 mm² wires + standard energizers (high energy, 5J) But I don't have an "official" mixed configuration (dogs inside + wild boars outside) already defined.3. Can 5J (white) “traumatize” dogs/cats? What is certain is:- The Gemi electric fence is not dangerous for people and animals: intermittent pulses, low amperage, in accordance with the law.- However, for dogs and cats the use of standard models is not recommended and the weakened one is recommended, precisely to avoid exposing them to an impulse that is too strong compared to their size and sensitivity. Translated: we are not talking about physical damage, but yes, for a dog or a cat the "white" 5J can be excessive as an experience, which is why the company clearly indicates to use the weakened one for them.
I'll clarify the points for you, so you can plan for the future without risking dogs and cats.1. Switch to a more powerful energizer in the future The indications I have clearly say:- for dogs, cats, rabbits and chickens, a specific WEATHERED model is included in the catalogue;- standard energizers (5J, 8J, etc.) are designed especially for wild animals / ungulates. So, even if the dogs "get used to it", the company's logic is not: > "first they get used to 2J and then you move to 5J or 8J with them running around in the pen" but rather:- for small/medium sized domestic animals (dogs, cats, chickens): always use a suitable/weakened model- the very powerful models (5J, 8J) are for wild boars, deer, large wild animals. If the dogs and cats at home continue to stay in the enclosure, I cannot advise you - based on the information available - to switch to a 5J or 8J "they have become accustomed to it". The philosophy is to always keep an impulse suitable for the species, not to "get them used to the blow".2. Add 25m chicken fence in the future The 25m chicken fence with mesh:- it is designed for hens and poultry (small/medium-small animals);- falls into the same "sensitive" category as dogs/cats/hens, so reference is made, again, to systems that are weakened or in any case suitable for small animals. Connect it directly to the same system where a very powerful energizer (5J or 8J) runs together with the dogs/cats:- it is not in line with the "official" security setting I have available;- the impact on chicken netting (animals much more delicate than wild boars) would increase even more.3. Connect the 25m net to the existing fence Technically, a 25m net can be connected to the existing fence, but:- the limit is not so much "whether it can be hooked up or not" (physically it can be connected to the conductive wire);- the critical point is "which electrifier you power it with". With the information I have:- chickens + dogs + cats → they all fall within the logic of using the weakened model / for small animals;- switching to a 5J or 8J with these animals inside is not the recommended solution. If in the future you have:- a separate enclosure, exclusively for wild boars/ungulates, without dogs/cats/hens → there it makes sense to evaluate a strong 5J or 8J;- but if we are talking about the same circuit where dogs, cats and chicken nets are located, the guideline remains: use a model suitable for them (weakened/specific).4. Chicken net + fence extension: what to keep in mind For the scenario:1. Today- 130 m fence with 4 wires for setter/lagotto + cats: → stay on a model suitable for dogs/cats (not on the 5J/8J for wild ones).2. Tomorrow – when you add the 25m chicken wire- If it will be in the same circuit (same energizer, same dogs/cats around): → remain in the "small animals" category → no upgrade to 5J/8J.3. Only if one day you will have a separate enclosure for ungulates, without dogs/cats/chickens:- there you can think about a dedicated system with 5J or 8J and 6 mm² wire.
For a small anti-boar fence of approximately 50 linear metres, with 220V power supply, the recommended model is the E/220- 10000V 5J. This model is ideal for fences up to 500 meters and is perfect for wild boars and large animals. Regarding water resistance: The energizer cannot be left completely outdoors. It is important to keep it covered to prevent it from being damaged by rain, humidity and bad weather. you can place it under a roof, in a box, or use a protective case, as long as it remains sheltered from atmospheric agents. If you need a list of recommended materials for a fence of this size,
Distance between energizer and fence: the energizer can also be positioned several meters from the fence. Generally, it is good practice not to exceed 30-40 meters of distance with the right cable, but if necessary, you can go even further, using the right cable.
Summary:- Cable to use: high voltage cable specific for electric fences (DO NOT use normal cables from domestic electrical systems).- Recommended distance: up to 30-40 meters is perfect; possible even further, but better avoided if not necessary.
Summary:- Cable to use: high voltage cable specific for electric fences (DO NOT use normal cables from domestic electrical systems).- Recommended distance: up to 30-40 meters is perfect; possible even further, but better avoided if not necessary.
For the case (30 m vegetable garden, 3 wires, porcupines + roe deer) an energizer around 5 Joules is more than sufficient. In our catalogue, for this power you have two typical solutions:1. 220V power supply (home socket)- Model: E/220 – 5 Joule- Ideal if you have an outlet near the fence or can be reached with the cable.2. 12V battery powered (with possible 220V use)- Model: B12- It should be used with a 12V car battery of around 40Ah (even higher is fine, it only increases autonomy).- From FAQ: it can also operate at 220V using the supplied power supply, connecting it to the "12V battery" or "solar panel" inputs.- It's the best choice if you don't have an outlet nearby or want something portable/mains independent. With a 30 meter perimeter (therefore very little length of wire) both the 5 Joules of the E/220 and the power of the B12 are more than abundant for porcupines and roe deer.
I answer based on the information I have available in the internal Gemi material. First a quick thing, as per our procedure:
The energizer cannot be left outdoors. It should always be kept indoors, because rain, humidity and sun damage it. you can therefore:- install it inside a room, garage, house, garage, etc.;- or in a closed container/shelter that protects it from water and bad weather, provided it is well ventilated and dry.
It is a very important situation to evaluate carefully. To make the fence energizer work correctly:- You need a dedicated earthing for the fence, made with 3 1 m galvanized pegs- The pegs must be:- spaced 3 meters apart- fix 80 cm into the ground (wet) and 20 cm outside- connected to each other with the yellow/green cable- 1 m of cable is supplied together with the fence, which must be connected from the earth terminal of the energizer only to the first post of the series.
Summing up what to do1. Do not connect the fence to the house earthing in any way.2. Create a new ground line for the fence:- 1 stake: as far away as possible from the house's earthing (ideally ≥ 10 m).- 2nd and 3rd post: 3 m away from each other, in line or in a triangle.3. Connect the 3 pegs together with the yellow/green cable.4. Connect the energizer to the first post of this new series with the cable provided. If you tell me:- how much free space you have around you (in metres)- where you plan to physically place the energizer, I can suggest a practical positioning scheme (such as "put the first stake here, the second there, etc.") adapted to your case. Also,
Summing up what to do1. Do not connect the fence to the house earthing in any way.2. Create a new ground line for the fence:- 1 stake: as far away as possible from the house's earthing (ideally ≥ 10 m).- 2nd and 3rd post: 3 m away from each other, in line or in a triangle.3. Connect the 3 pegs together with the yellow/green cable.4. Connect the energizer to the first post of this new series with the cable provided. If you tell me:- how much free space you have around you (in metres)- where you plan to physically place the energizer, I can suggest a practical positioning scheme (such as "put the first stake here, the second there, etc.") adapted to your case. Also,
Yes, it absolutely can happen. Even if only 1 insulator is mounted correctly and all the others are mounted "incorrectly", the fence behaves like this:- every poorly mounted insulator can create a small dispersion towards the iron pole;- the sum of all these small dispersions means that:- you still hear ticks/noises on the insulators,- the energizer seems weaker,- even the one mounted well "is affected" by the fact that the rest of the line discharges. It's like having many small holes in a water pipe: even if one section is perfect, water continues to leak from other points.
Very important question, because it is precisely the earthing that makes the entire enclosure work well. From our internal indications, correct earthing must be done like this:- 3 x 1 m galvanized pegs- 80 cm in moist soil and 20 cm outside- spaced 3 meters apart- connected to each other with the yellow/green cable- connection from the first post to the earth terminal of the energizer. This is because the ground (especially if humid, with vegetation) is the true "return" of the current.
What can be done 1. Move the grounding area slightly- Look for a point where the ground is:- softer,- more humid,- with some vegetation.- Even if it is a few meters further than the energizer, that's fine: just connect with the yellow/green cable.2. Connect the energizer to the distant stakes- From the earth terminal of the energizer, pull the yellow/green cable up to the area where you managed to firmly plant the 3 1 m pegs.- It's not a problem if you move away a little, the important thing is:- 3 pegs- 80 cm in damp soil- 3 m distance between them3. If you really only have rock everywhere (no “real” dirt):- in that case, the risk is that the fence never works at 100%.- You absolutely need to find a small area of excavable soil, even if it is a little distant.
What can be done 1. Move the grounding area slightly- Look for a point where the ground is:- softer,- more humid,- with some vegetation.- Even if it is a few meters further than the energizer, that's fine: just connect with the yellow/green cable.2. Connect the energizer to the distant stakes- From the earth terminal of the energizer, pull the yellow/green cable up to the area where you managed to firmly plant the 3 1 m pegs.- It's not a problem if you move away a little, the important thing is:- 3 pegs- 80 cm in damp soil- 3 m distance between them3. If you really only have rock everywhere (no “real” dirt):- in that case, the risk is that the fence never works at 100%.- You absolutely need to find a small area of excavable soil, even if it is a little distant.
Yes. The grounding pegs must be purchased separately, they are not included with the energizer or with the fence kit. For good grounding we recommend using:- 3 x 1 meter galvanized pegs- to be positioned 3 meters away from each other- 80 cm in the ground (wet) and 20 cm outside- connected to each other with a normal yellow/green cable
For your needs I can give you fairly precise indications, because they fall within the cases we have documented. First of all, I'll ask you something, so I can be sure to tell you about the right product: the "12V–220V mixed control unit" is our B12 Gemi energizer, right? However, I will answer you on the basis of the B12, which is precisely the mixed 12V / 220V model.1. Which battery to use for a week of autonomy For the B12 energizer:- the use of a 12V car battery is expected- in our documentation it is indicated that:- with a 12V 40Ah battery, if the enclosure is well insulated, the autonomy is on average 5–6 days (in another test even 10–12 days, but we conservatively consider 5–6 because a little dispersion is enough to reduce the duration). In your case:- well insulated enclosure (no grass/plants in contact)- you want to cover even a week of absence The most consistent choice is: > 12V car battery with at least 40Ah capacity; better if 50–60Ah >: a common 12V 50Ah car battery is fine to aim for a week of autonomy with a fence in good condition. However, keep in mind that:- if dispersion occurs over time (grass, loose connections, oxidation), autonomy is reduced- better to start with a battery in good condition and with a capacity that is not at the limit (so 50Ah is a better choice than the "minimum" 40Ah).2. Does the control unit recharge the battery when it is connected to 220V? For the B12 model we have a very clear note: > The B12 energizer can be used with a 12V battery or with 220V home current and not in both ways at the same time. > It does not automatically switch from mains to battery and does not work as a battery charger. So:- no, the control unit does not recharge the battery when it is connected to 220V- it is necessary:- use it or at 220V (with the supplied transformer),- or at 12V (with the terminals on the battery),- and recharge the battery with a dedicated external charger.3. Practical use for how you want to manage it Recommended scheme:1. When you are present:- connect the B12 to 220V using the transformer supplied- the battery can be left disconnected or charged with an external charger
that could be the problem if the grounding cable does not insulate well. From the material I have available:- if a fence cable fails to isolate the current well, you may also hear a ticking sound- in these cases the cable must be inserted inside a polyethylene tube, to avoid dispersion- furthermore the fence must be well insulated: grass, leaves or shrubs must not touch the wire, otherwise it disperses current and it seems as if it does not pass. Therefore: 1. The electrician's tape may not be enough2. If the sheath has been damaged, current leakage may occur3. It is best to replace the damaged section or isolate it correctly inside a polyethylene tube4. Also check that the fence wire does not touch grass or vegetation. To check if current is flowing, you can also do this test:- bring the tip of an insulated screwdriver close to the wire; if you hear a ticking sound, the current passes. Furthermore, a 12V 40Ah car battery is recommended for the B12 model; if the enclosure has no dispersions, the autonomy is approximately 10/12 days. If you want, I can help you do a step-by-step check to understand if the problem comes from the damaged cable, vegetation or grounding.
Yes. There is a complete kit for an electric fence, ready-made, also suitable for anti-boar use, with 12V power supply. In our catalog you will find, for example, the:- Complete kit for electric fence includes:- energizer for electric fence- common thread for grazing / wild animals- insulators- basic accessories to create the fence You can find it here: https://www.gemimarket.it/home/215-kit-completo-per-recinto-elettrico-recinzione-elettrica-rete-elettrica-elettrificazionere-isolatori-filo-cinghiali-mucche-galline-8053017261478.html
I cannot view the content of the Amazon link you sent: I can only use the information you wrote to me in chat. What I know, from what you described:- 2 Joules of energy- declared for fences up to 10 km- adjustable voltage, approximately 8,000–13,000 V- IP44 (therefore designed to also be outdoors)- LCD display From these general characteristics only this:1. It is a rather powerful device. For 100 m of chicken run it is "oversized", i.e. it was created for much longer fences and/or more difficult animals (wild animals, cattle, etc.). This is not a problem in itself, as long as:- use it at minimum setting- you have good grounding- the fence is well made (no dispersions, well-tensioned wires, etc.)2. It works for chickens, but it must be used wisely. The point is not so much "is it good or bad", but "how you use it":- for chickens you don't need all the power you can give- you can easily keep it "quiet" and you will only get an annoying/dissuasive discharge, not a dangerous one.3. Compared to Gemi products I only have detailed technical information on Gemi products, not on other brands, therefore:- I cannot compare internal quality, long-term reliability, certificates, etc.- I can only tell you that, as "numbers", the is more than sufficient for the use that needs to be made of it. If you want something in the future:- specific for small animals (chickens, dogs, cats, rabbits)- with characteristics calibrated specifically for them then you will also be able to evaluate a "softer" Gemi energizer, but with what you have now, well adjusted and installed correctly, you can manage the chicken fence without problems
To build an electric fence you need these main elements:1. Electrifier (or energizer): it is the heart of the system, it transforms the current into electrical impulses which will be transmitted to the wire. It can be powered by electricity (220V) or battery (12V).
I'll answer you using only the official information we have, even if it doesn't include exact consumption numbers in Wh.1. Consumption of the B12/B12A energizer From our official material we know that:- B12:- must be powered by a 12V car battery- with a 12V 40Ah battery:- has an average autonomy of 5–6 days with the enclosure always on (without panel)- this duration may be reduced if there is dispersion on the fence. From this official data we can say with certainty only this:- under normal conditions, a 40Ah discharges in approximately 5–6 days with B12 always running.- We don't have the precise consumption value in Wh/day or Ah/day in the table, so I can't give you an objective and "mathematical" number (e.g. "X Wh in 24 hours") without inventing it, and it wouldn't be correct.2. How much the Gemi solar panel "returns" in a day From our official information on the Gemi panel combined with B12:- The solar panel:- serves to keep the 12V battery charged- battery life depends on:- the Ah of the battery- the dispersion of the fence- the type of conductor Specific official indication: > The solar panel can, on average, keep a 50Ah car battery charged for more than a month, under normal conditions. What does it mean, with the certain data we have:- with panel + 12V 50Ah car battery, in a well-made system (little dispersion), the battery:- remains usable for more than a month with the fence always on- therefore the panel, in normal sunny conditions, compensates for a good part of the daily consumption of B12. But:- here too, official daily production numbers of the panel are not provided (e.g. “X Wh/day”, “Y Ah/day”);- so I can't give you a precise numerical value on "how much the panel gives you back in a day" without going beyond the official information.
The depowered 220V energizer (model for cats, dogs, rabbits, chickens) is supplied with:- Earthing cables- Power cord (a standard cable) Not included in the price:- The common thread to fence the area- Spacers/isolators These accessories must be purchased separately, depending on your needs and the length of the fence you want to create. Do you need advice on which accessories to add to your order?
I understand the idea, but for electric fence energizers it is strongly recommended to use 3 galvanized pegs of 1 meter each, inserted into the ground 3 meters away from each other, with at least 80 cm buried in damp soil. This system has been tested to ensure maximum earthing effectiveness and safety. Connecting the energizer to a galvanized fence (even if it is long and buried for 50 cm) is not recommended. Here's why:- The net may not guarantee uniform and constant contact with the ground, especially in the case of dry or poorly conductive ground.- The tests carried out with the 3 galvanized pegs ensure that the current discharge is complete and that the fence works correctly, avoiding dispersions and drops in power.- Inadequate earthing greatly reduces the effectiveness of the fence: the animals may not feel the discharge and overcome the fence. Tip: Avoid connecting to wire fences or the home earth. Always use the 3 galvanized stakes, as recommended, to have a safe and effective fence.
Absolutely yes, you can write here again whenever you want. When you assemble the fence, if you have doubts or something doesn't add up, you can:- describe the problem (even step by step),- tell me what model of energizer and materials you are using,- indicate where you are stuck (connections, ports, grounding, etc.), and I will help you fix everything here in chat.
Yes. All you need is a 12V car battery: you don't need a special battery. For the B12 energizer:- the battery is not included- must be connected externally with the cables provided- a 12V car battery is recommended
Important note The autonomy changes a lot if the fence has dispersions, for example if the wire touches:- grass- branches- earth- vegetation If you want, I can also tell you which battery to choose between 40Ah, 50Ah and 100Ah based on how often you want to go and check it.
Important note The autonomy changes a lot if the fence has dispersions, for example if the wire touches:- grass- branches- earth- vegetation If you want, I can also tell you which battery to choose between 40Ah, 50Ah and 100Ah based on how often you want to go and check it.
According to available information:- It must be a high voltage cable to carry the current from the energizer to the room or to join two rooms.- It is a copper cable covered with a rubbery sheath to maintain insulation.- If it is buried, it is recommended to pass it through a polyethylene pipe for greater insulation.- Can be used above ground or underground, without drainage, if installed correctly.- The indicated cable has a thickness of 3 mm.- It can also be used for distances greater than 100 m, although it is indicated as particularly suitable for 30/40 m. Furthermore, one of the technical answers indicates that, if the energizer and the fence are distant, a cable of any section is valid, as long as it fits into a polyethylene tube. In practical summary:- type: high voltage cable for electric fences- material: copper- insulation: rubbery covering- Recommended installation if going on land: inside a polyethylene tube- indicated thickness: 3 mm
You were right to ask: the E/220 energizer model you purchased is designed mainly for large animals (such as wild boars, deer, cows, etc.) and is not recommended for dogs, because the power is too high compared to what is ideal for them. For use with dogs, it is not possible to safely depower the standard model.
It is not mandatory to close the fence: it can also be opened on one side. For how Gemi electric fences work:- The thread can form a closed ring (parallelogram, rectangle, etc.)- Or it can be a non-closed "linear" barrier → In both cases the fence works normally, as long as the wire is always well insulated from the poles and the earthing is done well. So in your case, with:- iron rods + insulators,- wire that runs in a non-closed line (to protect only one side), this is fine: the energizer still sends the impulses along the entire length of the wire. The only points to take care of are:1. Good grounding (3 galvanized pegs connected to the black clamp).2. Perfect insulation of the wire from the poles (with iron insulators).3. Connection from the red clamp to your linear section wire
Yes. That's fine too: you can NOT even see the "short" cable in the cart, because it is not mandatory to buy it separately. I'll calmly explain what really matters and then I'll tell you what to check in your kit.1. How the kit is made (the one you described) The "Complete electric fence kit" you are using works like this: you can choose: 1) Electrifier 2) Insulators 3) Wire or Tape 4) Accessories From our internal information, the electric fence kit is made up of:- energizer- common thread- insulators- accessories for the passage And you can modify the kit products according to your needs. The short 2.2m wire is NOT fence wire:- it's just a connection cable (energizer → fence or earth).- not always shown as a separate item in the cart.2. What you need to have in your cart to be OK For the 10 × 15 m fence with 3 wires for deer, you just need these items in your cart (even if you don't see "2.2 m cable" written):1. ELECTRIFIER- A 220V (mains) model.- Ideal: E/220 – 10000V 5J.2. THREAD- At least 1 coil of conductive wire (not short wire), to go around the fence.- For deer/wildlife: 6 mm² line (500 m spool is more than fine).3. INSULATORS FOR WOODEN POSTS- For you: about 66 insulators (3 per pole × ~22 poles).-: 1 pack of 100 pieces.4. ACCESSORIES (OPTIONAL BUT USEFUL)- “Electric fence” signage table- Gate handle (
Yes. You can use the existing metal fence ONLY for grounding, but with some important attention.1. When it is correct to use the network as "earth" it can be done if:- The galvanized iron mesh:- it is firmly planted in the ground with stakes,- it is all metal (not interrupted by pieces of insulating plastic),- it is always damp in contact with the ground in various points (typical of gardens). In this case you can:- connect the earth terminal (black / “–” symbol) of the energizer:- directly to the metal mesh or to a metal pole of the mesh,- with a cable (better yellow-green or in any case a good conductor). Effect:- the entire network becomes a large earth electrode, often more effective than 1–2 single stakes.2. What should NOT be done1. NEVER connect fence wire to wire mesh:- the fence wire (red “+” terminal) must always be isolated, on insulators.- the wire mesh can only be the ground, never the “+ fence”.2. DO NOT let the electrified wire touch the net:- if the fence wire touches the net:- go short,- the fence no longer works properly. So:- metal mesh = connected to the earth terminal,- fence wire = connected to the red “+” terminal, and kept away from the network thanks to the insulators.3. However, it is better to add at least one ground stake. Even if you use the net as ground, it is an excellent practice:- add at least 1 1 m galvanized stake into the ground- connected to the mains and to the earth cable of the energizer. Like this:- you are sure you have good grounding even if in some places the ground near the network is drier.
If you tell me how the fence is made (low net only? High net? With iron poles every how many metres?), exactly:- where is it smartest to connect the ground cable,- and if you want to add 1 or 3 ground stakes at some specific point.
If you tell me how the fence is made (low net only? High net? With iron poles every how many metres?), exactly:- where is it smartest to connect the ground cable,- and if you want to add 1 or 3 ground stakes at some specific point.
For the 220 V energizer it should be done like this:- It should never be placed outdoors. Keep it indoors, in a place protected from rain, humidity and bad weather (e.g. inside a room, garage, house, garage).- Mandatory earthing:- Insert 3 1 meter galvanized stakes into the ground,- Distance between them: about 3 meters,- Depth: approximately 80 cm in the ground (better if moist) and 20 cm outside.- Connect the pegs to each other with the yellow-green cable, then connect the same yellow-green cable to the earth terminal of the energizer.- Connection to the fence:- The red cable of the energizer must be connected to the fence wire.- Never connect two energizers to the same wire: if you use two, they must work on two separate wire lines of the same fence. If you tell me where you have the current point (at home, in a garage, in the stable, etc.), I can suggest the most practical place to fix it.
An “extra strong” energizer typically should go higher than 4000V, especially if the wire is clean of weeds. However, several factors can affect the voltage measured on the electric fence wire: Things to check:1. Grounding: One of the most frequent causes of low voltage is improper grounding.- Three galvanized pegs must be used, driven into the ground approximately one meter deep and spaced 3 meters apart.- Connect them with a yellow-green cable (in a humid position it is better).- A single pole significantly reduces effectiveness and tension.2. Connections: All connections (between energizer, wire and earth) must be well tightened and without oxidation.3. Battery (if applicable): If the energizer is battery operated, make sure it is fully charged. A discharged battery delivers less voltage.4. Measuring instrument: Are you sure that the instrument used is suitable for measuring the high voltage of electric fences? An unsuitable tester can give incorrect values.5. Soil conditions: In summer, with dry soil, earthing loses its effectiveness. In that case, you can wet the ground around the ground stakes. Simple additional check: you can also bring the tip of an insulated screwdriver close to the fence wire: a "ticking" signal indicates the presence of current.
Just in case I'll give you a very direct answer. First important thing (as per our rules): Do you prefer an energizer powered by 220V or 12V battery? I'm asking because the recommended model changes. Meanwhile, the options suitable for your 350–400 m vegetable garden against wild boars.1. Choice of energizer (models you have just seen) On the site you have just opened:1. E/220 at 220 V current- Model: “E/220 220 V current energizer for electric fence”- Indicative price: €99.90- Power supply: 220V current only2. E/220 A Extra-strong current 220 V- Model: "Electrifier E/220 A Extra-strong current 220 V for electric fence"- Indicative price: €144.90- Power supply: 220V only, but more powerful (“Extrastrong”) For a 350/400 m vegetable garden against wild boars:- If a standard system is enough for you and you don't have very long fences connected in the future:- you can also use the normal E/220 (ID 51).-
To answer you well I only need two - What animals do you want to keep inside or outside?- More or less how tall are they (small, like sheep/dogs, or large like horses/cows, or wild, like wild boars)? In the meantime, I'll explain in a general way:1. Arrangement of the 3 wires on the pegs (physical diagram)
B) Enclosure for other animals (generic scheme) Based on the size of the animal (general guidelines of our material):- Small animals (dogs, dwarf goats, sheep, etc.)- 1 wire: 20 cm from the ground- 2nd thread: another 20–30 cm above the first- 3rd thread: another 20–30 cm above the second- Wild boars (specific case already indicated):- main wire approximately 30 cm from the ground- other threads above for safety, as in the wild pattern- Large animals (horses, cows, etc.)- main conductive wire 60–80 cm from the ground- the other wires can be placed lower, always in steps of 20–30 cm.2. How to connect the wires to each other (electrically) The objective is that all 3 wires are at the same potential (all "electrified") starting from a single energizer. Principle diagram:1. From the energizer:- Red contact = high voltage output towards the fence- Black contact = earth (connected to galvanized earth rods)2. From red contact to fence:- Use high voltage wire (not regular wire)- Ideally you pass it through a polyethylene tube if it has to travel a long way, to avoid dispersion- Once you arrive at the fence, connect this cable to the first electrified wire (usually the highest wire or the one that is most convenient for you to reach).3. “Bridge” between the three wires:- From the point where you arrive with the cable to the 1st wire, make vertical jumpers to connect:- 1 thread → 2 thread- 2 thread → 3 thread- it can be done:- with pieces of the same common thread- or with special connectors/junctions- Important: where you make the bridge, remove the plastic that insulates the conductor, once it is well tightened (knot or clamp). all three wires become a single electrical circuit, connected at several points vertically.3. How to power multiple “laps” (multiple lines/fences) with a single energizer It depends on what you mean by “laps”:
Case 2: Multiple separate enclosures / multiple turns in the same land Example: one main enclosure and one separate internal enclosure. it can be done like this:1. From the red output of the energizer start:- a cable towards the first turn- another cable towards the second turn (with connectors or joints)2. Each round will then have:- the point where the "hot" cable arrives- the usual bridges between the 3 wires of that loop make a kind of "distribution":- energizer → main cable- from the main cable → branches to each fence/turn4. Grounding (fundamental for everything to work) For the fence to "pinch" well:- Insert 3 1m galvanized stakes into the ground- Layout:- distance between them: 3 m- 80 cm in the ground (better if humid, with vegetation)- 20cm outside- Connection:- join them together with the yellow-green cable- then from the group of pegs go to the black contact of the energizer- In summer or dry soil: water the soil around the stakes to improve yield. With a single stake the discharge felt is much lower and the animals could pass through.5. Summarizing the "typical" scheme1. Electrifier- red → high voltage cable → fence- black → 3 ground stakes in series (80 cm in damp ground)2. At the fence- Red cable comes to the first wire- From the first make a bridge to the second, and from the second to the third- The three wires run along the entire perimeter3. Heights (example for wild animals)- 20 cm – 50 cm – 80/90 cm from the ground
If the energizer is far from the fence and the supplied cable is not sufficient, here is how to proceed for a safe and effective connection:
What NOT to do- Avoid using common electrical cables: only high voltage cable guarantees safety and effectiveness.- Do not leave cables exposed or unprotected, especially if buried or outdoors.
What NOT to do- Avoid using common electrical cables: only high voltage cable guarantees safety and effectiveness.- Do not leave cables exposed or unprotected, especially if buried or outdoors.
Yes. You can (and should) use a milder shock for dogs. For dogs, the standard 10000 V – 5J energizer should not be used, but the weakened model specific for dogs and cats. What needs to be done - we recommend using the weakened 220V energizer designed specifically for dogs and cats.- You can find it here on the Gemi website: https://www.gemimarket.it/recinto-elettrico/266-elettrificazionere-e220-per-recinto-elettrico-da-pascolo-8053017260174.html This model:- it is designed specifically for pets (dogs, cats, rabbits, chickens)- gives a short and dissuasive shock, not dangerous, but enough to make the dog understand that he must not touch the wire ️ Important:- Avoid using a strong boar/deer pattern on dogs.- The electric fence, used with the right model, is not dangerous: the discharge lasts a thousandth of a second and is only a deterrent.
At the moment I do not have the specific length of the connection cable supplied with each Gemi energizer. However, I can tell you two useful things, based on the information I have:- To connect the energizer to the fence, a high voltage crossing cable is used, which can also be worked underground without dispersions.- This cable, with a thickness of 3 mm, is suitable for up to 30/40 meters to connect the point where you have electricity to the fence (beyond these distances it is recommended to pass the conductor wire by air or create two separate fences). If you need to know:- the exact length of the cable supplied with a specific model (e.g. E/220 extrastrong, B12, etc.), or- what length of cable to buy for the situation, write to me:1. The energizer model (e.g. E/220, B12, etc.)2. The approximate distance between the energizer and the fence (in metres) and I will immediately show you the most suitable solution with the correct measurements.
Electric Fences / general
Yes. The grass has an impact and can cause problems for the electric fence.- If the grass touches the wires, part of the current is discharged to the ground through the grass.- This is called energy dispersion and decreases the force of the shock along the fence.- The more the wires are "filled" with grass, branches or hedges, the less effective the fence becomes. To have a good functioning it is important:- Keep the grass as low as possible under the fence (cutting, brush cutter, etc.).- Position the wires so as not to touch the ground, plants, hedges or the net. In your case, with 4–5 threads in front of the net:- Place the lowest wire high enough from the ground so that it is not constantly immersed in the grass (leave a few cm of margin considering how it grows).- The upper wires, being higher, will be less subject to contact with the grass.
Yes. At the last insulator you can close the thread with a knot, but with some care:1. End fence (without wire return)- You reach the last isolator- Pass the wire through the insulator- You stretch it well- Tie a knot to secure it. At this point you can also cut the excess thread.2. Splices along the fence or if it is necessary to lengthen the wire When it is necessary to join two strands of wire:- Strip the plastic covering to expose the internal conductor well- Tie a simple knot between the two ends- Make sure that the internal conductive wires are well connected to each other (splices should only be made where necessary, because each splice is a small point of possible dispersion).3. Pay attention to the insulator- The wire must only be inserted into the appropriate seat of the insulator- Do not make a complete turn (dead turn) around the insulator, because this creates current dispersion. If you tell me what type of thread you are using (plastic-coated cable, high voltage cable, etc.), I will explain exactly how to tie a knot on that specific type.
Yes. You can add the electric fence wire to an already existing network, the important thing is that the network is insulated and does not touch the ground. In this way you avoid dispersions and guarantee the correct functionality of the electric fence.
Here are the thicknesses available for the Gemi electric fence wire and the related instructions for use:
Advice for the situation In your case (protection against foxes and, above all, wolves on a fairly long fence), 6 mm² wire is highly recommended. The reasons:- Greater tensile strength.- Less current dispersion, which guarantees efficiency especially over medium/long distances.- More effective against determined animals such as wolves.
Advice for the situation In your case (protection against foxes and, above all, wolves on a fairly long fence), 6 mm² wire is highly recommended. The reasons:- Greater tensile strength.- Less current dispersion, which guarantees efficiency especially over medium/long distances.- More effective against determined animals such as wolves.
If a plant, branch, tall grass or shrub touches the electric fence wire, leakage current occurs. - The wire loses part of its effectiveness because part of the current passes through the plant and goes to "ground".- If the plant mass touching the wire is abundant or very humid, the dispersion can be considerable to the point of making the fence little or not at all effective.- In the case of just one small dry blade of grass, dispersion is minimal, but damp leaves, wet grass or many branches greatly reduce the charge of the fence. Result: The fence "works poorly" and does not maintain its deterrent effectiveness. Animals may not receive sufficient shock and may try to pass.
For the electric fence to remain effective, the wires must remain isolated from grass, leaves and branches. A little periodic maintenance guarantees all the protection you are looking for! Do you have any other curiosities or technical doubts? Just ask!
For the electric fence to remain effective, the wires must remain isolated from grass, leaves and branches. A little periodic maintenance guarantees all the protection you are looking for! Do you have any other curiosities or technical doubts? Just ask!
The energizer cannot be placed outdoors and must always be positioned in an environment protected from bad weather, such as a garage, a tool shed, a veranda, a shed or a special watertight box (well ventilated and protected from rain and humidity). > Reason: The appliance is not designed to withstand rain, humidity or direct sun and would risk serious damage if left outside. What to do:- Install the energizer in an indoor location near the current point.- From there you will simply run the positive wire out to the fence wire and the ground wire out to the ground rods. If you need an alternative solution (such as an outdoor waterproof junction box), just ask so I can explain what to consider!
If you touch the wires of the electric fence while the energizer is on, you will receive a pulsed electric shock. It is important to know that:- The shock is not lethal or dangerous for a healthy person, but it is still very annoying and can cause a small "blow" similar to a strong prick or pinch.- The sensation lasts only an instant, because the device sends low intensity and alternating pulses, precisely to avoid dangers.- The real risk is more the fright or possible sudden falls/reflexes, rather than real physical damage. Why does it feel so much? The voltage is high (even reaching 10,000 volts), but the current is very low and is delivered in very short pulses: this guarantees dissuasive effectiveness without causing permanent damage. > Accidentally touching the wires gives an intense and annoying shock, but is not dangerous for healthy adults. However, it is advisable to always avoid touching the wires with bare hands and to disconnect the power supply for any work on the fence, to work safely and without risks. If you have children, it is important that they know that they should never get close, because they are more sensitive and the fright can be greater! Just ask me
Yes. The electric fence sign is available and can be purchased directly from the Gemi website.
How many signs are needed?- The legislation requires that it be clearly visible at all access points and, in fenced sections adjacent to public spaces, at least every 50 metres.- In your case, with an L-shaped net (one side of 42 m and one of 73 m, total 115 m), we recommend:- A sign for each visible/access side (especially on gates and corners).- Generally, 2-3 signs are more than sufficient to ensure correct signaling and comply with the regulations. Practical example for the network:- 1 sign on the 42 m side (at the beginning of the side or near any accesses)- 1 on the other side, 73 m long (towards the access/corner)- Possibly 1 additional sign at the corner where the two sides meet, or if the fence is visible from a public space. Therefore it is advisable to purchase 2 or 3 signs for peace of mind.
How many signs are needed?- The legislation requires that it be clearly visible at all access points and, in fenced sections adjacent to public spaces, at least every 50 metres.- In your case, with an L-shaped net (one side of 42 m and one of 73 m, total 115 m), we recommend:- A sign for each visible/access side (especially on gates and corners).- Generally, 2-3 signs are more than sufficient to ensure correct signaling and comply with the regulations. Practical example for the network:- 1 sign on the 42 m side (at the beginning of the side or near any accesses)- 1 on the other side, 73 m long (towards the access/corner)- Possibly 1 additional sign at the corner where the two sides meet, or if the fence is visible from a public space. Therefore it is advisable to purchase 2 or 3 signs for peace of mind.
Great idea! I checked the link you indicated: [Electric Fence Spacer Insulator, 22cm Long Screw (Amazon)](https://www.amazon.it/gp/product/B00K5KXJVM/ref=sw_img_1?smid=A304OI6DXWXYE5&psc=1)
How to apply it on your 5x5 cm pole:- Drill the square post (approximately 8 mm through hole, check the card but the diameter should be the right one for the screw)- Insert the insulator through the pole- Tighten with the nuts (one on each side), so the plastic part remains cantilevered from the pole- With a 5 cm pole and 22 cm screw you will have approximately 17 cm of projection/detachment, more than enough to overcome any obstacles (such as nets, vegetation, etc.)
️ Tips- If the protrusion is "too much" for your needs, you can possibly shorten the screw (with a hacksaw) or leave it long if you need a lot of separation from the net.- Check that the nuts are suitable (often M6/8 mm), and perhaps use large washers so as not to crush the pole too much.- Get just one test piece, so you can verify the installation is as you want before buying many.
Yes. With Gemi plastic pegs you can also easily use aluminum wire. The plastic pegs for electric fences (such as the 160 cm one with 10 eyelets or the 121 cm one with 8 eyelets) are already insulating and are designed specifically to pass the fence wire or tape through them, without the need for additional insulators. The material of the wire (copper, steel, aluminum, mixed, etc.) does not create problems for the post, because the plastic acts as insulation. Only practical precautions:- pass the wire through the eyelets without pulling it excessively so as not to bend the stake;- prevent the wire from touching the ground or poles/metal nets outside the system, to avoid creating dispersions. If you tell me:- which animals do you want to contain or keep out- and how many meters of fencing needs to be done, I can help you better calculate the wire, number of pegs and accessories needed.
Yes. The insulators for iron poles are present in the catalog on our website and can therefore be purchased online. However, I confirm that:- they are only available in packs of 100 pieces;- they are suitable for iron poles/rods with diameters from 1 mm up to a maximum of 18 mm. If the poles are 20mm, these insulators are no good. you can see them here: https://www.gemimarket.it/recinto-elettrico/40-isolatori-per-recinto-elettrico-per-pali-in-ferro-8053017260662.html If you tell me:- diameter of the iron poles- how many meters of fence need to be made- how many threads do you plan to put (2, 3, etc.) I will calculate how many packs you need.
Yes, you can use it, but I don't recommend 2.2mm as the main choice in your case. With the data:- Perimeter: 350 m- Wires: 3- Total wire length: 350m × 3 = 1050m One 500m spool of 2.2mm:- alone it is not enough to make all 3 threads- plus the 2.2mm is designed for small enclosures / small animals, it has more dispersion than the 4mm and 6mm. In your case the best solution is:- use the same 4 mm (or 6 mm) wire for all 3 wires:- 350 m × 3 = 1050 m →- with 1 spool of 1000 m 4 mm you will still get there (between turns, connections, etc. you are at the limit but manageable)-
Yes, it can be done, but with an important clarification on the type of cable to use. From what you write, I understand this:- you want to use 6 mm² fence wire (red)- along a fence with galvanized pickets + wire mesh- to bring the current to another point about 18 meters away- passing the section where it cannot be buried inside a Ø 16 mm black irrigation pipe, secured with clamps.1. Use of the tube to avoid dispersion In our general indications, to carry the current when the cable is not on the fence, we recommend:- use high voltage cable e- pass it through a polyethylene tube (like black irrigation tubes), to prevent current leaks and increase safety. So:- using a Ø 16 mm black irrigation pipe, fixed with clamps, is a correct solution from the point of view of mechanical protection and additional insulation.2. Pay attention to the type of wire you pass through the tube. Here is the crucial point:- the 6 mm² fence wire is designed to be:- stretched on poles,- in the air,- isolated by insulators (not in contact with pickets/metal structures or ground). To bring the current out of the fence (as an extension between the energizer and the fence or between two fences), our instructions talk about:- dedicated high voltage cable (copper with rubberized sheath),- possibly inserted inside a polyethylene tube. So, the best solution is:- do not use the 6 mm² fence wire as a hidden "line cable",- but use an insulated high voltage cable, and pass that through the irrigation hose.3. Why avoid the fence wire (6 mm²) in that section The fence wire:- it is already insulated, but it is designed to:- stand on insulators,- do not rest or be crushed in narrow spaces or in contact with metal structures along the entire path. Better then:1. From point A to point B (18 m outside the fence):- use high voltage cable;- pass it through the 16 mm black tube (as you suggest);- fix the pipe with clamps to the pegs/structure.2. At point B:- connect the high voltage cable to the 6 mm² fence wire which then enters the new section of fence.4. Galvanized net and pegs Also pay attention to this:- the conductor (whether fence wire or high voltage cable) must never directly touch:- the metal mesh,- galvanized pegs,- other metal parts connected to earth,- unless that fence is intentionally the electrified fence (which is generally not recommended unless it is specifically designed for that). If you use the black tube:- the cable inside is mechanically separated from the net/pegs,- so it's a correct choice.
generator For grounding, no, it is recommended to use 3 dedicated galvanized pegs and not to use the gate. The indications we have are these:- you need 3 1 meter galvanized pegs;- they must be positioned approximately 3 meters away from each other;- approximately 80 cm in the ground and 20 cm outside;- then they must be connected with the yellow-green cable;- it is better to do it in a spot with moist soil, because arid soil conducts worse. The reason is that grounding is critical to the proper functioning of the fence. With a different solution, such as an iron gate fixed in reinforced concrete, I cannot confirm correct functioning, because the available instructions expressly indicate the use of the 3 galvanized pegs in the ground. In addition, we also have this practical indication:- with a single stake the perceived power may be lower;- with 3 pegs the functionality is correct. So the recommended solution is:1. install 3 dedicated galvanized pegs;2. connect them to the black terminal of the energizer using the yellow-green cable;3. make land in an area that is as humid as possible
good that the system is having an effect. For ticking on the wire, the available indications say this:- if you bring the tip of a screwdriver with an insulated handle a few millimeters from the wire and you hear a ticking, it means that there is electricity on the electric fence;- therefore, in this sense, ticking is an indication of the presence of current on the wire. However, there is one important point:- if the wire carrying the current emits a ticking noise as a continuous noise, it can also mean that the cable is not able to isolate the current well;- in that case the indication is to insert the cable inside a polyethylene tube. So: - yes, the ticking indicates that there is current on the wire;- but if you hear a constant abnormal noise along the connection cable, it should be checked that there are no leaks or poorly insulated points. Regarding grounding to the iron frame of the house, I cannot confirm this as the correct solution: the available instructions indicate the 3 dedicated galvanized pegs in the ground as the recommended solution. If it works at the moment, great, but the confirmed configuration remains the one with the ground rods.
We do not have an "official" distance in meters to respect from the home earthing system. Our indications are these:- The earthing of the energizer must be independent and not connected in any way to the earthing of the house.- The 3 galvanized pegs must be placed:- between them at a distance of 3 meters,- 80 cm in the ground (better moist, with vegetation) and 20 cm outside,- connected to each other with the yellow-green cable, and then to the black terminal of the energizer., common sense is:- place them in an area of ground that is as humid as possible and "dedicated" to the enclosure,- do not physically attach them to the earth rod of the home system and do not use the same earth conductor. If you tell me where you plan to install the energizer (near the wall of the house, in the garage, on a pole in the garden, etc.), I can suggest a practical location for the 3 pegs there.
I'll answer point by point.1. Is the weakened model suitable for a German Shepherd? Yes. The fact that the dog will grow to a large size is not a problem: the weakened model for dogs is designed specifically for dogs (even medium-large sized ones) and cats. It serves to give an educational but gentler shock than standard pasture energizers for large animals/wildlife. So: ️ The weakened one is also suitable for an adult German Shepherd.2. Iron poles: maximum diameter for insulators From our information on insulators for iron poles:- The iron stake/rod insulators are adjustable for poles with diameters from 1mm up to 18mm.- If the iron post has a diameter greater than 18 mm, these insulators cannot be used. So:- If you will use iron poles/rods → choose poles with a maximum diameter of 18 mm.- Ideal: 8, 10, 12, 14, 16 mm rods etc., as long as they do not exceed 18 mm.3. Next step: final configuration With what you told me, the ideal set for you becomes:- 220V depowered energizer for dogs- Conductor wire (4mm or 6mm, both ok for dog)- Insulators for iron poles (max poles 18 mm in diameter)- “Electric fence” sign If you just tell me:1. if you confirm the weakened model for dogs,2. if you prefer 4 mm or 6 mm wire, I will write you the precise final list (product name + quantity) as if the cart were ready.
Yes. With our electric fence products you will always find instructions for use, and for the main models there are also demonstration videos online on the Gemi website or on YouTube (just search for the model name, for example "Gemi B12 electric fence").
To lengthen (extend) an electric fence wire it can be done easily, just make the junction in the right way.
What NOT to do- Do not leave the copper half covered by plastic: the contact must be copper-copper.- Don't just make a "dead turn" around an insulator to join two wires: it's always better to have a well-joined knot + copper
What NOT to do- Do not leave the copper half covered by plastic: the contact must be copper-copper.- Don't just make a "dead turn" around an insulator to join two wires: it's always better to have a well-joined knot + copper
For pickets there is no mandatory fixed number, but an average distance of 3–5 meters is used between one pole and another. With the 140 meter fence:- if you place the pegs every 5 m → 140 ÷ 5 ≈ 28 pegs-
At the moment I have no information on a specific "anti-wolf" electrified fence for sheep. However, that our electric fences are designed to contain animals such as sheep, cows and pigs, and to ward off wild animals such as wild boars, deer and foxes.
Better not: the dead lap around the isolator should not be done, not even every now and then. In the Gemi guides it is specified that:- the wire must never go completely around the insulator;- otherwise current leakage is created and the fence loses effectiveness. How to do it then:- Pass the wire inside the insulator only when supported, in tension, without winding it.- To keep the thread taut use:- the corner posts well fixed,- any tensioners or tension points outside the insulator (before or after it), but not around it.
To connect two electric fence wires, the correct procedure is this:1. Strip the plastic covering that protects the conductor wire, to expose the metal.2. Tie a knot between the two lead wires, making sure the contact is secure.3. Connect the two wires well: it is important that the metal wires are in good contact with each other, without isolated or loose parts, to avoid energy dispersion. If after tying the knot you still notice a lot of dispersion, we recommend checking that:- The wires are well stripped and the metal is clean.- The knot is tight and the threads are well intertwined.- There are no oxidized or broken parts. An imperfect connection can cause current leakage and reduce the effectiveness of the fence.
Yes. You can easily use 12 mm metal pegs as support for the electric fence wire!
Summary:- Yes. You can use 12 mm metal pegs- Use iron stake insulators- Avoid any contact between wire and metal part- If necessary, I will also help you choose the best solution for earthing! Do you want me to update the materials list taking your pegs into account? Do you want clarification on insulation or installation? If
Summary:- Yes. You can use 12 mm metal pegs- Use iron stake insulators- Avoid any contact between wire and metal part- If necessary, I will also help you choose the best solution for earthing! Do you want me to update the materials list taking your pegs into account? Do you want clarification on insulation or installation? If
It's a very common doubt!
Here's what happens in practice:- The Gemi electric fence wire has a protective sheath, but this is not very thick and the internal metal wires are often intertwined and partly "emerge" or are found immediately under the surface of the sheath.- When an animal (for example a wild boar) touches the wire with its snout or body, the pressure and rubbing cause the skin (wet or dirty with earth) to come into contact with the metal part under the sheath or with the metal wires which, during normal installation and traction, often protrude slightly.- This brief contact is more than enough to close the circuit and cause a shock.
Because wild boars (and all animals) get the shock- When they touch the wire, they close the circuit between the internal conductor (by detaching the sheath or through small exposed points) and the earth.- Even a minimal exposure of the wire in those points is sufficient to transmit the electrical impulse.
The 4 mm² wire for electric fence, like the one you purchased, is suitable for medium or large-sized animals and for fences of a certain length. However, it is important to know that the wire should never be placed in direct contact with tall grass or dense vegetation. Reason: Tall grass, especially if damp, can cause current leakage, reducing the effectiveness of the electric fence and, in some cases, completely canceling the electric discharge. This applies to all types of wire, even thicker ones. What to do:- Keep the wire raised from the ground, at least 20-30 cm for small animals, 30 cm for wild boars and 60-80 cm for large animals such as cows and horses.- If the grass grows rapidly in the fence area, it is advisable to cut it regularly under the wire or to use a herbicide in the strip where the wire passes. Manual: I'm sorry you didn't find the manual in the box. If you need guidance on how to install the fence or would like detailed instructions, I can help you directly here or send you a link to a complete guide.
The iron pole nut insulators are currently not available in our inventory and unfortunately I have no information on a return date. If it helps you, I can confirm that standard insulators are available for iron poles (without nut) up to 18 mm in diameter: https://www.gemimarket.it/recinto-elettrico/40-isolatori-per-recinto-elettrico-per-pali-in-ferro-8053017260662.html To help you better with an alternative, tell me:- what diameter do the iron poles have?- what total length will the fence have?
Yes, of course: you can easily cut the 1000 meter electrified wire and use only the quantity you need. Some practical precautions:- Cut the wire to the desired length with a good pliers/wire cutter.- If you need to make a joint between two pieces of thread, you can do it with a simple knot between the two ends.- Make sure that, at the junction points, the internal metal makes good contact (don't just leave plastic against plastic). If you tell me how many meters of fence needs to be done, I can help you understand:- how much thread is actually needed- and if it is better for you to use the 1000 m roll all on the same fence or keep a spare part of it.
To fix the wire to a marble cornice without drilling it, you have few "safe" and practical solutions. First I'll ask you something quick, so I can advise you better:- Are you talking about Gemi electric fence wire (for animals), or "normal" wire (e.g. for pigeons, tent, etc.)? In general, for a Gemi electric fence on hard structures (concrete, marble, etc.) the standard solutions involve drilling to insert plugs and then the insulators; without the hole everything becomes "makeshift" and less reliable. however the possibilities without hole:1. Supports fixed to elements already present If on or near the cornice there are:- grates- railings- metal poles- other structures fixed to the masonry you can:- place small wooden/plastic/metal supports fixed to these structures,- and screw the classic Gemi wood insulators onto those supports.2. Pressure clamps / brackets (if there is a gripable edge) If the cornice has a thickness where it is possible to “hook”:- use metal clamps or U-shaped brackets that "hug" it without piercing it,- then fix a small piece of wood/plastic onto the metal,- and screw the wire insulators onto that.3. Clamps on nearby elements If near the cornice there are:- pipes,- downspouts,- railings, you can:- secure a support (wood/plastic) with sturdy clamps,- and use insulators on that support. Important points:- With an electric fence, the wire must be:- well insulated by marble, iron, etc.- taut and stable (nothing moving in the wind).- Without drilling the marble, there is no "official" Gemi solution with a guarantee of tightness like with dowels. If you tell me:- what use is the wire for (electric fence for which animals? pigeon deterrent? other?),- what shape the cornice has (thickness, if it has an edge to attach something to),- if there are railings, pipes, walls, poles nearby, I can suggest a more precise practical step-by-step solution for the case.
For an electric fence, the supports (posts + insulators) should be placed every 4–6 meters on average, but it adapts based on the type of animal and the terrain:- Wild animals (wild boars, badgers, porcupines, etc.): 4–5 meters between one pole and another is better → the wire remains tighter and more stable.- Grazing animals (cows, horses, sheep, etc.): 6 meters between one pole and another may be enough. From our internal guide: > it is recommended to position the fence posts at a distance of 4 or 6 m. > For wild animals: 4–5 m > For grazing animals: up to 6 m If you tell me:- which animals do you want to contain/remove,- how many wires do you want to put (2, 3, 4?),- how many linear meters the fence needs to cover, I can also calculate how many insulators you need in total.
To lengthen or repair the fence wire, you can easily use the classic knot. From the Gemi instructions:- The joints to the conductor wire are made:1. First stripping the plastic covering where the two ends need to be joined2. Tying a knot between the two ends3. Connecting the internal conductive filaments well together- It is recommended to make splices only where necessary, because each splice is still an extra point where there may be some dispersion. At the moment I have no indications on specific Gemi clamps or joints dedicated to joints: the envisaged procedure is precisely that of a well-tied knot, with the internal threads in good contact.
Very fair question: the first starting point is different from other "passage" insulators. Just tell me first, so I can answer you specifically on your case:- is the first stake made of iron, wood or plastic? In the meantime, I'll explain the general principle to you.
Simple solution (with the knot, but done well) If the thread is the classic Gemi one covered in plastic:1. Turn off the energizer.2. At the first isolator:- pass the wire inside the insulator.- Then, a few centimeters from the insulator (not really attached), tie a small knot on itself to block it.3. Important:- if you need to splice with another piece of wire, strip the plastic at that point, join the copper/metal conductors well and tighten. The node is fine if:- it is made on the thread itself,- does not squeeze or crush the insulator,- does not create contact with the post.
What to avoid- Do not wrap the wire around the stake.- Do not go all the way around the insulator.- Do not leave exposed copper wires near iron or other metals.
you can certainly compose the kit by choosing the battery-powered energizer instead of the mains-powered one. However, the purchase of the “complete” kit normally includes a pre-defined combination of products:
Within the complete kits offered on the site, the composition (including accessories and the type of energizer) is already predefined and cannot be changed when purchasing the kit directly.
The plastic pegs are an excellent choice, for 40 m and for a fence against wild boars they are very practical. In your case you can follow these instructions:1. Spacing between plastic stakes From our fence post guidelines:- for wild animals (such as wild boars) it is recommended to place them 4–5 meters apart. Out of 40 metres:- if you place them every 5 m → 40 ÷ 5 = 8 pegs-
It could depend on some fairly common causes in the installation of the electric fence. Based on what you describe, the most frequent situations are:1. Wire too close to poles or grass- If the wire is too close to the stakes (especially if they are metal) or tall grass, an electric arc can be created which generates sparks.- Check the entire perimeter and verify that:- the wire never touches the poles- the grass does not touch the wire- If necessary, move the insulators slightly or cut the grass near the fence.2. Download onto the iron pegs- If you see sparks right next to the iron poles, it means that the wire is not well insulated.- In that case it is necessary to use the insulators for iron poles correctly, mounting them so that the wire remains well distanced from the metal.3. Cables not well insulated or joints made poorly- If you have extended or spliced the wire, make sure that:- the conductive part is not exposed to poles or ground- the joints are tight and insulated- The cable that carries the current from the energizer to the fence must also pass through a polyethylene tube, to avoid dispersions and sparks along the way. I ask you two things to help you better:- Do you see the sparks in specific points (for example near an iron post) or along the wire in general?- What type of poles do you use (wood, iron, plastic)? For more specific technical problems (if the problem continues after these checks), we still recommend contacting our customer service directly so they can guide you step by step on your installation.
To protect yourself from wild boars, electrified wires can be easily integrated into the fence you already have. First I'll ask you something, so I can give you precise advice: can you indicate how many linear meters of fence need to be protected (more or less)? In the meantime, what is needed and how to do it:1. Number of wires and heights against wild boars For wild boars we recommend at least 3 parallel wires in front or on the existing fence:- 1 wire: approximately 20–30 cm from the ground- 2nd thread: 30 cm above the first- 3rd thread: 30–40 cm above the second. The important thing is that:- no wire touches grass, vegetation or wire mesh- are well stretched along the entire perimeter2. Recommended type of thread For wild boars and large game the following is indicated:- 6 mm² electrical wire- specific for wild boars, deer, fallow deer and large animals- tensile strength up to 100 kg- 8 conductive wires- dispersion 0.15 ohm/m The tape is instead more suitable for horse fences, so for wild boars it is better to stay on the 6 mm² wire. For length:- if the fence is under 500 linear m, 500 m coils are fine- you will need to consider the total meters of wires (e.g. 200 m of perimeter × 3 wires = 600 m of wire)3. What you need in total for the electric fence For an electric fence for wild boars you need:1. Gemi energizer for fences (brings current to the wires)2. 6 mm² wire for fences3. Insulators screwed onto the poles (iron or wood, depending on your poles) to keep the wire away from the net4. Any high voltage crossing cables if the 220V socket is far from the point where the fence starts- they can also work underground or on the surface without discharges If you tell me:- how many meters of perimeter you have- if you prefer a 220V energizer (home socket) or a 12V battery I can tell you more precisely:- how many meters of wire to take- how many insulators are needed- the type of Gemi energizer best suited to your case.
I completely understand the concern! Grounding works best in moist soil, but if you can't keep it moist there are still some practical solutions:1. Always use 3 galvanized pickets: Even in arid terrain, inserting 3 1 meter pickets 3 meters apart from each other will still ensure good functionality of the electric fence. It has been verified that with 3 pegs, even in less than ideal terrain, the system works without problems.2. Choose the best possible location: Try, if possible, to place the stakes where the ground is wetter (for example near a hedge, a tree, or in a more shaded area).3. If the soil is very dry:- you can slightly increase the number of pegs (for example 4 instead of 3) to further improve dispersion, but already with 3 pegs you usually have no problems.- Alternatively, if you have the possibility, wet the peg area every now and then, even just occasionally, to increase effectiveness. Even if you can't keep the ground moist all the time, with 3 x 1 meter galvanized stakes positioned correctly, the fence will still work well.
Yes, it can be done: the fence can also be a "barrier" and not necessarily a closed ring. In your specific case (linear piece):- you can make a low thread going forward and a high thread returning and connect them together at the end: make a sort of "closed U"/ring using the two threads.- The important thing is that the conductor wire remains isolated from the ground (always passes through the insulators and does not touch metal, wet grass, damp walls, etc.). The fence also works if:- the circuit is not a classic circle that closes on itself with a single wire,- but it's a linear stretch with the return on another connected wire. So:- yes, you can use the low thread for the outward journey and the high thread for the return journey,- by connecting the two wires at the beginning and end of the section, you still obtain an effective circuit.
Yes. You can put a mulch sheet under the path of the electric fence, in fact it is a good idea to limit the growth of the grass. The only really important thing is this: the wire must NOT touch either the tarp or the grass or leaves that could then grow on top or on the sides. If anything touches the wire, the fence leaks current and malfunctions. Some practical tips:- keep the first wire at least 15 cm from the ground (as is also recommended for porcupines and the like);- secure the cloth well so that it does not lift in the wind and touch the wire;- check every now and then that no grass or shrubs are growing that come into contact with the wire along the edge of the sheet. If you tell me what type of animals you want to keep outside/in and at what height you plan to place the wires, I can give you a more precise diagram.
Yes. If you purchase the kit with the 1000 meter spool of wire, you can safely use only the quantity needed for the fence. You don't have to use all the wire at once: you can cut just part of it and keep the rest for future use or possible extensions of the fence.
Yes, it is exactly the most suitable solution. it can be done like this:1. Choose the entry point (near the last post or wherever is most convenient for you).2. On that point:- interrupt the low thread and the high thread (do not pass them continuously).3. On one side of the gap:- the wire remains fixed on the post/insulator.4. On the other side:- connect an electric fence handle to the low length of wire,- and another handle on the high wire section.5. On the opposite side post, mount the hooks/handle insulators:- when you close, hook the handles → fence closed and under tension;- when you want to enter, release both handles → that section opens and you pass. For this use you can search on the site:- “Handle for electric fence” (e.g. [Handle for electric fence](https://www.gemimarket.it/maniglie-cancello-recinto-elettrico/106-maniglia-per-recinto-elettrico-recinti-elettrici-recinzioni-elettriche-recinzioni-elettrificate-8053017260860.html))- Or the ready-made gate kit:- [Gate handle kit 5 meters](https://www.gemimarket.it/maniglie-cancello-recinto-elettrico/108-kit-maniglia-cancello-5-metri-per-recinto-elettrico-recinti-elettrici-recinzioni-elettriche-recinzioni-elettrificate-8053017261331.html) For two wires (low and high) you will need two handles and related hooks.
I confirm that at the moment I have no information on specific offers or discounts on insulators for iron pegs. However, I can tell you this based on the information available:- The insulators are only available in packs of 100 pieces- For approximately 400 insulators you will therefore need 4 packs of insulators for iron poles (this is the product: insulators for electric fence for iron poles: https://www.gemimarket.it/recinto-elettrico/40-isolatori-per-recinto-elettrico-per-pali-in-ferro-8053017260662.html) It is not possible for me to apply or offer additional discounts in addition to the prices you see on the site: it is recommended to check the updated price per pack directly there. If you tell me:- approximate diameter of your iron posts I can only confirm if they are compatible (our iron insulators are adjustable from 1mm to 18mm post diameter).
It can be done both ways, but the best system is:1. A single thread “broken” vertically? No: if by “single thread” you mean making a single lap that goes up and down between 30 and 60 cm along the route, it is not practical:- it's complicated to stretch,- crossover risks and weak points,- it is more difficult to manage in case of failures or modifications.2. Correct solution: two wires + bridges between them Make the fence like this:1. First ring (30 cm from the ground)- Go all the way around the fence at a height of 30 cm.2. Second ring (60 cm from the ground)- Make a second complete turn at 60 cm.3. Connection between the two rings- From the cable coming out of the energizer (red terminal) connect:- to the 30 cm wire or to the 60 cm wire (it doesn't matter which one of the two).- Then you connect them with vertical jumpers (pieces of wire that connect the low wire to the high one) in some places:- certainly close to the point where the current arrives,- and maybe on another side of the fence.- You make the jumpers with:- the same fence wire,- connected with a tight knot or with clamps. Like this:- the two wires (30 and 60 cm) are electrically joined,- the current is present on both,- the system remains tidy and easy to control. If you tell me which animals need to be contained/kept outside (wild boars, horses, dogs, etc.) I can confirm that 30 and 60 cm are the right heights or whether it is better to add/vary something.
The third highest wire is not needed because the boars "fly", but to increase the effectiveness of the barrier. It is mainly useful for:- cover animals of different sizes, therefore making the fence more effective on both small and large subjects- avoid the passage by pushing or inserting your body between the wires- make the fence more visible and more deterrent- help in cases of uneven terrain or when the animal tries to cross in more favorable points. For wild boars the most important point is still the low wire, because they tend to pass under or push downwards. However, with only 2 wires the protection is less complete than3.
: it is not an obligatory "magic", it makes practical sense. When they tell you to:1. tie a knot between the two ends of thread,2. and then connect/wrap the metal parts well, the aim is above all this:1. Mechanical seal- The knot locks the threads together.- So the traction of the fence (when you pull the wire to tighten it, when an animal pushes it, or when the wind moves the posts) does not put all the force on the metal joint.- Without a knot, all the force goes on the few turns of wound conductor: over time they can loosen, break or make bad contact. With the knot:- the joint is mechanically robust,- the metal contact only works to carry current, not to keep the fence "tight".2. Prevent the splice from opening If you only wrap metal without knots:- with repeated tractions or vibrations, the threads can slip and loosen,- you risk having the wire come loose or a loose contact which reduces the tension of the fence. The knot acts as a "stop": even if the metal loosens a little, the threads physically remain together.3. Stable electrical contact After the knot:- discover the metal of the two ends carefully,- wrap the conductors around each other. So you get:- good electrical contact (metal to metal, on multiple points),- and a joint that doesn't move mechanically.
Yes. You can put it lying down inside the box, it is not a problem for the functioning of the energizer. The really important things are others:1. Must be indoors- The energizer cannot be left outdoors: the plastic box is fine if it protects it well from rain, direct humidity and sun.2. Grounding done well- Use 3 1m galvanized stakes in the ground, spaced approximately 3 meters apart.- Insert them about 80 cm into the soil (better if moist) and leave 20 cm outside.- Connect them together with the yellow-green cable and then connect the energizer earth cable (yellow-green/black) to the first post.3. Connection to the fence- From the red contact of the energizer lead a well-insulated high voltage cable to the fence.- If the stretch is long, pass it through a polyethylene tube (such as a water hose) to avoid current dispersion.- Connect the cable to the fence wire and, if you have multiple wires, make a bridge between the various wires.4. Placement in the box- Even if he is lying down, leave some space around him to avoid stagnation of heat and humidity.- Make sure that the output cables (red and ground) come out without being crushed or bent too much.
No. It is not mandatory to pass the wire back over itself as a "double turn" at the head and tail of the fence. I'll explain the most common situations in a simple way:1. If you only need to terminate the thread (end of line)- you can simply tighten the wire well and lock it on the tensioner or fixing point.- There is no need to make a "loop" that goes back on the same thread, unless you want to create a return line.2
When you connect the pliers to the string you feel the shock because the high voltage of the energizer passes directly through that point: it is normal for it to be "current". In detail:- the clamp/clamp that carries the current is connected to the high voltage output of the energizer (pulses up to 10,000 V);- when you touch it, or touch the wire/string already connected and the energizer is on, the body closes the circuit and you feel the discharge. From our FAQ: > there is no need to worry, this is due to the high voltage coming out of the energizer. To avoid taking the power, it is recommended to disconnect the energizer from the power supply before touching it. So, to work safely:1. Turn off and disconnect the energizer from the power supply (disconnect the 220 V or the battery) before:- connect/disconnect the caliper,- handle the fence twine/wire.2. Only after making the connections, turn the energizer back on.
It happens because in that area the wire is discharging to the ground or towards metal parts of the gate. At the gate point, there are usually:- fittings, hooks, clamps- metal parts of the gate- any cables crossing the passage If you feel shocks right there, the causes are generally:1. Wire too close or in contact with the metal of the gate Even if it only seems “close”, it can create small electric arcs and therefore discharges.- Check that the fence wire never touches:- gates- metal poles- metal mesh- Always use insulators and/or specific accessories for gate kits.2. Insufficient insulation of the fittings The points where you “hook” or “fit” the wire must be well insulated:- if you have wires rubbing on iron, screw, uninsulated hook → download there- check that each passage on the gate has suitable handles/isolators3. Gate kit connections not mounted correctly If you have a gate kit:- the handle must interrupt the circuit when released- the wire that carries current from one side of the gap to the other must pass in an insulated cable or in any case on insulators, never free in contact with the metal.
For an electric fence:- in general: poles every 4–6 metres- for wild animals (wild boars, roe deer, etc.): better denser, therefore every 4–5 meters- for grazing animals (cows, horses, sheep, etc.): every 6 meters is also fine. The exact distance also depends on the terrain: if it is very windy or uneven it is best to move the poles a little closer together to keep the wire taut. If you tell me which animals you want to contain and whether the terrain is flat or sloping, I can advise you on the most suitable distance for the case.
For the ground pegs I will answer you with what we have available in our internal information.1. Where to buy them We do not supply the ground stake with the fence kit: you need to obtain 1 meter galvanized iron stakes yourself. you can then purchase them:- at a hardware store- in a DIY / construction warehouse- any resale of galvanized pipes or rods (expressly asking for 1 m galvanized pegs/pipes for earthing). The important thing is that they are:- in galvanized iron- approximately 1 meter long2. Measurements and burial depths Our official indications:- Pole length: 1 meter- Number of pegs: 3 galvanized pegs- Distance between pegs: 3 meters apart- Depth:- 80 cm in the ground (wet)- 20 cm above ground (to be able to connect the yellow-green cable) Then: 1. Take 3 1 m galvanized pegs.2. Stick them about 80cm into the ground, leaving 20cm out.3. Place them in a row, about 3 m apart.4. Connect them to each other with the yellow-green cable and then from the first post go to the "earth" output (black terminal) of the energizer. If possible, ground in an area:- with moist soil or with some vegetation- avoiding very dry/arid soil. If you like, when you have placed them, you can indicate where you have positioned the energizer and pegs and I will also confirm the best route for the earth cable and the one towards the fence.
your intuition is correct! The electrified fence cable must never be wrapped around the insulator.
How should the wire be positioned on the insulators?- The wire must be inserted or placed on the groove of the insulator, blocking it with the appropriate tab or screw, BUT without making multiple turns.- If you need to "lock" the wire, only use the locking system provided by the insulator (for example the slot, the fork or the tab), NOT tying knots or wrapping around it.
How should the wire be positioned on the insulators?- The wire must be inserted or placed on the groove of the insulator, blocking it with the appropriate tab or screw, BUT without making multiple turns.- If you need to "lock" the wire, only use the locking system provided by the insulator (for example the slot, the fork or the tab), NOT tying knots or wrapping around it.
You are not obliged to make a closed ring: you can easily make the electric fence also in a C shape or "open on one side".
So you can also make the fence in a C shape or in other "open" ways, without problems!
So you can also make the fence in a C shape or in other "open" ways, without problems!
The (electrical) voltage of the wires of an electric fence DOES NOT discharge progressively on all the poles... but only if the fence is mounted correctly, i.e. with the right insulators!
Attention:- The current will disperse (and therefore the voltage will progressively decrease along the fence) only if:- The wire directly touches a pole (especially if it is metal).- There is a broken or dirty insulator.- There is moisture/soil connecting the wire to the posts.- If everything is assembled well (wires well tensioned and separated from the posts with insulators in good condition), the tension remains constant throughout the entire fence.
Attention:- The current will disperse (and therefore the voltage will progressively decrease along the fence) only if:- The wire directly touches a pole (especially if it is metal).- There is a broken or dirty insulator.- There is moisture/soil connecting the wire to the posts.- If everything is assembled well (wires well tensioned and separated from the posts with insulators in good condition), the tension remains constant throughout the entire fence.
Yes, you can insert a double loop knot on the springs for the electric fence, but pay attention to two important aspects:1. Mechanical compatibility- The double loop knot (i.e. two loops of wire twisted around the spring, one at each end) is a solution often used to secure the conductive wire to the galvanized spring.- The important thing is to tighten the knot well so that the thread does not slip away from the spring and that the joint is secure.- The thread must be passed through the slot/eye of the spring and then closed in a loop on itself, repeating the passage
For deer (and in general wild animals such as deer/deer/wild boar) we recommend at least 3 parallel wires at different heights:- 1 wire: approximately 20 cm from the ground- 2nd wire: approximately 30 cm above the first, therefore 50 cm from the ground- 3rd wire: approximately 30–40 cm above the second, therefore 80–90 cm from the ground. So protect well both at the bottom (to prevent them from passing under) and higher up, where the body touches the wire if they try to cross.
Yes. You can use iron post insulators on the iron post of the existing fence, but with one important condition:- Gemi insulators for iron poles are adjustable from 1 mm to a maximum of 18 mm in diameter of the pole.- If the pole is thicker than 18 mm, these insulators are not suitable. Here is the specific product: [Insulators for electric fence for iron poles](https://www.gemimarket.it/recinto-elettrico/40-isolatori-per-recinto-elettrico-per-pali-in-ferro-8053017260662.html) In addition:- The iron insulator is inserted from above onto the rod/pole, it cannot be mounted "halfway" without passing through the end.- It serves precisely to keep the wire distanced from the iron, avoiding sparks and dispersions. If you tell me the approximate diameter of your poles (e.g. 12 mm, 16 mm, 20 mm) I will immediately confirm if they are suitable or if another solution is better for you. And, if you like, also tell me:- how many meters of fence you want to electrify,- if you use 1, 2 or 3 wires, this way I will also calculate how many insulators you need.
I understand the problem, let's see together some possible causes and solutions:1. Checking the earthing: The most frequent cause of malfunction is incorrect earthing. Make sure you have at least 3 galvanized pegs, 1 meter long each, buried for at least 80 cm and spaced about 3 meters apart. They must be connected to each other with a yellow-green cable and placed in a humid area.2. Correct connections:- The yellow-green wire must be connected to the earth rods and to the energizer (near the black contact).- The red wire must be connected from the red contact of the energizer to the fence.3. Battery or power supply: If the energizer is battery operated, make sure it is charged and working. If it has power, check that the outlet works.4. Check for current on the wire: Bring the tip of an insulated screwdriver close to the fence wire: if you hear a ticking sound, the current is flowing. If not, the problem may be in the grounding or in the energizer itself.5. Long grass or short circuit: Make sure there is no grass or vegetation touching the wire, because it can absorb the current. If the problem persists after these checks, it could be an internal fault in the energizer.
Yes, it can be done without problems: in the same perimeter you can have 2-wire sections and 3-wire sections. The important thing is to respect some precautions:1. Electrical connection- All the wires that must be live (both in the 2 and 3 wire area) must be connected to each other with small pieces of wire or connectors:- thus the energizer supplies the entire perimeter uniformly;- you will not have "dead zones" or weaker ones.- Where you switch from 3 wires to 2 wires, you can simply:- interrupt the third thread where it is no longer needed,- or lower its height/move it if needed in another point.2. Practical logic of use- In the area most at risk (wild boar passages, accesses, narrow points or close to the woods):- keep the 3-wire part, as we said:- ~20–30 cm from the ground- +30 cm- +30–40 cm- In less critical areas:- you can only hold 2 wires, typically:- a lower one (for the snout of wild boars),- a higher one (for when they raise their heads or if larger animals pass by).3. Pay attention only to these aspects1. No wires “hanging” unconnected- If you leave a wire lying around not connected to anything, it just becomes an “inert” wire that can confuse animals (sometimes they dare to touch it if they don't feel a shock in one place).2. Correct insulators on each pole- Even where you only have 2 wires, always keep the passage in the insulator, never wrap the wire directly around the pole (wood or iron), otherwise it will discharge to the ground.3. Height consistency- Avoid too sudden jumps in the height of the wires by going from 3 to 2: try to maintain more or less the same heights for the "active" ones (e.g. the lower wire always at the same height along the perimeter, and the middle/upper one where needed).
For electric fence wire supports/insulators:- they must be placed approximately every 5 meters along the path of the wire. So, for example, if you have 100 meters of wire, you need about 100 ÷ 5 = 20 insulators for each wire. If you tell me how many meters of fence and how many wires you want to make (e.g. 2 or 3 wires), I will calculate the total number of insulators and the packages needed.
No. This is not normal: sparks between the wire and the pegs/insulators indicate a leak or a small short circuit. I'll explain what happens and how to fix it.
How to place the insulators on the steel rods After checking that the wire is well insulated and is not touching anywhere, you can position the insulator in this way:1. Put the nut on the rod first2. Insert the insulator onto the iron pole3. Screw the insulator "backwards" against the nut, thus blocking it and keeping it firmly and distanced from the iron. This type of insulator is used precisely for:- keep the wire well away from the metal pole- avoid short circuits- ensure the correct functioning of the fence. Here you will also find a video tutorial showing the correct assembly: https://www.youtube.com/watch?v=hHSHdweseSE
How to place the insulators on the steel rods After checking that the wire is well insulated and is not touching anywhere, you can position the insulator in this way:1. Put the nut on the rod first2. Insert the insulator onto the iron pole3. Screw the insulator "backwards" against the nut, thus blocking it and keeping it firmly and distanced from the iron. This type of insulator is used precisely for:- keep the wire well away from the metal pole- avoid short circuits- ensure the correct functioning of the fence. Here you will also find a video tutorial showing the correct assembly: https://www.youtube.com/watch?v=hHSHdweseSE
At the moment only that: > The products visible on the site are available for purchase. However, I do not have access to restock dates or future availability, so if the electric webbing you are interested in is NOT available for purchase on the site now, unfortunately I cannot see when it will be available again.
you can write to me whenever you want: chat support is active every day on the site and you can leave a message even in the late afternoon or evening, you will then be answered as soon as an operator is available. When you have finished the measurements, send me:- total meters of the fence- number of threads- type of animals and I will calculate the quantity of wire, insulators and accessories for the gates.
Yes, it can easily be done without wire tensioners and the fence still works. I'll explain how to organize yourself with the 3 threads and how to tighten the thread "by hand".1. How many wires to use and which ones With insulators at:- 25 cm- 50 cm- 70 cm you can use all 3 wires, which are great for almost all grazing animals and also to better contain any jumps or passages underneath.2. How to tighten the wire without a wire tensioner. All you need to do is choose a starting pole and a finishing pole for each wire.
Yes. You can easily leave everything in the cart and come back tomorrow to proceed with the purchase. Two important notes though:1. If you use the same device and the same browser, the cart usually remains stored.2. For safety, we still recommend:- take a screenshot of your cart- or write down the main products (names and quantities) So, if for any reason the cart is empty tomorrow, you can rebuild it in a few minutes without having to redo all the accounts. If you want, just tell me:- for how many meters of fence you are preparing the material and I will immediately confirm that the quantities you have chosen are adequate, before you complete the order tomorrow.
For the grounding wire you can rest assured: no special characteristics are needed. From our information:- you can use a normal yellow-green electrical system cable- Any thickness/section is fine: the thickness does not affect the functioning of the fence- It is not necessary for it to be shielded or "special": it just needs to be an insulated yellow-green cable, for outdoor use or in any case robust. Therefore, when you go to purchase it you can simply ask: > "A yellow-green electrical cable for earthing, also from a domestic system, a few metres, section of your choice (e.g. 2.5 mm² or 4 mm²)" The only important thing is:- that is long enough for:- go from B12 to the first post- and then connect pole 1 → pole 2 → pole 3- that the insulation is intact (no exposed cuts) If you tell me how many meters there are:- from B12 to the first post- and between one pole and another (usually 3 m) how many meters of yellow-green cable to buy in total.
you can connect the energizer to the grounding rod using a normal yellow-green ground cable: the thickness is not decisive, the one commonly used for electrical systems is fine. However, to obtain greater safety and avoid dispersion, especially if the cable must pass through an area where it can get wet or be in contact with the ground, it is recommended to pass it inside a polyethylene tube.
Yes. You can reuse the pegs from the old electricity grid if they are still in good condition and if they remain well insulated from the ground and wires. The important thing is this:- if the pegs of the old net are specific pegs for electric fences and still have the plastic attachments/insulations intact, you can reuse them;- if instead they are damaged, broken, or the wire passages no longer insulate well, it is better to replace them.
For pigs, the recommended wire is 6 mm², because it is robust and suitable for large animals. If the thread is not long enough, it is not necessary to replace it: you can easily join two rolls by making a simple splice (a knot between the ends of the threads).
Yes. Galvanized wire can be used to connect them: the current still passes. However, keep in mind that galvanized wire is not a good conductor, so it is possible as a solution, but it is not the best. If you want a more effective grounding, it is preferable to use the yellow-green cable to connect the pegs together. If you want, I can summarize the complete diagram of the connections between earth, generator and fence.
To calculate how many meters of wire are needed to fence 6 hectares for cows, you must first know the shape of the land. If we consider a rectangular shape (which is the most common), here is how it is calculated:- 1 hectare = 10,000 m²- 6 hectares = 60,000 m² Let's assume that the land is as "square" as possible, therefore:- Side = √60,000 ≈ 245 meters Fence perimeter = 4 × 245 m = 980 meters For cows, it is recommended to put 2 or 3 parallel wires. So:- With 2 wires: 980 m × 2 = 1,960 meters of wire- With 3 wires: 980 m × 3 = 2,940 meters of wire Summary:- If you put 2 wires: you need about 2,000 meters of wire- If you put 3 wires: you need about 3,000 meters of wire If the ground has a different shape (very elongated, irregular, etc.), the perimeter could be larger
At the moment I have no information on any 50% discounts: I can only rely on the list prices I see, which are those on the site. For the white plastic pickets for electric fences, the sizes I have available in the catalog are:1. 160cm plastic post for electric fence- Height: 160 cm- Eyelets: 10 eyelets to pass the thread/ribbon through- Indicative price: €2.89 per piece2. 121cm plastic post for electric fence- Height: 121 cm- Eyelets: 8 eyelets- Approximate price: €1.99 per piece They are both plastic pickets for electric fences, already prepared for the wire/tape, white in colour. Do you need advice on the most suitable size? Tell me:- which animals need to be fenced off- how many wires do you plan to put (2, 3, 4...)- if the fence is to contain animals or to keep out wild animals (wild boars, roe deer, etc.)
Yes, it can be done, but with a couple of precautions. The idea is:- pass the spring through two eyelets (to effectively "shorten" the distance)- and hook it on the other side to the wire or stake. This is only acceptable if:1. The spring never touches the iron post- It must pass inside the plastic insulators/eyelets, not in direct contact with the metal.- If you touch the iron, you send the wire to the ground and the fence scatters.2. The spring still works in "straight" tension- It must not remain crooked or bent to the side.- Ideally: wire → spring → wire, all aligned.3. Plastic eyelets take the strain- If you use two eyelets to "tighten" the spring, check that:- don't pull them so hard that you risk breaking them- the spring stays still and does not come out. Acceptable practical scheme:- Bollard with insulator- Wire arrives taut → hooks onto one end of the spring- The spring passes inside one/two insulators (plastic only)- The other end of the spring hooks:- to another piece of wire- or to a hook connected to an insulator. Yes. You can "gain space" by passing it between two eyelets/insulators, as long as it always remains isolated from the iron and works in tension, not bent and not resting on the post. If you describe to me where you want to put it (beginning of the side, end of the side, at what distance between two poles), I can suggest the safest configuration for that specific point.
Yes. We also have products suitable for keeping wolves away. Our electric fences are designed for large wild animals (wild boars, deer, foxes, etc.) and are also good for wolves: they are used to prevent the entry of predators or to protect/fence an area with domestic animals (sheep, goats, calves, etc.). To give you precise advice, I ask you only two things:1. What do you want to protect from wolves? (e.g. sheep in pasture, chicken coop, vegetable garden, house, dogs, etc.)2. Approximately how many meters of fence do you need in total? Based on this we can define:- the type of energizer (220V current or 12V battery),- the most suitable thread,- necessary poles and insulators.
You were right to check before assembling everything. For the 3 springs of the gate (entrance passage) unfortunately I currently have no internal information on a specific alternative Gemi product that I can recommend as a replacement. What you can do is:1. Temporary solution without spring Do a “manual” step:- break the wire on the side of the gate,- create an opening where:- on one side fix the wire to the poles,- on the other side you leave a tail of thread (quite long) which can be:- hook and unhook by hand to an insulator or an insulated hook.- Every time you need to enter:- turn off the energizer,- unhook the wire,- steps,- reconnect the wire,- turn the energizer back on. It's not as convenient as the spring, but it works until you can assemble the complete gate kit.2. Using a stretch of elastic cord/tensioner If your helper is handy:- you can create a sort of "handcrafted handle" using:- a piece of wire dedicated only to the passage,- fixed on one side to the fence,- on the other side hooked to a double hook insulator or similar (if you have it in the kit),- the important thing is that:- the coupling system is isolated,- and that when it is closed the electrical contact is good (no loose connections or loose parts).3. As soon as the springs are available again As soon as you see on the site that:- the 5 m gate handle kit or the gate springs can be ordered again, you will be able to:- purchase them and replace the temporary solution with a safe and comfortable transition.
Let's calculate together for 50 m of fence with 3 wires.1. Wire length- Fence length: 50 m- Wires: 3 in parallel Total wire needed: 50 m × 3 = 150 m All you need is a 500 m spool (left over for any extensions or repairs).2. Calculation of insulators Business rule:- 1 pole approximately every 5 meters → 1 insulator for each wire on each pole- therefore: 1 insulator × 3 wires = 3 insulators per pole Number of poles:- 50 m ÷ 5 m ≈ 10 poles Total insulators:- 10 posts × 3 insulators per post = 30 insulators But our standard wood insulators are sold in packs of 100 pieces. So, as a practical minimum:- you need 1 pack of 100 insulators- You will have stock for future stretches or replacements. *(Remember: Double Hook Wood Insulators are only used for gates, not as regular post insulators.)*3. Material summary for 50m, 3 strands- Common thread:- at least 150 m total → a 500 m reel is the most comfortable option.- Insulators for wooden poles:- minimum necessary: 30 pieces- available packaging: 1 pack of 100 pieces. If you tell me whether the poles are made of wood, iron or plastic, I can add some more precise information on the type of suitable insulator and how to arrange them at height for the goats.
For the fence the insulators do both:- they keep the wire isolated from the pole and at the right height- they also act as a passage along the perimeter. To "pull" the thread well you can proceed as follows:1. Organize “strong” poles- Choose 2 sturdy posts (corners or ends of the fence).- On these headlights the starting and ending of the wires.- If possible, place them slightly reinforced (well planted, perhaps with a brace if the corner is very tight).2. Attaching the wire to the first post On each wire:1. Start from a corner post:- pass the wire through the insulator,- wrap 2–3 turns on the thread itself and tie a simple knot or a loop knot to secure it. No special hardware is needed: a tight knot is fine.2. Then proceed along the fence, threading the wire into the insulators of the other posts, without tying knots.3. Tensioning at the final pole Once you reach the other corner pole:1. Pull the thread by hand until it becomes very taut (not like a violin, there must be a minimum amount of elasticity).2. Pass it through the end post insulator.3. Hold in traction with one hand, and with the other:- wrap the end of the thread 2–3 times on the taut section,- close with a simple, tight knot. If the distance is short, like 50 m, pulling by hand is more than sufficient.4
Yes. A pole every 4 meters is fine. For our fences we recommend:- Wild animals (wild boars, etc.): poles every 4–5 m- Grazing animals (like goats): up to 6 m is still fine. So:- with 4 m you are perfectly within the recommended distances,- the threads will remain taut and the net will be more stable, especially if there is wind or slightly uneven ground. Now you can easily:1. Finish driving the stakes every ~4 m.2. Place the 3 insulators on each pole at the heights you chose.3. Pass and knot the 3 threads as we have said (starting and ending line with knot, simple passage on the other poles).
To "cross" the entrance to the stable without bothering the goats you have two possible ways, depending on what you want to achieve there. I just ask you one thing to understand better: in front of the stable door do you want the fence to close and block the goats (therefore a real electric gate), or does the stable door already act as a lock there and you only need to carry the current "beyond" the door, without having wires in front of the passage? In the meantime I'll explain both to you, so you can see which is the case.
2) If instead you ONLY want to bring the power to the other side of the door, without wire in front of the passage Here the logic is different: the stable door acts as the real entrance, and the fence only has to "jump" or "bypass" the opening, without putting wires in front. you need to bring the thread:- on one side of the stable door- on the other side,- but without being at the same height as the goats' faces. You have two safe ways:
B) Underground bypass with high voltage cable In our catalog there is a high voltage crossing cable: it is used precisely to carry the current:- underground,- or inside a corrugated pipe, without dispersions. It works like this:1. On the left side of the enclosure:- connect the fence wire to one end of the high voltage cable (with a good knot/splice).2. Run the cable:- inside a corrugated- and you pass it under the door / on the ground, where the goats can't touch it.3. On the right side of the door:- take the cable out of the corrugated cable,- connect it to the fence wire that continues. Result:- no "visible" wires in front of the door,- the current passes through the hidden cable, which is insulated and suitable for this use. From our internal archive we know that: > the high voltage cable can also be placed inside a corrugated cable to bypass a gate/door.
Yes, it can be done. To use the electric fence along a concrete wall you can proceed as follows:- Even though insulators were created for wooden poles, you can use them on concrete.- Enough:1. Drill a hole in the wall where you want to place the insulator.2. Insert a dowel (fischer) suitable for the wall.3. Screw the insulator into the anchor. Alternatively, if you prefer, you can first fix a small piece of wood to the wall (with plugs and screws) and then screw the insulators onto that wood. In this way the electrified wire remains well insulated from the wall and does not discharge. To better help you with your dog fence design (wire height, wire type, etc.),
Yes, exactly: the thread is always the same. To make 2 or 3 lines you can proceed as follows:1. Start from the first insulator at the bottom (for example).2. Follow all the way around the fence at that height.3. Once you reach the last pole/insulator of that line, go up (or down) with the same wire to the insulator of the other height.4. Continue the tour on the second line.5. If you also do the third, repeat the same step. you have a single continuous thread that goes:- low line tour → move to the medium line → medium line tour → move to the high line → high line tour → return to the connection point with the energizer. It is important that:- all the lines are connected to each other (as I described, or with wire "bridges" between one line and another),- at the end that single wire is connected to the red terminal of the energizer. When you have the measurements (wall height, length, etc.), write to me and I will help you:- decide how many lines to make,- at what heights,- and how many insulators you need.
Yes, it can be done: the fence works even if 1 pole out of 16 is "dead", i.e. without a wire connected, as long as the wire remains continuous. The principle is this:- The circuit must be continuous in the WIRE, not in the poles.- The poles only serve as support via the insulators. So, in your example:- Square with 4 poles per side = 16 total poles- If the wire passes and remains connected continuously around the square, even if it is not fixed to a pole or does not touch the pole, the fence still works. you can also have:- 10 out of 16 poles with insulators and the wire "skipping" some poles- or fix the tightest wire between one pole and another. The important thing is that:1. The wire starts from the red output of the energizer2. Go around the entire fence without interruptions3. It returns or in any case remains closed as a ring or is a continuous barrier (even open) but always without interruptions in the thread.
Yes, you can easily re-tie it.
With the kit alone, without a tester, you can only do "symptom" checks, not a precise measurement, but you can understand something. For Gemi battery-powered energizers (e.g. B12):- When the battery is in a good state of charge:- the green light flashes regularly with each pulse,- the red light is on (circuit working).- When the battery starts to run out:- the impulses become less strong (you feel less "bump" on the wire),- in general the energizer tends to reduce the impulses. Without a tester you can do this:1. Observe the energizer lights- Green flashing well + red on: circuit working, battery still usable.- If the flashing becomes more irregular or fades (or the warning light no longer comes on), it is a sign that something is wrong: flat battery or connection/grounding problem.2. Listen to the “tic tic”- A regular "tick", always the same, is a sign that the appliance is working.- If the rhythm changes or feels very weak, it may be a sign of declining battery or leakage.3. Practical test on the fence Without touching with your hand, you can:- use a long blade of grass or a small dry twig to bring it closer to the wire: if the spark is visible and can be heard well, the fence is still "strong"; if there is almost no spark, the battery may be dead (or there is a lot of leakage).4. Check for leaks Before blaming the battery, check:- that the wire does not touch grass, poles, wire mesh, etc.,- that the earthing is done with iron pegs and connected well. Strong leakage makes even a still good battery appear “discharged”. if you see that the fence is "working" more and more weakly, the lights are not flashing as usual and you have not changed anything in the system, it is time to disconnect and recharge the battery with a 12V charger. If you tell me what model of energizer you have (B12 or other), I can tell you exactly how the warning lights should behave when everything is ok.
to protect hens from the fox on a fence with diamond mesh and 20 mm poles, we recommend mounting the 3 electrified wires on the outside of the fence, on the poles, not on the mesh. Generally, these heights from the ground are used: 1 wire: approximately 15/20 cm (to prevent the fox from passing under or starting to dig) 2 wire: approximately 35/40 cm 3 wire: approximately 60/70 cm
Yes, you can rest assured: the electric fence can also be "open", it is not mandatory to close it in a ring. From the Gemi instructions:- The fence can be:- closed in a ring, or- open to barrier- The functionality does not change, as long as the wire remains well insulated and the earthing is done correctly. So:- You don't have to go all the way around the garden.- a linear barrier can be made in front of the area to be protected (for example the side towards the forest).- The "closing of the circuit" is not done by bringing the wire back like a ring, but by:- connection from the red terminal of the energizer to the fence wire,- good earthing (3 galvanized pegs connected to the black clamp). If by “return level” you mean a second, more internal parallel wire to close the circuit:- it is not necessary to operate the fence,- you can have all the wires connected to each other on the power supply side (with "bridges" between the wires), but the fence can be finished "completely" without returning to the starting point. If you describe to me exactly what shape it will have (e.g. "only the 70 m side", or "an L", etc.), I can tell you where to connect the energizer and how to make the connections between the various wire levels.
For how the electric fence works in general:- The shock is pulsed, so it is not like the 220V at home: you are not "attached", but you receive a very annoying impulse.- The voltage is high (e.g. 10,000 volts), but the pulse lasts a thousandth of a second and is designed to be dissuasive, non-lethal, for both people and wild animals. That said, for 2 year olds:- Children are much more sensitive to shock than adults.- In our information it is specified that: > it is a 10,000 volt impulse shock, it does not stick like the 220 volt current, but children should not get close to it because they are much more sensitive.- Therefore: it is not conceived as dangerous in the "mortal" sense, but contact must be absolutely avoided: the child would feel a very strong and painful shock, with the risk of great fright, crying, possible falling if he is moving, etc. About the wire mesh fence:- The energizer can also be connected to a metal mesh fence, the important thing is that the mesh does not touch anywhere (ground, hedges, non-insulated poles...), otherwise the current is dispersed and the fence does not work properly.- If a cat (or a child) touches the network connected to the energizer:- He receives the same impulsive shock as the wire: it is a strong and unpleasant stimulus, which only serves to make him move away.- It does not cause permanent internal damage, but it is very painful, and for a small child it should be absolutely avoided. If the objective is to stop cats (for example to prevent them from climbing over), our internal instructions recommend a specific weakened model for animals such as dogs and cats, available in the catalogue, precisely because:- the standard product is designed for wild animals,- for dogs/cats a reduced power version is preferable.
Yes. The lawnmower wire can damage the electric fence cable. Even if the corded trimmer is not as sharp as a blade, repeated and rapid contact of the nylon line against the cable can:- Cut or nick the plastic covering of the cable, exposing the internal conductors.- Break or weaken the internal wires, especially if the mower passes over the same point several times.- Create micro-cuts which, with time and exposure to atmospheric agents, can worsen and lead to actual breakage of the thread. Even seemingly small damage can cause current leakage and thus a voltage drop in the enclosure.
To create three passages with electrified gates in the fence, you can use complete gate kits that allow you to cross the fence safely without getting shocked. How it works:- Each gate kit allows you to create a safe passage/passage to enter and exit the fence without interrupting the electrical circuit.- you can install multiple gate kits on the same fence, so for three passes you will need three gate kits. What you need:- 3 complete gate kits- Isolators specific to the point where you are going to open the gate- Assemble each kit following the instructions (connection to wires and insulators)
Yes. The E/220 depowered energizer for dogs and cats can be placed in the same trolley together with pegs, wire, handles, etc. Place a single order with all the materials. The depowered model is not a "separate" product that must be managed separately: it is a normal item on the site, only with reduced power suitable for dogs/cats. For safety, when you are on the site:1. Open the page of the depowered model (the link I indicated to you: https://www.gemimarket.it/recinto-elettrico/266-elettrificazionere-e220-per-recinto-elettrico-da-pascolo-8053017260174.html)2. Click on “Add to Cart”3. Then add:- Wire 500 m – 4 mm (1 piece)- plastic pegs 121 cm (28 pieces)- Handle with 2 double hook insulators (3 pieces)- (possible high voltage cable, if needed)
the doubt is very important, let me clarify.
Is it dangerous/can it kill animals or people? For correct use:- Does not kill the animal: it is designed to ward off (cows, wild boars, deer, wild animals, etc.), not to injure.- It does not kill man, but:- the shock is strong and very annoying- for a healthy adult it is bearable, but it certainly "makes itself felt". But pay attention to two things:1. Children From our information material: > it is an impulse shock of 10,000 volts, it does not stick like the 220 volt current, but children should not get close to it because they are much more sensitive. Therefore the fence must always be installed in the following way:- clearly visible (signs, etc.)- with children kept away.2. Type of animal- Standard 10000V appliances- 5J are designed for:- large animals- wild animals- For dogs, for example, we specifically recommend the weakened model (specifically for dogs), precisely because they are much more sensitive. For cows, with the correct energizer, good earthing and tight wire:- the discharge is:- definitely felt (painful, so they respect the fence)- but not lethal, neither for the animal nor for an adult who accidentally touches it
Is it dangerous/can it kill animals or people? For correct use:- Does not kill the animal: it is designed to ward off (cows, wild boars, deer, wild animals, etc.), not to injure.- It does not kill man, but:- the shock is strong and very annoying- for a healthy adult it is bearable, but it certainly "makes itself felt". But pay attention to two things:1. Children From our information material: > it is an impulse shock of 10,000 volts, it does not stick like the 220 volt current, but children should not get close to it because they are much more sensitive. Therefore the fence must always be installed in the following way:- clearly visible (signs, etc.)- with children kept away.2. Type of animal- Standard 10000V appliances- 5J are designed for:- large animals- wild animals- For dogs, for example, we specifically recommend the weakened model (specifically for dogs), precisely because they are much more sensitive. For cows, with the correct energizer, good earthing and tight wire:- the discharge is:- definitely felt (painful, so they respect the fence)- but not lethal, neither for the animal nor for an adult who accidentally touches it
Then let's set everything up clearly, so you can order straight away tomorrow.1. Safety: how to "feel" the tension and precautions on the construction site
because that is precisely where power is often lost. Even if physically it is necessary to "break" the cable into pieces, electrically it must appear as a single, well-connected continuous wire. it can be done like this:1. Recommended scheme- Exit from the black terminal of the energizer with a yellow/green cable and go to the 1st earth post.- From the 1st post go out with another piece of cable towards the 2nd post.- From the 2nd pole go with the cable to the 3rd pole. So you will have 3 pieces of cable, but with good connections it is not a problem.2. How to fix the cable on the pegs. On each galvanized stake do this:- Strip the copper of the yellow/green cable well.- Wrap the bare copper tightly around the stake (as many turns as possible).- If possible, tighten with:- a metal clamp, or- a clamp (such as those for electrical cables) to secure the copper to the post. The important thing is:- metal-to-metal contact,- no rust at the contact point,- do not leave the thread "leaning" loosely.3. To minimize
Absolutely yes, "earthing" is essential for the correct functioning and safety of the electric fence!
If the "shock" is irregular, felt very strong in some points or weak in others and you notice sparks even without vegetation in contact, in most cases the problem is ineffective earthing. we recommend checking and fixing that point as described above.
If the "shock" is irregular, felt very strong in some points or weak in others and you notice sparks even without vegetation in contact, in most cases the problem is ineffective earthing. we recommend checking and fixing that point as described above.
If the entire system works perfectly and the only problem is the swelling of the batteries, the most common cause is still the battery itself or the way in which it is charged, not the energizer. This is why the energizer is unlikely to be the cause:- The energizer takes power from the battery, but "consumes" what it needs without sending current to the battery.- You cannot in any way overcharge or damage the battery: it does not charge it.- If there is a problem with the energizer, you may experience erratic output, weak pulses, or fence failure, but not battery swelling. The swelling, however, is almost always due to:- Battery not suitable for deep cycles- Overloading by the panel (often due to lack or malfunction of the charge regulator)- Already worn or defective battery Replacing the battery with a deep cycle one and making sure the regulator works should resolve the problem. Keep going, you're on the right track! If you still have problems after changing the battery, you can also write to me via email and I will help you find the solution!
What you describe is a fairly typical problem, but the result can be improved a lot. From what I know about Gemi fences, I can confirm some key points.1. How to make wire splices correctly To lengthen fence wire:- it is correct to make a joint with a simple knot between the two ends- however:- it should only be done where it is really necessary- the problem is not the knot itself, but how the internal conductors are connected. The Gemi wire is covered in plastic, with the conductive wires inside. If you knot only the external "plastic" part and the conductors inside do not make good contact, what happens:- resistance is created- sparks can form at that point- over time the wire tends to burn/damage in the splice area2. Recommended procedure to avoid sparks and burns When it is necessary to make a joint:1. Strip the plastic covering- carefully remove the external plastic for a few centimeters on both ends of the wire- expose the internal conductive wires well2. Tie the knot between the two ends- knot the threads so that the two sections are well joined- the knot serves to mechanically keep the threads together3. Connect the conductors well together- after the knot, make sure that the internal conductive threads of the two ends:- are well twisted together- have a lot of metal in contact, not just a minimum point- more contact surface = less resistance = less risk of sparks4. Minimize the number of splices- where possible, use longer lengths of wire to avoid having many close joints- it is better to make joints only where it is essential3. Also pay attention to these two points- Grass and ground contacts- if the grass touches the wire a lot, especially near imperfect joints, dispersions increase- when possible, keep the grass short along the fence- Passage through insulators- the wire should never be passed with the "dead loop" tight around the insulator- with Gemi insulators you just need to pass it through the appropriate channel, to avoid dispersions4. Practical summary for the problem To avoid sparks and thread burning on knots:- don't limit yourself to just the knot on the covered thread- peel the plastic, tie the knot, and then:- twist the internal conductors of the two ends well together- try to:- reduce the number of joints- keep the grass short near the wire- do not tighten the wire dead-end on the insulator. If you like, in the next answer you can indicate:- if you are already making the splices by stripping the thread or just knotting the whole thread so if you just need to correct that step or if you would also like to review some existing joints in the points where you see the most problems.
What you describe (arcs between the wire and the iron post) is a classic case of ground leakage: it's normal for it to cause you to lose tension and burn the wire over time, but it can be fixed. I'll answer you point by point, only with what I know for sure about the Gemi fences.1. Sparks between wire and iron post: what does it mean If:- you hear noises such as ticking or crackling- you see sparks between the wire and the iron post, in the insulator area so it means that:- the thread is too close to the iron or- the wire touches (even slightly) the post or- the insulator does not keep it far enough away or is mounted incorrectly Result:- an electric arc is created towards the post- the current “runs away” to ground- the fence loses strength- at that point the thread can also burn over time2. Basic check: well-insulated wire First general rule (also confirmed in our official answers):- check that the wire is well insulated e- that it does not touch the iron post anywhere So, along the line:1. Look at each insulator:- does the wire pass through the insulator channel?- or is it so tight that it almost touches the post?2. If you see that:- the wire almost rubs on the metal- or it's just a few millimeters from the iron that's the point where you can get sparks.3. Correct assembly of the insulator on the iron stake For iron stakes, the specific Gemi insulator must be mounted as follows:- it must be inserted onto the iron rod from above (it can only be installed like this, not "opened laterally")- it must keep the wire well distanced from the iron. In the case of insulators with nut (spacer type for iron), the advice is: > Screw the nut onto the post first, then insert the insulator, and screw it in reverse to lock it. - the nut allows you to stop the furthest insulator- so the thread remains further away from the iron- and reduce or completely eliminate the arcs If the insulator is:- too "crushed" against the post- or if the wire is mounted crookedly, it can get too close to the iron and cause a spark.4. What to do, concretely, where you see arcs In the places where you see electric arcs:1. Turn off the energizer before working on it.2. Check the insulator on the iron post:- if it is damaged/burned: replace it- if it is just too close to the post:- reposition it better- or advance the nut a little (if there is one) to keep the body of the insulator more "outside"3. Check that the wire is well centered in the insulator, not forced sideways towards the iron.4. Turn the energizer back on and:- listen to see if the noise is gone- look in the dark if you can no longer see sparks at that point.5. Grass and bushes: not just an "extra" As already indicated in our answers:- where the wire must pass, bushes and grass must be cut- leaves, grass and branches must not touch the wire otherwise:- the fence disperses current- the voltage drops along the line- sometimes right next to those dispersions more problems are created for the joints and insulators. So, in addition to the insulators:- keep the wire along the line as clean as possible, especially near:- iron pegs- junctions- low lines6. Practical summary for the problem To eliminate or minimize sparks between wire and iron pegs:1. Check each iron insulator:- thread well in the channel, not stuck "dead loop"- wire that does not touch or touch the post2. Adjust or replace the spacer insulators:- first screw the nut onto the post- mount the insulator and lock it in a position "away" from the iron3. Replace burnt/deformed insulators:- if you see burn marks or baked plastic, change them4. Clean the grass and bushes along the wire:- the grass touching the wire is always dispersion and lowers the voltage
I'll answer you with the data we have and a proportional comparison. For B12 we know that:- with 12V 40Ah car battery, without dispersion, the autonomy is approximately 10–12 hours / 5–6 days (our internal information is a little different from each other, so we reason by proportion on the real 5–6 days reported most often). Going from 40Ah to 70Ah:- 70Ah is approximately 1.7 times 40Ah- therefore, in similar conditions (well-made enclosure, little dispersion, without sun which helps charging): Approximate autonomy: approximately 8–10 days without sun. Please note that:- if there are leaks (grass touching the wire, dirty insulators, poorly made joints) the life is reduced- if even with little sun the panel charges something, the duration increases beyond these indicative days Practical summary:- 12V 70Ah + B12 battery, without sun: approximately 8–10 days- With panel that recharges every now and then: you can easily exceed these values.
Gemi electrified fences are designed and certified exclusively to keep wild animals away (such as wild boars, deer, foxes, etc.) or to contain farm animals (cows, sheep, pigs, etc.). They are not designed or authorized as an anti-personnel security system or for use against thieves.
now it is very clear: 75 m perimeter, 3 wires, iron T-poles and an "internal" door that cannot be reached from the outside. I'll go in order:1. Calculation of insulators and wire
Insulators for iron poles Gemi rule: one insulator every 5 m for each wire.- 225 m total of wire ÷ 5 m = 45 insulators The insulators are sold in packs of 100 pieces, therefore:- you need 1 pack of insulators for iron poles (you will have some spare, always useful for additions or modifications).2. Where and how to mount the insulators With the structure (painted T-posts and loose mesh net):
Correct solution: insulators on T-poles. Insulators for iron poles are made for this purpose:- They must be installed on the pole, not on the net.- Generally:- or they are threaded onto rods/iron (adjustable “collar” type)- or they tighten around the pole with a screw/lock In your case, with T-shaped poles, there are two practical possibilities:1. If the insulator you choose can hug the T- You mount it directly on the stem of the T, adjusting the screw or the tightening system.2. If a hole is needed (as you hypothesize)- you can drill the T-pole at the height of the wire- Insert and lock the insulator. In any case:- The wire must be passed through the insulator without making a dead turn (do not wrap it all the way around), otherwise dispersion will be created.- Gemi insulators are designed specifically to pass the wire "in line".3. Management of the two doors (internal entrance + exit) You have:1. Entrance door (normally reachable)2. Door/exit on the opposite side, not reachable from the outside to operate the handles
Internal door/exit that cannot be reached from outside. Here there are two practical ways (electrically correct):
Option B – Fixed electrical connection above the door If you are able to:- pass the wire over the door, at a height where you never pass with your head/body. Then you can:- place 1–2 posts next to the goal- raise the 3 wires vertically with insulators- pass them horizontally over the door (always with insulators)- and then go down again on the other side Like this:- the door opens only on the network- the wires remain physically far from the door and there is no need to "unhook" anything.4. Material summary for the case For the 75m fence, 3 wires:1. Electrical wire- Conductive wire for fences, recommended 6 mm²- Quantity: You only need 1 spool (500m or 1000m, but with 500m you're more than covered).2. Insulators for iron poles- Calculation: 225 m total of wire ÷ 5 m = 45 insulators- Packaging: 1 pack of 100 pieces.3. Door accessories- Entrance door:- 3 gate handles (one per wire)- dedicated insulators/hooks for the attachment points- Internal door:- better to do a lateral by-pass or pass over with the wires, so you don't need to operate handles from the outside.4. Electrifier- the chosen E/220 extra strong works very well with 3 wires and 75 m of perimeter.
For grounding, ground rods are not included in the kit. Must use 3 x 1 meter galvanized pegs. It is not recommended to use any generic iron stake: the correct indication is galvanized pickets. For correct operation:- they must be placed 3 meters away from each other- approximately 80 cm in the ground and 20 cm outside- better in moist soil- they must be connected with the yellow-green cable. Only 1 meter of cable is supplied with the fence to connect to the first post. If you want, I can also help you understand which energizer to choose for the fence. In that case,
The height at which to place the wire of an electric fence depends on the type of animal you want to contain or keep out of the fence. Could you tell me which animals the enclosure is intended for? So I can give you the most effective setup. In the meantime, I'll give you the most common recommended configurations:
For wild animals (wild boars, deer, fallow deer)- First wire: 20 cm from the ground- Second wire: 30 cm from the first (therefore 50 cm from the ground)- Third wire: 30-40 cm from the second (therefore 80/90 cm from the ground)
If you tell me which animal the fence is for, I can give you the precise layout! Would you also like advice on materials and quantities for 120 meters?
But first I need some important information to give you a correct quote:- What animals should be contained/kept outside (wild boars, cows, horses, goats, dogs, etc.)?- Do you want to make 2 or 3 fence wires? In the meantime, I'll explain the reasoning and give you a basic estimate.1. Approximate length of the perimeter for 1 hectare One hectare is 10,000 m². If the land were, for example, approximately 100 m x 100 m, the perimeter would be:- 100 + 100 + 100 + 100 = 400 linear meters of fence. If the shape is a little different it doesn't change much: we remain approximately around 400–450 m of perimeter. For the calculations I will use 400 m (we can then adjust together).2. Recommended wire From our catalogue, for electric fences we have:- White thread 500 m 6 mm² – 100 kg – €34.90- White thread 1000 m 6 mm² – 100 kg – €67.90- (other 4 mm wires but for large animals 6 mm² is better) For wild boars or large animals, 6 mm² is always recommended, resistant up to 100 kg of traction.
Minimum summary (hypothesis 1 hectare ≈ 400 m, 3 wires, wooden/iron pegs)- 6 mm² wire:- 1x reel 1000 m 6 mm² – €67.90- 1x reel 500 m 6 mm² – €34.90- Isolators:- 3 packs of 100 pieces (total 300 pieces) Plus:- pegs (about 80 pieces, wood/iron or Gemi plastic)- 1 energizer (220V or 12V, to choose from)
Minimum summary (hypothesis 1 hectare ≈ 400 m, 3 wires, wooden/iron pegs)- 6 mm² wire:- 1x reel 1000 m 6 mm² – €67.90- 1x reel 500 m 6 mm² – €34.90- Isolators:- 3 packs of 100 pieces (total 300 pieces) Plus:- pegs (about 80 pieces, wood/iron or Gemi plastic)- 1 energizer (220V or 12V, to choose from)
To contain dogs safely, especially near a busy road, the electric fence is an effective solution but you need to use a model specifically designed for them. What is recommended:- For use with dogs, the weakened model should be chosen, specifically designed to guarantee their safety while maintaining full effectiveness for containment.- With standard enclosures, the voltage would be too high; so I suggest you view the version intended specifically for dogs, which can be found in our catalog on the site. What is needed to install the electric fence:1. Depowered energizer specific for dogs.2. Electrified lead wire (pet friendly).3. pegs (plastic, metal or wood).4. Insulators for the pegs (one every 5 meters on the perimeter).5. Warning signs. Do you want me to show you the specific model for dogs and the other necessary components?
for 1 horse over 150 m.1. Recommended type of poles For a mobile or semi-fixed electric horse fence we recommend: Gemi plastic pegs- They are already insulating → no insulators are needed- They are easily planted and moved- Excellent for horse fences (with wire or tape) On the site you will find:- Plastic post for electric fence (121 cm or 160 cm): https://www.gemimarket.it/recinto-elettrico/261-paletto-plastica-recinto-elettrico-8053017260792.html https://www.gemimarket.it/recinto-elettrico/262-paletto-plastica-recinto-elettrico-8053017260792.html For a horse I suggest 160 cm, so the wire/tape reaches an adequate height. Distance between posts: 4–6 m. Over 150 m, placing them approximately every 5 m:- 150 ÷ 5 ≈ 30 posts (add 2–4 more for corners/entrances → say 35 posts).2. Horse wire or tape? For horses the tape is ideal:- 8 mm ribbon, 200 m, for electric horse/pony fences: https://www.gemimarket.it/recinto-elettrico/252-fettuccia-8mm-200-mt-per-recinzione-elettrica-recinti-elettrici-per-cavalli-pony-8053017261522.html For 150 m you only need 1 roll of 200 m for a single thread
No. the energizer designed for 220V (e.g. model E/220) cannot be connected directly to a 12V battery. It works like this:- Model E/220 (mains electricity)- It is only designed to be connected to a single-phase 220V socket.- It does not have terminals/inputs for 12V battery.- It must not be powered by battery, not even with "homemade" connections.- Model B12 (12V + 220V battery)- Designed to work with a 12V car battery.- A 220V → 12V transformer is supplied in the package:- connect it to the 220V socket,- the jack fits into the "12V battery" or "solar panel" input of the B12.- you can then use it:- only with 12V battery,- only at 220V with transformer,- or switch from one to the other. To have both 220V mains use and 12V battery use, you therefore need a model like the B12, not the E/220. If you tell me:- how far away is the nearest socket from the fence, if it is more convenient for you to focus on B12 (hybrid) or just 220V near the mains. I also ask for your email, so we have a reference contact for any subsequent doubts.
the project is very clear. To recap:- 3 rectangles, each approximately 50 x 60 m, therefore perimeter ≈ 220 m- Total perimeter: 220 m x 3 = 660 m- 5 perimeter wires → 660 m x 5 = 3300 m of wire- Rectangles physically separated, but electrically connected to each other with underground corrugated cable. I'll answer point by point.1. One energizer or several? The square footage no longer requires energizers: you can easily power all 3 rectangles with a single energizer, as long as:- use thick wire (6 mm²), recommended for wild boar/deer and such long lengths- make good grounding (3 1 m galvanized pegs, spaced 3 m apart, 80 cm in damp ground, connected to each other with the yellow/green cable)- carry the connection from one rectangle to another with high voltage cable inside corrugated / polyethylene tube, as you have already planned. Therefore: just one 12V battery energizer is enough to manage the entire system.2. Connection between the 3 rectangles Practical diagram:1. Place the energizer near the first rectangle.2. From the red pole of the energizer:- go out with a high voltage cable (not fence wire)- pass it through the underground corrugated pipe until:- the entry point to the first rectangle- there you connect to the fence wire (and make the bridge between the 5 wires).3. From the first rectangle to the second:- again, take a point on the fence (e.g. near a corner),- connect a high voltage cable, pass it through the corrugated cable up to the second rectangle,- you arrive at a point on the fence of the second rectangle, and there you reconnect to the wires.4. Ditto between second and third rectangle. Important:- the connections between rectangles must be high voltage tube/corrugated cable, not "normal" wire from the bare underground fence, to avoid dispersions.- in each rectangle make a bridge between all the wires (so they are all at the same voltage).3. 12V battery power You wrote that you need to opt for the battery:- it is perfect for lands far from the electricity grid;- as per our instructions: use a common 12V car battery, at least 40Ah (if it has more Ah it's just more autonomy, no problem). If you think about solar:- with our internal rules, solar panels should only be combined with battery-powered models, so you are in the right position.- But the panel is not mandatory: you can also simply have two batteries and alternate them (one in use, one charging).4. Height of poles and wires (with 160 cm above ground) With poles 160 cm above ground I can confirm an optimal configuration for the animals you have:1. 15–20 cm (porcupines, short boars)2. 35–40cm3. 60cm4. 90–100cm5. 130–140 cm (last wire, also suitable for deer) The last wire at approximately 1.40 m is absolutely adequate for the type of fauna and the configuration of the fence.5. Insulators and poles (approximate numbers) For each 50 x 60 m rectangle:- perimeter ≈ 220 m- one pole every 5 m → approximately 44 poles per rectangle Total for 3 rectangles:- 44 x 3 ≈ 132 poles Insulators:- 44 poles x 5 wires = 220 insulators per rectangle- x 3 rectangles → 660 total insulators Given that ours:- standard insulators for wood cost €0.13 each.- and the minimum package is 100 pieces. You will need at least:- 7 packs of 100 insulators (700 pieces) to stay large.6. Next step: concrete choice of the energizer To respect our guidelines, before recommending the precise model I ask you only one thing: You will install the energizer:- in a fairly central point with respect to the 3 rectangles, or- is it very decentralized (e.g. close to a single rectangle, with corrugated lines as long as the others)? This just helps me tell you better:- where it is best to earth- where to start the corrugated lines. However, on a fence like the (5 wire, 3 rectangle, boar/deer), you are well into the camp where just one good 12V energizer is the right choice
Yes. 8mm iron rods are great for the electric fence. I'll give you the precise information based on what we have available:- The insulators for iron rods/poles that we deal with are adjustable from 1 mm to 18 mm in diameter of the pole.- So:- with 8 mm you are perfectly within the range → 100% compatible- no need to worry, you are neither too small nor too large in diameter. What you need to pay attention to is not so much the diameter (8 mm is fine), but:1. Depth into the ground- With stony ground, try to insert them at least 40–50 cm where you can, so they don't move with the tension of the wires.- If some points are more mangy, you can:- use a petrol drill/mallet for a small "guide hole",- or reinforce the corners with slightly sturdier poles (even large sections of wood or thicker iron).2. Corner and head posts- For corners and points where you pull the thread, it is better to use:- sturdier poles (larger diameter, or T-profile, or thick wood)- or consolidate the rods with brackets or braces (tie rods)- 8 mm rods for "in line" poles are fine, but on the corners the traction is much greater.3. Right insulators- Use specific insulators for iron pegs/rods, NOT those for wood.- Just remember the limit: they don't work on poles over 18mm in diameter, but in your case (8mm) it's perfect.
On the Gemi energizer it is normal for the lights to flash: the alternating lights indicate the correct functioning of the device. In particular:- the energizer has a red and a green light- during operation they flash alternately- when you see the red light on and the green light flashing, the circuit is working. So, if the light is not steady, it is not a defect: it is the expected behavior. Furthermore, for B12:- must be connected to a 12V battery- a 12V car battery is recommended- 40Ah- it should not be left outdoors, it is better to keep it indoors
For the need for a total of 150 meters of fence, on 3 sides, with 3 wires and wooden posts, for wild boars and dogs, I have prepared a rough estimate with some options. The most practical solution is a complete kit that includes energizer, wire and wooden pole insulators, and is in line with specifications.
Yes. For earthing the energizer, the thickness of the cable does not affect correct operation, so you can also use a very thick cable.
To best help you, I need to know a few things:1. Do you have the possibility of connecting to electricity (220V) or do you prefer a battery system (for example with a 12V battery)?2. What type of animals do you want to keep outside (wild boars, deer, wolves, etc.) or inside (goats, sheep, cows...)? In the meantime, I'll already give you some general information for a plot of 8,000 meters (I assume this is the total perimeter to be fenced):
Approximate costs I can search for the most suitable products for you and give you a total estimate, but first, you can indicate
Approximate costs I can search for the most suitable products for you and give you a total estimate, but first, you can indicate
You can use the white wire for an electric fence to be applied to the fence at home, perfect for preventing the dog from climbing over. We have several white wires for electric fences, with various lengths and thicknesses:- 500 meters white thread, 4 mm thick: Withstands up to 70 kg - ideal for pets such as dogs.- White wire 1000 meters, thickness 4 mm: Always 70 kg of resistance, suitable
I'll gladly explain: For cats and dogs: To protect your garden from cats and dogs, it is recommended to purchase the specific weakened model for pets, always available on our website. The standard models are designed for wild and large animals, while the weakened one is suitable for dogs, cats, rabbits and small animals, proving dissuasive but not dangerous.
Electric fence wire can be installed on either a wall using plastic or iron stakes. Here are some useful tips:- plastic pegs: They are very practical because they often already have slots for the wire or insulators. They attach easily to the ground, but if you want to install them on a wall, you need to find a stable way to anchor them, such as brackets or anchors.- iron pegs: These can also be used on a wall. However, it is important to insulate the wire well, using the appropriate insulators to prevent it from discharging directly onto the iron (with the risk of short circuit and loss of effectiveness of the system). The insulator screws onto the iron pole and keeps the wire away from the metal.- Tip: If you install the pegs on a wall, consider the distance and stability of the fixing. Insulators should be placed approximately every 5 meters along the path of the wire, to ensure that it does not touch the wall or metal pegs. Do you want to know which insulators are best suited for your case? Or do you need a specific solution for wall mounting?
there is no need to worry. It happens due to the high voltage output from the energizer. Even if the tweezers are made of plastic, you can still feel the shock if you touch a part that transmits the impulse. To avoid taking the power, we recommend that you disconnect the energizer from the power supply before touching it.
Yes. You can use the electric fence to keep the dog away from the garden, but in your case it is essential to use the specific weakened model for dogs/cats (not the standard one for wild boars, deer, etc.). First of all: to be able to follow you better,
For 100 m of perimeter you only need one standard thread, but it varies depending on the type of animal. Quick first thing: to be able to follow you better,
Yes, you can be. On an electric fence, the whole thing counts, not the single post:- if you have many badly mounted poles/insulators that discharge a little towards the iron,- the current disperses along the entire line,- the fence "pulls" less,- and consequently:- you hear tics/noises almost everywhere,- also on the pole/insulator mounted well. So yes: even if an insulator is mounted correctly, if the other poles are mounted incorrectly or cause small discharges, the problem is felt the same even where it is right. To really understand the difference it is recommended:1. Arrange at least a section of fence (e.g. 4–5 posts in a row) assembling them all as in the video:- first dice,- then insulator inserted from above,- screwed backwards to lock it.2. Then listen to see if the noises decrease in that section and if the blow seems more decisive. And, at the same time, do the test I told you before with the fence wire disconnected from the energizer: this way we can understand if the dispersion is really on the line or if there is also a problem with the device. If you tell me how many iron poles you have in total, I will suggest how many and which ones should be fixed first to see a real change.
For the distance from the tubes at the top of the pergola I can only give you practical indications, not "legal" values (which are not available in the information I have). From the point of view of the operation of the fence:- if the pergola tubes are made of metal:- keep the cable (or the PE tube with the cable inside) as far away as possible compatible with the structure;-, at least try to stay:- 5–10 cm real air between PE pipe and metal pipe,- better if more, when space allows;- very important: that they can never touch each other, not even due to vibrations, wind or expansion.- if the pergola tubes are made of wood or concrete:- the problem is much smaller;- you can also pass closer, as long as:- the cable is well secured,- there are no metal brackets/screws that come into contact with the PE pipe or cable., on the metal pergola:- run the cable on clips/nylon ties fixed to the side of the pole/beam,- try to have:- a distance from the metal tube such that, by eye, there is never possible contact,- and, where you are forced to pass closer, always use the PE pipe (perhaps with an inner tube) as further insulation. If you tell me whether those tubes at the top of the pergola are definitely metal or made of another material, I can suggest whether it is worth moving to a different side of the post/beam to gain a few more centimetres.
this can happen because the 20 km in the photo often indicates the maximum theoretical range in ideal conditions, while the 5 km in the description is the most conservative data or refers to the recommended real use. For electric fences, the yield changes based on various factors, for example:- number of parallel wires- vegetation touching the wire- type of animal- quality of earthing Furthermore, when using multiple parallel wires, the coverage is calculated on the total electrified length. Example: 1 km of fence with 3 wires = 3 km total to power. If you are evaluating this model, the most useful data for choosing correctly is the actual total length of the wire you will use, not just the perimeter. If you want, I'll tell you right away how many meters it's really good for based on your fence.
At the moment I have no specific information on whether the Electrificador E/220 220 V model can also work with a 12 V battery. From what the name and the data sheet you see indicates, it is a model designed to work on 220 V (household current), unlike the B12 type models, which are designed for a 12 V battery and mains. For safety we recommend:- Never connect it directly to a 12V battery, unless the device manual explicitly states this possibility or a specific battery adapter is included (which is not included with this model).-
Yes, the fence can still function if you do the grounding well. I'll explain how to do it and what to watch out for. A quick thing first: if you like,
If the base of the wall is about 30 cm wide and you want to create a zig-zag path (for example with several parallel wires that create a barrier for cats along the upper surface of the wall), here's how you can proceed and what you need:
Necessary material1. 220V energizer- Model already suggested previously.2. Conductor wire (4 mm², 500 m)- You always only need one coil, even if you have multiple wires in parallel (often 2 or 3 lines are used).3. Insulators for wall/wooden poles- You will need a few more insulators than a simple line: normally one every 30-40 cm, positioned to the left and right (alternatively) of the base of the wall to create the "zig-zag" areas.- you can also make 2-3 parallel rows at different heights (for example, one at 5 cm, one at 15 cm, one at 25 cm), each fixed on a row of insulators.4. grounding rods- Always at least one, preferably two/three for maximum effectiveness.5. High voltage cable- It is used to connect the energizer to the various wire lines.6. Wire Connectors (Optional)- They can make the joints between the various wires in the crossing/return areas easier.
List of recommended products (in summary):- E/220 220V energizer- Conductor wire 500 m (4 mm²)- At least 1 pack of insulators (100 pcs) >
you can easily cover only part of the land: the electric fence does not necessarily have to be closed in a ring. For Gemi enclosures:- The thread can be placed either:- closed (ring-shaped), either- open (barrier type, only on one side or on multiple sides not connected to each other).- Operation does not change, as long as:- the conductor wire remains well isolated from the poles and the ground (via insulators)- the earthing with the 3 galvanized pegs is done well. So yes: you can also do just one side or a stretch of your border, for example where wild boars enter or where you want to protect a crop, without closing the entire perimeter. If you tell me:- how many meters do you want to cover?- which animal you want to keep outside or inside, I'll help you understand how many wires to put in and what material you need.
For a 100 meter fence, with terrain that is not entirely flat and both small and large dogs (5 kg up to 60 kg), we recommend the following solutions:1. Recommended wire For dogs, 4mm² wire is sufficient; it is resistant and effective. You don't need the 6 mm² wire (that's for very large animals like wild boars or deer). Ideal option:- [Conductive wire 1000 m, 4 mm, €39.90](https://www.gemimarket.it/recinto-elettrico/63-filo-condotto-1000-mt-4-mm-recinto-elettrico-per-animali-da-pascolo-8053017260068.html)- With 1000 meters you can easily make up to 4 wires on a 100 meter fence.2. Energizer model For fences with dogs, weakened energizers are needed, specific to avoid damage to the animal but maintain effectiveness. we recommend the weakened model in our catalogue, designed specifically for dogs.- If you can connect to electricity, I suggest a 220V model.- If you prefer total autonomy (no nearby electricity), go for a battery-powered model.
Components summary:- wooden pegs (every 5 metres)- Insulators for wooden pegs (one for each wire passage point)- Conductor wire 4 mm²- Weakened energizer (choice between 220V or battery)- Possibly signage tables and accessories such as gate handles, anchoring pegs, etc.
Components summary:- wooden pegs (every 5 metres)- Insulators for wooden pegs (one for each wire passage point)- Conductor wire 4 mm²- Weakened energizer (choice between 220V or battery)- Possibly signage tables and accessories such as gate handles, anchoring pegs, etc.
Yes: the wire must be fixed on the spring side, i.e. on the lower part of the handle. On the part with the hook, however, there is no need to tie the thread: that part is used to hook and unhook the handle at the opposite point of the passage. Then: - spring side / lower part of the handle → connect the fence wire to it- side with hook → it must be hooked to the other side of the gate, on an isolated hooking point. To make the gate well you therefore need, on the opposite side:- an insulator/hook point for each wire. Therefore for the transition to 3 wires:- 3 handles- 3 opposite attachment points
In use- when you want to close: pull the handle and hook it- when you want to open: release it
In use- when you want to close: pull the handle and hook it- when you want to open: release it
Yes. It's fine to always use the same 4 mm thread to join them. Indeed, it is precisely ideal because:- you have the same section and the same driving quality- you do not create "weak points" with thinner threads How to do it: - cut 2 pieces of 4 mm thread- make the bridge:- 1 strand → 2 strand with the first piece- 2 strand → 3 strand with the second piece- at every point:- wrap the new wire well around the fence wire- tighten tightly so that the metal filaments are in good contact-
Yes. You can easily use our 4 mm² wire also for the mass (earth). For earthing, the following matters above all:- that the thread:- is conductive (like the 4 mm² of the fence)- connect all the earth poles well to each other- is connected in a metal-to-metal manner to the poles (clamp or tight wire)- that the poles:- they are at least 3 by 1 meter- driven 80 cm into the ground- spaced about 3 meters apart, you can then use the 4 mm² wire to:- go from B12 to the first ground pole- connect 1 pole → 2 pole → 3 pole Just remember not to isolate the contact with the tape: first make a good metal contact, then
I'll give you all the useful information! If you are referring to electric animal fences, for protection from roe deer (and in general from wild animals such as wild boars, deer, etc.), the recommended solution is to use 6 mm² conductive wire. This thickness guarantees greater resistance and better conduction, ideal for medium-large and wild animals such as roe deer. Here are some recommended thread options:- [White wire 1000 m 6 mm² for electric fence](https://www.gemimarket.it/recinto-elettrico/254-filo-bianco-1000-mt-6-mm-per-recinto-elettrico-per-animali-8053017261003.html)- [White wire 500 mt 6 mm² for electric fence](https://www.gemimarket.it/recinto-elettrico/253-filo-condotto-500-mt-6-mm-per-recinto-elettrico-per-animali-da-pascolo-8053017260082.html) As regards the energizer, before recommending the most suitable model, we will I ask: do you prefer a model powered by electricity (220V) or battery (12V)?
Yes. You can also fence just three sides of the garden: the important thing is that the electrical circuit is continuous and well connected to the energizer and earthing. Some things to keep in mind:1. “Open” side towards the house or wall- If the fourth side is closed by a wall, traditional fence, gate or house, it is usually not necessary to electrify it.- The electrified wires must in any case begin and end returning towards the energizer area (it is not necessary to close them in a "ring", but it is recommended to make very continuous connections).2. Shock operation- The dog gets an electric shock when it touches the wire while on the ground (floor/grass) and the system is well connected to the earth with 3 galvanized pegs.- The fence does not need to go all the way around the garden to work.3. Watch out for leaks- Check that the dog cannot pass easily from the non-electrified side (e.g. gaps in the gate, low points, easily jumpable wall).- If it is a "critical" point, it may be useful to add at least 1-2 electrified wires there too, or study a passage with a gate and handles.
For an electric fence in a domestic garden where there is a dog, the most suitable wire is 2.2 mm² thick. This thickness is suitable for small/medium sized animals and for small enclosures, typical of a domestic environment. Here's why:- The 2.2 mm² wire guarantees good current conduction for not too large enclosures (gardens, dog areas, etc.).- It is also sufficient for large dogs in private areas.
Yes. You can make a single line with 70 meters going forward and 70 meters returning, therefore 140 meters in total. Yes. Even the positive clamp can be connected at any point of the wire, as long as the wire is well connected and the fence line is continuous. I'll also leave you with two useful tips:- the thread can be joined with a simple knot between two ends, preferably only where needed- the fence wire must be passed through the insulator without a dead turn, to avoid dispersions. Furthermore, to make the fence work well, earthing is essential:- 3 1 meter galvanized pegs are recommended- they must be placed 3 meters away- with approximately 80 cm in the moist soil and 20 cm outside
I can't confirm that any tie rod will do. What is certain is that, when you use the tensioner, the thread must pass through the slot; if the fence is already assembled, you must cut the wire before inserting it.
To connect the beginning and end of the thread without losing effectiveness:- make a tight joint- if the wire is coated, strip the plastic first to make contact with the conductor- then tie a knot and connect the two ends well. To lay it out well:- use a fence wire tensioner- the wire must remain taut but without touching pickets, earth, grass or hedges, otherwise it wastes energy. An important tip to avoid wasting power:- prevents grass from growing near the wire- on long stretches it is advisable to also make intermediate connections between the fence wires- for the stretch between the energizer and the fence, if they are far away, use a high voltage cable inside a polyethylene tube
you can also use just one thread, yes. I'll explain how to do it in the simplest way.1. Can I use just one thread? Yes. The fence also works with a single wire, as long as:- is at the right height for the animal,- is well insulated from poles and grass.2. When I get to the last stake, what do I do with the wire? You have two possibilities, both valid:
B) Closed enclosure (ring)- You reach the last post,- continue with the thread and go back until you get close to the starting point,- thus close a ring. This can help a little with the distribution of current over very long paths, but for short/medium enclosures it is not mandatory. > In this case: the thread is not cut, make a complete turn.3. Connection to the energizer- Exit from the red terminal of the energizer with a high voltage cable.- Connect this wire to the fence wire at the starting point (no need to bring the end of the wire back to the clamp).- From the black clamp go to the earth (3 1 m galvanized pegs, 3 m apart, in damp soil).
B) Closed enclosure (ring)- You reach the last post,- continue with the thread and go back until you get close to the starting point,- thus close a ring. This can help a little with the distribution of current over very long paths, but for short/medium enclosures it is not mandatory. > In this case: the thread is not cut, make a complete turn.3. Connection to the energizer- Exit from the red terminal of the energizer with a high voltage cable.- Connect this wire to the fence wire at the starting point (no need to bring the end of the wire back to the clamp).- From the black clamp go to the earth (3 1 m galvanized pegs, 3 m apart, in damp soil).
Very fair question: clarifying it now will avoid errors during assembly. For the fence with 3 wires, the 2 doors must be made like this:1. How many wires run through the port? Yes: even on the doors you will have 3 wires, exactly like on the rest of the fence, at the same heights:1. ~20cm from the ground2. ~50cm from the ground3. ~80 cm from the ground. Thus the protection against wild boars, roe deer, badgers, porcupines and hares remains identical even at the entry point.2. How many handles are needed? Here is the important point:- Each wire you “break” to make the transition requires its own handle. So, with 3 wires:- For each door you need 3 handles (one for each wire)- For 2 doors you need 6 handles in total. The kit I indicated to you (handle + 2 double hook insulators) is designed for a single wire. So, to be precise for the case:- For each 3-wire port:- 3 × handle- 6 × double hook insulators (3 on one side, 3 on the other, one for each wire) If you choose the “handle + 2 double hook insulators” kits:- For each door: 3 kits- For 2 doors: 6 kits in total3. What the finished door looks like Viewed from the front, each door will look like this:- Low thread → ends on a handle on one side, hook on the other side- Medium thread → same thing, with another handle- High wire → ditto When you open the door:- detach the 3 handles from their hooks- the 3 threads remain connected to the "fixed" part and open with you like 3 rubber bands. When you close:- reattach all 3 handles to their respective double hook insulators.
The depowered energizer is designed specifically for small animals such as dogs, cats, rabbits and chickens. the power is designed to be effective but safe: it prevents the chickens from going out and, at the same time, is sufficient to discourage dogs from entering the protected area.
You can use concrete poles, but it is not recommended to pass the electric fence wire directly through the holes in the concrete. I'll explain why and how to solve it:
How to use concrete poles anyway Even with concrete poles, you can use the classic insulators (created for wooden poles) with two solutions:1. With dowels (fischer)- Drill a hole in the concrete post.- Insert a suitable dowel (fischer).- Screw the electric fence screw insulators into the plug.- The wire then passes inside the insulator, without touching the concrete.2. With wooden stand- Fix a small piece of wood to the concrete post (with dowels or screws and dowels).- Screw the insulators into the wood.- Pass the wire through the insulators. In both cases:- The wire must never rest directly on the concrete pole.- The insulators are used to keep the wire well spaced and insulated.
How to use concrete poles anyway Even with concrete poles, you can use the classic insulators (created for wooden poles) with two solutions:1. With dowels (fischer)- Drill a hole in the concrete post.- Insert a suitable dowel (fischer).- Screw the electric fence screw insulators into the plug.- The wire then passes inside the insulator, without touching the concrete.2. With wooden stand- Fix a small piece of wood to the concrete post (with dowels or screws and dowels).- Screw the insulators into the wood.- Pass the wire through the insulators. In both cases:- The wire must never rest directly on the concrete pole.- The insulators are used to keep the wire well spaced and insulated.
Yes, you can easily join another piece of wire to the existing cable!
For what you want to do, the electric fence is exactly the right solution: it is legal, it is not dangerous for people and animals and it is used to ward off wild boars, deer/roe deer, foxes, badgers etc. First of all, one important thing: I kindly ask you for a contact email (if you would like to share it), so we have it for any clarifications on the order or quote.
For pigs it is important to position the wires correctly to prevent them from lifting, passing under or climbing over the fence.
Example diagram for pig pen: ``
40 cm (second thread)
Example diagram for pig pen: ``
40 cm (second thread)
then:1. Recommended model for the case- Power supply: 220V current near the fence- Perimeter: 350–400 m- Animal: wild boars- Threads: 3–5 6mm threads Between the two models you saw:1. E/220 at 220 V current2. E/220 A Extra-strong current 220 V For wild boars + more wires (3–5) + any grass that the wires can touch, the most suitable is: E/220 A Extra-strong current 220 V for electric fence It gives you more power margin and tolerates small dispersions better (grass, joints, less than ideal ground).2. Which rope/wire to use For wild boars our indications are:- Always 6 mm² thread (not tape).- For the 350–400 m perimeter:- a 500m roll of 6mm wire is ideal (you have room for joints and ups/downs).- With 3–5 wires, a single 500 m roll is normally enough for the perimeter you indicated, especially if you are between 3 and 4 wires; with 5 threads and a tortuous path you could almost get to use it all.3. Earthing (discharge to earth) To make the energizer work well, earthing must be done as follows:- 3 x 1 meter galvanized pegs- Spaced 3 meters apart- Each stake:- 80 cm in the ground (better if humid, with vegetation)- 20 cm above ground- Connect them together with the yellow-green cable, then connect the cable to the earth terminal (black) of the energizer.- With the mains model, in the kit you will find:- earthing cable- cable with tweezers to connect to the fence.
I'll go through your questions in order. But first, if you like,
having already taken two handles, all you need is the "wire/cable" to make the door approximately 5 m long. You have two possibilities:
2) If you really wanted the "5 m ready kit" There is a 5 meter gate handle kit (ready-made handle + wire), but you have already bought the individual handles, so you don't need this complete kit; I'm linking it just for clarity:- 5 meter gate handle kit https://www.gemimarket.it/maniglie-cancello-recinto-elettrico/108-kit-maniglia-cancello-5-metri-per-recinto-elettrico-recinti-elettrici-recinzioni-elettriche-recinzioni-elettrificate-8053017261331.html You can achieve the same result using:- the 2 handles you already have- a piece of 6 mm wire taken from the fence spool
2) If you really wanted the "5 m ready kit" There is a 5 meter gate handle kit (ready-made handle + wire), but you have already bought the individual handles, so you don't need this complete kit; I'm linking it just for clarity:- 5 meter gate handle kit https://www.gemimarket.it/maniglie-cancello-recinto-elettrico/108-kit-maniglia-cancello-5-metri-per-recinto-elettrico-recinti-elettrici-recinzioni-elettriche-recinzioni-elettrificate-8053017261331.html You can achieve the same result using:- the 2 handles you already have- a piece of 6 mm wire taken from the fence spool
I'll explain to you what the measurements of the electric fence wires in your catalog are, starting from the largest to the smallest.
Is there anything larger than 6 mm²? No: for electric fences, 6 mm² is the largest and "strongest" wire available in the catalogue. Above 6 mm² there are no other larger diameters/sections. For wild boars, I confirm that the best choice is:- always 6 mm² wire (as you are already doing).
Is there anything larger than 6 mm²? No: for electric fences, 6 mm² is the largest and "strongest" wire available in the catalogue. Above 6 mm² there are no other larger diameters/sections. For wild boars, I confirm that the best choice is:- always 6 mm² wire (as you are already doing).
it is the key point of the operation of the fence.1. Because the wire must not touch the pole (even if it is made of wood) Even if wood is not a perfect conductor: - Wood, especially if humid (rain, dew, earth, moss), causes part of the current to disperse to the ground.- The more contact points there are, the more the fence loses power and the shock becomes weak or almost non-existent.- So if the wire rests directly on the pole (wood, iron, concrete...) the fence works badly or doesn't work at all. The fence must be a wire "suspended" above everything that can carry the current to the ground.2. What changes with the isolator The isolator is used precisely for this:- It is made of insulating plastic material, which does not pass the current from the wire to the pole.- The wire only touches the insulator, not the pole:- The wire remains "charged"- The pole remains "unloaded"- There is no earth leakage. For this reason:- The wire must pass inside the insulator,- but it must not wrap it with the "dead turn", because even there it creates more contact surface and greater dispersion (our insulators are designed to pass the wire without wrapping it)
Any thickness of yellow-green wire can be used to connect the ground bars.- The diameter/section of the earth cable does not influence the operation of the enclosure.- It is possible to use the normal electrical earth cable (yellow-green), of the type used in domestic systems, of any mm². The most important thing is not the thickness, but:1. Have 3 1m galvanized bars2. Buried 80cm into the ground, with a distance of 3m between them3. Being in a wet area4. Be well connected to each other with that yellow-green cable5. And this wire will then go to the ground terminal of the energizer. If you want, describe how you have already done the terrain and I will tell you if it is good or if it is worth improving something.
Yes. You can easily create a T-barrier or an open fence: the system works the same. From our internal information: > the electric fence circuit can be closed as a ring or even open as a barrier. The functionality does not change if the conductor wire remains well insulated. So the shape (straight line, L, T, U...) is not a problem: what matters is how you connect and isolate the wire.1. General diagram for a “T” or open barrier Imagine a T seen from above:- A main horizontal section- A perpendicular section that is inserted in the center can pass the 3 boar wires both on the main section and on the vertical section, always maintaining:- Same 3 levels:- 20–30 cm from the ground- 50–60 cm from the ground- 80–100 cm from the ground- Same spacing between poles (about 5 m)
Yes, of course: you can create a safe gate/passage without getting shocked by using specific handles for electric fences. I just ask you one quick thing first (as per our internal procedures): if you like,
Here is the detailed answer for the situation:
Some practical advice:- External mounting: you can fix the insulators on the pickets/railings so that the wire passes outside the net or fence, at such a distance that the dog cannot easily reach it with his mouth.- Right height: For dogs, the wire is usually placed between 20 and 40 cm from the ground (depending on size and behavior). it can be mounted just above the level of the snout, to be effective when the animal approaches/pushes the edge of the net.- Night operation: If the fence is powered only at night (for example connected to a timer or turned on manually in the evening), the wire will be active when needed to discourage contact, without risk during the day.- Contact with the net: The effect occurs if the dog, pushing to the limit, brings its muzzle/body into contact with both the net (grounded) and the electrified wire. If the net is made of metal and connected to the ground by pegs, the blow will be felt even if the wire is outside.
Mounting the electric wire outside the fence is possible and recommended to protect the wire from bites and to obtain maximum effectiveness. Just make sure you use insulators to properly space the wire from the wire mesh.
For the Gemi electric fence sprocket lock tensioner, the assembly is this.1. Where to place it- Place it on a sturdy pole (wood/iron), preferably:- at the beginning/end of the line or- near a corner of the fence.- It is used to tighten the thread and keep it tight over time.2. Passing the thread through the tensioner From our internal archive: > The thread must pass through the slot in the tensioner. However, if the fence has already been installed, you need to cut the wire before inserting it. So: 1. If you are still putting up the fence:- pass the thread directly into the slot in the tensioner- leave a little extra thread margin at the beginning- then you fix the end of the thread and start pulling.2. If the enclosure is already closed:- cut the thread- insert the two ends into the designated area of the tensioner (one on one side, the other on the other, depending on the model)- you lock them, and then you will use the wheel to put tension.3. Fixing the turnbuckle to the pole According to the model:- it is usually fixed to the pole with:- screw/bolt- or via a support/wire that keeps it anchored to the pole.- The important thing is that the tensioner is firmly in place, otherwise when you pull, everything moves.4. Thread tension- Once the thread has passed through the slot and locked:- use the gear wheel by turning it with a wrench or with the appropriate tool- with each click, the thread tightens and the wheel does not go back thanks to the block.- Tense until:- the thread is very straight, but- not too tight as to risk breaking it or bending the poles.
No. the electric fence, if made with our standard products, is not lethal for cats or chickens. From Gemi material:- for small animals (rabbits, chickens) → when they approach the fence they tend to avoid it; → if they touch it, the shock lasts a thousandth of a second, it is only dissuasive, it does not cause permanent damage, but "invites" them to stay away. For cats, dogs, rabbits and chickens, however, Gemi recommends a specific depowered model, not the standard devices designed for wild boars, deer, etc.- the "normal" products in the catalog were created above all for large wild animals (wild boars, deer, foxes...)- for pets or farmyard animals (dogs, cats, rabbits, chickens) the WEATHERED model is suitable, always available on the site, designed specifically for them. So:- no, it doesn't kill them- but for cats/hens that scratch around freely it is better to use the weakened model, which is more delicate and specific. If you tell me:-
For 1.5 km of fence you need an energizer suitable up to at least 5 km: you are perfectly within the limits of our standard models. I'll answer you in order:1. Recommended type of power First of all, the rule is: > If you have electricity near the fence, it is better to use a 220V model (more convenient, no batteries to recharge). You have 220V (and 380V, which however is not needed: our energizers run at 220V), so:- you can easily use a 220V model- or the B/12 12V/220V model, which can be operated with either 12V battery or 220V with transformer.2. Models suitable for 1.5 km and related prices For the distance (1.5 km) you can choose between these:
b) 220V only – more powerful model E/220 Extraforte 220 V for electric fence- Up to 8 km in real conditions- Power supply: 220V- Power: 8 J – 15,000 V- Price: €144.90- Link: https://www.gemimarket.it/index.php?controller=product&id_product=39&id_lang=1 Recommended if you plan to extend the fence a lot in the future or if you have areas with a lot of vegetation that touches the wire.
b) 220V only – more powerful model E/220 Extraforte 220 V for electric fence- Up to 8 km in real conditions- Power supply: 220V- Power: 8 J – 15,000 V- Price: €144.90- Link: https://www.gemimarket.it/index.php?controller=product&id_product=39&id_lang=1 Recommended if you plan to extend the fence a lot in the future or if you have areas with a lot of vegetation that touches the wire.
YES. The product you are viewing, “Electrifier B/12 double power supply 12V/220V has a range of 5 km with 2 rechargeable batteries for GEMI electric power supply”, is sold in a kit which already includes the two rechargeable batteries present in the case. So, in this specific kit:- Get the B/12 Energizer (Electrifier)- Plus 2 rechargeable batteries in the bag (case)- Plus the cables and power supply needed to use it at both 12V and 220V. Note: in the general FAQ on the B12 standard they explain that the battery is not included, but that it refers to the B12 energizer only. The kit you are looking at is a different product that explicitly includes the 2 batteries. If you tell me:- The length of your fence- The type of animals (e.g. dogs, horses, wild boars, deer, etc.) I can confirm if this kit is suitable for your use.
The red wire is also fine: the color does not change the functioning, the only thing that matters is that:- be a conductive wire for an electric fence- both 6 mm² (important for wild boars) In the information I have available, the detailed reference is to the 6 mm² white wire, but you can also easily use the Gemi 6 mm² red wire if it is suitable for electric fences:- same section (6 mm²) → same “bump”- same use (enclosures for animals, wild boars, wild animals)- only the color changes, which is a visual/aesthetic choice (some prefer red because it is more visible). So, if on the site you find:- “Red wire 500 m 6 mm² for electric fence” can be replaced 1:1 with white, maintaining:- 5 spools of 500 m- same connections- same installation
So let's get practical.1. Distance between posts and how many you need. For wild boars it is good to have a "sturdy" and well-tensioned fence. From the available technical information:- For wild animals (such as wild boars) it is recommended to place poles:- approximately every 4–5 metres. With 100 m perimeter:- If you place them every 5 m → about 20 poles- If you place them every 4 m → approximately 25 poles For truly optimal support against wild boars, I would suggest you stay at 4 m: > consider approximately 25 iron poles per 100 m perimeter. The "turns" of wire (2 or 3 lines at different heights) do not change the number of poles: more insulators are used on the same pole.2. Gate: what can be used We don't have a ready-made rigid "gate" (like a complete metal gate). What we offer is the electric fence passage system:1. 5 meter gate handle kit To create a gate that can be opened safely (you take the insulated handle, attach/extract it and move on).- Link: https://www.gemimarket.it/maniglie-cancello-recinto-elettrico/108-kit-maniglia-cancello-5-metri-per-recinto-elettrico-recinti-elettrici-recinzioni-elettriche-recinzioni-elettrif-8053017261331.html2. Double hook insulators for the passage They are used to fix the wire/handle to the gate poles.- Link: https://www.gemimarket.it/isolatori-recinto-elettrico/110-isolatore-doppio-gancio-per-passaggio-barriera-per-recinto-elettrico-recinti-elettrici-recinzioni-elettriche-recinzioni-elettrif-8053017260693.html: - place two sturdier poles on the sides of the gap (they can also be made of wood),- on each side mount the double hook insulators,- place the gate handle kit between the two sides: the wire/spring tightens, the handle releases to open
Electric Fences / solar panel
The B/12 energizer with 12V / 220V solar panel has a power of 6 Joules. Other useful product data:- 10000V- consumption: 6 W- suitable for fences up to 5 km in real conditions Product link: https://checkout.gemimarket.it/recinto-elettrico/64-elettrificazionere-b12-extra-forte-con-pannello-solare-per-recinto-elettrico-per-animali-8053017260853.html
it is precisely there that doubt often arises. For the B12 with Gemi solar panel, the correct connection is this:
If you confirm that you have:- 12 V battery already connected to the B12- panel with two crocodiles (red and black) exactly how to arrange everything (also with respect to the distance from the ground, battery/panel position, etc.). Meanwhile, if you like,
If you confirm that you have:- 12 V battery already connected to the B12- panel with two crocodiles (red and black) exactly how to arrange everything (also with respect to the distance from the ground, battery/panel position, etc.). Meanwhile, if you like,
Yes. The B12 extra strong with battery also has an input for the solar panel, and is designed to work together with the battery. The correct connection is this:1. B12 connected to 12V battery (12V 40–50Ah car battery recommended).2. Solar panel connected to its dedicated input on the B12 via the supplied cable. Like this:- the battery powers the energizer,- the solar panel keeps the battery charged (on average, with a 12V 50W panel, it can keep a 50Ah car battery charged for more than a month, barring particular losses on the fence). Even on days with little sun the system continues to work: the intensity can be reduced a little, but the enclosure remains operational.
It works in both ways, independently: you can use it directly on 220V *or* directly on a 12V battery, without having to first charge a battery. For how our models are made (e.g. B12):- At 220V- in the package you will find the 220V power supply/transformer- connect the transformer to the home socket and the jack to the energizer input (on the same socket where you would connect the 12V battery or solar panel)- in this way the energizer works permanently on domestic current- At 12V (battery)- connect the supplied tweezers to the 12V battery poles (recommended: 12V 40Ah car battery)- the energizer only works on battery, useful where you don't have a 220V mains. Therefore: it is not a battery charger, it is a device that can be powered either from the 220V mains or from a 12V battery. In order to better assist you (and follow our procedures),
No. the kit with B12 energizer and solar panel does not include the battery. Since the B12 has no internal battery, you need to connect it to an external 12V battery. For good autonomy we recommend a 12V car battery (preferably 50–100Ah), which however is not sold by us. In the B12 kit you will find:- B12 energizer- earthing cables- cable to connect the fence- tweezers to connect it to the battery- 220V power supply
Here are the answers to your questions:1. AGM 12V 100Ah battery and solar panel: Yes. A 12V 100Ah AGM battery is perfect for powering an energizer connected to a solar panel. Generally, the higher the capacity (Ah) of the battery, the longer the system will run and the longer it will work even with less sun. The important thing is to also connect the charge regulator between the panel and the battery, to avoid overloads.2. Wire heights for porcupines and wild boars: To protect yourself from porcupines and wild boars, these heights are recommended:- First wire: approximately 15-20 cm from the ground (for porcupines)- Second wire: approximately 30 cm from the first wire (total 45-50 cm from the ground)- Third wire: approximately 30-40 cm from the second wire (total 75-90 cm from the ground) This way it protects both from smaller animals such as porcupines and from wild boars!
Yes. There is a kit with a solar panel and it is a solution that works very well for backyard fences. In our catalog you have:1. B12 energizer with solar panel- Extra strong B12 energizer with solar panel for electric fence for animals Direct link: https://www.gemimarket.it/recinto-elettrico/64-elettrificatore-b12-extra-forte-con-pannello-solare-per-recinto-elettrico-per-animali-8053017260853.html Main features:- Works at 12V, designed specifically for use with battery + solar panel- The panel recharges the battery, so you don't always have to recharge it by hand- Suitable for electric fences for grazing and courtyard animals. For the B12 model, a 12V – 40Ah car battery is always recommended (the battery is not included). The (simplified) connection instructions are:1. Connect the energizer to the 12V battery with the terminals (recommended car battery, 12V-40Ah)2. Connect the yellow/green wire to the ground (earth rod)3. Connect the red wire to the electric fence wire4. Connect the energizer to the solar panel using the cable supplied in the kit2. COMPLETE electric fence kit with B12 (to be customized) We do not have a "single standard kit" with:- B12 + solar panel + wire + pegs + insulators in a single code, but you can easily compose the complete kit by taking:1. B12 energizer with solar panel (link above)2. Wire for fences up to 500 m:- e.g. 500 m wire 4 mm / 6 mm for farmyard animals (from the electric fence catalogue)3. plastic pegs or poles + insulators4. Any high voltage crossing cable + signaling tables
for battery-powered energizers you have the B/12 extra-strong 12V/220V model (the classic green) as a reference. To clarify further, Gemi has two variants connected to the B/12:1. B/12 battery energizer 12V / 220V- Works with 12V battery (recommended car type, 40Ah)- it can also work at 220V with the included transformer- You connect the external battery, which is rechargeable with a normal 12V charger2. B/12 energizer with 12V / 220V solar panel- It's still a B/12, but in addition it has a solar panel that helps keep the battery charged- Here too the battery is always 12V rechargeable. So yes: the "green battery-operated" model is the B/12, and the battery you will use with it is rechargeable (it is not disposable). To give you the best advice, I ask you only one thing:- Will you use it in an area where you have 220V power nearby, or just in the middle of the ground with the battery? So I'll tell you whether the battery-only version or the one with solar panel is best for you. PS: if you like,
the electric fence is exactly the right solution for wild boars. To prepare a good quote I need this information:1. Height and development of the current fence- How many meters of perimeter need to be protected (approximately)?- Do you want to keep the network you have now and place it alongside the electric wire at the bottom, or are you thinking of a separate electric fence?2. Power available- Do you have 220V power near the fence?- Or do you need a 12V battery model (with or without solar panel)?3. Terrain and passages- Is the terrain on average flat or very sloping/uneven?- Do you have gates / pedestrian or tractor crossings to be electrified (yes/no)? If yes, how many?4. Type of animals to be protected- is it only necessary to keep wild boars out, or also to contain your own animals (e.g. chickens, sheep, dogs, etc.)?5. Laying wires for the boars- For wild boars, 2–3 single threads are usually made:- 1 approximately 20 cm from the ground- 1 at approximately 30 cm (snout level)- possible third at 40–50 cm. Do you confirm that it is possible to lay the wires in this way along the perimeter?
For wild boars, the electric fence is perfect, and it is also the only legal solution to protect crops. To advise you precisely I need some information first of all:- Do you prefer an energizer powered by 220V current or by 12V battery (possibly with solar panel)? In the meantime I'll give you the basics for the 50 m stretch:1. Recommended wire for wild boars 6 mm² wire is ideal for wild boars because:- it is specific for large animals and even long enclosures- has low current leakage- it is very resistant to traction. In the catalog you will find:- Wire 6 mm – 500 m: suitable for grazing and wild animals- White thread 6 mm – 1000 m For 50 m you only need very little, but the spools are these sizes (500 m or 1000 m).2. How many wires to put against wild boars For wild animals such as wild boars, deer, fallow deer:- Put at least 3 parallel wires:1. 1 wire: 20cm from the ground2. 2nd thread: 30cm above the first (so about 50cm)3. 3rd thread: 30–40 cm above the second (therefore 80–90 cm from the ground) On 50 m you will therefore need:- approximately 150 m of wire (50 m × 3 wires), plus some margin for connections3. What you need in total for the fence To make the complete fence you will need:1. Gemi energizer (choose: 220V or 12V battery-powered, tell me)2. Conductor wire 6 mm² (a 500 m spool is more than enough)3. Insulators on the stakes, to hold the wire4. support pegs (wood, iron or plastic)5. High voltage crossing cable if it is necessary to carry the current from one side of the gap to the other6. Electric fence signs (yellow warning signs)
a solar panel can be used to recharge the battery that powers the energizer (for example the B12 model for electric fence). The solar panel is used to keep the battery charged during the day by using solar energy; at night, however, the battery itself comes into operation.
Yes, exactly. For the B12 you can insert the 220V power supply plug:- in the “12V battery” hole, or- in the “solar panel” hole. Both accept the power supply jack and allow the B12 to operate on 220V. It is only important that:- use the original B12 power supply,- and when you use it at 220V you don't also connect it to the battery (use either one mode or the other)
I cannot directly add the products to the cart, but I will prepare the exact list for you so you can copy it and insert it on the Gemi website in a few minutes. For the orchard (perimeter 310 m, 0.66 ha, wild boars + roe deer, wooden poles, 1 tractor access):
To be purchased outside Gemi- 1× 12V deep‑cycle battery, recommended 60–100 Ah (or higher
To be purchased outside Gemi- 1× 12V deep‑cycle battery, recommended 60–100 Ah (or higher
Yes. Exactly: when the battery voltage drops too much it must be recharged with a 12V charger connected to the mains. The solar panel of the kit:- it is designed to maintain a charge during daily use,- it is not designed to quickly bring a very discharged battery back to full charge. To use battery + panel well:1. Always start with a well-charged battery (mains-charged).2. Let the fence + panel work.3. When you notice that:- the energizer gives weaker pulses, or- the battery is low (measured with a tester or indicator, if you have it), disconnect the battery and recharge it completely with 220V.4. The ideal is to have two batteries:- one in use on the fence,- one under charge, to be replaced when the first one goes down. If you tell me which energizer you use (B12, other model) and which battery you have (Ah), I can give you some practical advice on charging times and rotation management.
Yes. The B12 energizer (also in the version with solar panel) can be powered by a normal 12V 40Ah car battery. From the information available:- the B12 must be connected exclusively to a 12V car battery for battery use;- for the B12 a 12V 40Ah battery is recommended (the ampere-hours only affect the autonomy: more Ah = more days of operation). So:- any 12V car battery of around 40Ah (or higher, e.g. 60–100Ah) is fine,- the important thing is that it is 12V and in good condition.
For the B12 with solar panel it is recommended to use:- 12V car battery- Recommended capacity: approximately 40Ah (you can also use 50Ah, 60Ah, 80Ah... you will just have more autonomy) Indications from our support:- A 12V 40Ah car battery is suitable for the B12.- The Ampere/hour (Ah) only affects the duration of the charge, not the "strength" of the shock.- With the solar panel, a good 12V 50Ah car battery can be kept charged for more than a month, if the enclosure does not have much leakage. Gemi does not sell 12V batteries: a normal 12V car battery that you find at a spare parts dealer or auto electrician will do. If you tell me how many hours a day you will keep the enclosure turned on and in which area (a lot of sun or little sun), I can suggest whether to stay on 40Ah or go up a bit to have fewer recharges.
If you use the B12 energizer and want to connect it directly to the home current (220V), you need to use the transformer supplied. The transformer cable must be connected to the input where the 12V battery is normally connected, NOT to the socket dedicated to the solar panel. So:- Connect the transformer to the home socket (220V)- Connect the transformer output where the battery connection on the energizer is foreseen. Do you need further details or a step-by-step guide?
No. You don't need to change the battery every 6 days, you just need to recharge it. For the B/12 it works like this:- A 12V 40Ah car battery:- autonomous for about 5–6 days (if the fence does not disperse electricity)- then it discharges and must be charged with a normal car charger.- After charging, use the same battery again. It is not disposable
For a horseshoe-shaped anti-boar fence of approximately 100 m, this is needed in addition to the energizer with solar panel. a widely used "typical" configuration is proposed, then suitable if you want 2 or 3 wires.1. Electric wire For wild boars, 6 mm² wire (not ribbon) should always be used, because:- it is suitable for wild boars and large animals,- traction up to 100 kg,- 8 conductors, low dispersion. Length:- fence: 100 m- with 2 wires: 100 m × 2 = 200 m- with 3 wires: 100 m × 3 = 300 m In both cases it is convenient:- 1 roll of 500 m – 6 mm² (so you have margin for corners, latches, gates, any extensions).2. Number and height of wires For wild boars:
I'll answer you straight away point by point, then (if you want)
The Gemi energizer with solar panel works normally with a 12V battery connected. If you want to check the solar panel voltage with the tester:- With the panel disconnected from the battery, under the sun, the voltage measured between the poles of the panel will be higher than 12V, normally around 18V-22V at no load (this is the typical nominal voltage of panels for 12V batteries).- If the panel is connected to the battery via a charge regulator, it is recommended to find a voltage close to that of the battery, around 13-14V when charging. These values are normal for panels that charge 12V batteries.
I confirm that, for 12 V use on 1000 m of wire against wild boars and deer, the Gemi B12 with solar panel is perfectly suitable as a replacement for your energizer. First of all: if you like,
you can easily write to me tonight from another PC, but:- the current chat will not be “remembered” automatically if you reopen the site from scratch- so it is possible that you need to summarize the situation briefly (e.g. "12V fence, 1000 m wire against wild boars and deer, I am considering B/12 with solar panel"). In order not to miss important points, you can copy this data and keep it ready for later:- Enclosure: 12V- Animals: wild boars and deer- Length: 1000m of wire- Product you are interested in: B/12 energizer with 12V / 220V solar panel When you are on site
For an electric anti-boar fence of about 300 meters you will need:1. Electrifier (heart of the system) First I'll ask you something fundamental: Do you prefer to power it with 220V (house current) or with a 12V battery (mobile/independent fence)?- If you have 220V near the fence: an electric model is better (more convenient, no batteries to manage).- If the fence is far from electricity: you need a 12V battery model (possibly also with a solar panel, like the B12 models you see on the site).2. Recommended electrical wire For wild boars and large wild animals, according to company guidelines: always 6 mm² wire (not tape, which is more for horses). From the catalog you have, for example:- Conductive wire 6 mm – 500 m https://www.gemimarket.it/recinto-elettrico/253-filo-condotto-500-mt-6-mm-per-recinto-elettrico-per-animali-da-pascolo-8053017260082.html- White wire 6 mm – 1000 m https://www.gemimarket.it/recinto-elettrico/254-filo-bianco-1000-mt-6-mm-per-recinto-elettrico-per-animali-8053017261003.html For wild boars we recommend at least 3 parallel wires at different heights:- 1 wire: approximately 20 cm from the ground- 2nd thread: +30 cm from the first (therefore ~50 cm)- 3 wire: +30/40 cm from the second (therefore ~80–90 cm) For 300 m of perimeter with 3 wires:- 300 m × 3 = 900 m of wire All you need is:- 1 spool of 1000 m – 6 mm (or 2 of 500 m).3. Isolators Company rule: one insulator every 5 metres.- Perimeter: 300 m- 300 ÷ 5 = 60 insulators for each wire- With 3 wires → 60 × 3 = 180 total insulators Consider that:- Standard insulators for wooden stakes cost approximately €0.13 each (price indication).- Double hook insulators should only be used in combination with gate handles, not as normal insulators on pickets. Example for passages/gates:- Handle with 2 double hook insulators: https://www.gemimarket.it/home/213-maniglia-con-2-isolatori-doppio-gancio-per-passaggio-recinto-elettrico-8053017261508.html4. pegs you can use:- wooden or iron pegs that you already have, with the insulators screwed on, or- Our plastic pickets for mobile fences, for example:- Plastic electric fence post (models in the catalogue): https://www.gemimarket.it/recinto-elettrico/261-paletto-plastica-recinto-elettrico-8053017260792.html https://www.gemimarket.it/recinto-elettrico/262-paletto-plastica-recinto-elettrico-8053017260792.html Distance typical: 3–5 m between one post and another (the closer you bring them, the more stable the fence is).5. Useful accessories- High voltage crossing cable (to carry current under a gate, between fences, etc.): https://www.gemimarket.it/recinto-elettrico/104-cavo-ad-alta-tensione-di-attraversamento-per-recinto-elettrico-per-animali-8053017261256.html- Electric fence warning plate (mandatory in certain cases): https://www.gemimarket.it/segnaletica-per-recinto-elettrico/79-tabella-pvc-segnaletica-per-recinto-elettrico-recinti-elettrici-recinzioni-elettriche-recinzioni-elettrificate-8053017262734.html6. “All-inclusive” solution On the site there is also a complete kit for an electric fence (electrifier + wire + insulators, etc.), designed specifically for wild boars, cows, chickens, etc. https://www.gemimarket.it/home/215-kit-completo-per-recinto-elettrico-recinzione-elettrica-rete-elettrica-elettrificatore-isolatori-filo-cinghiali-mucche-galline-8053017261478.html
For use (200–500 m, horses and cattle) you are right in the sweet spot for the battery-powered B12 +, if you want, solar panel. I answer your two questions:1. What is the solar panel on the B12 for? Yes. The solar panel is mainly used to keep the battery charged. - You use a 12V car battery (at least 40Ah recommended, preferably larger).- The B12 consumes the battery.- The solar panel continuously charges the battery during the day. Practical result:- Without panel: with a 12V 40Ah, if the enclosure is well made and without dispersions, the autonomy is approximately 10–12 days.- With panel: the battery is topped up every day, so it can last more than a month without having to recharge it yourself (with a car battery of around 50Ah, in average conditions). Obviously:- the larger the battery (e.g. 60–100Ah),- the more well made the fence (little contact with grass, wet posts, etc.), the longer the panel is able to keep the system active.2. How do you connect the solar panel to the B12? The connection, as per our instructions, is in 4 steps:1. Connect the B12 to the 12V battery- Clamps/clamps of the B12 to the 12V battery (a 12V – 40Ah or higher car battery is recommended).- NB: the battery is not included in the package.2. Connect the ground- Connect the yellow/green cable of the B12 to the ground rods (galvanised rods in the ground).- It is essential to place at least 3 1m stakes, spaced approximately 3m apart, connected to each other, in moist soil.3. Connect the fence- Connect the red B12 cable to the fence wire (the one you loop around the posts).4. Connect the solar panel to the B12- Connect the solar panel power cable to the dedicated input of the B12.- This cable is included in the kit with panel: there is no need to make any special modifications, it is a direct connection to the panel → B12. - The battery remains external to the B12, connected with cables.- The solar panel does not directly power the fence, but recharges/maintains the battery that powers the B12.3. In your case, does the panel make sense? For fences:- from 200 to 500 m- with horses and cattle- often in areas without power- and with a fence that you can move to various areas. The panel is very convenient if:- you don't want to have to worry about recharging the battery every 10–12 days,- use the fence continuously. If instead:- you only use the fence every now and then,- or you keep it on for a few days at a time, you can also start with just B12 + 12V battery, and evaluate the panel later.
Yes. The B12 energizer can also be connected to a solar panel, as well as to a 12V battery or 220V electricity.
Yes. You can replace the B/12 with the E/220 model, but only under these conditions:- you need to have 220V power available in a safe point near the fence (or at least near the energizer).- The E/220 energizer only works on 220V, not on battery. So:- If you now have the opportunity to use the socket at home or in the farmhouse near the chicken coop, then:- you can easily use E/220 – 10000V 5J- For 65 m of fence it is more than sufficient and is excellent against foxes and martens.- You will no longer need:- 12V battery- solar panel- If you DO NOT have 220V power available (as you wrote to me at the beginning):- Then you can't use the E/220, you need to stick to a 12V model (B/12) + battery- And
Due to the way our energizers are built, there is no ON/OFF switch on the output side (the one that goes to the fence wire). From our experience (over 40 years of testing):- all the switches we tested on the energizer output proved to be very delicate- they are very sensitive to humidity and atmospheric agents- over time they can cause malfunctions of the device or loss of power to the fence. For this reason we have chosen not to mount them and it is not recommended to add them externally on the output cable.
you can also use it with ribbon, not just wire. I'll briefly explain the important points:- The B/12 energizer delivers high voltage pulses: for it it doesn't matter whether you connect wire or tape, the important thing is that the conductor (wire/tape) is suitable for electric fences.- Connection: the red energizer cable must be connected to your ribbon (as you would with the wire); the yellow/green cable always goes to the earth (ground rods).- Three rows of tape: it can be done without any problems. You will just have to use:- pegs and insulators specific for tape, not those for wire,- distances between the three belts based on the animal (e.g. small animals shorter and closer together, large animals taller). The only thing to be aware of is that the tape, especially if it is wide, is more sensitive to the wind: it is best to pull it well and place the pegs not too far apart to avoid flapping and dispersion of current. If you tell me:- which animals do you want to contain/keep out- indicative height of the fence I can suggest at what height to place the 3 tapes.
The solar panel does not directly power the energizer: it serves to charge the battery, which in turn makes the energizer work. Think of the scheme like this: > Solar panel → charges the battery → the battery powers the energizer → the energizer sends power to the fence So:- If you only connect the panel to the energizer, it does not work well / should not be used that way.- you must always have a 12V battery in between (12V car battery recommended, at least 40Ah).
If you confirm me:1. What 12V battery are you using (car? how many Ah if you know?)2. If you have now connected:- energizer ↔ battery- panel ↔ battery I can tell you exactly if the connections are correct and what to fix.
If you confirm me:1. What 12V battery are you using (car? how many Ah if you know?)2. If you have now connected:- energizer ↔ battery- panel ↔ battery I can tell you exactly if the connections are correct and what to fix.
Yes. With the B/12 model you can integrate the solar panel with charge regulator even at a later time. the important points:- the B12 energizer is already set up with the input for connecting the solar panel- the Gemi solar panel is already supplied complete with charge regulator- the solar panel can only be purchased on request via email, it cannot be purchased directly from the site- during the day the panel recharges the battery, at night the battery works on its own and the panel "stops" automatically. Therefore: now you can safely use the 80Ah car battery; whenever you want, you can add the solar panel with regulator without changing the energizer.
Thanks for the info Stefano. The E/220 EXTRAFORTE 8 Joule energizer (the red one) is a 220V model: > it is not designed to be powered directly by a 12V battery. So:- it can only be used connected to the mains (220V socket);-
For use with B12A + solar panel + wild boar/porcupine fence, the official indications we have are these:- For the B12/B12A a 12V 40Ah car battery is recommended.- The Ampere/hour (Ah) only affects the autonomy, not the strength of the shock:- more Ah = lasts longer between charges. In addition to this, the following are not specified in the official materials:- particular brands- specific technologies (free acid, AGM, EFB, etc.)- nor models to prefer or avoid. Therefore, remaining faithful to the information available, only this with certainty:
If you purchase the B/12 Extraforte energizer (also in the version with solar panel), the 12V battery is not included in the package. You will therefore have to obtain a 12V car battery separately (recommended at least 40Ah for normal use, or 100Ah for greater autonomy).
Yes. It is normal to find some insulation or transparent silicone grease in the solar panel socket on the energizer.
Yes. The solar panel supplied in our kits already includes the charge controller.
For the case (400 m, donkeys and goats, 2 wires, plastic pegs) the most suitable offer is:
That's fine, we can continue without email. In this case the correct solution is a 12V battery energizer, and if you want you can also add the solar panel.
To properly compose the kit for 500 linear metres. To advise you precisely, I just need a clarification: do you want to fence mainly to contain the animals inside (cows and pigs), or also to keep wild animals out? As soon as you tell me, I'll tell you:- how many wires- indicative height of the wires- every how many meters to put the poles- most suitable kit composition.
To properly compose the kit for 500 linear metres. To advise you precisely, I just need a clarification: do you want to fence mainly to contain the animals inside (cows and pigs), or also to keep wild animals out? As soon as you tell me, I'll tell you:- how many wires- indicative height of the wires- every how many meters to put the poles- most suitable kit composition.
you can also opt for a battery-powered solution, ideal if you want a mobile fence or if you prefer not to depend on fixed electricity.
Wire assembly diagram- First wire 20 cm from the ground- Second thread 30 cm from the first- Third strand 30-40 cm from the second
Do you want to receive a detailed quote for this solution too?
Wire assembly diagram- First wire 20 cm from the ground- Second thread 30 cm from the first- Third strand 30-40 cm from the second
Do you want to receive a detailed quote for this solution too?
The dual power models available for electric fences are:1. B/12 energizer with 12V / 220V solar panel- Can be powered by a 12V battery, 220V mains or solar panel (panel included).- Price: €299.00- Includes: unit + 1 solar panel with 3 meter cable.2. 12V / 220V battery powered energizer B/12- Can be powered by a 12V battery or 220V mains.- Price: €149.00- Includes: unit (battery or mains transformer included). Both models allow you to use a standard 220V EU plug or a 12V battery, giving you flexibility based on your needs. If you would like more details or a link to one of the products, just
Yes. The solar panel is used to charge the battery during the day when it is exposed to sunlight. At night, however, the battery that powers the energizer comes into operation, while the panel turns off automatically. If you are interested in learning more about how it works or need advice on the most suitable model,
Yes. It is possible to have a solar powered electric fence kit. The kit usually includes:- Electrifier (model B12, suitable for connection to a solar panel)- Common thread- Isolators- Various accessories for assembly The solar panel cannot be purchased directly from the site, but is available on request via email. The B12 energizer is designed to be powered by both a 12V battery and a solar panel.
Thanks for the clarification: unfortunately, surveillance cameras cannot be powered directly by the energizer, nor use the battery. Here is some important information:
Possible alternative solutions1. Cameras with their own power system- we recommend the installation of rechargeable battery cameras + small solar panel specific for video surveillance. These cameras work completely independently, are designed for the outdoors, do not risk influencing the functioning of the fence and can be positioned anywhere.2. Local registration- If you don't have WiFi or 4G/5G coverage, choose cameras that record on an internal SD card: this way you can view the images by connecting the camera to a PC after retrieving it from the site.3. Use of power banks or small batteries- There are also cameras that can be connected to a large capacity power bank, which can be recharged occasionally.
Possible alternative solutions1. Cameras with their own power system- we recommend the installation of rechargeable battery cameras + small solar panel specific for video surveillance. These cameras work completely independently, are designed for the outdoors, do not risk influencing the functioning of the fence and can be positioned anywhere.2. Local registration- If you don't have WiFi or 4G/5G coverage, choose cameras that record on an internal SD card: this way you can view the images by connecting the camera to a PC after retrieving it from the site.3. Use of power banks or small batteries- There are also cameras that can be connected to a large capacity power bank, which can be recharged occasionally.
we make an "abundant" set so you don't miss anything during assembly. I remind you that I am only talking about Gemi products: – 12V battery and galvanized ground pegs must be taken separately (they are not in the catalogue).1. Recommended quantities (large version) For 500 m running, 3 wires, boars, with gate and more pegs:
Wire 6 mm² (wild boars) Calculation:- Perimeter: 500 m- Wires: 3 → 500 × 3 = 1500 m is proposed to abound slightly:2. 4× White wire 500 m 6 mm² for electric fence- Required: 3 spools (1500 m)- 1 more spool for:- vertical connections between wires- any errors/cuts/additions- Price kb: €34.90 each. → 4 × €34.90 = €139.60
Gate4. 1× 5m gate handle with 2 insulators for electric fence- Price kb: €4.49 If in the future you want a second gate, you will add another identical one.
I'll summarize everything in an orderly way so you can:1. Place your order on Gemi without forgetting anything2. Install the fence correctly (electrical part + "mechanical" part) I divide you into:- A. What to order from Gemi (list from cart)- B. What to get outside Gemi- C. How to install step by step
HOW TO PROCEED for the ORDER1. Go to www.gemimarket.it2. In the search field above, enter the product names (one at a time), for example:- “B12 solar panel”- “500 m 6 mm wire”- “wooden pole insulators”- “gate handle 5 m”- “plastic stake 160 cm”- “PVC signage table”3. For each product, select the quantity indicated above and click on “Add to cart”.4. When you're done, go to your cart and proceed to:- shipping data- payment method (cash on delivery, card, PayPal, bank transfer, etc.)
C. HOW TO INSTALL – STEP BY STEP GUIDE1. Positioning of the plastic pegs- Fence length: 500 m- You have 90 pegs → place them about 5–6 m apart.- Plant them well in the ground (better if the ground is not stony).2. Wire Heights (Boars) On each plastic stake, use 3 eyelets:- 1 wire: 30 cm from the ground- 2 thread: 50–60 cm- 3 wire: 80–90 cm This pattern is optimal for intercepting the boar's muzzle.3. Laying the thread1. Start from a nearby location where you will install the energizer and grounding.2. Lay out the first thread (30 cm) around the entire perimeter and returning to the starting point.3. Repeat for the second strand (50–60 cm).4. Repeat for the third strand (80–90 cm).5. Keep the thread taut but not too tight, so that it doesn't break.6. Prevent the wire from touching:- earth- tall grass- branches- poles without insulator (all this causes dispersion).4. Connection between wires To have the same voltage on all wires:- In at least two points (beginning/end of the fence, e
Other
Gemi Elettronica's round base fireplace extractors are available with adapters for round flues ranging from 10 cm to 43 cm in diameter (approximately 4 inches to 17 inches). When ordering, you need to select the round base extractor and then choose the size of the adapter that corresponds to the external diameter of the flue, so in your case you would select the 12 inch adapter (approximately 30 cm).
For the extraction (fan) side of the Gemi fireplace extractor:- Polarity: The fan uses an AC (alternating current) motor, so there is no strict polarity for the two power cables connected to the motor. It doesn't matter which fan wire you connect to each "motor" terminal on the speed controller: either connection will work.- Earth: ensure that the earth (normally green/yellow or plain green wire) is always connected correctly to the earth terminal for safety. you can connect the two power wires from the fan to the "motor motor" terminal - there is no right or wrong orientation for these on AC. Just make sure the ground is connected correctly.
In the event of a fire inside the chimney, the standard electrical cable would not resist high temperatures. However, for safety situations like this: - Special cable resistant to high temperatures: for the internal electrical connection to the flue, we recommend using ONLY our special cable, certified and resistant up to 300 °C. This cable is designed precisely for these situations and guarantees maximum safety, even in the event of a sudden increase in temperature (such as during a soot fire).- Exhaust fan and components: the Gemi extractor is made of high-resistance steel and has been designed to withstand the high temperatures that can be reached on chimneys, avoiding damage to the appliance under conditions of normal use. However, in the event of a very intense and prolonged fire inside the chimney, the safety of the system also depends on the severity of the event and the adequacy of the installation. What happens then:- The normal cable would be damaged almost immediately, while the high temperature cable resists much more and offers greater safety.- The extractor itself, being externally located and made of metal, tolerates external conditions well, but like any device, in the event of a serious and prolonged fire in the barrel, each component could suffer damage if the temperatures exceed the resistance limits. Tips:- Always use high temperature cable if the passage takes place inside the flue.- Carry out regular cleaning to avoid the risk of soot fires.
you can easily keep it on for many continuous hours, even all day if needed. From the technical data sheets and the use for which it is designed:- it is designed to work for a long time during normal use of the fireplace/stove- the motor is standard class for continuous operation- the maximum operating temperature is 300 °C, therefore it is suitable for staying lit for the entire time the fireplace is in operation, provided it is used correctly. - you light it before lighting the fire- keep it on for all the hours the fireplace/stove is on- you can turn it off when the fire is now embers and you no longer have smoke problems. It is not designed to be turned on 24/7 for entire days for no reason, but for daily use for several hours in a row it is fine.
To create an effective barrier against foxes and wolves, it is recommended to install several parallel wires at different heights above the ground, taking advantage of the existing fence. Recommended heights and number of threads- First wire: 20 cm from the ground (essential for foxes and other animals trying to pass underneath)- Second wire: 40 cm from the ground- Third wire: 60 cm from the ground- (Optional) Fourth wire: 80 cm from the ground,
At the moment I cannot generate original images, but in a simple and detailed way what an "ideal" spacer for T-posts should look like, so that you can make it or look for it in the hardware store or online.
Here is a schematic representation: `` [Net/fence] | | <== T-pole |===[====]============= electric wire |_____| fastening (clamp or bracket) ``- [====] = spacer arm (approximately 8-12 cm)- === = insulating eyelet where the wire passes- | | = T-post- |=== wire = electric wire remote from the mains
Here is a schematic representation: `` [Net/fence] | | <== T-pole |===[====]============= electric wire |_____| fastening (clamp or bracket) ``- [====] = spacer arm (approximately 8-12 cm)- === = insulating eyelet where the wire passes- | | = T-post- |=== wire = electric wire remote from the mains
For deer and roe deer you are on the right track with 4–5 overlapping wires. In general, for wild animals (wild boars, deer, fallow deer) we recommend at least 3 threads:- 1 wire: 20 cm from the ground- 2nd wire: +30 cm from the first → therefore 50 cm from the ground- 3 strand: +30/40 cm from the second → therefore 80–90 cm from the ground Since you want to make 4/5 strands (excellent for increasing safety), it can be distributed like this:
5 wire configuration- 1 strand: 20cm- 2 wire: 40 cm- 3 wire: 60 cm- 4 wire: 80 cm- 5 thread: 100–110 cm Like this:- the low wires hinder young roe deer/deer and any smaller animals well- the high wires prevent adults from jumping. For fences against wild animals I also remind you:- poles every 4–5 metres- for wires: for deer/roe deer, 6 mm² wire is ideal, because it disperses less current over long distances. If you tell me:- how many linear meters of fence need to be made- if the fence is only for deer/roe deer or also for other animals I can help you define in detail the indicative number of insulators, type of wire and overall structure.
5 wire configuration- 1 strand: 20cm- 2 wire: 40 cm- 3 wire: 60 cm- 4 wire: 80 cm- 5 thread: 100–110 cm Like this:- the low wires hinder young roe deer/deer and any smaller animals well- the high wires prevent adults from jumping. For fences against wild animals I also remind you:- poles every 4–5 metres- for wires: for deer/roe deer, 6 mm² wire is ideal, because it disperses less current over long distances. If you tell me:- how many linear meters of fence need to be made- if the fence is only for deer/roe deer or also for other animals I can help you define in detail the indicative number of insulators, type of wire and overall structure.
You're right: the video mainly shows fixing the regulator box to a brick wall near a brick chimney. With a round metal chimney, DO NOT mount the box to the metal pipe itself. Here's how to handle it:1. Where NOT to mount the box- Do not screw the speed control box to:- the round metal flue- any very hot surface- the chimney. The regulator must stay away from high temperatures and vibrations.2. Where you MUST mount the box Choose a nearby fixed surface that is:- solid (wall, beam, upright or other structure),- not exposed to direct rain,- it's not very hot,- reachable when you want to adjust the speed. Common Solutions:- An internal wall near the passage of the flue (for example behind the fireplace, in an adjacent room, closet or attic).- A wall protected under an external gutter (if you really have to keep it outside, it must be protected from water and bad weather).- A wooden/metal board or plate fixed to a wall or structural element and the box screwed onto it. You assemble it just like in the video, but:- Instead of brick fireplace, choose a wall or safe support nearby.3. How to route the cable from the fan to the box1. The fan sits above the round metal chimney (with the 20cm adapter).2. The cable coming from the fan usually:- runs along the outside of the metal flue OR- passes through the roof and runs into the house.3. Secure the cable with appropriate cable glands or cable ties:- If outdoors, use UV resistant fixings and keep clean and protected.- If internal, pass it through a duct or surface channel where possible. The electrician (or installer) must:- Run the cable from the fan to the speed control box.- Fix the box to the chosen wall.- Connect the box to your 110V power supply.4. Quick placement examples For a metal flue that passes through the roof:- Fan placed on the top of the round metal tube.- The cable runs down the pipe, through a passage in the roof or a nearby hole.- Box fixed on:- the wall behind the fireplace, or- a nearby internal wall, or- a stud/board in the attic (if that's where you want the controls). For a free-standing stove with exposed metal flue:- Fan above the chimney on the roof.- Wall box near the stove (as a location for a light switch), wired by an electrician.
Thanks for explaining that, now I understand exactly what part you mean. You're talking about the little round plastic junction box that comes with the fan. That box is not designed to be placed over a hot chimney.
Where *can* you mount the round junction box Mount it on a nearby, cooler fixed surface, for example:- On the roof or wall, a short distance from the chimney, where:- it is mechanically protected,- temperatures are normal (sun/ambient heat only),- is reasonably sheltered from water (or within a protected area such as an attic). or- Inside an attic or attic, very close to the fan cable entry:- The fan cable comes down from the fan,- Goes through roof/flashings,- It goes into the attic and goes straight into that little plastic junction box, mounted on a rafter/beam or board. From there:- The high temperature wire coming from the fan terminates in the box.- Normal house wire continues from that junction box to the wall mounted speed control.
Where *can* you mount the round junction box Mount it on a nearby, cooler fixed surface, for example:- On the roof or wall, a short distance from the chimney, where:- it is mechanically protected,- temperatures are normal (sun/ambient heat only),- is reasonably sheltered from water (or within a protected area such as an attic). or- Inside an attic or attic, very close to the fan cable entry:- The fan cable comes down from the fan,- Goes through roof/flashings,- It goes into the attic and goes straight into that little plastic junction box, mounted on a rafter/beam or board. From there:- The high temperature wire coming from the fan terminates in the box.- Normal house wire continues from that junction box to the wall mounted speed control.
For iron fence pickets Gemi does not give a precise depth regarding grounding, but a simple rule can be applied to guarantee their stability. For a fixed fence around the greenhouse: - If your posts are approximately 1.50–1.80 m long: - Bury them at least 40–50 cm into the ground.- If you use slightly shorter poles (1.20–1.40 m): - Bury at least 30–40 cm instead. The objective is that the stake: - does not move when the wire is tensioned,- stays straight over time (wind, tension of the threads, contact with wild boars). Two other tips: - Slightly tilt the corner posts towards the outside of the fence and bury them a little deeper (50–60 cm) so that they maintain tension better.- Compress the earth well around the post (or add some compacted gravel) for greater stability. For earthing the energizer the situation is different: the Gemi pegs must be planted in the ground for 80 cm (over 1 m in length, 20 cm remain outside) in a fairly humid place. If you tell me the length of your iron pegs, I can give you exactly the ideal depth for those.
Yes, the Gemi fume extractor can also be used for kitchen hoods and to better extract vapors and odors. Our internal information indicates that:- The extractor can replace the kitchen hood motor.- It is suitable for hobs, ovens, barbecues, restaurants, industrial and economic kitchens, etc.- The basic model, for example, extracts up to 2500 m³/h and resists up to 300 °C, sufficient for kitchen fumes and steam. The important thing is:- Install it on the roof, at the chimney/hood pipe outlet.- Choose the diameter/adapter that corresponds to the outlet pipe of your hood.
Yes it can. With the fireplace extractor you receive approximately 80cm of high temperature resistant cable already connected to the motor. You have two options to extend:1. External path (outside the fireplace)- Use a normal 3 x 1.5 mm² rubber cable (type FG7 for external use).- Connect it to the existing fan cable and pass it outside the flue to the speed regulator.2. Internal path (inside the fireplace/flue)- In this case you need to use our special high temperature resistant cable.- It is:- Resistant to over 300–350 °C- In silicone, covered with flexible steel sheath- It can be easily slid inside the chimney up to the regulator.- It is sold in fixed lengths (5 – 10 – 15 – 20 m), and it is not possible to order it in customized lengths.- Price example: 5 m = €30.50. So yes:- you can extend the short cable included with our high temperature resistant cable
it works perfectly. When you are ready tomorrow, simply send:1. Approximate length of fence you want to protect2. If you want one line or two lines and I will help you calculate:- Polywire cable length- Approximate number of insulators- Clear connection layout for B12 + 12V battery (+solar) I will be here when you are ready.
I don't have a physical location or time zone - I'm an online assistant for Gemi, so I'm available 24/7, no matter where you are or what time it is in California. That's why you get responses at midnight local time. Whenever you come back with your fence measurements, morning, evening, weekend, I'll be here to help you complete the setup.
The height of the humus evacuation pipe (flue) is not a problem for Gemi humus extractors. The chimenea vacuum cleaners work correctly in tubes up to 50 meters above sea level. If you have a 10 or 12 meter hose, you can install both the basic model and the professional model without any inconvenience. Do you have any other doubts about the installation or the product?
What you describe is not normal: the wire should neither bend nor break on the iron pegs. This means that there is a loss of current at the poles. Here's how to fix it, step by step: 1. Check the insulation on the iron stake Even with a special insulator for metal stakes, if the mounting is not perfect, current can pass through.- Check that the wire never directly touches the metal (pole, screw, nut).- Do not make multiple turns of the wire around the insulation: it must only pass through the ring. By rolling it up, you increase the risk of leaks.2. Correctly mount the insulator on the iron peg The correct method (indicated by Gemi) is: - First screw the nut/nut onto the threaded rod of the insulator.- Then insert the insulation onto the iron post.- Then, screw the nut in the opposite direction to securely lock the insulation against the post. In this way the insulation remains firmly fixed and the wire remains away from the metal, thus avoiding the formation of an electric arc.3. Make sure nothing touches the wire- Cut grass, leaves or shrubs that could touch the wire: if the wire comes into contact with vegetation or an object, current leakage and chattering may occur.- Also check that the wire does not touch another wire, fence, gate, etc.4. Check the high voltage cable (if you have one) If the "ticking" noise comes from the cable running from the energizer to the fence wire: - Put this cable in a polyethylene tube (sheath).- This improves insulation and eliminates ticking noise due to poor cable insulation.5. Simple test to verify the presence of current To verify the correct functioning of the wire you can: - Bring the tip of an insulated screwdriver close to the wire.- If you hear a small “ticking” it means that the current is flowing well. But this noise must be between the wire and the screwdriver, not permanently on the post.
For deliveries outside Italy, including the United States, the estimated delivery time is 4 to 6 working days from the shipping date. If you place your order today or tomorrow, you can generally expect your fireplace extractor to arrive within 4-6 business days of shipment.
At the moment we do not have dedicated discounts for resellers or installers: the prices are always those published on our website and are the same for all customers.
If the electric fence is located approximately 200 meters from the energizer, here is how to proceed for a safe and efficient installation: 1. Use a high voltage cable: To connect the energizer to the fence located at a distance (200 meters in your case), we recommend using a dedicated high voltage cable, suitable for running outdoors or underground in a protective tube (for example a polyethylene pipe). This cable prevents any power loss while traveling.2. Cable protection: Place the high voltage cable inside a pipe to avoid power loss and protect the cable from physical damage (treading, animals, etc.).3. Correct connection: - Connect the high voltage cable to the red output (“fence output”) of the energizer.- Connect the other end directly to your fence wire.4. Earthing: Remember to provide good earthing for the energizer, using 3 galvanized pegs spaced 3 meters apart, fixed approximately 1 meter deep and connected with a yellow-green cable.5. Current test: Once everything is connected, check that the circuit works (red light on and green light flashing on the energizer). Tip: If the distance is more than 100 m, it is advisable to choose a quality high-voltage cable, designed not to lose current even over long distances. Do you want details on the cable to use or the accessories to order for this type of installation? If yes, specify the total length or the model of energizer you will use!
Excessive overheating of the chimney can actually affect the draft, although it is not the most common cause of extraction problems. Normally, when the temperature in the chimney increases, the draft should improve because the hot air tends to rise faster (creating a "current" that favors the outflow of fumes). However, if the fireplace remains lit for many hours and very high temperatures are reached, it is possible that less favorable conditions for draft are created, such as:- Accumulation of residues: Prolonged use can cause the formation of soot or creosote which, accumulating in the bends or walls of the flue, obstructs the passage of smoke.- Expansion of materials: The heat can expand some parts of the flue, slightly modifying the path of the fumes and creating small losses or slowdowns in the draft.- Anomalous air currents: In some cases, intense overheating can create unexpected pressure differences, generating turbulences that disturb the normal draft of the fumes. Generally speaking, however, a well-installed fireplace with a clean flue should not suffer from drops in draft even after many hours of use. If the problem persists, the advice is to have the state of the flue checked and make sure it is free from obstructions.
You will have to choose two things: 1) The model of the fan (Basic / Professional / Steel / Professional Copper) 2) The correct size of the adapter for your round chimney Let's go step by step.1. Choose the adapter size for your 125mm round flue From the knowledge base:- For a round chimney, you need to choose the round base chimney extractor.- Next, in the drop-down menu, select the size of the adapter that corresponds to the external diameter of your chimney. In your case:- If the external diameter of your chimney flue is 125 mm (12.5 cm), in the "adapter size" menu for the round fireplace fan you will select the adapter closest to 125 mm (e.g. 125 mm if available, otherwise the measurement specified on the product page which corresponds to 12.5 cm). If your current 125mm chimney is placed on a slightly larger pipe, it is important to know whether 125mm is the chimney size or the actual outside diameter of the flue. If you are not sure, measure the outside of the metal tube itself at the top and tell me the exact mm - I will tell you which adapter size to choose. Furthermore, if you prefer, the fireplace fan can be:- mounted in place of the bonnet (removing the cap), or- integrated into a hood by removing the hood hood or ordering the fan without hood.2. Choose the right chimney extractor model According to the knowledge base, Gemi offers these chimney extractor models:1. Basic model- Suction: 2500 m³/hour- Maximum temperature: 300°C- Warranty: 3 years2. Professional model- Suction: 3800 m³/hour- Maximum temperature: 700°C- Recommended for chimneys less than 3 meters long- Warranty: 6 years3. Steel model (AISI 304 stainless steel)- Material: AISI 304 stainless steel (high corrosion resistance, excellent outdoors/near the sea)- Suction: 3800 m³/h- Maximum temperature: 700°C- Warranty: 8 years4. Professional copper model- Top of the range- Suction: 3800 m³/hour- Maximum temperature: 700°C- Stainless steel fan, entirely painted in copper finish- Warranty: 10 years- Chosen above all for aesthetic and performance reasons. They can all be installed at any height, even on very short flues (about 1 m).
Thanks for checking out the drop down menu, it's very helpful. If you only see 150mm (15cm) in the adapter/variant drop-down menu, it means the site only offers standard sizes (e.g. 140, 150, 180, etc.) and 125mm (12.5cm) is not directly selectable there. From the information we have for round fireplace extractors:- The adapter must correspond to the external diameter of the flue.- Adapters are only available in standard sizes (such as 14cm, 15cm, 18cm).- For non-standard sizes we recommend contacting customer service to verify alternative or customized solutions. In your case:- The usable connection is 125 mm.- The drop down menu only shows 150mm.- So you shouldn't just choose 150mm because it would be too big for a 125mm stub. That said, there are two safe options:1. Contact Gemi customer service directly Since 125mm is not in the standard drop-down menu for that model, you should contact them for:- Ask if they can provide an adapter or specific solution for 125mm in your setup (double insulated, on truck).- Confirm exactly which variant to order (they may offer a custom ring/adapter or tell you which size to choose along with an additional adapter).2. Alternatively, if there is another round based fan page where 125mm appears as a selectable size (sometimes different listings per market), you could:- Choose that product instead, directly with the 125mm adapter. With the information I have here, I can't tell you for sure to order the 150mm version for a 125mm tube; this would normally require an additional mechanical transition which is not described in our documentation.
It is better to absolutely avoid this situation. - the electric fence for animals is described as non-dangerous for people and animals, with intermittent pulses and low amperage- however, for children it is specified that they must not get close, because they are much more sensitive. For the specific case of:- adult who receives electric shock- while holding a 2 month old baby I don't have a specific indication to give you and I don't want to guess.
1) The electrical cable supplied with the fireplace extractor- The cable already connected to the fireplace vacuum motor is 80 cm long and is resistant to high temperatures. 2) Maximum dimension of the fireplace for the square “Base” model- The square base fireplace fan comes with adjustable brackets that can be set from 20 x 20cm up to 43 x 43cm.- For fireplaces larger than 43 x 43 cm, installation is still possible from:- Don't use parentheses, e- Fix the base directly to the wall at the four corners using the holes provided for the fisher anchors. So:- Standard adjustment range: from 20×20 cm to 43×43 cm- *can* be mounted on larger fireplaces by attaching it directly to the corners. If you tell me the exact size of the fireplace, I can confirm the best way to install it.
It is possible to operate the fireplace without the fan being turned on. The Gemi fireplace fan is designed so that:- It does not obstruct the flue when it is turned off- Smoke and vapors can still pass normally through the chimney- you can use it only when needed (for example when turning it on or when you have smoke problems) So, even with the fan installed, you can use your fireplace/stove/oven with the fan off whenever the draft alone is sufficient.
There is no special "mixed" adapter in the catalog (square base + round adapter on top), but you don't need it for this situation. For a square (or rectangular) masonry fireplace with an internal round metal flue, Gemi's indications are:- If the round tube is at the same height as the wall (or just a few cm higher):1. Close the space between the round pipe and the square/rectangular masonry (with mortar or sheet metal), so that smoke cannot escape into that space.2. Install the square-based extraction chimney directly on the wall, using its adjustable brackets.3. In this case you buy the square-based model, *not* the round one.- If the round tube protrudes well above the wall:- So you use the round base chimney extractor with a round adapter sized for the outside diameter of the round tube and ignore the square base option. So:- Square flue + internal round vent, pipe flush or almost flush with the wall → Buy the square-based fan; bridge the gap; fix the fan to the wall. No additional round adapter is needed.- Square chimney + round vent that protrudes significantly higher than the brickwork → Purchase the round base fan with the correct round adapter; mount it on the round tube. If you tell me:- The internal dimension of the square fireplace (for example 30×30 cm), e- The outside diameter and height of the round vent pipe above the brickwork, I can tell you exactly which version (square or round) suits you best and how to install it.
you can use the fireplace when the rookgasventilator (fireplace extractor) is turned off. The fan does not obstruct the flue or smoke exhaust, even when it is turned off or in the event of a power cut.
Hello and greetings to Vancouver! Yes, the "steel" model (also called "steel" model) is made entirely of Aisi 304 stainless steel.
For a round fireplace, you need to measure the outside (outside) diameter of the fireplace, including the outside wall if it's a double-wall fireplace. The fan adapter is designed to fit the outside of the fireplace, so the outside measurement is what matters. If your measurement does not match the standard adapter size (for example, if it is not 12, 15, 20, 22, 25, 30 or 35 cm for the steel model),
It is suitable for barbecues. The Gemi fireplace fan/extractor is designed to reproduce the natural draft of a chimney and is suitable for:- Fireplaces and thermo fireplaces- Stoves and pellet stoves- Bakeries, rotisseries, pizzerias-Barbecue- Industrial/catering hoods It can therefore be used to improve the extraction of fumes from a charcoal barbecue, helping to reduce the stagnation of fumes, provided that the barbecue is connected to a special flue where it is possible to install the extractor in the upper part. A couple of important points:- It is not a smoke abatement/suppression system: the smoke will still come out of the chimney; the fan does not filter it or eliminate it, but only improves the draft.- It must be chosen and installed based on the shape of your flue (round or square/rectangular). If you tell me:- if your barbecue is equipped with a chimney/flue (and its approximate shape/size),- and whether the veranda is entirely closed or semi-open I can give you more precise indications on which type of Gemi extractor configuration would be most suitable.
Thanks for checking out the options, it's very helpful. Your situation:- External diameter ≈ 26 cm- Adapters available on the round model: 25 cm and 30 cm For our fireplace extractors, the adapter must come out of the flue and "hug" it. This means:- A 25cm adapter is too small for a 26cm outside diameter → it would not fit the hose.- A 30cm adapter is wider than your 26cm pipe and could, in principle, be adapted with a suitable reduction or collar, but this type of adjustment depends on how the flue is constructed and how the installer can secure it on site. From the information in my possession, the adapters are only available in standard sizes, while for non-standard sizes such as 26 cm the official indication is to contact customer service to verify alternative or customized solutions. I don't have enough details here to responsibly tell you "choose 30cm and do X/Y" without seeing your setup. So, the correct and safe next step is:1. Don't choose the 25cm adapter (it's too small for the 26cm flue).2. Before ordering, contact Gemi support and say:- External diameter of the flue: 26 cm- Adapter sizes available on the site: 25 cm and 30 cm- You are in Ireland, you have a charcoal barbecue on the veranda and you want the round base fan.3. Ask them directly:- "What size adapter should I choose for an external diameter of 26 cm? Is there a 26 cm solution or should I order the 30 cm one with specific adaptation?" This way they can:- Check if a 26cm adapter is available for your model, or- Provide precise instructions if the 30cm adapter is the right one with specific mounting method.
To connect the chimney extractor, a 3 x 1.5 mm² cable is generally sufficient if you lay the cable outside the chimney. This wire size meets the requirements to safely power the fan and connect it to the speed controller. However:- If you plan to pass the cable inside the fireplace or flue, you must use a special cable resistant to high temperatures to ensure safety and compliance with regulations. The standard 3 x 1.5 cable is not suitable for the high temperatures inside the chimney. - For external installation: the existing 3 x 1.5 cable is sufficient.- For internal installation (inside the fireplace/flue): Replace it or integrate it with a cable resistant to high temperatures, available from Gemi.
the cat energizer is a depowered model (reduced power), but the power itself is not freely adjustable via knob or selector. From our instructions:- It is *possible* to reduce the potency of an energizer, but only in specific cases, such as in the case of small animals (cats, dogs).- This is done with a specific setting/procedure, not by normal pulse adjustment by the user.- For cats we recommend the special 220V reduced power model and not the standard one: https://www.gemimarket.it/recinto-elettrico/266-elettrificazionere-e220-per-recinto-elettrico-da-pascolo-8053017260174.html
You can wire the speed controller using a 3-conductor cable. Here is how it should be done according to the official instructions:- Use a 3 x 1.5 mm² cable (rubberized FG7 for external use or the special cable for high temperatures if routed inside the flue).- At the speed regulator you will have three connections:1. Motor/Motor: Connect the two wires from the fireplace fan motor to the terminals labeled "motor motor."2. Ground (Ground): Connect the power supply and fan ground wires together to the center terminal.3. 220V line: Connect the two wires from the 220V mains supply to the terminals labeled "220V line". For the neutral, it is not necessary to separate the “in” and “out” neutrals. It is possible to connect (bridge) the neutral wire from the mains directly to both the speed controller and the fan, since they share the same neutral connection point. Important:- Do not disconnect the special high temperature cable from the fan terminal block to use a different cable, as the original is designed to resist heat.- Always ensure that all connections are secure and comply with local electrical regulations.
HI! Thank you for your message and explaining your problem with the chimney and radiator boiler. I do not currently have specific information about removing tar or creosote buildup inside the chimney in our official archive. However, I can offer you some general advice based on the usual management of these problems:- “Pitch” or creosote is a very common residue when using wet wood or when there is incomplete combustion. It is very important to remove it because it can cause serious problems, such as fires and clogging of the chimney, causing smoke to escape into the house.- To remove creosote, mechanical cleaning with special chimney brushes is normally recommended and, in cases of intense accumulation, the intervention of a specialized professional may be necessary. There are chemicals that help break it down, but physical cleansing is essential.- To prevent this problem from recurring in the future, it is recommended to ensure that you always use dry wood and carry out periodic cleaning. Remember that professional cleaning is usually the safest and most effective option when there is a lot of buildup.
For Portugal, delivery is very fast:- Delivery times: normally between 4 and 6 working days.- Counting from order/shipment confirmation (weekends and holidays may be a little longer). When you place your order, the corresponding delivery estimate will also be displayed on the website. If you want, when ordering, I can help you review the list of materials to ensure that nothing is missing for the wild boar enclosure.
You are right to be confused, because the two pieces of information seem different. Let's clarify point by point based on what is available in Gemi's official indications:1. Official heights that I have available In Gemi's general information, this appears:- For wild animals such as wild boars, deer, fallow deer, etc. → recommend at least 3 parallel wires, for example:- 1st wire: 20 cm from the floor- 2nd wire: + 30 cm (i.e. approximately 50 cm from the ground)- 3rd wire: + 30/40 cm (approximately 80–90 cm from the ground) In other words, for wild animals in general, typical heights range from low (20 cm) to approximately 80–90 cm.2. Why do 30 / 60 / 90 cm drawings appear? These schemes are generic for “pigs/boars” and follow a similar logic:-30cm-60cm- 90 cm They are just a "rounded" way of representing these 3 levels:- Low- Medium- Taller And they fit in the same spirit as the general heights I mentioned above (20, ~50, ~80–90 cm).3. So, what do I do in practice? For wild boars, the critical issue is:- Have at least 1 low wire to catch the animal when it tries to pass “slowly”- Arrange the cables halfway up and higher to prevent them from entering the body. Based on this, and in line with Gemi's general recommendations for wild animals, the safe solution for you is: Option A – Follow the more “classic” scheme for wild animals (adapted to your case):- 1st thread: 20–30 cm from the floor- 2nd thread: 50–60 cm from the floor- 3rd wire: 80–90 cm from the ground. It is very close to the 30 / 60 / 90 model, but allows it to adapt slightly to the ground. Option B – If you want to focus further down (area preferred by wild boars):- 1st thread: 20 cm- 2nd thread: 40–45 cm- 3rd thread: 60–70 cm It continues the "3 levels" logic and protects the lower part well.4. Regarding what was said before (15, 25–30, 40–45 cm) These very low and close heights are excellent for some specific cases (such as yews, turra, sea urchins, etc., where you work almost glued to the ground). For wild boars, to be completely in line with the spirit of the site's schemes, it is more balanced to use 3 heights that reach at least 60–80/90 cm, and not just keep everything up to 45 cm. Therefore, for you, against wild boars, we correct it like this:- Do not use only 15 / 25–30 / 40–45- Prefer something like: Final tip for your case (50 m, wild boars):- 1st thread: 20–30 cm- 2nd thread: 50–60 cm- 3rd thread: 80–90 cm5. Simple summary- The two versions (the one I said before and the drawing) seem different because:- One was very focused on constant bass- The other one (from the website) works low + medium + high- For wild boars, follow this logic of 3 heights: 20–30 / 50–60 / 80–90 cm. Therefore, it is fully consistent with Gemi's general recommendations for wild animals. If you tell me:- how tall are your poles (the plastic ones are 160cm, right?)- if the terrain is very steep/undulating, I can suggest exactly in which "eyes" of the plastic poles to place each wire to make it practical and as close as possible to these measurements.
Good question, because how you set up the stretchers makes a lot of difference in the quality of the fence. Since I don't have the exact model of your tensioners here, I'll explain the most common method for spool tensioners used in fences (the principle is always this):1. Where to place the turnbuckles- Normally positioned:- at one end of the metal line- or in the middle of a long stretch (for example if there are curves or up/down hills). For 50 meters:- You can place 1 tensioner for each wire, at one end (e.g. near the energizer or at the opposite corner).2. Height and position on the pole- Mount the stretcher at the same height as the wire on which it will act:- lower thread → tensioner at the height of this thread- central thread → ditto, etc.- can be corrected:- directly to the wooden/iron pole, with screw/clamp- or on a small section of wire fixed to the pole ("suspended" type).3. How to pass the thread through the tensioner As a general rule, for a tensioner with a through hole or channel:1. Attach the end of the wire to a fixed point:- or on the corner post on the opposite side- or to the structure of the stretcher itself (some models are equipped with an anchor point).2. Bring the thread to the tensioner (side where it will stretch):- Pass the thread through the hole/channel of the tensioner- Rotate the gear wheel 1 or 2 turns (depending on the model)- Secure the end of the thread so that it cannot come out (by twisting it on itself or using a bow).3. Important:- The wire must go “around” the sprocket, so that when you turn it, it wraps around the wire and pulls it.4. Lengthen the thread- With the thread already threaded:1. Leave the thread with light tension by hand (do not touch the floor).2. Use the tensioner wrench (or wrench, depending on model) to:- Turn the gear wheel- The thread winds and stretches slowly.3. Stop when:- the thread is tight,- but without exerting excessive force (to avoid deforming the uprights or damaging the insulators). Tip:- Tighten the lower thread first, then the central one and finally the upper one.- In the presence of curves or differences in level, check that the wire does not "lift" too much from the post in the center of the path.5. Safety and practical details- Carry out the entire assembly with the energizer turned off.- Always leave:- a minimum of 5–10 cm of excess thread "slack" wrapped near the tensioner, for any future adjustments.- After a few days:- Check the tension of the cables (hot ground, wind, etc. can cause them to bend slightly)- If necessary, turn the pinion another 1–2 turns.6. Do you want me to adapt it to your case? If you tell me:- if the tensioners are for metal wire or rope-type conductive wire,- and if you have 1 stretcher per wire or more, I can indicate exactly:- how many to use,- at what end of the 50 m,- and in what order I would mount them in your wild boar enclosure.
For the Gemi fireplace extractor (basic model), the wiring colors are as follows:- The neutral wire of the motor is the white wire.- The red wire of the motor is not the neutral.- The black wire is not the neutral; is generally used for live (phase) connection in many wiring standards, but for the Gemi motor you need to refer specifically to the colors above. Connection tips:- The capacitor supplied with the fan has two wires: one connects to the white (neutral) wire and the other connects to the red wire on the terminal block.
I'll clarify the steps for you because this is where we are "crossing paths". When I say “knot with the stripped part” I mean:- first remove the plastic (stripping = removing the sheath)- then tie the knot using the piece of thread where the metal is exposed- and then wrap the metal well between the two wires. I'll give you the step by step diagram.
What NOT to do (what is screwing you over) From what you wrote to me before, you did:1. knot with the thread still with the plastic2. then you only stripped the "pieces that stick out"3. and you joined them The problem is that like this:- the knot tightens plastic against plastic, not metal against metal- the stripped part outside the knot often does not have full contact- small sparks can be created → the “tic”
What NOT to do (what is screwing you over) From what you wrote to me before, you did:1. knot with the thread still with the plastic2. then you only stripped the "pieces that stick out"3. and you joined them The problem is that like this:- the knot tightens plastic against plastic, not metal against metal- the stripped part outside the knot often does not have full contact- small sparks can be created → the “tic”
When you hear tics even on new insulators, there are only a few possible causes. very concrete to check.1. The wire must NOT make a "dead turn" on the insulator. From our technical indications: > The wire must NOT be wrapped around the insulator. > If you make a dead turn, dispersion is created and tics may be felt. Check that:- the wire passes only in the insulator channel- DO NOT go around 1 or more times- It is NOT "choked" or crushed in a strange way. If the wire makes even just half a turn more or is twisted on the body of the insulator, it can discharge and tic there.2. Wire too close to the pole / iron Even with new insulator:- if the pole is made of iron- and the wire, coming out of the insulator, gets too close to the pole (perhaps it touches it with the wind), you can have:- small discharges towards the pole- so tics, above all:- with humidity- or at night Check:- that the wire, once it comes out of the insulator, does not:- you touch the pole- touch other threads- touches of mesh, metal hooks, screws, etc.3. Moisture, dirt or cracks (even on new insulators) Even if “new”, take a good look:- is there dirt, mud, wet dust on the insulators?- is the insulator cracked or damaged (perhaps during assembly)?- there is some metal wire that:- is it pressed against the insulator body in an odd position? In rain or fog, on a dirty insulator the current can flow on the surface and cause ticks/leaks.4. Too high voltage concentrated in one point If in that point:- there is a joint very close to the insulator- or the thread is stretched "to the death" right there, it may happen that:- the bare metal of the splice or a part of the wire- gets too close to the insulator/pole- or you create a small edge where the air “jumps” → tic Solution:- move the joint away from the insulator (at least 20–30 cm)- keep the joint in the middle of the section, not "stuck" near the pole.5. What to do at the points where you feel tics on the insulators For each insulator where you feel tics:1. Turn off the energizer (to work in peace).2. Check visually:- does the thread pass straight, only in its channel?- does he walk around the isolator? If yes → remove it and let it pass straight again.3. Watch the distance:- is the wire, coming out of the insulator, well spaced from the pole/iron?- if it easily touches the pole in the wind → move it, or tighten the insulator better.4. Check if there is:- a joint very close to the insulator- a piece of bare metal that touches or grazes the insulator or pole5. If you find dirt/sludge on the insulator:- clean it (dry rag, or slightly damp and then dry well) Then turn the energizer back on and listen again:- if the tic disappears or moves elsewhere, you have found one less point of dispersion.
For the Gemi chimney cap with a square base the overall size of the base is:- Standard square base: 43×43 cm- Height (without brackets): 35cm All square base fireplace fan models share the same base dimension; what changes between versions is typically the adapter or configuration, not the size of the external base. If you tell me which exact model or link you are looking at, I can confirm it for that specific item as well.
At the moment I have no information on the future availability of the springs for the kit. it is advisable to keep an eye on the site directly: if they are not visible or are "not in stock", unfortunately I cannot give you a precise date for restocking.
I'll give you the direct link. Here you have the installation guide for the Gemi fireplace extractor (includes wiring diagram and assembly video): https://www.gemimarket.it/content/12-guida-all-installation-aspiratori There you will see:- Step by step assembly video- Electrical connection diagram- Indications for the different shapes of fireplace (square, rectangular, round tube, etc.)
For the "Pro" round chimney extractor model, the connection to the chimney flue does not take place with an adjustable fitting but with a specific adapter ring sized to the external diameter of your chimney flue. From what I have available:- For round flue pipes we supply adapters from 10 cm up to 43 cm in external diameter.- For the Professional model with round base it is sufficient:1. Choose the fireplace extractor *round base* on the site2. Select the exact adapter size from the drop-down menu (based on the outside diameter of your round flue). The adapter is slightly larger so that it *covers* the outside of the flue and tightens; it is not a universal “one size adjustable” collar, but a dedicated size adapter. If you tell me:- the exact external diameter of the round flue, e- whether your chimney is simply a free-standing round pipe or a round pipe inside a masonry chimney, I can confirm exactly which version and size of adapter you should choose.
You can usually send a photo using the attach/upload button in the chat interface (often shown as a paperclip, image icon, or "Upload File" button). Just click on it, select the photo of the fireplace top and send it here - I will look at it and confirm the best configuration. Regarding water protection:- The fireplace extractor is already prepared for rain.- The base of the fan has a specially raised edge to prevent water infiltration during rain, so an additional hood is normally not necessary. So in normal installations:- There is no need for an additional hood or cover over the Pro fireplace extractor for rain protection.- Just make sure it is installed correctly on the adapter/pipe and secured securely. Once the photo is uploaded, I can:- Check if your freestanding 12" round tube fits the Round Pro model with 30cm adapter- Check if there is anything particular in your configuration that may require special attention.
and it is a VERY IMPORTANT point. Clear answer:- The gate must NOT be powered.- It is essential that it is the wire that is electrified, not the iron gate. So you're right: the electrified part must be inside, in front of the gate, so that:1. You, from the terrace, first touch the wire (and get the shock there).2. You can't even put force on the gate → he stops trying to break it down.3. The gate always remains non-electrified, safe to touch for you.
So: what should it be like in your case? Exactly like this:- The gate remains AS IT IS now: no connections to the energizer, no wires attached directly to the iron.- In front of the gate, terrace side, 20–30 cm towards the inside, place:- 2 parallel wires (40–50 cm and 60–70 cm from the ground),- held by insulators on the lateral supports. When she goes to push:1. Starts from the terrace →2. Meet the electrified wires first →3. He gets a shock there →4. It stops →5. The gate no longer suffers violent pushes., to answer your doubt: > “Is it enough for the current to reach the gate?” No. There is no need to "send power to the gate". What needs to happen is:- the current arrives via the high voltage cable,- to the fence wires that are IN FRONT of the gate, internal side of the terrace.- It's these wires that stop the bitch BEFORE she touches the gate
So: what should it be like in your case? Exactly like this:- The gate remains AS IT IS now: no connections to the energizer, no wires attached directly to the iron.- In front of the gate, terrace side, 20–30 cm towards the inside, place:- 2 parallel wires (40–50 cm and 60–70 cm from the ground),- held by insulators on the lateral supports. When she goes to push:1. Starts from the terrace →2. Meet the electrified wires first →3. He gets a shock there →4. It stops →5. The gate no longer suffers violent pushes., to answer your doubt: > “Is it enough for the current to reach the gate?” No. There is no need to "send power to the gate". What needs to happen is:- the current arrives via the high voltage cable,- to the fence wires that are IN FRONT of the gate, internal side of the terrace.- It's these wires that stop the bitch BEFORE she touches the gate
The basic model is made of galvanized steel sheet (galvanized steel). Regarding corrosion:- Galvanized protects well from normal oxidation by atmospheric agents.- However, it is not as resistant as AISI 304 stainless steel (Steel model) nor as Corten in particularly aggressive environments.- If your fireplace is located in a very humid or high salinity area (near the sea, for example), a stainless steel or Corten model is more recommended for greater durability. If you tell me what type of environment your fireplace is in (indoor area, outdoor area, near the sea, mountain, etc.), I can guide you better if the basic one is sufficient or if it is worth switching to another model.
At the moment Gemi Elettronica products can be found in a single physical store, which is in Basilicata at the production headquarters. There are no other physical sales points either in Piacenza or in Milan (or in other areas of Italy). If it is more convenient for you, you can purchase directly from the website and receive everything at home by courier (BRT or GLS for Italy). To be able to assist you better in the future (e.g. for advice on products, shipping, etc.),
What I can confirm is:- the regulator must be connected to a 220V power source- it should be installed away from heat sources because there is a transformer inside. So, based on the available information, it seems that the configuration is intended for 220V power, for the United States and other countries where the voltage is 120V a dedicated 120V version is provided.
The sparks are not normal: they indicate that the current is "jumping" at that point because there is too little distance or a dirty contact. From what you describe, it usually happens for one of these reasons:1. Wires too close to each other or to a post- At the point of the "bridge" between the three wires, check that:- the conductors do not accidentally touch each other with metal parts (post, fence, gate);- there are no excessively tight bends or overlapping knots that leave some bare copper wire near iron or other wires.2. Joint made with plastic still intact- When you make a joint or a bridge:- you need to strip the plastic of the wire,- tie the knot/half a coil,- and connect the internal conductors well to each other.- If the coverings "touch" and under the conductors they are very close but not well tightened, the current can create a small arc (spark).3. Incorrect insulation on insulators- The wire should never be completely wrapped around the insulator, because this creates points where it can get lost.- It just has to pass inside the insulator, remaining distanced from the post.
The insulators for wooden poles are assembled very simply:1. Direct screwing: The insulators are equipped with a threaded part that must be screwed directly into the wooden post.
The insulators do not have to be mounted exactly every 5 metres, but must be fixed to every pole you have available, whatever their distance. The “every 5 meters” rule serves only as a guideline to ensure good thread retention. What to do if the posts are not regular:- Fix an insulator to each existing pole, regardless of the distance between them.- If you have poles closer together, the wire will simply pass from one insulator to the other.- However, if there is a distance of more than 5 meters between two poles, consider inserting an intermediate one to prevent the wire from bending or "dropping" too much. Install an insulator on each pole, regardless of the distance between the poles. The important thing is that the wire is taut and does not touch the wood or other materials (to avoid dispersion).
I understand the situation! If the stove or fireplace has been turned off for a prolonged period, as in your case (2 weeks), it may happen that opposing air currents, humidity or small "plugs" of cold air are created inside the flue which hinder normal draft, even if the flue has been cleaned recently. Here are some practical tips to remedy this:1. Pre-heat the chimney:- Before turning on the stove, you can try to "heat" the flue. A simple method is to burn a few sheets of paper or use a hairdryer aimed at the mouth of the joint for a few minutes. This helps create a draft of hot air which promotes immediate draft from the chimney towards the outside, eliminating the obstacle of cold or humid air.2. Soft start:- Use small pieces of very dry wood and light the fire gradually, increasing the amount of wood only when you see that the smoke is starting to come out correctly.3. Check for blockages/moisture:- Even if the flue has been cleaned, if there is a lot of humidity in the house or in the flue itself, initial combustion may be difficult. Consider using very dry wood to mitigate this effect.4. Room ventilation:- Make sure there is good air intake in the room by opening a window or door for a few minutes. Fresh air helps the stove draft.5. Using the Gemi fireplace extractor:- If the problem is recurring or you want a permanent solution, a fireplace extractor can help you significantly improve the draft, especially in the early stages of lighting or when there are adverse conditions (humidity/cold air/wind). Do you want more detailed information on the fireplace extractor? Or can you confirm what type of stove you have (wood, pellets, other) so I can suggest some specific tricks?
The website price may change, but I can only confirm the current prices in the catalog I have. As regards fireplace fans, the Base model in the catalog is listed at €248.90 for the square version, while the Base Round model is listed at €268.90. For round fireplace fans the final price may also vary depending on the size of the adapter.
The cable can actually be passed inside the chimney, but to do so in complete safety it is essential to use a specific cable resistant to high temperatures, designed precisely for this purpose. The suitable cable is also available on our website: it is a silicone cable covered with a steel sheath, tested and certified to withstand over 300 °C.
and thank you for your attention to detail! The high temperature resistant cable supplied by Gemi is tested and certified to withstand up to 300–350 °C (depending on the version). This means that it is suitable for withstanding the temperatures normally present in the upper part of the chimney, where it is usually installed, because in that area - even with the fireplace lit - these temperatures are rarely exceeded. What happens if the temperature exceeds 300-350 °C?- If the flue reaches temperatures higher than those for which the cable is certified (for example in the event of a fire, soot or other extreme conditions), the cable could be damaged, lose its insulation and no longer guarantee electrical safety.- In the normal operating conditions of a fireplace, however, those temperatures are difficult to reach inside the upper part of the flue.- The cable is NOT suitable to resist in the event of a fire inside the chimney. Advice: If you suspect that the flue may reach even higher temperatures, or if you have had problems with build-ups or flames in the past, I suggest you always have the flue checked periodically and install the cable in the highest possible part (away from direct fire)
I describe a simple step-by-step scheme so you can follow it easily.1. Earthing (EARTH)1. Obtain 3 galvanized pegs (galvanised iron) approximately 1 m long.2. Plant them:- 80 cm in the ground and 20 cm outside.- In a row, spaced about 3 meters apart.- In a humid area (e.g. near a point where the ground remains a little wet).3. Take a yellow/green wire (ground wire) and:- connect it to the first post with a clamp or well screwed;- then continue by connecting the second and third posts, always with the same cable (you put them "in series").4. From the last stake, take the yellow/green cable to the energizer and connect it to the earth terminal (black) of the energizer. Simplified diagram: Bollard 1 —— Bollard 2 —— Bollard 3 —— (yellow/green cable) —— BLACK energizer terminal2. Connecting power to the fence (RED WIRE)1. From the positive output of the energizer (RED terminal) exit with:- high voltage crossing cable (well insulated, especially suitable for fences).2. If the energizer is far from the fence, run this cable:- buried inside a polyethylene tube or- in the air, securely fixed, so that it does not touch soil, stones, iron, etc.3. Once you reach the fence, connect the high voltage cable to the first wire of the fence.4. Then make a bridge between all the wires of the fence (e.g. with pieces of conductive wire) so that:- low wire, medium wire and high wire are all connected to each other electrically. Simplified diagram: RED energizer terminal —— high voltage cable —— fence wire (1 wire) 1 wire —— jumper —— 2 wire —— jumper —— 3 wire … (and so on)3. How to understand if everything is ok Once the connections are completed:1. Connect the energizer to the 220V socket (if it is a mains model) or to the battery (if it is a 12V model).2. Check that:- the red light is on,- the green light flashes: it means it is sending impulses to the fence.3. In very dry periods, lightly wet the soil around the ground stakes to improve grounding.
At the moment there are no active coupons or specific discounts for first purchases or for Greece. What you can do is sign up to our newsletter on the site - that's where any future promotions or special offers are announced first. If you wish, I can also help you check the correct configuration of the PRO chimney extractor for your 250mm chimney (square base vs round adapter, etc.).
Here's how to do it, step by step, with the B12 and a 12V car battery: 1. Type of battery to use- For the B12 you need to use a 12V car battery, preferably 40Ah or more.- The higher the Ah, the longer the autonomy (the time before having to recharge).2. Connect the B12 energizer to the battery1. Connect the B12 to the 12V battery: - Clamps of the B12 to the battery terminals (red on +, black on -).2. Connect the earth: - B12 yellow/green wire → earth rod(s).3. Connect the fence wire: - red wire B12 → electric fence wire. At this point the energizer already runs on battery power.3. Connecting the solar panel The Gemi solar panel for B12 is designed to work via the battery, not directly on the B12 (recent models are equipped with clamps): 1. On the solar panel, there are output clamps.2. Connect the panel clamps directly to the battery terminals: - Red panel → + battery- Black panel → – battery3. The panel will recharge/maintain the battery, while the B12 will consume it. Result: B12 battery solar panel4. Does the battery need to be fully charged?- It is strongly recommended that you leave with a well-charged battery (close to 100%) upon departure.- After that, the solar panel keeps the charge: - With a battery of around 50 Ah, the panel can keep it charged for more than a month on average, based on:- the Ah of the battery,- the quality of the earthing,- the length and type of fence wire,- any leaks (grass, insulation, etc.). Even on cloudy days, the B12 continues to work with the panel, the intensity may decrease slightly but the system remains operational, provided you have a correct 12V car battery.
The insulated earth pole/ground penetration cable has a conductor thickness of 3mm. From our technical notes:- The electric fence cable has a 3mm conductor- Can be used for distances greater than 100m, but is mainly recommended for sections of 30–40m for best performance. If you tell me exactly which product page you're looking at (or link to it), I can confirm it's the same 3mm cable.
Our square base fireplace exhaust fan will fit your fireplace with a 12x12 inch clay liner. The fan features adjustable brackets and is designed to fit square or rectangular fireplaces from 20x20cm up to 43x43cm (approximately 7.87x7.87 inches to 16.93x16.93 inches). Since your fireplace measures 12x12 inches (approximately 30.5x30.5 cm), it falls well within this range and will allow for a secure installation.
For iron poles it's fine to use plastic insulators, that's exactly what you need: the important thing is to never put the wire in direct contact with the iron, otherwise you'll ground everything. However, I have to ask you something important about the size of the poles:- what diameter do the iron rods/poles have?- Gemi insulators for iron poles are suitable for poles from 1 mm to a maximum of 18 mm in diameter.- If the pole is thicker than 18mm, these specific iron insulators are not suitable. If you are around 16–18 mm you are at the limit, but still ok. If you are around 20 mm (as often happens with larger rods), those iron insulators cannot be used, and in that case it is better for you:- use wood insulators fixing them to the concrete/iron with dowels or brackets, or- provide additional plastic poles where needed (Gemi plastic poles are already insulating and do not require insulators).
In summary:- Yes. Iron poles + plastic insulators are fine, but:- the diameter of the pole must be ≤ 18 mm to use the specific insulators for iron;- beyond 18 mm alternative solutions are needed (wood insulators with dowels, or plastic poles).- For deer: 3 lines, 6 mm² line, 500 or 1000 m spool depending on how many reserves you want. If you confirm the diameter of your poles (e.g. 16 mm, 20 mm, etc.), I will tell you exactly which type of Gemi insulator can be used in your case and in what quantity (also calculating the pieces).
In summary:- Yes. Iron poles + plastic insulators are fine, but:- the diameter of the pole must be ≤ 18 mm to use the specific insulators for iron;- beyond 18 mm alternative solutions are needed (wood insulators with dowels, or plastic poles).- For deer: 3 lines, 6 mm² line, 500 or 1000 m spool depending on how many reserves you want. If you confirm the diameter of your poles (e.g. 16 mm, 20 mm, etc.), I will tell you exactly which type of Gemi insulator can be used in your case and in what quantity (also calculating the pieces).
Yes. You could still have problems even with the hood off if there is no return valve on the extractor hood. Here's why:- Without the return valve, the hood pipe always remains open towards the outside. In this way, even when the hood is off, it allows cold air to enter or room air to exit through the duct.- This can create an air current that removes air from the internal environment and can alter the chimney draft, especially in a large room like the one.- The result may be that the smoke from the chimney finds it difficult to exit correctly from the chimney and is drawn towards the room, especially if there are external wind conditions or pressure differences. Practical advice:- Installing a non-return valve on the hood helps block the passage of air when the hood is off, isolating the duct and reducing interference with the chimney draft.- However, it is always useful to have a small external air intake, as already suggested, to improve recirculation.
Hi Peter! Don't worry, I will explain the options you have to pay for purchasing a 1000 meter roll of rope:
The cable is not included because the necessary length can vary greatly based on each customer's installation. For this reason, it is sold separately and you can choose how many meters you need directly from the site.
Thanks for letting me know. At the moment the only electrical specifications I can provide are:- The fireplace extractor regulator must be connected to a 220V power source.- For wiring it is possible to use a 3 x 1.5 mm² cable externally or a high temperature resistant cable internally. Unfortunately, I currently do not have access to more detailed electrical specifications (such as power consumption, current draw, or motor details). If these details are not listed on the site, I recommend contacting Gemi technical support directly for more precise information. If you wish, I can provide you with contact information or guide you to the support section.
I'll answer you in two parts: 1) simple connection diagram 2) adding a second battery to the same panel.1. System connection diagram Imagine the main line like this: PANEL → CHARGE CONTROLLER → BATTERY → (PUMP + B12 + OTHER USES) More in detail:1. 100W photovoltaic panel → Charge regulator- “+” cable of the panel → “+ SOLAR” terminal of the regulator- “–” cable of the panel → “– SOLAR” terminal of the regulator2. Charge regulator → 12V 40Ah battery- “+ BATTERY” terminal of the regulator → “+” pole of the battery- “– BATTERY” terminal of the regulator → “–” pole of the battery3. 12V pump → Battery- Pump “+” cable → to battery “+” (passing through a switch or control, if present)- Cable “–” pump → to “–” battery4. B12 energizer → Battery- Red B12 clamp → “+” battery- Black B12 clamp → “–” battery5. B12 → Fence + Earth- Red OUT terminal of B12 → fence conductor wire- Earth terminal (yellow/green or black) of the B12 → to the 3 earth rods connected together with a yellow/green cable. Wild boar fence (120 m):- 6 mm² wire- insulators every 5 m- 1–2 wires 20–30 and 40–50 cm from the ground.2. Can I add another battery to the same panel? In general, yes, it is possible to use multiple batteries on the same panel, but with some important precautions:1. Type of connection between batteries- To stay at 12V you need to connect them in parallel:- “+” battery 1 with “+” battery 2- “–” battery 1 with “–” battery 2- So the voltage remains 12V, but the Ah add up (e.g. 2 batteries of 40Ah ≈ 80Ah).2. Same batteries- It is strongly recommended to use:- same voltage (12V both)- same capacity (e.g. 40Ah and 40Ah)- same type (both cars/lead acid, etc.)- similar state of wear- Avoid mixing very different old and new batteries together.3. Charge regulator- The charge regulator must be sized for:- the maximum current of the panel (100W / 12V ≈ 8–9A)- the battery bank (the two batteries in parallel are seen as a single larger battery).- Usually, if it is suitable for 100W, it also holds two batteries in parallel, but it depends on the model (capacity in Ah supported).4. Convenient connection with 2 batteries- Connect the batteries in parallel to each other:- “+” bar 1 → “+” bar 2- “–” bar 1 → “–” bar 2- Then connect the charge regulator to the common + and – of the battery bank.- The pump and B12 always go to the same terminals (+ and – common).5. Pros and Cons Advantages:- More total capacity (e.g. from 40Ah to 80Ah)- Greater autonomy in case of days with little sun- Less "stress" on each individual battery. Be careful though:- The 100W panel is always the same:- charges a larger battery bank more slowly- if consumption is high and the days of bad weather are different, you could still run into a charge deficit.- Without precise pump absorption data not “100% sure”, but generally speaking:- with a +100W battery, you are already in a good situation- with two batteries + 100W, you increase the energy "reserve", but not the production.
1. How to connect the yellow/green cable to the galvanized pegs can be done in two ways:
B) “job done well” solution (even better)- With hole in the post:1. Make a through hole in the stake, just above the ground:- hole to fit the cable (for a 2.5–6 mm² a 5–6 mm hole is sufficient)2. Pass the yellow/green cable through the hole3. Tie a loop and knot/wrap around the stake4. Tighten everything with pliers. Advantages:- better mechanical contact (holds longer over time)- more stable electrical contact (it does not loosen with the wind or with hoe blows around it). If you have a way to drill the post, this is the cleanest and most long-lasting solution.2. What diameter / section should the yellow/green cable have? From our instructions:- The thickness of the yellow/green grounding cable DOES NOT affect the correct functioning of the fence.- So you can use any thickness of yellow/green wire to connect the pegs., to do a nice job:- use a normal yellow/green electrical system cable, for example:- 2.5 mm² or 4 mm² are fine- it is robust, easy to work with, more than sufficient for the energizer current. Remember:- Gemi does not sell the earthing cable, so a normal yellow/green cable that you find at an electrician or hardware store is fine.3. Little extra precaution Whichever method you choose (wrapped or with hole):- make sure that:- the copper of the cable is in good contact with the bare metal of the post- the connection is well tightened, so that it does not move- if the cable remains exposed to the elements, a round of insulating tape just to block it better (not to isolate the copper from the post!) can help on the mechanical side.
B) “job done well” solution (even better)- With hole in the post:1. Make a through hole in the stake, just above the ground:- hole to fit the cable (for a 2.5–6 mm² a 5–6 mm hole is sufficient)2. Pass the yellow/green cable through the hole3. Tie a loop and knot/wrap around the stake4. Tighten everything with pliers. Advantages:- better mechanical contact (holds longer over time)- more stable electrical contact (it does not loosen with the wind or with hoe blows around it). If you have a way to drill the post, this is the cleanest and most long-lasting solution.2. What diameter / section should the yellow/green cable have? From our instructions:- The thickness of the yellow/green grounding cable DOES NOT affect the correct functioning of the fence.- So you can use any thickness of yellow/green wire to connect the pegs., to do a nice job:- use a normal yellow/green electrical system cable, for example:- 2.5 mm² or 4 mm² are fine- it is robust, easy to work with, more than sufficient for the energizer current. Remember:- Gemi does not sell the earthing cable, so a normal yellow/green cable that you find at an electrician or hardware store is fine.3. Little extra precaution Whichever method you choose (wrapped or with hole):- make sure that:- the copper of the cable is in good contact with the bare metal of the post- the connection is well tightened, so that it does not move- if the cable remains exposed to the elements, a round of insulating tape just to block it better (not to isolate the copper from the post!) can help on the mechanical side.
you can write to me whenever you want, I will continue where we left off. About now:
Yes, it can be done, and that's fine, under two conditions:1. Both the center wire and the jumper wire must have bare metal- On the central wire: 2–3 cm of bare metal.- On the bridge: 2–3 cm of bare metal right where you join them.2. The turn must become a tight winding, not just "one turn and away" it can be done like this:- Place the two stripped sections in contact (metal against metal).- With the jumper:- go around the twisted section of the central thread,- and then continue to tightly wrap the metal of the jumper wire onto the metal of the central wire for a few turns.- If you can, you can also bend the metal of the central wire around the bridge a little, so they stay intertwined. - Yes: you can go around the peeled parts, in fact it's the right place to do it.- The important thing is that, after the turn, you tighten well, so that:- you don't just stay leaning,- but you become just a small “braid” of wrapped metals. If you do this:- the electrical contact is excellent,- mechanically holds,- and the risk of tics and sparks on the board is greatly reduced.
I'll clarify your doubt straight away: The electric cable to power the smoke extractor can be passed both inside the hood/smokestack and externally, but there are important differences in the materials to be used:- Outside the flue: a normal rubberized outdoor cable 3 x 1.5 mm² can be used.- Inside the flue: in this case it is necessary to use a special cable resistant to high temperatures (up to 300 °C). This cable is available separately on our site and must be chosen based on the meters you need. It is certified and complies with safety regulations
Yes. You can pass the electric cable inside the chimney.
Hi Kay! Thanks for your message
I will explain to you in a simple way how to fix it on the stone/masonry chimney cap.1. First thing: "close" any gaps If you have:- round pipe inside the square stone chimney cap → the space between the pipe and the masonry must be closed (with mortar or sheet metal), so that all the suction passes through the flue and does not escape from the sides. If, however, you only have the square hole in the stone, without any visible tube, you don't need to do anything: you rest on it directly.2. Choice of model: square base In your case, with a square stone fireplace, the model with a square base is used. The base is adjustable from approximately 20×20 cm up to 43×43 cm with the brackets.3. How to fix it, concretely Once the 4 brackets have been assembled and adjusted to the size of your chimney cap:1. Place the extractor on the stone/masonry chimney cap.2. The 4 large brackets embrace the perimeter of the chimney pot on the outside.3. With the 4 small brackets and the screws + bolts (all included in the package) tighten the brackets so that the base locks firmly.4. In the lower part of the aspirator, at the 4 corners, there are also holes:-
For the needs (maximum draft + minimum noise) the choice is made in two steps. But first I need some fundamental information:- is the fireplace/stove open, closed, wood stove, pellet, oven, barbecue?- Is the flue low (less than 3 m) or normal/high?- Are you in the sea area (salt) or not? So I can be more precise among the professional ones (base, steel, corten, copper). Meanwhile, general indications:1. Maximum draft All the Gemi professional models that you have in the "high-end" catalog have:- Flow rate 3800 m³/h (more than the basic model of 2500 m³/h)- Resistance 700 C (even in the event of a chimney fire)- They are designed specifically for:- problematic flues- fireplaces that make a lot of smoke- low rods or with many curves. So, if you are looking for maximum draw, the right family is:- Professional standard- Professional stainless steel- Professional in corten- Professional in copper (top of the range)2. Minimal noise The “trick” for noise is not so much the model, but the use of the speed regulator:- At first/second speed the extractor remains very silent.- You still have enormous suction power compared to a fireplace without a smoke extractor.- If necessary, you can increase the speed only in critical phases (ignition, strong wind) and then return to a low speed. So
For a barbecue flue with a 10 cm exhaust pipe, Gemi Elettronica offers square-based flues with adjustable brackets. They are suitable for fireplaces from 20x20 cm to 43x43 cm.
Cable only resting on the ground (like now)- The cable touches the ground on the surface, often:- moist soil,- perhaps with wet grass, stones, roots, etc.- In these conditions, earth leakage is easier and:- hear the tick tick,- it means that the cable is discharging some current to ground. This is why our instructions clearly state:- if the cable carrying the current makes a ticking sound and does not insulate well, it should be placed inside a polyethylene tube.2. Buried cable (as you were told it can be done) When we say that the cable can be “simply buried”, we mean that:- The high voltage cable already has an insulating rubberized sheath, therefore:- it can also work underground without the need for other particular electrical insulation;- However, the underground installation must be done:- covering it well with earth,- without leaving it exposed,- avoiding it remaining "half out" or in contact with damp surfaces for long stretches. - Buried well (covered with earth) it works correctly.- Only resting on the ground, meters long, especially if damp, can create leaks and ticking.
What you should actually do (for 15 metres) You have three practical options:1. Improve underground installation- Dig a small track,- lay the cable,- cover it well with compacted earth.- This way you respect the concept of “simply buried” without pipe.2. Use the polyethylene tube- Insert the cable into a polyethylene tube (irrigation type),- place it or bury it lightly.- This greatly reduces the risk of leakage and ticking.3. Lift it off the ground (if possible)- Pass it in the air, fixed with insulators/poles,- thus avoids direct contact with damp soil. - You were told that it can be buried: that is correct.- The problem arises when it is just placed on the ground, not well buried, especially if damp: there it can tick and unload.- To eliminate the problem: polyethylene pipe or well-done underground installation. If you describe me exactly:- how the cable has passed now (height, type of terrain, if you see humidity/grass),- and whether you can dig a little or not, I'll tell you which of the 3 solutions is, realistically, the most comfortable for you.
What you should actually do (for 15 metres) You have three practical options:1. Improve underground installation- Dig a small track,- lay the cable,- cover it well with compacted earth.- This way you respect the concept of “simply buried” without pipe.2. Use the polyethylene tube- Insert the cable into a polyethylene tube (irrigation type),- place it or bury it lightly.- This greatly reduces the risk of leakage and ticking.3. Lift it off the ground (if possible)- Pass it in the air, fixed with insulators/poles,- thus avoids direct contact with damp soil. - You were told that it can be buried: that is correct.- The problem arises when it is just placed on the ground, not well buried, especially if damp: there it can tick and unload.- To eliminate the problem: polyethylene pipe or well-done underground installation. If you describe me exactly:- how the cable has passed now (height, type of terrain, if you see humidity/grass),- and whether you can dig a little or not, I'll tell you which of the 3 solutions is, realistically, the most comfortable for you.
To open the fireplace fan control regulator case, follow these general steps:1. Safety first:- Make sure that the regulator is disconnected from the mains before starting any operation.2. Locate the screws:- On most Gemi regulators the case is fixed with screws. These are typically found on the sides or back of the unit.3. Remove the screws:- Use a suitable screwdriver to carefully remove all screws holding the trim together.4. Gently open the package:- Once the screws have been removed, gently separate the front and back parts of the case.- If the case seems stuck, check for any hidden screws or clips that may still be holding it together.5. Access inside:- After opening you will have access to the internal components for inspection or connection. Important:- Avoid forcing the casing open as this could damage the regulator.- If you are unsure or have no experience with electrical components, it is always best to consult a qualified technician.
If your speed control knob has a set screw (usually a small screw on the side of the knob), you will need to loosen this screw to remove the knob. Here's how to do it:1. Locate the fixing screw:- Find the small screw on the side of the speed control knob.2. Use the right tool:- Most set screws require a small flathead screwdriver or a hex wrench (Allen), depending on the type of screw.3. Loosen the fixing screw:- Turn the screw counterclockwise enough to loosen it. You don't need to remove it completely, just enough so the knob can slide off.4. Remove the knob:- Gently pull the knob off the shaft.5. Check for hidden fasteners:- After removing the knob, check if there are any additional screws or clips holding the trim together. Once you remove the knob, you should be able to open the case more easily, especially if the knob held the front panel in place.
those two circles you see on the plastic wrap are most likely blind holes. These are common on electrical enclosures and are designed to allow you to insert wires, such as Romex or other types of electrical wiring, into the regulator securely. How knockout holes work:- These are thin, pre-scored sections of plastic (or sometimes metal) that can be "knocked out" or removed.- You can use a screwdriver or pliers to gently push or twist the hole until it pops out, creating an opening for the cable. Purpose:- These holes are for cable entry, so you can run the wiring into the controller and secure it properly, often with a cable gland or strain relief fitting to protect the cable and maintain safety. Tips:- Remove only the pre-cut necessary for installation.- After inserting the cable, use a cable gland or cable gland to prevent the cable from rubbing against the sharp edges of the hole.
Here's what you need to know: 110V AC vs 120V AC:- Most modern electrical devices labeled 110V are designed to operate safely on standard North American household voltage, which is typically 120V (and can range from approximately 110V to 125V).- The transformer and internal components of the Gemi speed controller should be able to handle this slight voltage increase without problems. Regarding overheating:- The regulator is designed to operate at a normal operating temperature of approximately 60°C (140F), which can be quite hot to the touch.- A small increase from 110V to 120V is generally within the safety margin for such devices and should not cause the transformer to overheat or fail.- If you notice that the regulator is overheating excessively (much hotter than usual), or if there are signs of malfunction (burning odor, discoloration, etc.), unplug it and contact support. You can safely use the 110V AC controller with your 120V AC household power supply. The difference is minimal and should not cause overheating or damage under normal conditions. If you have any doubts or notice anything unusual during operation, do not hesitate to ask for advice!
Yes, cash on delivery is available in Greece, as well as in all EU countries. For Greece the cost of cash on delivery is €19.00. Payment takes place in cash only and the courier requests the exact amount.
you can place the order directly on the site. For cash on delivery in Greece, the additional cost is €19.00 and payment takes place only in cash, with the exact amount requested. To proceed:1. Add products to cart2. Go to the checkout3. Enter your delivery details4. Select cash on delivery5. Confirm the order
Since Bosnia and Herzegovina is not a member of the European Union, orders shipped from our store (located in Italy) will be treated as international shipments. Here's what you need to know: Customs and taxes:- When ordering from non-EU countries, your package may be subject to customs duties, import taxes and local VAT according to your country's regulations.- These charges are not included in the price on our site and are usually collected by the courier or customs office before delivery.- Unfortunately, we cannot help you avoid customs clearance or additional taxes: these are set by the Bosnian authorities. Shipping costs:- Shipping to non-EU countries such as Bosnia may have different costs than shipping within the EU.- The exact shipping price will be calculated at checkout on our website based on your address and order details.- For specific shipping costs for Bosnia, please check directly on our site during the order process. Shipping Process:- We ship internationally and you can complete your order online.- Please note that delivery may take a little longer due to customs procedures.
For wild boars and roe deer we recommend at least 3 parallel wires, at these indicative heights:- 1 wire: 20 cm from the ground- 2nd wire: +30 cm from the first → therefore approximately 50 cm from the ground- 3rd thread: +30/40 cm from the second → therefore approximately 80–90 cm from the ground Like this:- the low threads stop the boars well,- the higher wires discourage roe deer and other ungulates. With slightly sloping terrain:- maintain these real heights above the ground as much as possible,- if the difference in height varies, add some intermediate poles where needed to prevent the wire from touching the ground or grass (especially the first wire: it must never touch grass or bushes, otherwise it will discharge). If you tell me how many meters of perimeter you need to fence, I can also help you calculate how many posts and how many insulators you need.
let's plan the steps first and then,
For tensioning, the important thing is that the wire is firmly in place but without deforming the pegs or breaking the conductor. I summarize how to do it and which devices to use.1. What to tighten the threads with? You have three typical possibilities:1. By hand, pulling the thread and using gloves:- Valid for short sections and moderate voltages.- Less control and more effort.2. Reel holder/unwinder:- It is mainly used to unwind it without tangling, keeping the thread tidy and with a slight tension while tightening it.- Facilitates the “presentation” of the straight wire along the section.- It is not a final tensioner, but it helps prevent it from coming loose while driving.3. Tensors (tensioners):- They are specific devices that are positioned on the line and allow:- Tighten with a wrench,- Retensioning in the future if the wire has failed.- They are the cleanest way to maintain constant tension between fixed posts. The ideal in your case (1000 m, 3 wires):- Use the spool pin to unwind and position the thread,- And fit mechanical tensioners at strategic points (normally in the sections between fixed wooden posts).2. How much voltage is enough? Rule of thumb:- The wire must be straight, with no visible "belly" between the uprights,- but not so tense that:- bend or tilt the poles,- the insulation creaks,- Difficulty engaging door handles. Visually:- If you look at a 25 m stretch between two wooden poles:- the thread should appear almost online,- with a small minimal arrow (curvature), not a guitar string. The usual:- Tighten until, by pushing the wire with your hand in the center of the section, you can move it about 3–5 cm without excessive effort.- If you have to use a lot of force with your hand to move it a little, you're probably overdoing it.3. How is the tension between the pole and the fixed pole maintained? In a design like yours:- Wooden poles every 25 m = anchoring and tensioning points.- Iron rods every ~6 m = intermediate guides only. The usual thing is:1. At one end of the section (wooden post):- The wire is firmly anchored:- or by making a loop around the pole and securing it with an anchor insulator,- or using a specific corner insulator/anchor.2. At the other end of the section:- The same type of anchoring insulator is placed,- and a tensioner is inserted between the wire coming out of the section and that point. Namely:- The thread enters the tensioner,- turn the tensioner key/hook,- the tensioner shortens the length of the wire and creates tension. A wire tensioner can be positioned every 25 m (between the wooden poles), or in any case in several strategic sections.4. Is there a device that prevents the cable from coming loose during assembly? Yes, and there are basically two types of help:
b) Tensors (tensioners)- Once positioned and tensioned:- prevent the thread from coming back.- If the thread "gives" a little over the months, turn the tensioner again and restore the tension.- They are literally the device that prevents the fence from becoming increasingly looser as the temperature, use and small expansions vary.5. Practical advice for your case With 1000 m, 3 wires, mountains, terraces:1. Use the reel seat:- To unroll:- First the 6 mm² thread (bottom),- then the 4 mm² ones.- Continue taping the wire into the insulators as you go, without leaving much wire loose.2. Put the turnbuckles in the sections:- At least:- 1 tensioner per wire and long section (e.g. every 100–150 m of straight),- and at points of conflict (strong changes in direction or height).-
b) Tensors (tensioners)- Once positioned and tensioned:- prevent the thread from coming back.- If the thread "gives" a little over the months, turn the tensioner again and restore the tension.- They are literally the device that prevents the fence from becoming increasingly looser as the temperature, use and small expansions vary.5. Practical advice for your case With 1000 m, 3 wires, mountains, terraces:1. Use the reel seat:- To unroll:- First the 6 mm² thread (bottom),- then the 4 mm² ones.- Continue taping the wire into the insulators as you go, without leaving much wire loose.2. Put the turnbuckles in the sections:- At least:- 1 tensioner per wire and long section (e.g. every 100–150 m of straight),- and at points of conflict (strong changes in direction or height).-
Excellent question, it's a very common doubt. In the case of Gemi fireplace extractors:- The base of the extractor is designed with a raised lip that prevents rainwater from seeping into the chimney.- Furthermore, the equipment is already equipped with a protective "hat" or hood:- Protects the engine from rain and wind.- Prevents water from entering above the smoking pipe.- It also has a metal mesh that prevents the entry of birds or rodents. That is to say: installed outside, as the manual indicates, rainwater does not enter the chimney. The system is designed specifically to work outdoors. these conditions must be respected:- Place it flat and well secured.- Do not modify or remove the top “hat” or the base edge.- If it is integrated into a cap/chimney cap construction, it is possible to do so by removing the chimney cap or by requesting the extractor without a cover, but always leaving the outlet free and with adequate protection.
YES. The light on the switch may still come on even if the fan motor (or anything after the switch) is faulty. Here's why in simple terms:- The red light in the switch is usually connected between phase and neutral inside the control box.- As long as:- The controller has power and- The switch is on...the light is powered and turns on. The lamp does not require:- The speed regulator is OK, or- The fan cable is OK, or- The motor/capacitor is OK. So you can absolutely have this situation:- Turn on the light- Correct voltage output from the switch- But the fan is completely dead because:- The speed controller is defective, or- The cable to the fan is broken, or- The fan motor/capacitor is defective. That's why we're checking:1. Is there voltage input to the switch? (yes – top right black)2. When it is turned on, does the voltage come out green? (we still need to confirm with the meter) If you find full voltage on the green wire with the switch on and still no fan noise, then the fault is definitely beyond the switch (regulator/cable/motor), not the illuminated switch itself. If you want, the next step is:- With the power on:- Measure the voltage from the black top right to neutral/ground (should be ~120/230 V).- Measure from bottom left green to neutral/earth:- Power off → should be 0V- ON switch → should be the same as the power supply (~120/230 V). Tell me these two readings and I can tell you if the problem has moved beyond the switch and into the fan/regulator side.
The Gemi fireplace extractor motor operates on 220 V (compatible with the 230 V mains). The regulator supplied with the fan must be connected directly to a 220V power source. There is a transformer inside the regulator, but it is mainly for the control electronics, not to reduce the voltage to the motor itself. Therefore, the motor operates on standard mains voltage (220–230 V).
If the exact external diameter of your chimney flue is 23cm and only 22cm or 25cm adapters are available on the site, we recommend choosing the 25cm (250mm) adapter. Why choose 25cm:- The 22cm adapter would be too small for a 23cm hose and you would not be able to attach it correctly.- The 25cm adapter will be slightly larger, but you can easily seal any gaps with heat resistant materials, such as high temperature silicone or a hose clamp, thus ensuring a secure and effective fixing. This type of small difference in diameter can be easily managed during the installation phase and does not cause problems for the functioning of the extractor.
For wild boar, here's what we recommend based on your information:1. Thickness and length of the wire- For wild boar: 6 mm² wire (particularly recommended for wild animals/large animals).- Your fence has a perimeter of approximately 120 m (I assume 120 m of fence line, not square meters of area). If you make 3 rows of yarn around 120m:- Total cable length ≈ 120 m × 3 = 360 m- One 500m spool of 6mm² wire is sufficient for your fence and leaves some margin for connections and corners.- So: 1 spool of wire 500m – 6mm² is what I would recommend.2. How many rows for wild boar? For wild boar and similar wild animals, at least 3 electrified wires are recommended:- 1st wire: 20 cm from the ground- 2nd wire: 30 cm above the first (≈ 50 cm from the ground)- 3rd wire: 30–40 cm above the second (≈ 80–90 cm from the ground) This configuration is specifically designed to prevent the entry of wild animals such as wild boars, deer and roe deer.3. Poles and insulators (optional but useful information)- Wildlife posts: every 4–5 metres.- On a 120 m fence, with posts every 4-5 m, approximately 24-30 posts are needed.- Isolators: they are positioned every 5 m.- Total cable length: 360 m- 360 ÷ 5 ≈ 72 insulators- So you will need 1 pack of 100 insulators (minimum pack size and enough for your fence). If you confirm:- the exact length of the perimeter (is it really 120 m around?), e- whether you are fighting only wild boars or also other animals (e.g. deer, foxes, indoor livestock), I can customize the heights and quantities even more precisely for your case.
In your case, you should choose the model with a round base. To order correctly:- Measure the external diameter of the flue (in centimeters or millimetres).- On the site, choose the smoke extractor with a round base.- Next, in the adapter selection menu, select the size corresponding to the external diameter of your tube.- Example: if the pipe has an external diameter of 15 cm, choose 150 mm – 15 cm; if it is 18cm, choose 180mm – 18cm, and so on (140mm, 150mm, 180mm, 200mm, 300mm, etc.). If you tell me:- the external diameter of the pipe (e.g. 150 mm, 180 mm, 200 mm, 300 mm, …)- and the type of appliance (open fireplace, hob, hob, barbecue, etc.), I will explain exactly which option to select on the product and how to indicate the right adapter at the time of purchase.
To mount spring handle insulators on iron poles for an electric fence, follow these simple steps:1. Choosing the right insulator: For iron poles, use specific insulators for iron. Typically, these insulators have a self-tapping screw or bracket/tie to securely attach to the pole.2. Positioning: Decide at what height you want to place the handle on the iron pole, considering the animal to be contained.3. Isolator fixing:- If the insulator has a self-tapping screw, screw it directly to the iron post (sometimes you may need to drill a small hole with a drill first).- If the insulator has a bracket or strap, pass the strap around the pole and tighten it well to secure the insulator.4. Attaching the handle: Insert the hook of the handle into the eyelet of the insulator. If the handle-specific insulator has a ring, the spring hooks directly there.5. Connecting the wire: Then connect the wire or electrical tape to both the handle spring and the other side of the fence. General advice:- The insulators must be positioned in such a way as to keep the wire taut and away from the pole, preventing dispersion.- Make sure that the spring never touches the iron pole directly: the current would disperse and the fence would lose its effectiveness.
you understood perfectly! The wire tensioner (wire tensioner ratchet) must always be installed near a sturdy pole (usually at the corner pole or at the end of the line), because when you pull the wire with the tensioner a lot of tension is exerted, and only a pole well fixed in the ground can bear it without bending or moving. To recap:- Install the wire tensioner immediately after (or attached to) a sturdy pole.- The post should be made of thick wood, sturdy metal or concrete, driven deep.- Avoid mounting the tensioner on light or mobile pegs as they could bend or detach under tension
Perfect question, and I'll help you right away with practical clarity.
No double hook needed here:- The double hook is ONLY used where you want to interrupt the current on command (e.g. gate).3. Secure the wires with the insulator After connecting them, secure the joint on the insulator of the central pole so that the wire remains well tensioned and does not touch the pole (if it is metal or wood).
To recap- “Classic” insulator on the central pole.- Make a junction between the two ends of wire by uncovering and connecting the metals → the current passes.- Secure everything well to prevent the connection from touching the pole (to avoid dispersion).
Now it's very clear, thanks for the clarification! You are talking about the mechanical tension of the wire, that is, the force with which the taut wire "pulls" on the poles and, consequently, on the insulators.
Practical advice:- Poles at the beginning and end of the section (and those at the corners, or where you use turnbuckles) must be very sturdy, because all the tension is concentrated on them.- The insulators (if good quality) support the normal voltage of the electric fence wires without problems, provided they are mounted well and are not old/broken.- The intermediate poles help the wire to stay aligned, but feel less force than the poles that are more stressed at the "head ends".
Practical advice:- Poles at the beginning and end of the section (and those at the corners, or where you use turnbuckles) must be very sturdy, because all the tension is concentrated on them.- The insulators (if good quality) support the normal voltage of the electric fence wires without problems, provided they are mounted well and are not old/broken.- The intermediate poles help the wire to stay aligned, but feel less force than the poles that are more stressed at the "head ends".
but it depends on the model:- Basic model: recommended only for fireplaces at least 3 meters high from the heat source. For less than 3m it is not ideal.- Professional Model: can be installed at any height, even in 1 meter chimneys. There is no minimum distance to be respected from the fire and it is recommended for low fireplaces (less than 3 m). If you tell me:- approximate height of the chimney,- type of appliance (fireplace, stove, hob, oven, etc.),- and the diameter or side of the chimney outlet, I can tell you exactly which professional model is best suited.
Very sensible question. In reality, 121 cm pegs are "fine" if you stop at 4 wires at 100 cm, but in your case (vegetable garden in the Apennines with wild boars, roe deer, badgers, foxes) the practical limits are these:1. Margin above the last thread- With a 121 cm stake and last wire at ~100 cm, you will have a few cm of "empty" left above.- This reduces the stability of the high wire a little (more leverage if pushed, snow, wind, branches, etc.).2. Somersaults and jumps- For roe deer, it is often preferable to have the possibility of raising a further wire (e.g. 110–120 cm) or in any case keeping the last wire higher than 100 cm.- With the 121 cm post you are at the limit; with the 160 cm you have margin for:- raise the last thread- or add a 5 thread if you see it needed in the future.3. Uneven terrain in the Apennines- If the ground is not perfectly flat, it may happen that in some places:- the stake sinks more- or the wire, following the profile of the ground, is lower than expected.- With a higher stake you have more play to adjust the heights without finding yourself with the last wire too low in some sections.4. Wild boar push / snow / vegetation- In wooded/mountain areas, among snow, tall grass, pushing animals, it is useful that the last wire is not "hanging" right at the top of the pole:- with the 160 cm the high wire is more "inside" the structure of the pole, so it is a little more robust as a whole.
For a situation (pizza at ~500 C, dimnjak oko 7–8 m) model at 300 °C je premalo – svakako je bolji izbor model at 700 C. Evo zašto:- Model Base – 300 °C-Maks. temperature: 300°C- Namijenjen je klasičnim kaminima, pećima, dimnjacima s umjerenim radom.- Kod pizza peći imate:- see temperatures,- I mean the dugotrajno loženje,- once you see the temperature limit, you can immediately see the temperature when it is “razvije”.- Professional / čelični (inox, corten, bakar) models – 700 C-Maks. temperature: 700 C- Dizajnirani su i za slučaj jačeg zagrijavanja dimnjaka, pa čak i požara čađe.- Preporučeni su i u slučaju:- vrlo intentional rada (pizzerije, pizza peći),- kraćih dimnjaka (< 3 m), ali su isto tako sigurniji izbor i za dulje dimnjake kod visokih temperature.- Svi ti 700 C modeli imaju i jaču snagu usasa (3800 m³/h), što je plus za pizza peći. Kod vas:- temperature below: do 500 C- visina dimnjaka: 7–8 m- tip uporabe: pizza peć = intentivan rad, puno dima Iz sigurnosnih i praktičnih razloga jako se preporučuje jedan od modela do 700 C (profesionalni / steel / corten / profesionalni bakar), a ne osnovni 300 °C. Ako mi još samo kažete:- je li gore na krovu kvadratni zidani izlaz ili samo okrugla Schiedel cijev, mogu vam konkretno napisati: točan model (kvadratni ili okrugli) i na što trebate paziti kod odabira.
Yes. This is a great practical idea, and it's exactly what you should do in your case. you can:- use the green iron poles only as structural support,- and fix the 160 cm Gemi plastic pegs to them,- then running the electric wire only through the plastic pegs. Like this:- the wire remains well insulated (the eyelets of the plastic pegs are insulating),- do not touch the iron directly,- use the existing fence to provide stability.
The Gemi chimney vacuum weighs about 20 kg. Installation information:- The extractor is installed directly above the chimney outlet (at the top, on the duct).- It is not necessary to place additional supports on the wall, since the extractor itself is fixed to the base of the fireplace using the adjustable bars or brackets supplied.- you need to make sure that the outlet of your chimney is compatible with the base of the extractor (in your case, with a diameter of 200 mm, you can choose the model with a round base of that size).- If the fireplace is built-in and the outlet is square or rectangular, there are also models with a square base and adjustable brackets. In summary: No additional wall supports are needed, just fix the extractor to the chimney outlet following the assembly instructions. Would you like to see the product link or need more installation details?
At the moment I have no information about local representatives or partners in Split, so I cannot confirm whether the on-site assessment service is available there. What I can do is help you choose the right remote fireplace extractor. To do this I would need some details:1. Section and indicative height of the flue (e.g. Ø round or square side in cm, and total height)2. Type of grill/fireplace (open grill, closed barbecue, built-in fireplace, etc.)3. If you have smoke problems only with wind, or always4. Approximate distance from the grill to the roof outlet5. Material of the chimney (brick, metal, etc.) With these I can explain which model (basic, professional, steel or professional copper) is most suitable and how it should be installed. If you prefer to speak directly with the staff about possible local installers, you can:- Call or send an email to Gemi Elettronica (contacts are on the website gemimarket.hr / gemimarket.it) and specifically ask if they have a partner/installer in Split.
Thanks for the extra details - it helps. From what you described:- 120V model- The capacitor is on the red wire- The yellow/green is bolted to the chassis → i.e. earth/mass- You have a 3 screw terminal and need to know where the hot and neutral go. Some key points:1. The capacitor on red does NOT, in itself, mean "this is hot". On these motors the capacitor is in series with one of the windings (start/run), not used to mark the polarity of the line. The motor will generally run well with the line and neutral swapped on the two motor wires.2. With PSC/CSCR type single-phase motor and 3-screw block:- A screw is earth/mass (yours is yellow/green, already transparent).- The other two screws are simply the two motor power conductors (one of which is in series with the capacitor).- At 120V, the line (hot) and neutral go to these two motor terminals; polarity is not critical to the operation of the motor. So, in practice:- The terminal on which the yellow/green landed = ground- The other two terminals (the red one and the remaining wire) = motor power supply- you can connect:- Hot (120V) on one of the two motor terminals- Neutral to other The motor will still see 120V between its two windings and will function properly. If the three-screw clamp is arranged, for example, like this:- Left screw: yellow/green → frame- Center screw: red (and one side of the capacitor)- Right screw: other motor cable Then you will cable:- Earth → left screw (already present)- Hot (120 V) → center or right screw- Neutral → the remaining central or right screw Also in this case, the only strict "must" is:- Do not put hot or neutral on the ground terminal- Make sure hot + neutral are on the two motor terminals (the ones not tied to the chassis) If you tell me exactly what colors are on each of the three screws (for example, "left: yellow/green to the chassis, center: red + cap, right: black only") I can write it line by line like:- Screw 1: earth (to the equipment mass)- Screw 2: hot- Screw 3: neutral
It can be assembled without problems, with the right model and fixing. From the page you visited, you are looking at the professional square base fireplace extractor. According to the technical information:- The square base fireplace fan comes with adjustable brackets for fireplaces from 20x20cm to 43x43cm- For fireplaces in this range (your 30x30cm steel flue), it can be fixed normally using the brackets- It is suitable for grills, fireplaces, stoves, ovens, hoods, barbecues, thermo fireplaces- Maximum air temperature: up to 300 °C So for your 30×30 cm steel flue, 1 mm thick:- Yes, the square base model is compatible- It will be positioned above the chimney and the brackets will be fixed on the sides- The thickness of 1 mm is not a problem; the important part is the external dimensions (30×30 cm), which fall within the range 20–43 cm
we have a solution The Professional fireplace fan is not normally black (standard finish), but you have two practical options:1. Install it as is Technically this is not a problem at all. The chromatic difference is only aesthetic; it will still work perfectly on your black steel fireplace.2. Paint it black locally- you can have it painted by a local professional (or do it yourself) with a high temperature resistant paint suitable for fireplaces/ovens.- This way you can match it to the color of your black fireplace.- Painting the *external* metal parts with paint suitable for high temperatures does not jeopardize their functioning, provided that:- Do not add paint to the motor, inside the electrical parts, or block the ventilation openings.- No mechanical parts are modified or deformed. There is no factory black version of the Professional model listed in our catalog; customization (such as making it black) must be done after purchase. If it is very important to you to have it perfectly black, the most realistic option is:- Order the square-based Professional model of your choice (compatible with your 30×30 cm fireplace)- Then have it painted black with high temperature paint so that it fits the fireplace.
the Gemi fireplace extractor is designed to operate with the fireplace lit and at maximum temperature. Some key points based on how it is built and intended to be used:- Continuous use is allowed: it can work continuously without problems, so you can keep it lit for as long as the fireplace is lit.- High heat is no problem - it is specially made to sit on top of the chimney and handle the temperatures and smoke of working fireplaces, stoves, ovens and barbecues.- It is not a temperature reducer: it regulates the draft and extracts the fumes; it does not cool the chimney or the environment. At low speeds (1–2 on the 6-speed regulator) it helps extract fumes without "stealing" heat from the environment. For better use:- Usually you set a higher speed when starting to create a strong draft, then reduce to a lower speed once the fire is stable and no smoke is coming out.- In case of very strong wind or problematic chimney, a higher speed can be maintained as needed. If you want, tell me:- Type of flue (open fireplace, insert, stove, barbecue, etc.)- Chimney flue shape (round or square/rectangular) and approximate diameter/side and I can help you figure out which of our fireplace fan bases (round or square) would be right for your setup.
on the Gemi fireplace extractor regulator, the highest speed is usually in position 6 and the lowest speed is in position1. So:- Position 1: slowest speed- Position 6: Maximum Speed If your regulator seems to behave the opposite way (1 is high and 6 is low), it may be due to the orientation of the knob or a wiring error during installation. Double-check the installation steps, especially how the regulator is connected. If the problem persists, it may be helpful to contact technical support or send us a photo of your regulator for clarification.
This fireplace extractor is not UL certified. Gemi vacuum cleaners are certified according to European standards (for example CEI EN 60335-2-80, UNI EN 16475-2:2017, and quality system certifications such as TÜV), and the documentation in our possession refers only to these standards. There is no indication of UL certification or a UL File Number for use in the United States.
Gemi fireplace fans are currently designed to be controlled via the manual speed controller included with the unit. However, if you have a home automation (home automation) system, you can integrate the fan with it to manage turning the fan on and off.
you can do it directly from this chat, in a very simple way:1. From smartphone or tablet- Tap the paperclip / image / “+” icon next to the field where you write messages.- Select “Gallery/Photo” (to choose a photo already taken) or “Camera” (to take one on the spot).- Choose the photo (or photos) and confirm with Send.2. From computer- Near the box where you write the message it is recommended to see an icon such as "upload file/image".- Click it, a window will open to choose the file from your PC.- Select the photo(s) and then press Open/Send. After you have uploaded them, write to me under each photo (even if only in a very simple way):- “Here I was thinking of passing the fence from right to left”- “Here there will be the large gate / a pedestrian gate” So I can give you very precise indications on where to put poles, wires and gates.
yes: you can use a yellow/green cable even 4 mm to connect the earth rods to the B/12. The important thing, regarding grounding, is that the thickness of the cable does not affect correct functioning: any section is fine. So, for what you're asking:- 20 meters connection can be fine- 4mm cable is fine- you can use a normal yellow/green cable. The indication we have is precisely this:- the grounding cable can be of any thickness- to connect the earth poles you can use a simple yellow/green cable
For a 42x45 cm chimney it is advisable to choose an extractor with a square/rectangular base. How it works in your case:- The adjustable rods are suitable for sizes between 20x20 cm and 43x43 cm.- Since one of the measurements of your chimney flue is 45 cm, i.e. higher than 43 cm, there is no problem:- just don't use stirrups- and fix the extractor directly to the 4 corners of the chimney outlet, using the holes already pre-drilled in the base. Important:- it is necessary to have a sufficient support base- the base of the aspirator is 43x43 cm- the height is 43 cm without rods or 60 cm with rods. A compatible option is this:- Aspirator mod. Base — €248.90 Image: https://checkout.gemimarket.it/image/product/36/31 Link: https://checkout.gemimarket.it/aspiratori/36-aspiratore-per-camino-tirafumo-aspirafumo-tiracamino-8012004024793.html There are also versions of the same type:- Steel model — €399.00 Image: https://checkout.gemimarket.it/image/product/208/593 Link: https://checkout.gemimarket.it/aspiratori/208-aspiratore-da-tetto-in-aux-alloy-per-camino-8053017261591.html- Copper model — €549.00 Image: https://checkout.gemimarket.it/image/product/179/594 Link: https://checkout.gemimarket.it/aspiratori/179-comignolo-in-rame-8053017260921.html- Corten steel model — €399.00 Image: https://checkout.gemimarket.it/image/product/251/934 Link: https://checkout.gemimarket.it/aspiratori/251-aspiratore-per-camino-corten-gemi.html If you want, I can also explain which of these models is best suited to your use (fireplace, hob, barbecue, oven, etc.).
I have no specific information on whether you are required to indicate a specific reason for the return. What I can confirm is that:- you can return the product within 100 days- even if it has been used- and without return costs, because the costs are borne by Gemi Elettronica
Thanks for the question! In your case, since you have a 50x50cm (500x500mm) chimney, the square base of the standard extractor fan is equipped with adjustable supports that cover chimneys from 20x20cm to 43x43cm. When the chimney flue is larger than 43x43 cm, like yours, you simply should not use supports (adjustable arms). Here's how you should proceed:- Place the base of the extractor directly above the chimney outlet.- Holes are already pre-drilled in the four corners of the extractor base for fixing it with screws or plugs (fisher).- Make sure that the upper part of the fireplace is level and that the support base is at least 40x40 cm (in your case there is no problem, since you have a larger size). This way the vacuum cleaner will be securely fixed and will work properly. Would you like to know which model is best suited to your case? If you give me more details about your installation I can help you choose the ideal product.
I can't currently see an English or German version of the site directly from the information I have here, so I can't confirm that those languages are available as full translations on the website. However, you can still:- Look for a language switcher on the site (usually at the top right, bottom of the page or in the menu). If present, it will allow you to switch to English or German.- If there is no language switcher, the site is likely only available in the default language and you should use a browser translator (e.g. Chrome's "Translate this page") for English or German. If you tell me which pages or products you are interested in, I can explain them to you in English here in the chat.
For the right energizer I need two key details first, so don't undersize or oversize it:1. Approximate fence length (total cable length in meters or km, including all lines)2. What animals do you want to keep in/out (e.g. dogs, goats, horses, cows, wild boars, etc.) So I can be very specific. Below is what I can tell from the information I have.
2) More powerful 12V battery The detailed specifications I see are mainly for a mains product line and for the battery I only have specific information for the B12 model:- Designed for 12V car battery- Recommended battery: 12V 40Ah car battery- Typical autonomy: approximately 5–6 days with B12 always on, depending on fence losses- The Ah (Ampere Hours) only affect the duration, not the force of the impact. From our guidelines:- For the B12 always use a 12 V car battery of 40 Ah or more- Using a larger battery (more Ah) offers more runtime, not more power. I don't have a direct Joule comparison for the B12 versus the 15000V–8J in the data here, but within the 12V range, the B12 is the reference model we use, including the solar panel versions.
If you tell me:- Length of the fence (approximately metres/km and number of cables)- Which animals (e.g. sheep/goats/cattle/dogs/wild boars etc.) can I tell you specifically:- If 15000V–8J is appropriate for you from the mains- If the 12V B12 battery is enough for your case and what size battery would I suggest for good autonomy in Greece.
In the United States, while most household outlets provide 120V, 240V circuits are also available for some appliances (such as clothes dryers or ovens). The Gemi fireplace fan you ordered has a nominal voltage of 220 V, which is typical for European household appliances. Here's what you need to know:- Compatibility: The fan is designed for 220V and a 240V US circuit has a very close voltage. Most 220V appliances can operate on a 240V US circuit; the small difference (220V versus 240V) is generally acceptable for most electrical devices, but it is important to consult your fan's manual to verify that it supports voltages up to 240V.- Plug and wiring: Plug and wiring may be different. US 240V outlets have different plug types than standard US 120V outlets or European outlets, so an adapter or rewiring by an electrician may be required.- Safety: For safe installation and operation, we strongly recommend that you have the installation carried out by a qualified electrician to ensure that everything (including grounding and connections) meets local electrical codes. Yes, generally in the US you can run a 220V fireplace fan on a 240V circuit, but you should:- Carefully check the manual or the technical plate of the fan to verify the maximum voltage supported (usually up to 240 V is safe).- Please use proper socket and consider professional installation to ensure safety.
Insulators for square poles The specific insulators for iron poles in our catalog are mainly designed for round poles, with a diameter ranging from 1 to 18 mm. If the square poles have sides within 18 mm, they can still be adapted and tightened; the fixing will be stable (but less precise than with round posts).
You're absolutely right, Monica: 18 mm corresponds exactly to 1.8 cm, so the 35/40 mm (3.5-4 cm) poles are definitely larger.
Updated links for the situation:- Screw insulators for wood/plastic [See product](https://www.gemimarket.it/recinto-elettrico/41-isolatori-per-legno-100-pz-per-recinto-elettrico-per-recinto-elettrico-8053017260679.html) – €13.00 (100 pieces). All other products remain unchanged:- [Electrifier 220V](https://www.gemimarket.it/recinto-elettrico/39-elettrificazionere-e220-extraforte-per-recinti-elettrici-da-pascolo-8053017260181.html)- [Electrifier 12V](https://www.gemimarket.it/recinto-elettrico/44-elettrificazionere-b12-extraforte-per-recinto-elettrico-per-animali-8053017260198.html)- [500m conductive wire](https://www.gemimarket.it/recinto-elettrico/63-filo-condotto-1000-mt-4-mm-recinto-elettrico-per-animali-da-pascolo-8053017260068.html)- [Earthing pole](https://www.gemimarket.it/recinto-elettrico/53-palo-di-messa-a-terra-per-recinto-elettrico-8053017260258.html)- [Signpost](https://www.gemimarket.it/recinto-elettrico/38-cartello-recinto-elettrico-8053017260289.html)
Updated links for the situation:- Screw insulators for wood/plastic [See product](https://www.gemimarket.it/recinto-elettrico/41-isolatori-per-legno-100-pz-per-recinto-elettrico-per-recinto-elettrico-8053017260679.html) – €13.00 (100 pieces). All other products remain unchanged:- [Electrifier 220V](https://www.gemimarket.it/recinto-elettrico/39-elettrificazionere-e220-extraforte-per-recinti-elettrici-da-pascolo-8053017260181.html)- [Electrifier 12V](https://www.gemimarket.it/recinto-elettrico/44-elettrificazionere-b12-extraforte-per-recinto-elettrico-per-animali-8053017260198.html)- [500m conductive wire](https://www.gemimarket.it/recinto-elettrico/63-filo-condotto-1000-mt-4-mm-recinto-elettrico-per-animali-da-pascolo-8053017260068.html)- [Earthing pole](https://www.gemimarket.it/recinto-elettrico/53-palo-di-messa-a-terra-per-recinto-elettrico-8053017260258.html)- [Signpost](https://www.gemimarket.it/recinto-elettrico/38-cartello-recinto-elettrico-8053017260289.html)
I'll detail the information I have available:
2) Shipping times Gemi's general instructions are:- The order is shipped by fast courier (for Spain you will see it indicated during the purchase).- The delivery time is that indicated on the page at the time of the order; may vary by country and address.- Please note that weekends and holidays may delay delivery. In summary:- Has fast shipping via courier.- you can see the specific deadline immediately before confirming the order, on the site. If you tell me:-
2) Shipping times Gemi's general instructions are:- The order is shipped by fast courier (for Spain you will see it indicated during the purchase).- The delivery time is that indicated on the page at the time of the order; may vary by country and address.- Please note that weekends and holidays may delay delivery. In summary:- Has fast shipping via courier.- you can see the specific deadline immediately before confirming the order, on the site. If you tell me:-
They must be as similar as possible to galvanized poles, and I will explain why, so you also understand the meaning of the "3 poles" and the "3 metres".1. Do they necessarily have to be galvanized? It is not "necessarily by law", but it is strongly recommended to use:- galvanized iron poles / rods of approximately 1 m. The profiles you have:- corner ones for tiles (thin bathroom profile)- they are very thin- they have little surface area in contact with the ground- they are often only lightly treated, not like real outdoor galvanized poles Probable result:- weak earthing → much lower shock than the one that E/220 can give- the fence "works", but the animal feels little and risks not respecting it. If you really want to reuse them, it's better than nothing, but:- it is not a reliable solution, especially with a strong and stubborn animal like the crossbreed. For an enclosure that needs to keep an aggressive pig/boar, it is really advisable to get the following from the hardware store:- 3 1 m galvanized iron poles / rods (or even a little longer). Low expense, but makes the difference between:- “so-so” fence- and a fence that really “stings”.2. Why exactly 3 poles and not just 1? Here it is really a question of current yield:- The energizer charges the fence with thousands of volts.- For the shock to be full, when the animal touches the wire, the current must be able to return well to the ground. With:- 1 pole only: the contact surface with the ground is small → the earth "conducts poorly" → the shock is much weaker.- 3 poles in series: increases a lot:- the metal surface that touches the ground- therefore the ability to discharge the current → the shock comes closer to the real one that the E/220 can give. The tests carried out show that: > with 3 1 m galvanized poles, in any type of terrain, functionality is significantly better than with just 1 pole. With just 1:- animals often manage to endure and pass the fence.3. Why 3 meters away from each other? It is not a "magic" number, it is the result of practical experience:- if you put them too close together (almost attached), it's almost like having a bigger pole → you don't change much.- if you place them a little apart (about 3 m):- you “exploit” more land around each pole- each pole "fishes" for humidity and conduction in a different area- the whole thing works much better. For this reason we recommend:- 3 poles- from 1 meter- fixtures for approximately 80 cm- about 3 m away from each other- connected to each other with the yellow-green cable.4. What is recommended to do For the case (enclosure 20x20, strong animal, E/220):1. Go to the hardware store and get:- 3 galvanized iron rods/poles of approximately 1 m (even smooth ones, such as galvanized rebars are fine, as long as they are full and sturdy).2. Put them like this:- 80 cm in the ground, 20 cm outside- one next to the other in line, with about 3 m of distance between one pole and another.3. Connect them together:- with a yellow-green cable- wrapping the cable well on each pole (even better if tightened with a clamp).4. Then run the yellow-green cable from the last post to the ground terminal (black) of the E/220
for a chimney with a height of approximately 3 meters from the firebox to the extractor, the Base model is suitable in most cases. Based on what we have:- Flue height: ~3 m → the Basic model is recommended (the professional model is mainly recommended when the flue is less than 3 m or in more critical situations).- Normal domestic use: domestic fireplace, without extremely intense use → The Base model is designed precisely for this.- Basic model data: suction 2500 m³/h, resistance up to 300 °C, 3 years warranty. Therefore, in your case you can safely choose:- Smoke extractor with round base – Basic model- Diameter: 25cm (250mm), depending on the tube. The Professional model becomes interesting if:- even with a 3 m flue there is a lot of smoke return,- or you want as much fire as possible (very heavy use, very large fireplace, etc.),- or you want something that can withstand up to 700 C (even in the event of a chimney fire) and with a longer warranty. If you tell me if a lot of smoke is coming into the room today, I can tell you if it's worth upgrading to professional or if Basic is more than enough for you.
Really smart question, thanks for the clarification! The plastic insulator is used exclusively to isolate the electric wire from the pole (to avoid dispersion) and must not be used as an electrical connection point. The current does not pass through the insulator: the conductive wire must remain continuous and intact along all the poles, supported or inserted into the insulator WITHOUT being cut or electrically connected to the insulator itself.
Practical scheme- On one side the conductive wire leaves, arrives at the gate where it is cut, and the stripped end is connected to the spring/handle of the gate (which has metal terminals).- The handle is then hooked to the other insulator on the opposite pole, where the metal hook is.- In this way the current passes from the wire → metal terminal → handle → opposite terminal → back to the fence wire.- The insulator simply keeps the wire separated and stuck on the wooden post, without transmitting current.
Practical scheme- On one side the conductive wire leaves, arrives at the gate where it is cut, and the stripped end is connected to the spring/handle of the gate (which has metal terminals).- The handle is then hooked to the other insulator on the opposite pole, where the metal hook is.- In this way the current passes from the wire → metal terminal → handle → opposite terminal → back to the fence wire.- The insulator simply keeps the wire separated and stuck on the wooden post, without transmitting current.
The energy consumption (Watts) of the round steel fireplace fan, also called "Aisi 304 stainless steel model", is as follows at each speed:- 1st speed: 64W- 2nd speed: 87W- 3rd speed: 110W- 4th speed: 146W- 5th speed: 216W- 6th speed: 261W To calculate the amp draw at 120 volts for each speed, use the formula: Current (Amps) = Power (Watts) / Voltage (Volts) So for the 120 volt steel round fan: | Speed | Power (W) | approx. Amplifier absorption (A) | |-------|-----------|----------------------| | 1| 64| 0.53 | | 2| 87| 0.73 | | 3| 110| 0.92| | 4| 146| 1.22 | | 5| 216| 1.80| | 6| 261| 2.18 |
The protected cable (high temperature resistant), suitable for connecting the fireplace fan and the controller, is not included with the unit by default. Here's how it works:- The fan comes with a short length of special high temperature resistant cable already connected.-
Good morning! Based on the details you provided:- Chimney height: 30 feet (approximately 9 meters)- Pipe diameter: 10 inches (about 25 cm)- Model of interest: round steel chimney extractor Here's what you need to know:
Additional information- The material (stainless steel) is also highly resistant to weathering and corrosion, perfect for long-term outdoor installation.- If your smoking problems are related to wind, downdraft or chimney height, this model is specifically recommended to solve those problems. In Yes, the round steel fan is more than capable of creating a strong draft in the 30-foot, 10-inch diameter chimney, ensuring that smoke is removed effectively. If you want, I can show you the specific product and adapter size, or help you with installation advice!
Additional information- The material (stainless steel) is also highly resistant to weathering and corrosion, perfect for long-term outdoor installation.- If your smoking problems are related to wind, downdraft or chimney height, this model is specifically recommended to solve those problems. In Yes, the round steel fan is more than capable of creating a strong draft in the 30-foot, 10-inch diameter chimney, ensuring that smoke is removed effectively. If you want, I can show you the specific product and adapter size, or help you with installation advice!
Good morning! For your chimney, here's what you need to know:- The adapter for our fireplace extractor is designed to fit the outside diameter of your round chimney flue.- If your pipe is 12 inches in diameter but has a flared end for the last 1/2 inch, you should measure the diameter just below the flare (where the pipe is a true 12 inch).- The adapter will "plug" the tube from the outside, so it is important that the fit is tight and not loose. Recommendations:- you can cut the tube just below the flare and use the 12 inch adapter (if that is the true OD just below the flare). This is usually your best bet for the most secure fit.- The 13-inch adapter would be too large and may not fit perfectly, which may affect performance and stability.
You can absolutely control the fan remotely with a separate switch, but there are a couple of important points:1. The Gemi variator must always remain inserted in the circuit- The controller is not just an on/off switch; contains the transformer and the electronics that power and regulate the motor.- It is not possible to bypass or eliminate it and power the motor directly via a simple wall switch.2. What is commonly done in practice There are two usual approaches:
B) Use home automation/relay to turn on the controller- Similar to A, but instead of a simple wall switch you use a smart relay/home automation device that switches the power that powers the controller.- This is in line with Gemi's note that the fan can be connected to home automation to turn it on/off.- The wiring concept is the same: the device switches the power supply that powers the controller, not the motor output.3. What you should NOT do- Do not try to interrupt only one of the motor wires between the controller and the fan with a remote switch and hide the controller in a completely inaccessible place; this is not how the system should be run.- Do not power the motor directly from a switch without the controller in between.4. Recalling the terminal logic (from Gemi's instructions) On the controller you have:- Terminals marked “motor motor” → 2 wires going to the fan- Terminals marked "220 V line" (power input) → 2 wires from the mains (hot + neutral)- Central earth terminals → earth from system + earth to fan. The remote switch must be connected in series with the line entering the “220V line”, not between the controller and the motor.
B) Use home automation/relay to turn on the controller- Similar to A, but instead of a simple wall switch you use a smart relay/home automation device that switches the power that powers the controller.- This is in line with Gemi's note that the fan can be connected to home automation to turn it on/off.- The wiring concept is the same: the device switches the power supply that powers the controller, not the motor output.3. What you should NOT do- Do not try to interrupt only one of the motor wires between the controller and the fan with a remote switch and hide the controller in a completely inaccessible place; this is not how the system should be run.- Do not power the motor directly from a switch without the controller in between.4. Recalling the terminal logic (from Gemi's instructions) On the controller you have:- Terminals marked “motor motor” → 2 wires going to the fan- Terminals marked "220 V line" (power input) → 2 wires from the mains (hot + neutral)- Central earth terminals → earth from system + earth to fan. The remote switch must be connected in series with the line entering the “220V line”, not between the controller and the motor.
At the moment I do not have specific information on the minimum height at which the ventilation grill must be installed next to the fireplace. For this type of installation, it is generally recommended to follow local regulations and the instructions of your trusted technician/installer, because the requirements may vary based on the type of fireplace, environment and building regulations.
you can only replace the condenser (condenser) of your Gemi chimney extractor motor. From what you describe, you currently have a 6 µF 450 V capacitor. According to Gemi's technical indications, when the fan buzzes but does not spin (or the capacitor is defective), it is advisable to replace it with:- 450 V – 6 µF capacitor- The use of an 8 µF – 450 V capacitor is also acceptable. On Gemi models:- Basic model: the condenser is installed near the motor, inside the aspirator.- Professional / steel / corten / copper models: the capacitor is placed outside, in the terminal box. I don't have direct access here to select and place your order for you, but you can:- Purchase a 450V 6 µF (or 8 µF) motor start capacitor compatible with Gemi fireplace extractors from the Gemi website or your electrician/parts supplier.- Make sure it is a 450VAC capacitor, for motor use (not an electrolytic audio capacitor, for example). To help you better I would like to ask you:1. What Gemi model do you have exactly (basic, professional, steel, corten, copper, etc.)?2. Which country are you in (to be able to choose the correct Gemi website/shipping options)?
Yes, you can have the outer tube in a single wall, but there are several important points to keep in mind:1. Work, work- A single-wall pipe outside can work, especially if you sweep your chimneys every year, like you do (great practice).- The Gemi aspirator can also be mounted on this last section of simple Ø 150 mm pipe.2. What problems can the simple wall cause on the outside?- Standing outside, the single wall:- It cools faster, the smoke cools and loses draft.- Increases the risk of condensation and creosotes (sticky dirt) in the cold part.- With your installation (1m horizontal + T + 2m vertical), the risk is not extreme, but it can affect that “little smoke” you notice.3. What improvement does having a double external wall bring? It's not mandatory, but it improves:- Maintains the temperature of the fumes better.- Improve shooting.- Reduces the formation of soot/creosote on the outside.- Protects better from atmospheric agents.4. My recommendation in your specific case With what you told me:- You are in a coastal area.- You have 2 m of external vertical in 150 mm tube, free.- Chimney sweep every year (very well done).- You only have "a little" smoke, it's not a serious problem. I would tell you:- You can only keep one wall facing the outside, it is not a serious mistake if you do annual chimney sweeping.- The biggest improvement in your case will be the Gemi vacuum cleaner with round steel base with 150mm adapter, instead of changing the entire tube now.- If one day I had to change the external pipe, the ideal would be to switch to an insulated system (double wall) to optimize the draft and further reduce problems.5. vacuum cleaner + maintenance- With the exhaust fan on and the annual chimney sweeping routine, the installation is well planned.- Always make sure:- Burn dry wood.- Avoid resinous or very humid firewood as much as possible, which dirties the pipe more.
The chimney extractor (also basic model for round chimneys) is supplied as standard:- 80 cm of electrical cable included, resistant to high temperatures.
Yes, you can fix the special cable directly to the metal tube using cable ties, without problems, keeping this in mind:1. Type of terminals- Better metal ties (flange/hose clamp type) or temperature resistant cable ties.- Do not use very thin plastic ties right in the hottest area, because they could degrade over time.2. Contact with the tube- The special Gemi cable is prepared for high temperatures and can be glued to the pipe.- However, try not to let the clamps "strangle" it: tighten firmly, but without damaging the cover.3. Separation in the hottest section- In the first centimeters below the extractor (hottest area) it is possible:- Put fewer cable ties (make the cable a little "freer"), or- Attach it first to the watertight box and then to the pipe a little further down, where the temperature drops.4. Distance between terminals- Every 40–60cm is enough to keep the cable safe and tidy. In short: Yes, it is absolutely valid to attach the special cable directly to the 20cm tube with metal cable ties, it is just one of the typical uses of that cable.
Yes, you can place it on that concrete slab to help extract the smoke and keep it from blowing inward, but it should be done with some caution. According to what you explain:- It has a concrete slab that covers it and the exit is "to all four winds" (open on the sides).- In these cases the square-based Gemi aspirator can be fixed directly to the insole, provided that:1. Provide a flat and stable surface (minimum approx. 40x40 cm) on which to place the base.2. Fix it with Fisher dowels in the 4 corners of the base, drilling the plate.3. The part where the smoke rises is below the extractor area, so that it does not disperse and the draft is effective. Very important for it to work well:- Prevent the smoke from "escaping" through very lateral cracks and from passing under the extractor.- If the opening is very large and the smoke disperses, it is sometimes advisable to partially close it with bricks, sheet metal or similar, leaving a more centered opening and mounting the extractor above that area, to concentrate the draft. With the Gemi aspirator:- It does not cover the smoke outlet when it is turned off, so you can use it alone when the smoke returns or when there is strong wind.- It is designed specifically to improve the draft and prevent smoke from returning to the house. To further refine the solution, if you can:-Tell me approximately the size of the actual hole from which the smoke comes out from under that slab.- Or, better yet, describe to me if there is a central hole, several gaps, cracks on the sides, etc. With this I will tell you more specifically how it should be closed (if necessary) and where exactly to place the vacuum cleaner.
With a chimney approximately 6 meters high, the basic model is for you. According to available information:- the basic model is suitable for chimneys of 3 meters or more- the professional model is particularly recommended for chimneys shorter than 3 meters, because it resists higher temperatures Quick summary:- 6 m high → base- If you want a version with more heat resistance and greater suction capacity, then the professional one can also be considered, but due to the height it is not necessary. If you want, I can also explain the difference between the two in terms of power, warranty and heat resistance.
Thanks for the details, they help a lot. Before suggesting the right kit I need two quick clarifications:1. What animals do you want to keep outside (e.g. wild boars, deer, rabbits, dogs, etc.) or inside?2. Do you prefer a system powered only by battery, or are you interested in a battery + solar panel solution (so the battery is kept charged automatically)? Given what you've already said:- Distance: 100m → a 500m spool of wire is more than enough and is the right size for this length.- No 220V socket nearby → a 12V battery powered energizer is required (e.g. our B12 models).- For B12 models we always recommend using a 12V car battery.- For wild animals such as wild boars, deer, etc. we always recommend wire with a 6 mm² section.
Excellent choice to use only Gemi products! As regards the joint procedure, the method you use is essentially correct, but I can give you some advice to optimize the result:- Remove the plastic: You can use a lighter to melt the plastic, but be careful not to damage the internal metal wires. Alternatively, you can use a cutter or pliers to gently strip the sheath without denting the metal.- Knot the wires: Once the conductors are exposed, tie a simple knot between the two strands and make sure that the metal wires are well intertwined with each other. This ensures good current flow.- Final check: After splicing, check that there are no exposed wires that could touch the ground or other objects, to avoid current leakage. Remember that splices should only be made where strictly necessary, because each splice is a potential leakage point.
You're right: without the 3 gate springs the passage is not comfortable, but you can still work safely and functionally until they become available again. we propose 2 practical solutions, both feasible with what you already have (wire, insulators, iron poles).
2) Homemade mini-handle with wire and double hook insulators. If you also have double hook insulators in the kit (those for barrier passage), you can create something more "similar" to a spring:1. Place a double hook insulator on each side of the gap, at the height of the wire.2. Prepare a piece of wire for each level (low, medium, high) with:- a ring at one end,- the other end firmly fixed to the insulator of one side.3. When you close:- hook the ring to the double hook insulator on the opposite side.4. When you open:- unhook the ring and “park” the thread on one side. The principle is the same as point 1, but the connection is a little more orderly.
If you tell me:- how many meters wide you want for the passage (e.g. 3 m, 4 m, 5 m),- if you also have the double hook insulators in the kit, I can write you a specific step-by-step diagram only for the input (e.g. "1. cut the wire here,2. make the ring here,3. hook like this...").
I currently have no information about on-site installation services or pricing in Antipolo City, only the products themselves. Gemi Elettronica sells electric fence materials (energizers, wires, poles, insulators, etc.), but installation is generally handled locally by an electrician or fence installer in your area. Labor costs can vary greatly by country, city, length of fence and difficulty (terrain, number of gates, concrete work, etc.) and I do not have access to such local rates. What I can help you with is:- Calculate what materials you will approximately need for the perimeter (cable length, number of insulators, type of energizer, poles, etc.)- Provide you with the approximate product cost of such materials from our store (excluding labor/installation). If you want, please tell me:1. The approximate total length of the fence around your home (in metres) e2. What animals do you want to keep inside or outside (pets, livestock or simply as a deterrent) e3. If you have access to a 220V mains where the fence will start or prefer a 12V battery/solar solution.
I understand the doubt. The 6 mm² conductive wire that I suggested is exactly the one suitable for wild boars, deer and large animals. In the description you may also find references to small animals, but I assure you that the 6 mm² wire is the most robust and recommended for large and wild animals such as wild boars, thanks to:- Tensile strength up to 100 kg- 8 internal conductive wires- Very low dispersion (0.15 ohm/metre) For wild boars, fallow deer, deer and wild animals in general, 6 mm² is the right choice. There are no thicker wires in our catalog recommended for normal use: the superior solution would be steel wire, which however is not suitable for modern electrified fences, because it can cause dispersions and above all it is not flexible as needed in these installations.
For the Gemi M/43 fireplace fan controller, when you use it with a 110V power supply (like in the US), you noticed that both input wires are brown. In this case:- For European devices, sometimes both wires are the same color (often brown or black) because in many situations (especially for devices shipped internationally), the plug or wiring assumes that the installer will determine "Line" (hot) and "Neutral" based on your local system.- For M/43 with 110V input: Both brown wires simply connect to the line (black) and neutral (white) power wires. There is no polarity issue as the fan and controller are designed to work both ways for AC motors of this type.
that's correct! You should connect both the fan ground wire and the switch ground wire (house wiring) to the same ground terminal on the M/43 controller.
To answer you correctly I need to clarify which model you are talking about. Having seen the page you visited, I assume: - B12 energizer (12 V, with solar panel) for electric fence. Can you confirm that it is indeed the B12 model with Gemi solar panel? Meanwhile, here is the connection principle of the B12 kit + solar panel: 1. 12 V battery- First connect the energizer to a 12 V battery (ideally a 12 V – 40 Ah car battery).- RED cable from the energizer → + pole of the battery.- BLACK cable coming from the energizer → battery pole.2. Connection to solar panel- The Gemi solar panel comes with clips (crocodile clips).- These panel clamps connect directly to the battery posts, not to the socket marked "solar panel" on the case (this socket was an old version).- RED panel clamp → battery + pole.- BLACK panel clamp → battery pole.3. Enclosure and earth connections- Yellow/green wire coming from the energizer → earth rod.- Red wire (fence output) from the energizer → fence wire.4. Day/night operation- The panel charges the battery during the day.- At night only the battery powers the energizer, the panel turns off automatically. If your box still has the socket marked "solar panel": it corresponds to an old setup. Current models use panel clamps on the battery, as described above. Tell me: - What exactly is your model (reference on the box label)?- Have you already connected a 12V battery? And I can provide you with a step-by-step connection diagram, adapted to your specific case.
I understand the concern. At the moment, however, I do not have access to the specific contents of the advertisement you are referring to (video, text, image or channel where you saw it), so I cannot verify in detail what you mean with respect to the law. that:- all our products are certified and compliant with the law, e- the company complies with current regulations regarding product safety (as per the certifications and technical reports reported) and commercial communication. To be able to answer you concretely I would need some more details:- where did you see this advertisement? (Instagram, Facebook, site, other?)- is it a video, an image or a text?- what, specifically, do you think is in conflict with the law? (e.g. misleading message, improper use of a product, safety, etc.)
Yes, if on the page you are viewing you mean the fireplace fan is also suitable for barbecues. Its function is to improve the draft of the chimney and help solve smoke evacuation problems by reproducing the natural draft. It is not a smoke reducer in the sense of lowering the temperature. Furthermore:- can work continuously without any problems- if the chimney/cap is already present, it is possible to install it inside by removing the cap, or it is possible to order the fan without the cap. For the round fireplace fan, the price depends on the size of the adapter, so it is advisable to check on the site based on the diameter of the flue.
the standard (basic) model can meet your needs in most cases:- Suction capacity: 2,500 m³/h (well above the requirement of 1,000 m³/h)- Designed for: chimney/chimney extraction, similar to forge needs- Temperature resistance: up to 300°C- Ideal for: Regular use and moderate temperature environments For your setup (200 mm diameter, 8 m length, 2 bends, approx. 100 Pa, 1,000 m³/h):- The basic model will achieve your air draft needs with a medium speed setting.- It is an effective and economical choice if your forge does not reach extremely high temperatures or requires continuous, heavy mining at maximum capacity.
- For most hobbyists or small/medium sized smithies, the standard model is more than sufficient.-
- For most hobbyists or small/medium sized smithies, the standard model is more than sufficient.-
that's correct! When you see "40 cm = 15.7", it means 15.7 inches (using comma instead of decimal, which is a common European notation). So:- 40 cm equals 15.7 inches. If you are designing in the United States and want to match the standard inch dimensions, you can use these conversions:- 30cm = 11.8" (commonly rounded to 12")- 40 cm = 15.7" When ordering, simply choose the adapter size whose value in centimeters corresponds closest to the expected measurement in inches. If you ever need adapters for specific inch dimensions not shown,
Yes. You can easily use the existing net and put the electrified wire over/over the net, it is actually a very effective solution against foxes. The important thing is to follow some precautions:1. The wire must NOT touch the net- The metal mesh must never be in contact with the electrified wire.- To do this, you need to use:- insulators if you fix the wire on wooden or iron pegs- or plastic pegs placed inside/outside the net, which keep the wire spaced apart. If the wire touches the net (or the hedge, tall grass etc.), the current disperses and the fence works poorly or not at all.2. Where to put the wires in relation to the net (foxes) If you already have a 120 cm net, you can do it like this:- Place 1 electric wire approximately 20–25 cm from the ground, inside or immediately outside the network- Place a second wire 40–45 cm away, always distanced from the net with the insulators-
read this – post up je následující:1. You will find a red model- on the left side of the fan:- kulatý model,- adapter / velikost pro 20 cm (200 mm) komín.2. Přidáte zboží do košíku- click on “Přidat do košíku“.3. Přejdete k pokladně- v košíku zkontrolujete zboží,- přejdete na „Pokladna“ / „Dokončit objednávku“.4. Vyplníte dodací údaje- jméno, adresu, telefon, e‑mail.5. Vyberete způsob platby- zvolíte platbu kartou (kreditní/debetní karta – Visa, Mastercard, Maestro, atd.),- zadáte údaje z karty,- platba se provede při potvrzení objednávky.6. Potvrdíte objednávku- then you can contact your e‑mail. In the meantime, there is no record, please listen to more. If you want to check out your mobile platform (paypal, bank account, payment card), don't you want to check out your card?
Excellent explanation, you understand perfectly. Summarizing your technical situation:- Horizontal section of 4.33 m up to the fumeral.- False ceiling with only 16 cm of useful height.- You want to remove the Ø150 PVC pipe and put the AISI steel316.- Are you thinking of doing:- Vertical section with 200 mm tube- And inside the false ceiling go down to Ø120 mm with a slope towards the T-manifold.- Doubts: whether Gemi copper will work well, whether it will make noise and whether this reduction is feasible. I have to be honest: in the information I have from Gemi on smoke extractors only these points appear:- The model is chosen based on:- If the fireplace is round or square.- The OUTSIDE diameter of the outlet (in case of round tube).- For square base:- The base is adjustable from 20x20 cm to 43x43 cm and for adults it is fixed to the 4 corners.- For round base:- The adapter must be chosen based on the external diameter of the pipe (adapter 15 cm → 150 mm, adapter 25 cm → 250 mm, etc.).- There is no official data at this time on:- Maximum allowable pressure drops (metres of pipe, elbows, diameter variations...).- Specific effects of going, for example, from 200 mm to 120 mm in a long stroke.- Noise in “non-standard” configurations (horizontal lengths + strong reductions). With the available documentation I cannot confirm for certain:- If the engine will work properly with that combination of:- 4.33 m practically horizontal- Reduction from 200 mm to 120 mm in the false ceiling- Nor will it increase noise or back pressure much. What I can tell you with certainty, based on what is documented on Gemi, is:1. The extractor must always be sized based on the ACTUAL external diameter of the pipe at the roof/terrace outlet.2. You work better when:- The tube section is constant.- Reductions and elbows are reduced to a minimum.3. In cases of "complicated" installations (numerous diameter changes, false ceilings, long layouts) Gemi recommends having it checked by a technician/installer, because a bad configuration can:- Increase the noise.- Significantly reduce the suction capacity.- Generate more condensation and dirt in the duct. Regarding your specific idea (go up 200mm and then go down to 120mm):- Technically, such a strong reduction is usually the opposite of what is ideal for a smoke extractor.- But I don't have an official Gemi table that says “yes, it's possible” or “no, it's forbidden” for that exact case.- It would be risky for me to assure you that it will be fine, because the product information I have does not go into this level of detail. My honest recommendation, with what I have available:- Maintain the largest possible diameter throughout the journey, reducing the necessary minimum.- Avoid strong reductions immediately before the aspirator.- Consult your installer or a chimney technician for the exact data (arrangement, diameters, length and type of hood), because there they will be able to calculate the real pressure and noise losses.
I'll answer your points one by one:
1) Air intake behind under the firebox vs. high air intake next to the fireplace Having a 200 mm air intake at the back that introduces air directly under the hearth is already an excellent solution for supplying combustion air, and is normally sufficient. Inserting an additional high air intake next to the fireplace (as shown in the Gemi videos) does not "come into conflict", but attention must be paid to the management of the flows:- A high intake near the mouth of the chimney tends to feed any turbulence from the upper part, which in some cases can be advantageous (especially in chimneys that go into depression), but it can also alter the flows created by the intake under the hearth.- The two intakes bring air to different points: below they feed the combustion, on the sides they can help in the case of depression or draft recovery near the mouth. The main risk is that outlets that are too close or too far from each other generate microcurrents that disturb the draft of the smoke. Usually one solution or the other is chosen, not both together, unless they are needed for very specific reasons (e.g. large volumes, monumental fireplaces, etc.).
1) Air intake behind under the firebox vs. high air intake next to the fireplace Having a 200 mm air intake at the back that introduces air directly under the hearth is already an excellent solution for supplying combustion air, and is normally sufficient. Inserting an additional high air intake next to the fireplace (as shown in the Gemi videos) does not "come into conflict", but attention must be paid to the management of the flows:- A high intake near the mouth of the chimney tends to feed any turbulence from the upper part, which in some cases can be advantageous (especially in chimneys that go into depression), but it can also alter the flows created by the intake under the hearth.- The two intakes bring air to different points: below they feed the combustion, on the sides they can help in the case of depression or draft recovery near the mouth. The main risk is that outlets that are too close or too far from each other generate microcurrents that disturb the draft of the smoke. Usually one solution or the other is chosen, not both together, unless they are needed for very specific reasons (e.g. large volumes, monumental fireplaces, etc.).
However, you can use a Gemi chimney extractor with an oval flue. Here's how it works with the available templates:1. If your chimney is basically “oval but rounder”- Measure the outside diameter at the widest point.- you can choose a round base flue extractor with adapter: there are adapters for round flue flues from 10 cm to 43 cm.- Select the round model on the site and then choose the size of the adapter that best suits the external diameter of your chimney.2. If your chimney is more “oval/rectangular” than round- Use the square-based smokestack.- The square base is equipped with adjustable brackets for fireplaces from 20×20 cm to 43×43 cm and can also be mounted on larger openings by fixing it to the four corners with the pre-drilled holes.- In the case of an oval flue, the fan is fixed to the brickwork or to the upper surface around the flue, not to the pipe itself, so it can still work properly. To give you a precise suggestion (round + adapter vs square base), I need two measurements:- The long diameter of the oval (in cm)- The short diameter of the oval (in cm) If you send me these two numbers, I will tell you exactly which type of base is best suited and how you would install it.
Great question, this is where a lot of people go wrong. You have 3 wires on the fence and 4 gates. Let's look at it portal by portal.1. General principle In order for a gate to open and close easily while keeping the 3 wires tensioned, the following are in fact necessary: - 1 handle per wire → therefore 3 handles per gate (a set of 3 levels: low, medium, high)- Double hook insulators on the posts on each side of the gate, for hanging handles and guiding wires. So when you open the gate you just need to unhook the 3 handles, the wires remain taut and insulated and you're through.2. Number of kits/handles for YOUR 4 gates
b) Variant: handles + insulators sold separately Basic products: - Handle only: Handle for electric fence- Double hook insulator: Double hook insulator for electric fence barrier passage For 1 gate: - 3 wires → 3 handles- and at least 4 double hook insulators (2 on each pole, to be distributed according to the heights). For 4 gates: - 12 handles- minimum 16 double hook insulators (I recommend 20 to be comfortable).3. Simple summary for you For your installation (3 wires, 4 gates): - Per gate: 3 handles (one per wire)- For 4 gates: 12 handles in total Easiest option: - 12 handle kit with 2 additional electrical insulators → this covers handles + insulators for all your gates.
b) Variant: handles + insulators sold separately Basic products: - Handle only: Handle for electric fence- Double hook insulator: Double hook insulator for electric fence barrier passage For 1 gate: - 3 wires → 3 handles- and at least 4 double hook insulators (2 on each pole, to be distributed according to the heights). For 4 gates: - 12 handles- minimum 16 double hook insulators (I recommend 20 to be comfortable).3. Simple summary for you For your installation (3 wires, 4 gates): - Per gate: 3 handles (one per wire)- For 4 gates: 12 handles in total Easiest option: - 12 handle kit with 2 additional electrical insulators → this covers handles + insulators for all your gates.
Excellent question, this is a key point for everything to work well and without losses. I'm talking about the high voltage crossover cable (between energizer and fence and between segments) and the 6mm fence wire.1. General connection principle The idea is simple: we need to put the metal conductor of the high voltage cable in direct contact with the metal conductor of the fence wire. Therefore, at each connection: 1. Lightly strip the end of the high voltage cable (remove the insulating sheath by a few cm, without cutting the strands).2. If necessary, also strip or loosen a small piece of fence wire (if it is multi-wire with plastic coating).3. Twist/crimp the two metal conductors together.4. Tighten well (knot + possibly thread nuts) for good contact.5. If possible, protect the joint (tape or insulating sheath) from humidity and oxidation.2. Concrete cases for you
b) Connection between two fence segments For example, between Segment 1 and Segment 2 (separated by 5 m): - At the last post of Segment 1 are the 3 wires of the fence.- At the first post of Segment 2 there are the 3 fence wires of this segment. To keep the 3 wires live on both segments, there are two ways: Option 1 – One high tension wire per wire level (cleaner)- Use 3 pieces of high voltage cable (one for each height: bottom, middle, top).- At each end: - connect the HT cable to the corresponding wire (bottom to bottom, center to center, top to top) as described above (stripping + twisting/tightening).- The cable passes on the ground or buried in a polyethylene tube between the two segments.
If you tell me exactly: - where you intend to place the energizer,- and between which poles you want to pass the high voltage cable, I can describe you very precisely: "to this pole you connect like this, to this pole like this", for your 3 segments and your 3 wires.
the consideration is correct.
Two practical solutions1. Use only one handle- All wires are connected near the handle with small conductor cables.- When you release the handle, all the wires "open" together and the passage is free.- This solution is convenient and fast.2. Use multiple handles- Install a handle for each wire, so you can open only the ones you want, but to completely free the passage you need to unhook them all and remove the wires from the gap.
Two practical solutions1. Use only one handle- All wires are connected near the handle with small conductor cables.- When you release the handle, all the wires "open" together and the passage is free.- This solution is convenient and fast.2. Use multiple handles- Install a handle for each wire, so you can open only the ones you want, but to completely free the passage you need to unhook them all and remove the wires from the gap.
setting The basic model round fireplace fan from Gemi Elettronica is equipped with a 6-speed regulator, so you can adapt the suction force to your needs. At the lowest speeds (1-2), the fan is designed to help naturally extract the smoke without pushing hard or affecting the heat in the room.
Yes: if the wire is single and continuous, a single terminal powers the entire wire. So, in your case, yes: it electrifies all the meters of the continuous wire. For the other question, the wire must never touch the iron pole: it must only pass inside the insulators.
How to make 3 continuous threads without cutting If you make a single continuous thread for all 3 rounds, the trick is this:
Important When changing between:- low → medium- medium → high the wire will make a small vertical stretch near the pole, but:- must not touch the iron- it must remain kept "detached" thanks to the position of the insulators. If necessary, keep that section a little tense and tidy.
third round | [medium insulator]
first round `` You:- enter the bass and do the first turn- go back there- go back to the middle finger without touching the iron- do the second round- go back there- go back up without touching the iron- do the third round
The Gemi professional copper smokestack works with a 220V power supply. The regulator must also be connected to 220V and installed away from heat sources because it contains a transformer.
Yes it can. The Gemi flue fan does not obstruct the flue when it is turned off, so smoke and vapors can escape normally even if the fan is not in operation. It is specifically designed so that, when turned off,:- does not obstruct the normal flow of fumes- allows you to use the fireplace intermittently with or without a fan. So you can light and feed the fire in your wood insert without the fan working. The fan is there to improve draft and help in problematic situations (breathing smoke, weak draft, wind problems), but is not mandatory for basic operation. If you tell me:- height and type of flue (masonry/metal, approximately length)- main problem you are trying to solve (smoke in the room, wind, low draft, etc.). I can explain when it is best to run the fan and at what speeds.
I currently have no information on a product called “handle with hook for electric shepherds” in our catalog, so I am unable to see if and when it will be available again. What I can confirm is:- All products visible on our website are currently available for purchase.- If a specific handle with screwed hook is not visible it means that I have no details on refueling times.
To avoid piercing the roof and passing inside the chimney, you need to use the Gemi high temperature resistant cable. Here are the main features:- It is a special cable resistant above 300–350 °C- Structure:- internal conductors in special cable (silicone/high temperature)- covered with a flexible steel sheath- It is certified to be placed inside the chimney- External diameter of the metal sheath: approximately 1cm- It is sold only in predefined lengths: 5 / 10 / 15 / 20 meters (example: 5 m = €30.50; customized lengths cannot be ordered) This is the cable that should be used when:- the passage is inside the flue- you don't want/can make holes in roof or walls to pull a normal external cable. Typical connection:- from the first section of cable already mounted on the aspirator- extend with the Gemi high temperature resistant cable- go down the chimney to the point where you exit to get to the speed regulator. If you tell me:- approximately how many meters are there from the chimney to the point where you want the regulator, I will help you choose the most suitable cable cut (5, 10, 15 or 20 m).
If your fireplace has vent bricks (sometimes called “hollow bricks” or “vent bricks”) on the top sides, here's what you need to consider:- The fireplace extractor must be installed on a solid, flat surface at the top of the fireplace.- If the top layer consists only of vent bricks (with holes or gaps), these will not provide a stable or airtight surface for the fan and may reduce the effectiveness of the fan's suction. What to do:- If possible, it is best to remove the ventilated bricks at the top and replace them with solid bricks or a solid cap, creating a flat and stable surface.- The fan must be mounted directly to this solid surface to ensure a proper seal and secure installation.- If there is a pipe flush with the wall inside the flue, make sure to close any spaces between the pipe and the wall before installing the fan. Yes, if the top is made of ventilated bricks, you need to remove them and create a solid, closed surface for installing the fan. If you wish, I can guide you step by step or recommend the right model for your setup.
YES. For Canada the fireplace extractor is supplied in the 110V version. From our technical notes:- For European countries we supply 220V- For USA, Canada, Japan and Mexico we provide 110V. So, for your commercial pizzeria in Canada, you will receive the compatible 110–120V version, suitable for the local mains voltage. If you want I can also summarize:- Which exact round model + size (30cm / 12") should you select on the website for your oven- And how is the speed controller generally used in a commercial oven.
For your setup, choose the 12" (30cm) option, not the 12.2". Here's why:- Gemi round adapters are sized to the *external* diameter of the flue (e.g. "external chimney diameter 30 cm").- When choosing 30cm, the adapter is designed to fit and attach to a 30cm outer diameter pipe. It already has the tolerance needed to go *around* the tube.- The 12.2" (approximately 31cm) option is intended for flues whose *actual* outside diameter is approximately 31cm. If the flue truly has an outside diameter of 12" / 30cm, increasing the size would be too loose and would not lock properly. So, for a commercial wood oven in Canada with a 12" (30 cm) OD round flue and two 45 offsets, the correct choice is:- Professional round fireplace fan- Adapter size: external diameter of the flue 30 cm (12") The two 45 curves do not constitute a problem for the professional model, as long as the fan is installed on the upper vertical part of the flue.
To protect your kiwi orchard from wild boar intrusion, an electric fence is an effective choice! Here's what you need to do:
Installation Tips:- For wild boars, place the first wire 15 cm from the ground to make it difficult to pass underneath.- If you want maximum effectiveness, use 2 to 3 strands, spaced 15-20cm apart, to create multiple barriers.- Avoid allowing the cable to touch grass, plants or objects to avoid losing electrical efficiency.- Always connect the yellow/green wire of the energizers to the ground (on galvanized pegs) and the red wire to the start of the fence wire.
Installation Tips:- For wild boars, place the first wire 15 cm from the ground to make it difficult to pass underneath.- If you want maximum effectiveness, use 2 to 3 strands, spaced 15-20cm apart, to create multiple barriers.- Avoid allowing the cable to touch grass, plants or objects to avoid losing electrical efficiency.- Always connect the yellow/green wire of the energizers to the ground (on galvanized pegs) and the red wire to the start of the fence wire.
I'll answer point by point, so you have everything clear.1. Heights of the 4 wires For Border Collies:- 1 wire: 20 cm from the ground- 2 wire: 40 cm- 3 wire: 60 cm- 4 strand: 80cm All strands:- internal side, where the dogs are- in front of the metal fence- without touching the net, iron poles, grass, branches, etc.2. How often to place a pole Our indications:- Wooden or iron poles: recommended distance 4–6 meters between one pole and another- for wild animals: 4–5 m- for grazing animals: even 6 m. In your case (dogs in the garden, with an existing net) it can be done like this:-
It works exactly like a normal electric fence energizer, but with a reduced (weaker) pulse suitable for small animals such as cats, dogs, rabbits and chickens.1. What it does- Transforms 220V mains current into short high voltage pulses (not direct current).- These pulses travel along the fence wire.- When the animal touches the wire, it receives a short, unpleasant but not harmful shock.- The reduced power version is designed so that the pulse is more moderate, suitable for small pets and poultry. The effect is educational: the animals learn to respect the fence and stop trying to cross it.2. How to install it (simplified)1. Create the fence- Use electric fence wire around the area you want to protect.- Keep the cable isolated from the posts (using posts or plastic insulators).2. Grounding (very important)- Use three galvanized metal poles approximately 1 m long.- Bury them about 80 cm deep, spaced about 3 m apart.- Connect them together with a yellow-green wire.- Connect this yellow-green wire to the black terminal (earth/mass) of the energizer.3. Connect to the fence- From the red terminal of the energizer, pass a cable to the fence wire.- If you have more than one wire, you create a “bridge” between them so that they are all powered.4. Feed it- Connect the energizer to a 220 V domestic socket.- When it works correctly:- The red light stays on.- The green light flashes in rhythm with the pulses. For best performance in very dry and hot weather, it is helpful to moisten the soil around the grounding posts.3. Safety and use with small animals- The pulse is short and low energy, suitable for cats, dogs, rabbits and chickens.- It's meant to scare, not hurt.- Do not connect the cable directly to the 220 V mains – the energizer is what makes it safe and pulsed.
Swelling of the batteries is a clear sign that something is wrong with the charging cycle. The most frequent causes can be:1. Defective charge regulator: If the regulator does not work properly, the battery can be overcharged, causing swelling and irreversible damage.2. Direct charging from the panel (without regulator): If the battery has been connected even for a short time directly to the panel, it may receive excessive voltage (18-22V) which causes damage.3. Unsuitable or poor quality battery: Batteries that are not specific for deep charge cycles, or of low quality, are damaged much more quickly.4. High temperature: If the system is located in a very hot place, the batteries may swell more easily especially during charging. What can be done:- Check that the charge regulator is working. it may be useful to have it checked by a technician or measure the output voltage: it must never exceed approximately 14.4V during charging.- Make sure that the connection is always with a regulator between the panel and the battery.- Use good quality batteries, specific for photovoltaic systems or deep cycles, not just for car starting.
The fireplace extractor comes with an 80cm high temperature resistant cable included. However, if you need a longer cable or want to pass the cable inside the flue, it is necessary to purchase the special high temperature resistant cable separately, available in different sizes. If you need help choosing a cable or want to know how to purchase one, I can guide you!
I understood the type of balustrade very well. A quick thing first: if you like,
Good question, I'll explain it to you step by step.1. Can it be integrated? Yes, the 6-position speed controller can be mounted flush with the wall.2. Is there a specific box? It does not have a "standard electrical box" like a home mechanism. It comes with its own box/controller, which is fixed to the wall or inserted into a hole in the wall.3. Approximate Hole Size To fit snugly, leave a hole slightly larger than the regulator body. As a practical reference:- Hole in the wall: approx.- Width: 12–13 cm- Height: 10–11 cm- Depth: 8–9 cm This way the controller fits well and you have some space for the cables.4. How to embed it (basic scheme)1. Mark on the wall- Mark a rectangle with the previous measurements (for example 12×11 cm).2. Open the hole- Chop or cut the hole in the wall until it is 8-9 cm deep.3. Pass the cables through the hole- Aspirator cables (“motor motor”)- 220 V power cables (“220V line”)- Common mass (system mass + aspirator mass)4. Connect the regulator- The two cables that come out of the aspirator, where it says "motor motor"- The two 220 V cables, where it says “line 220V”- The earths together in the central part (that of the aspirator and that of the system)5. Set the regulator- It screws or fixes inside the hole (depending on the model)- Subsequently the front/lid is positioned flush with the wall.6. IMPORTANT:- Do not place the regulator near heat sources (stove, fireplace, oven, etc.), because there is a transformer inside that already works at a high temperature.
It is not advisable to use just any “universal” regulator, even if it is more aesthetic. The Gemi vacuum cleaner requires its specific regulator because:- The engine is designed to operate with this type of regulation (6 specific speeds).- The governor incorporates the appropriate electronics for that engine.- A universal controller (fan, light, etc.) can:- Cause hum, vibration or loss of engine power.- Cause overheating or failure.- Void the vacuum cleaner warranty. What you can do, if you are looking for something more aesthetic, is:- Fit the Gemi regulator well and:- Integrate it into a decorative frame.- Paint the wall/create a niche to make it “cleaner”.- Or install it in a less visible place (for example the side of a tall piece of furniture, side wall, small technical room, etc.), always accessible.
You will have no power problems with 7 meters of hose height. According to the characteristics of Gemi fireplace extractors:- They work without problems up to approximately 50 meters of chimney height.- Even at greater heights, good suction is guaranteed thanks to the power of the motor.- Professional models (like the ones we are looking for for your large barbecue) are the most suitable for both low and high pipes, because:- They extract up to 3800 m³/h- They are designed to solve difficult draws and large amounts of smoke. With:-Large BBQ- External round tube of ~20 cm- Height of approximately 7 meters → A professional round model (standard, stainless steel or Corten) with 200 mm (20 cm) adapter is more than sufficient; You won't lack power. If you tell me which one attracts you more (professional standard, stainless steel or Corten), I will tell you exactly:- the name of the product as it appears on the site- and which options to select (size, color if applicable, etc.) to be able to just add it to the cart.
Yes of course. I'll tell you how to see the photos of each one directly on the Gemi website:
2) professional round Corten steel extractor Photo here: https://www.gemimarket.es/extractor-de-humos/264-profesional-acero-corten-redondo-extractor-de-humo--8053017261607.html On that page you can:- See the corten finish (very decorative rust brown/orange shade)- Select the 20cm (200mm) diameter for your tube from the menu. Both have the same power (3800 m³/h) and resistance (700 C), but above all the material and aesthetics change.
2) professional round Corten steel extractor Photo here: https://www.gemimarket.es/extractor-de-humos/264-profesional-acero-corten-redondo-extractor-de-humo--8053017261607.html On that page you can:- See the corten finish (very decorative rust brown/orange shade)- Select the 20cm (200mm) diameter for your tube from the menu. Both have the same power (3800 m³/h) and resistance (700 C), but above all the material and aesthetics change.
For Gemi round fireplace fans, always choose the adapter based on the external diameter of the flue.- Your outside diameter: 15¼" ≈ 387 mm ≈ 38.7 cm From the information available, the standard round adapters listed for the basic and professional models include: 12 – 13 – 14 – 15 – 18 – 20 – 22 – 25 – 30 – 31 – 35 – 40 cm Since your flue is approximately 38.7 cm, the closest standard size is 40 cm In these cases Gemi's note is: > If the flue has an external diameter of, for example, 25 cm, choose the 25 cm adapter and they will provide you with a slightly larger one to fit it correctly:- You need to select the 40cm round adapter for the round base fireplace extractor.- Gemi will provide it in the appropriate size so that it can fit the outer diameter of ~38.7cm. If your measurement is accurate and you are concerned about fit (since 15" is very close to 40"), you can also send your exact measurement and a photo to Gemi Support for confirmation, but from the list of available adapters, 40" is the correct choice.
For correct and safe operation of the fan it is necessary that the adapter fits correctly to the flue. Here's how small differences affect things:1. If the adapter is slightly larger than the flue- This is normal and expected.- Gemi explicitly says to supply the adapter slightly larger so that it can slide over the flue and attach securely.- With proper fixing and sealing, the fan:- Pull the smoke correctly- Don't lose the draft noticeably → A slightly larger adapter is fine, as long as it is attached and sealed correctly.2. If the adapter is too large (much larger than the flue)- you may have difficulty:- Center correctly- Seal it well- This could cause:- Air leaks- Reduced draft efficiency- If so, it is not ideal and you should contact Gemi for a more suitable solution.3. If the adapter is smaller than the flue- It just doesn't fit in the chimney.- Never force, cut or deform the adapter to fit.- In this case it is necessary:- Choose the next largest standard size that fits, or- Contact Gemi support with your exact outside diameter for guidance.
For the Gemi professional fireplace fan the height of the chimney does not limit the length of the cable. The length of the cable is chosen based on the distance from the roof fan to the speed controller/socket, following the actual route of the cable (internal or external to the chimney + along the walls, etc.). From Gemi's information:- The fan comes with approximately 80cm of high temperature cable already connected.- You have two options for the rest of the ride:1. Out of the chimney: Run a standard 3 x 1.5mm² rubber cable (FG7) along the outside of the chimney and up to the regulator.2. Inside the flue: Use the special Gemi cable for high temperatures (up to 300 °C), sold by the metre. Choose the exact counters you need from the drop-down menu. Your chimney is more than 40 feet tall (~12 m), but that doesn't automatically mean you need 20 m of high-temperature cable. you need to buy:- The actual number of meters needed from the fan to the controller along the chosen path (internal or external). Example:- If you run the special cable inside the chimney for ~12 m and then only a short distance to the regulator, something just over 12 m may be sufficient (e.g. 13–15 m for the safety margin).- If you prefer to go out with a standard 3 x 1.5mm², you may only need a short piece of high-temperature wire (included + a little more if needed) and the rest of standard wire. Therefore, 20m is not a hard rule: it may be more than necessary or more or less right, depending on the exact route. If you tell me:- If you plan to pass the cable inside the flue or outside, e- Approximately the distance from the top of the chimney to where you want to mount the regulator (in meters or feet). I can help you estimate a much more accurate cable length to order.
You are absolutely right, and you have described very well how the wire is made: it does not have an "external sheath" to be stripped like an electric cable, but it is a unique mix of:- plastic filaments- conductive metal filaments So I'll confirm one thing straight away: it is not necessary and cannot be "stripped" as if it were a cable with an internal core. The important thing is how you tie the knot and how you bring the metal filaments into contact between the two ends.
Because otherwise it sparks and burns. If the board is made like this:- just a quick knot, maybe not too tight- with little real contact between the metal threads it happens that:- the current passes through a very small contact point- there the resistance is high- sparks and overheating occur- over time the thread burns right in the knot. With a well-tied knot + twisting the two ends for a few cm instead:- you greatly increase the contact surface between metals- resistance drops- sparks and burns disappear (or are greatly reduced).
If you like, in the next answer you can indicate:- if the nodes are now “just one node and away you go” or- if you already do a bit of twisting but it still sparks in some specific point. So I'll tell you if it is enough to improve the tightening of the knots or if it is better to review certain sections of the fence (e.g. too many joints too close together, some parts touching ground, etc.).
You're thinking the right way, I'll make the point clear to you. Our high temperature resistant cable:- it is specific to stay inside the flue or fireplace- it is resistant up to approximately 300–350 °C- it is made of fiberglass with a steel sheath, to avoid melting or damage problems due to heat- it is tested and certified according to safety regulations. Therefore, even if the flue has a diameter of 140 mm and the cable descends for 15 meters inside, the use is still compatible with the temperature that develops in the flue: it must not melt, because it is designed exactly for this application. That said, the “prudent” reasoning makes sense:- if you can get the cable out earlier (upstairs instead of down to the tavern),- and therefore reducing the section immersed in the hot fumes is in any case an even more conservative solution, because:- you have less cable exposed to the direct heat of the fumes- takes up less space inside the flue Therefore:- It is not mandatory to let it out first: the cable is made to also remain along the barrel for many meters.- But if it's convenient for you and it's better for you in terms of passages, going out on the upper floor is an excellent and even more "quiet" choice. In summary:- using 10–15 m of Gemi high temperature cable inside a 140 mm barrel is technically ok;- if you can get it out first (upper floor) and then continue with a normal 3x1.5 cable out of the barrel to the tavern/regulator, it is a very good and advisable solution. If you tell me:- indicative distance between the extractor on the roof and the point where you would like to place the regulator (upper floor or basement), whether it is best to take 5, 10 or 15 meters of high temperature cable and how to combine the internal/external section in the most practical way.
Yes, you can organize yourself this way without any problems. Today:- you purchase the 5 meter high temperature resistant cable- run the cable down the flue and bring it out where it is needed in the apartment- connect the speed controller there Next year:- you will be able to purchase a second cable resistant to high temperatures, for example 15 metres- you can make it go down to the tavern, always passing through the chimney and letting it come out at the point you are interested in. Two important points however:1. Do not remove the original cable from the motor. The first section (the one fitted as standard on the aspirator) is special and must be left. If necessary, it can be extended by connecting the new high temperature cable.2. When you move the regulator:- you do not reuse the 5 m “cut and add” cable;- but make a new connection using a single section of the new cable (e.g. 15 m) between the extractor and the exit point in the tavern, or:- high temperature cable as far as needed inside the barrel- then, outside the barrel, a normal FG7 3×1.5 cable up to the regulator. So yes: today you can easily start with 5 m, and in the future move to a different route with 15 m, simply by modifying the connection.
In your case you need an electric fireplace/barbecue extractor, not a smoke blaster. Gemi extractors are installed at the chimney exit (on the roof) and their function is to reproduce the natural draft of the chimney, so that:- They extract the smoke that accumulates under the roof of the barbecue- They expel it upwards, preventing it from exiting towards the area you are in. For a barbecue with a roof and open at the front, the following is normally used:- Square base model if your fireplace outlet is square or rectangular- The base is adjustable from 20x20 cm to 43x43 cm- If your socket is larger than 43x43 cm, it can also be mounted by screwing the base into the 4 corners, without using the brackets.- Round model if the chimney outlet is a round tube- The diameter of the adapter is chosen based on the tube (e.g. 12cm, 15cm, etc.). Note:- The extractor does not reduce the temperature of the fumes, it only improves the draft and moves the fumes away from your area.- Works very well even in strong winds, which is a common cause of smoke blowback. To advise you on the exact model I only need one more piece of information:1. Is the outlet of your rooftop fireplace/BBQ round or square/rectangular?2. What is the approximate measurement (diameter if it is a tube or width x length if it is square)?
you can do it directly from here in chat. Usually you have two possibilities (depends on the device you are using):- From smartphone- Tap on the paperclip, camera or + icon next to the field where you write the message- Select “Gallery / Photo” or “Take photo”- Choose the photo of the chimney and send it- From computer- Click on “Attach file”, “Upload / Upload image” or on the paperclip icon- Select the image from your PC- Confirm sending As soon as I receive the photo, I'll tell you exactly:- if the round model with 230 mm adapter is 100% fine- if any precautions are needed (any closures of spaces, positioning, etc.).
For our round fireplace fans always size the adapter based on the outside diameter of the pipe, not the inside diameter. In your case:-Internal: 6"- External: 10" (≈ 25 cm / 250 mm) You should choose: → round base chimney extractor with a 25 cm (250 mm) adapter, corresponding to the 10" external diameter of your double wall pipe. The adapter is designed to fit on the outside of the chimney, so the 6" internal pipe does not affect the choice of fan size.
I can help you with questions about your air-cooled prefab fireplace and air draft! To clarify your needs:- Are you wondering if you can use a chimney exhaust fan to regulate or close the air draft in your prefabricated air-cooled fireplace?- Or do you want to know if it is possible (or safe) to completely block/close the air draft in a chimney of this type? Here are some general guidelines taken from our information on fireplace extractors:- The fireplace extractor does not block the flue when it is turned off; it is designed to allow continuous air draft. This ensures that the fireplace remains safe and ventilated even if the fan is not running.- The main function of the fireplace extractor is to regulate the draft and solve problems related to smoke; It should not be used as a complete locking device. If you are looking for a way to completely close the air draft in a prefabricated air-cooled chimney, this is generally not recommended, as it may compromise the safe exhaust of fumes or gases.
can. For the chimney smoke extractor there are two ways to supply electricity:1. External connection to the chimney- Use a normal FG7 3 x 1.5 mm² rubberized cable, passing outside the smoking rod to the speed regulator.2. Internal connection, inside the smoking pipe itself- You must use our high temperature resistant cable, specifically for this purpose.- Features:- Resists up to 350 °C- Made of fiberglass, sheathed on steel- It was created specifically to connect the extractor to the regulator passing through the flue. Therefore: > Yes, Gemi's high temperature electrical cable can always pass inside the flue itself, along the chimney. > It is tested and certified according to safety standards. > Only warning: it resists high temperatures, but is not designed to resist fireplace fires. If you tell me approximately how many meters it is from the exhaust fan to where the regulator will be located, I can suggest how many meters of high temperature cable you should purchase.
Great choice for your case (barbecue restaurant). From the data I have:- High temperature resistant cable- Sold in fixed lengths: 5 / 10 / 15 / 20 metres- Price per 10m: 5m costs R$30.50, so 10m is the cut immediately above; the exact price is indicated on the site, but the reference is "from €30.50".- Professional chimney vacuum- “Standard” professional model (not stainless steel): R$358.90- Higher versions (e.g. stainless steel, corten, copper) have a higher price, "starting from" this value. Since I do not have here all the specific transport costs for Portugal nor the exact price for each combination of model + cable length, I can only tell you: > For a professional vacuum cleaner + 10 m of high temperature cable, the total will be in the order of €400–450, including both products, excluding transport to Portugal. The exact final value (product + VAT + shipping to Portugal) appears as soon as:1. Go to the Gemi website.2. Add to Cart:- 1 × professional vacuum cleaner (the model you choose: standard, stainless steel, etc.)- 1 high temperature resistant cable – 10 m.3. Indicate the address in Portugal in the purchase simulation. I can help you choose between:- Standard professional (cheaper)- Professional stainless steel (more resistant for restaurant environments) Which of the two do you prefer, so I can guide you exactly through the site?
Hvala na detaljnom upitu! Here's what to do:1.
You can replace the battery of an electric fence energizer in complete safety, as long as you follow some fundamental rules. From the information available on Gemi electric fences:- Electric fences are not dangerous for people or animals because:- The current is sent in intermittent pulses- The amperage is very low, so it gives a strong but short shock without causing damage. To replace the 12V battery safely, do the following:1. Turn off the energizer/disconnect the power- If it is a Gemi B12 or another 12V model, disconnect the battery terminals (red and black cables).- If the mains power supply is also present (for dual models), first remove the plug from the socket.2. Avoid touching the fence wire while it is powered- When the battery is connected and the energizer is on, touching the wire causes a shock (not dangerous, but unpleasant).- During replacement, with the battery disconnected, the fence will no longer send pulses.3. Connect the new (or recharged) 12V battery correctly.- Gemi energizers must be powered exclusively with 12V batteries (not 9V).- The 12V battery remains external and connects with the supplied cables:- Red terminal → positive pole (+) of the battery and then to the red terminal of the energizer (fence output)- Black clip → negative (–) terminal and then to the black/ground terminal (connected to the ground rod system)4. Check the indicator lights- On Gemi energizers, when:- the red light is on and- the green light flashes, the circuit is working properly.5. Store the energizer indoors- The energizer itself must be stored in closed environments, protected from rain and bad weather; only the wires exit to the fence and ground stakes. So: yes, changing the battery is safe if you first disconnect it correctly and avoid touching live fence wire when the energizer is on. The shocks produced are designed not to be dangerous. If you tell me:- which Gemi model do you have, e- which battery are you using now, I can provide you with detailed instructions tailored to your exact setup.
For this type of kit, the solar panel connects directly to the battery terminals with the panel output clamps/cables. In practice: 1. Connect the energizer to a 12 V battery- Recommended battery: 12V car battery-40Ah- the battery is not included2. Connect the yellow/green wire to ground3. Connect the red wire to the fence wire4. Connect the solar panel to the battery with the power cable provided in the kit Useful information: on some older models, a “solar panel” socket was provided on the energizer. Now the assembly has been modified: the solar panel comes out with clamps that fit directly into the battery poles. So, if your kit is complete, you don't need the cable sold separately: the panel → battery connection is normally made with the connections already supplied with the panel.
YES. On the Gemi speed controller it is necessary to connect both:1. The two wires coming from the fan (line and neutral) to the terminals marked “motor motor”2. The two wires coming from the mains (line and neutral) to the terminals marked "line 220V" (in the 120 V version, this is the 120 V power supply). Additionally, you connect the ground (ground) wires together in the center terminal area:- Mass from the fan- Ground from the house system Then, in - Engine motor terminals:- Fan line → “motor motor”- Fan idle → “motor motor”- 220V line terminals (120V for you):- Power line (heat) → “220V line”- Power supply neutral → “220V line”- Earth/earth:- Fan ground + house ground together in the central ground terminal.
On this regulator there is no functional difference between “terminal 1” and “terminal 2” within each pair: they are just the two ends of the same input/output. So:- ENGINE ENGINE side:- One terminal = fan line- The other terminal = fan neutral- The order does not matter electrically.- On the 110V 60Hz LINE side:- One terminal = supply line (household)/heating- The other terminal = power supply neutral- Again, the order between the two LINE terminals does not matter. The only thing that should not be mixed is:- Do not insert a fan cable on the LINE side or a LINE cable on the MOTOR side.- Always connect both masses (fan + house) to the central earth terminal. If you tell me the colors of the wires from:- the fan cable e- the house cable (e.g. black/white/green), I can tell you exactly: "black top left, white bottom left", etc., just for your peace of mind.
It's absolutely quite simple, especially for an electrician. Some key points:- Designed for DIY: the fireplace extractor is made to be installed even by non-professionals; an electrician will find it simple.- What they will do, in practice:- Attach the fan to the top of the chimney (using the supplied brackets/bolts for the round adapter).- Make the electrical connection to the control unit and to the network, following the electrical diagram.- Time required: normally around 1 hour for a normal installation. There is also a step by step video tutorial on our site that shows the whole process of fitting it to different types of chimney: https://www.gemimarket.it/content/12-guida-all-installation-aspiratori you can send that link to your electrician so he can see in advance how it fits and how the wiring is organised. If you tell me:- if the flue comes out of a flat roof or a sloping roof, e- if it is definitely a round metal flue, 150 mm external, I can show you the exact parts of the video that will be most relevant for your installation.
With a length of 2m and a depth of 1.5m and a fence on one long side, you will be well covered with 4 posts; 6 would be more than necessary for this size and use.
When 6 posts might make sense You would only really need 6 posts if:- Subsequently the protected area is extended beyond 2 m, or- You want a very rigid, box-like structure with almost no give. For now, at 2m × 1.5m with a fence on one side, 4 posts are a sensible and economical choice.
When 6 posts might make sense You would only really need 6 posts if:- Subsequently the protected area is extended beyond 2 m, or- You want a very rigid, box-like structure with almost no give. For now, at 2m × 1.5m with a fence on one side, 4 posts are a sensible and economical choice.
YES. The product comes with an installation manual printed inside the box and includes:- The assembly phases of the fireplace extractor- The electrical diagram of the regulator and the power connection- The list of required tools- Safety and usage notes So, everything you need to install it (including what we did together) will be available in the manual that comes with the fan.
In our system the regulation takes place via a 6-level speed regulator connected to 220 V. From the available data, the speed changes by varying the voltage applied to the motor. In fact, each level corresponds to a different voltage:- Speed 1: 68V- Speed 2: 92V- Speed 3: 117V- Speed 4: 153V- Speed 5: 182V- Speed 6: 220 V So, as far as we know, the system does not work by reading the engine rpm, but with a voltage regulation that increases or decreases the rpm. The relative rpm are these:- Speed 1: 174 rpm- Speed 2: 286 rpm- Speed 3: 483 rpm- Speed 4: 832 rpm- Speed 5: 1162 rpm- Speed 6: 1350 rpm - the card, to be compatible, should provide a regulation output suitable for varying the voltage towards the motor- from the data I have, there is no rev feedback control- therefore I cannot confirm a command via rpm signal, PWM or other different systems, because it is not indicated. If you want, I can also summarize everything in a very technical and schematic way, so you can compare it directly with the MB250 board.
Yes. The flue extractor can also be installed when there are two fireplaces connected to the same flue, as in your case (rumpus room and apartment on the second floor). Here is some important information:- The smoke extractor must be positioned on the top of the flue, therefore above the roof, so that it sucks the smoke from both chimney mouths connected to the same flue.- It is important, however, that when you light one of the two fireplaces, the other is closed by a special damper when not in use, to prevent smoke from re-entering the room from the other unlit fireplace.- The operation of the aspirator is also effective in these situations: adjust the suction as needed using the speed regulator provided.- The Gemi professional vacuum cleaner is designed to work all day without problems. Advice: If you have doubts about the configuration of your chimney flue or if you are already experiencing draft problems, you can also ask a technician for an opinion before purchasing, or provide me with some more details on the configuration (e.g. diameter, length of the flue, presence of bends), so I can recommend the most suitable model.
Yes, it can be installed, but you must first understand exactly how the chimney cap is made to choose whether to use the square or round model with adapter. Since you have:- round sheet metal outlet- diameter approximately 35–40 cm these general rules apply (taken from our technical support):1. Round tube at the same height as the wall (or slightly higher)- If the round pipe is flush with the masonry chimney cap (or protrudes a few cm) and there is a base/masonry around it:- the void between the pipe and the masonry must be closed (with mortar or sheet metal), so as not to disperse the suction.- in this case you choose the aspirator model with a square base, which works against the wall, not the pipe.2. Round pipe that goes much higher than the chimney cap- If the sheet metal pipe protrudes significantly above the chimney cap (i.e. it is not practically level with the masonry, but much higher):- in this case the round model with adapter is indicated, choosing the diameter suitable for the round tube. So:- Yes. The extractor with a square base can be mounted even if the actual outlet is round, but only if:- close the space between the round tube and the external structure- and install the extractor on the square/rectangular masonry part, not directly on the pipe. To give you a precise indication, I ask you just one thing:- how much does the 35/40 cm sheet metal pipe protrude above the masonry chimney? Is it almost flush or much higher? Answer me this and I'll tell you exactly whether the square model or the round one with adapter is better. Also, if you like,
Thanks for the clarification, it helps. For Gemi extractors on round flues:- The adapter must correspond to the external diameter of the flue.- Our standard adapter sizes are: 12 – 13 – 14 – 15 – 18 – 20 – 22 – 25 – 30 – 31 – 35 – 40 cm (for basic and pro models). So:- With an outer diameter of 13cm, you need to directly select the 13cm adapter.- DO NOT buy a 15cm adapter hoping to "adapt" it to a 13cm flue. 15cm would be too large, would not lock properly and would not be secure or well sealed. In short: → For your 13 cm round chimney flue, choose the round base chimney and in the drop-down menu select Ø 130 mm – 13 cm. This is the correct and safe choice. If you send me the exact link of the product you want to purchase, I can tell you exactly which option to click on the page.
After filling in all the required fields on the registration page, the next steps are:1. Click the confirmation button At the bottom of the form there should be a button like "Register" / "Create account" / "Confirm".- Make sure all mandatory fields (those with an asterisk *) are completed.- If the button is grayed out, swipe up to see if any fields are highlighted with an error.2. Check the error messages on the page If something is missing or formatted incorrectly (email, password, etc.), you will see a red message next to that field. Correct it, then click the button again.3. Confirmation via email (if required) Some registrations require you to:- Open your email inbox- Search for a message from Gemi Elettronica / Gemi Market- Click the confirmation/activation link within the email. After that, your account will be active and you can log in.
For the animals you want to stop you have made an excellent choice with 4–5 wires, but 1.5 m of final height is already a very good measurement: it is not "too little", if you distribute the wires well. For wild boars/roe deer/deer and porcupines we recommend this indicative setting for each rectangle:- 1 wire: 15–20 cm from the ground (porcupines / badgers / young wild boars)- 2 thread: 30 cm- 3 thread: 50–60 cm- 4 thread: 80–90 cm- 5th wire (if you use it): approximately 110–130 cm. If you reach 1.40–1.50 m with the last wire you are already at an effective height, especially if:- the low wires are well positioned (essential for porcupines and wild boars)- the fence is well stretched and visible- the animals "learn" at first contact and then avoid the area. Therefore, with lower poles that allow you to work without a ladder, you can easily:- use poles 160–180 cm above ground- stop with the last wire at around 1.40–1.50 m Rather than forcing 2.5 m poles into the stony ground (with all the problems of drilling and safety with the ladder), a final height that is manageable but done well is better, with:- wires well spaced- no contact with grass, stones, plants- good energizer.
Thanks for the information! Living in Valencia, even if you are about 2km from the sea and don't have particularly high humidity, the environment can be slightly saline. This speeds up corrosion over the years, although not as much as if you were right on the coast. My recommendation:- If you are looking for a long-lasting solution with minimal long-term maintenance, the professional Aisi stainless steel model would be ideal.304. This way you will have the peace of mind that it will not rust over time, even in slightly saline environments or in the event of frequent rain.- If you are looking for a slightly cheaper solution and the barbecue is protected or not used all year round, the standard professional model (made of galvanized sheet metal) may also be right for you, but you will have to pay more attention to maintenance and, over the years, it may show a little rust. In summary:- Best option (
Thanks for your detailed questions! Here's how the Gemi Pro round fireplace fan can help you and what you need to know:1. Will the Pro Model Round Fireplace Fan help extract smoke? Yes, the professional model fireplace fan is specially designed to regulate the draft of the chimney and solve smoke problems in fireplaces, even in the absence of wind. It reproduces the natural draft and is recommended for demanding situations like the one you describe.2. Pipe measurement: what diameter to use? When we say to measure the "external pipe", we are referring to the external diameter of the chimney/flue where the fan will be installed. In your case, with an Amerivent 8TLC (inside 8", outside 11"), you would select the size based on the 11" diameter (outside).3. What's included in the hood: controls and wiring?- For round fireplace fans, the package includes a speed controller and an adapter suitable for the selected size.- The electrical wiring required for installation is not completely pre-installed. The fan comes with a cable and you can route it externally using a 3 x 1.5 cable or internally with a high temperature resistant cable (available separately if needed). - The Pro model is suited to your customer's problem.- Measure the external diameter of the pipe (in your case 11").- Price includes speed controller and correct adapter, but not all wiring (some must be supplied/installed during setup). If you want more technical details or have other questions about installation, don't hesitate to ask!
the Gemi Pro model fireplace fan is designed to suck smoke from the chimney. Its main function is to regulate the draft of the chimney and solve smoke problems in fireplaces, ovens, stoves and barbecues by reproducing the natural draft. This helps prevent smoke from entering your home and ensures that it is properly expelled through the chimney. If you have any other questions about how it works or installation details, don't hesitate to ask!
the basic model fireplace fan is supplied with the speed regulator included in the package. By purchasing the fireplace extractor you will also receive the speed regulator with on/off switch.
Yes. I understand: you are looking for a system that keeps both pets such as dogs and cats away, as well as people who could enter your unfenced garden, acting as a deterrent without being dangerous. Here is some important information for the case:1. Effectiveness on pets For dogs and cats, I always recommend the WEATHERED model, designed specifically for small animals. It effectively protects the garden without causing harm to animals: the shock is short, not painful, but enough to dissuade them from passing.2. Effectiveness on people The electric fence also acts as a deterrent on people. If someone touches the wire, they feel a short, uncomfortable shock. This is generally enough to dissuade, but does not cause any danger. However, it cannot be considered a true "anti-theft device".3. Can the shock be increased? No. In our products the shock power is not adjustable. European safety regulations require that the discharge be short and at low amperage so as not to be dangerous, neither for people nor for animals. Only in specific cases (such as for use with very small animals, such as kittens or puppies) is it possible to further weaken the system, but the power cannot be increased beyond safety limits.4. Operation and safety- The discharge is pulsed, not continuous.- Does not pose risks to healthy people or animals.- It must always be reported with an "electric fence" table (available on the site).5. Garden tip-
No, there is no kit or accessory to transform the square-based A2 version that you already own into a round-based version. You have these practical options:1. If the flue is square/rectangular- you can use the A2 you already have directly on the wall (square/rectangular) as expected, with the adjustable brackets (from 20×20 to 43×43 cm), or by fixing the base to the 4 corners if the mouth is larger.2.
Great that the material has arrived! For the 3 ground rods:- They must be:- 3 x 1 m galvanized pegs- 80 cm in moist soil, 20 cm outside- 3 meters away from each other- connected to each other with the yellow-green cable The shape (line or triangle) is not a problem: the distance and the terrain count, not the geometry. So:- you can put them in a straight line- you can arrange them in a triangle. Choose the arrangement that:- allows you to stay in more humid and soft soil,- facilitates the passage of the yellow-green cable. When you start work on Saturday,
No. The cable from the energizer to the earth rods does not have to be of a specific special type:- You can use a simple yellow-green ground wire, of any thickness.- The thickness does not affect the correct functioning of the electric fence. Voltage information on that cable:- This cable is connected from the ground terminal of the energizer to the ground rods.- It is part of the grounding system, not the live/shock side of the fence.- Under normal operating conditions, there is not the same high voltage on that cable as on the fence wire. It is not the handler who shocks the animals. Only the high voltage wire running from the *output* of the energizer to the fence wire (or between separate fence sections) needs to be the special insulated high voltage wire. If you tell me which Gemi energizer model you have (e.g. E/220, B12 or other), I can confirm exactly what's in the box and what you may still need to purchase.
Yes, it's a good idea. Place a piece of inner tube (rubber) between steel pipe clamp and PE pipe:- increases insulation from metal- reduces the risk of the hose clamp crushing or "biting" the hose- helps limit any micro-discharges towards the iron. Some tips:1. Sufficient thickness- Use a piece of rubber thick enough to create a real “cushion” between metal and tube, not just a thin layer.2. Cover the entire contact patch- Make sure that the metal of the pipe holder does not touch the PE pipe anywhere, not even from the side.3. Check after installation- After placing the rubber in the most critical points, turn the system back on and listen if:- the ticking decreases or disappears in that area. If you see that it improves with the inner tube, over time you can consider completely replacing the steel hose clips with plastic clamps/collars, which are even safer for this use.
Can you send a photo of the fireplace? Send:- 1 photo of the chimney exit seen from above/side (where the extractor will be mounted),- if possible, 1 photo from a little further away to better understand the pipe and the masonry part. With the images I tell you:- which type of model is most suitable (round base or square base),- whether it is necessary to close the space between the pipe and the wall and how,- and the easiest way to install in your specific case.
For the Gemi fireplace fan it is not necessary (and generally not advisable) to embed the grille and blades inside the duct just to protect it from rain and humidity. From the information available:- The base of the fireplace extractor is specially designed with a raised edge to prevent water seepage during rain.- The fan is also described as suitable for strong winds and used to solve smoke problems caused by wind. Therefore the product is made to work exposed above the chimney, even in bad weather. About how to hide it inside a hood:- The fan can be installed inside an existing hood:- by removing the bonnet cap and inserting the fan, or- ordering the fan without its hood so that it can be inserted under the fireplace.- However, this is primarily for integration with an existing chimney, not because the fan needs additional rain protection.- Installing it too low inside the duct could:- reduce extraction efficiency (narrower air path),- make maintenance/cleaning more difficult. Given the climate (very rainy and windy):- you can easily install the fan in the standard position above the chimney, using the normal configuration: it is already protected against rain infiltration and prepared for strong winds.- If you already have a hood and want a more "hidden" look or extra protection from horizontal rain, the best approach is:- use the square or round base model adapted to your chimney flue,- integrate it into the bonnet as described (fan in replacement of or in combination with the chimney cap),- but avoid pushing it so deep inside the duct that it significantly hinders the air draft. If you want, tell me:- whether the flue is round or square/rectangular, e- the internal dimension/diameter of the flue and based on this I can suggest the most suitable installation option.
Marine. To suggest the right model I just need one detail first:- Does the internal round tube (160 mm) protrude above the chimney masonry or is it flush with/inside the masonry?- If it protrudes: approximately how many centimeters above the brick? From our guidelines:- If the round pipe protrudes far above the chimney, we recommend that you choose the fan for round-based flue pipes and then select the size of the adapter corresponding to the external diameter of the pipe (in your case probably the model for round flue pipes close to 160 mm).- If you have a square/rectangular shaped masonry chimney with a pipe inside that is at the same height as the masonry or just a few cm higher, the correct solution is:1. Cut/bring the pipe flush with the wall.2. Close/fill the space between the pipe and the brickwork.3. Choose the square-based chimney extractor model, equipped with adjustable brackets to adapt to the section of the chimney. So:- Pipe significantly higher than the chimney = round model (with 160 mm adapter).- Flush/almost flush tube inside square chimney = square base model. Please tell me:1. Is the head of your masonry square/rectangular (approximate dimensions in cm)?2. How many cm does the 160 mm pipe rise above the wall? Then I will tell you exactly: "Choose the square model" or "Choose the round model with XX mm adapter" which is right for you.
At the moment I do not have specific information regarding the color coding of the live (hot) wire of Gemi fireplace extractors. For electrical connections, wire colors may vary depending on the country and specific production batch. Important:- In general, for many European appliances, brown or black is commonly used for the live (hot) wire and blue for the neutral. Red is less common but can sometimes represent an active signal in some regions or in older installations.- However, to avoid any risk, it is always better to refer directly to the installation manual or the electrical diagram of the product. If you are unsure, we recommend contacting an electrician or contacting Gemi customer support for confirmation.
The Gemi fireplace fan (basic model) has 6 speeds and its electric power varies from:- 29 W at speed 1- 170 W at speed 6 (maximum) A 115 VAC, which corresponds to a maximum absorption of approximately 1.5 A at maximum speed (170 W ÷ 115 V ≈ 1.48 A).
Good question. What I can confirm is:- If your hose has an outer diameter of 25cm, you should choose the 25cm (250mm) adapter.- Gemi sends the adapter slightly wider so that it hugs the tube on the outside and can be adjusted well, but it is not specified exactly whether it goes to 26cm, 25.5cm, etc. That is, the customer always selects the actual external measurement of his tube (25 cm in your case), and the "a little wider" adjustment is already calculated at the factory, but the exact figure is not indicated.
Yes. Plastic poles can be fine for wild animals such as wild boars, but they are more suitable for a lightweight or less permanent solution than wood or iron.
YES. For the United States the Gemi fireplace extractor is supplied in the 110V version. Gemi provides:- 220V version for European countries and most of the world- 110V version specific for United States, Canada, Mexico and some areas of Japan. So if you buy it through the official US channel/for US use, it will be the 110V model.
Better not to wrap the wire around the insulator, because:- every additional lap can create a little energy dispersion- the thread gets damaged and becomes more difficult to tighten in the future. To tighten it you should do this:1. Pull the wire with your hands from one post to the other, just letting it slide inside the insulators.2. When you reach the last post of the stretch:- there you can tie a closing knot, but by wrapping the thread around itself, not around the iron.- If you have the insulator, block the thread by passing through its hook and then tie the knot afterwards, on the thread, so that it remains tight. If you tell me which insulators you use (for wood, for iron, plastic pegs) I will explain exactly where to tie the knot to keep the wire tight without wrapping it around the insulator.
For an electric fence for both small and large dogs: Distance between the wooden pegs- it is recommended to position them at a distance of 4-6 meters from each other.- If the ground is flat, you can also place them every 5-6 metres.- If it is a windy or uneven area, it is better to be closer together (every 4-5 metres) to keep the line taut. Wire height- For small dogs:- First wire 20 cm from the ground- Second wire 40 cm from the ground- For large dogs:- Third wire 60 cm from the ground- Fourth wire (if necessary) 80 cm from the ground-
a 1000 meter reel is recommended because:- Our smallest coils are 250m, 500m and 1000m.- With 4 threads of 100 meters = 400 actual meters of thread, a single spool of 500 meters could be enough, but you would use practically all of it and you would risk having no margin for any unforeseen events (splices, extra passages, corners, double tying, cutting errors, future replacements).- The 1000 meter spool leaves you with plenty of spare thread for any future repairs or modifications and is often more cost effective (the cost per meter drops on larger spools). - you can choose a 500 meter reel (you cover what you need and have little waste)- Or, to be more relaxed and save on the price per metre, you can opt for the 1000 meter one. If you prefer the more precise solution and want to avoid waste, the 500 meter reel is also fine:- [Conductive wire 500 m, 4 mm](https://www.gemimarket.it/recinto-elettrico/255-filo-bianco-1000-mt-4-mm-recinto-elettrico-per-animali-da-pascolo-8053017260068.html) Is the 500 meter spool okay for you? Do you want a detailed quote with this solution?
it is recommended to place the poles 4 or 6 meters apart. More specifically:- for wild animals it is best to stay 4 or 5 meters away- for grazing animals you can even go 6 meters. In your case, since you want to protect the vegetable garden from porcupines and wild boars, therefore wild animals, the recommended distance is:- 4–5 meters between one rod and another
Your order with reference ZUBYDLOZQ is currently marked as "Shipped", but there is no tracking number available in the system at this time.
In a condominium with 26 apartments, it is not always easy to understand which flues are for the exclusive use of the individual apartments and which are common areas. Here's how you can easily find out:1.
Yes, it can be assembled, but there are a couple of important measurements to check first. As regards the assembly inside the 800×800×550 metal slat cap: Our square-based vacuum cleaner has a base of 43×43 cm and, in order to be able to install it inside a common/cap, you will need at least:- Internal free height: at least 37 cm- Internal width: at least 43×43 cm In your case (800×800×550) the space is more than enough, so yes, it can be installed inside, as long as there is 37 cm of useful height for the device. As regards the Ø450 mm metal tube on which you want to fix the aspirator:- There is no minimum size of the flue for the operation of the extractor; Functionality is guaranteed regardless of the size of the flue.- you can close the space between the round tube and the work/wall and then install the square-based model directly on the work, or adapt it according to your construction solution. As for your question: “if you removed your slats, would it even work?” Yes, you can mount the extractor without a hood/hood (without slats) and it will work just as well. In fact:- It is possible to order and mount it without a cap, just when you want to insert it into an existing joint/cap.- The important thing is that there is a minimum space inside of 37 cm in height and 43 cm in width. I leave you the diagram with all the measurements of the square-based model so you can check it on the spot: https://static.gemimarket.it/img/schede/aspiratori/base/misure-aspiratore.jpg If you tell me:- Effective internal useful height of the shell (subtracting any reinforcements, profiles, etc.)- How do you plan to fix it (on site, on a metal structure, etc.) I can better guide you on the most appropriate mounting method. Before continuing, you can leave me a contact email for the company (for example, purchasing or technical) via
No problem, I'll wait for you when you have the photos. To attach them to the chat, you generally need:1. From smartphone- Tap the paperclip or camera/picture icon next to the field where you write the message.- Choose whether:- take a photo right now, or- select a photo from the gallery.- Confirm sending.2. From computer- Click on the paperclip icon or on a button like “Upload file/image” next to the text box.- Select the photo from your PC.- Confirm sending. The exact appearance of the buttons can be changed depending on your device or browser, but it is usually always a paper clip, a camera or an image next to the text field. When you come back with the photos, send them to me and I'll tell you exactly how to mount the extractor on your fireplace. See you soon, see you soon!
No. In Uruguay it is not possible to see the products in person. Gemi Elettronica has only one physical point of sale in Italy (Basilicata). In the rest of the world, including Uruguay, the purchase is made exclusively through the site and we ship the product to your home. For you in Uruguay, the website is: https://gemimarket.com.uy/ From there you can:- See all models and features- Make your purchase online- Receive the product at your home If you tell me what you are interested in (chimney vacuum cleaner or electric fence? For what purpose?), I will help you choose the right model and give you the exact links to the products. And
Good afternoon! Thanks for your question. For an installation with a hose of approximately 5 meters in length and a diameter of 30 cm, the 2500 m³/h basic model extractor is perfectly suited. This model is recommended for ducts up to 10 meters high, so in your case (5 meters) you will have enough power to evacuate the smoke from your barbecue without problems. The basic model vacuum cleaner has the following features:- Suction capacity: 2500 m³/h- Resistance up to 300 °C- 3 year warranty If you are looking for an option with even more power or resistance to higher temperatures (for example if you use the barbecue very intensively), you can consider the professional model, which extracts up to 3800 m³/h and resists up to 700 °C, but in your case it is not essential. Do you want me to send you the direct link to see the 30 cm model? Or do you need help with the purchasing process?
the Pro model's round unit is exactly the right one for your setup. To recap your setup:- Model: Professional fireplace fan- Base: Round (for round flues)- Adapter size: 8" → select 20cm / 200mm- Voltage: automatically 110V for USA This is the correct choice for:- Reduced vertical height (~4 feet after elbow)- Large grill opening (24" x 50")- Using the internal grill Once you have chosen the round Pro model and chosen 20cm / 200mm, you are choosing correctly.
For outdoor junction box, the key idea is:- The cable from the fireplace extractor goes to the junction box outside- From the junction box you run a suitable cable to the speed controller and from the controller to the 110 V power supply and earth. However, I do not have a detailed wiring diagram specific to your junction box model or local code, so I can only provide general guidance, not exact conductor-by-conductor instructions. From the information on the installation of our fireplace extractor:- The fan comes with a special high temperature cable already connected to the motor- There is no need to remove or replace the fan cable- To extend it, you:- Use a suitable external cable (for example, a rubber cable with external rating, 3 x 1.5 mm² in our EU documentation)- Then connect it in a protected junction box- Bring the cable to the speed controller. On the speed controller side (conceptually):- The two wires coming from the fan connect to the regulator terminals labeled “motor motor” (or similar)- The two wires from the mains (the 110V line and the neutral) go to the regulator terminals labeled "220V line" in our EU manuals - in your case this is your 110V supply- The ground/ground wires (from the house ground and the fan) are joined together on the ground terminal or bar. Since wiring colors, junction box layout, and US code requirements may differ, I highly recommend:1. Do not disconnect the cable from the fan itself. Make all connections in the external junction box.2. Use weatherproof connectors and a weatherproof box rated for outdoor use.3. If you are not completely comfortable with network wiring, ask a qualified electrician to connect:- Fan cable → junction box → cable to controller- Regulator → 110V power supply and earth If you tell me:- How many conductors do you see in the fan cable (and their colors)- How many conductors do you intend to run from the junction box to the regulator, I can describe, in principle, which side is "from the fan to the regulator" and which is "from the mains to the regulator", so that you and/or your electrician have a clearer picture, while keeping it general enough to stay within safe limits.
When the basic model smoke extractor does not start, even if the power is present and the regulator is set to maximum speed, there could be two main causes:1. Bad start capacitor: If you only hear a hum from the motor but the fan doesn't start, the problem is most likely with the start capacitor. In this case it must be replaced with a 450V 6 Microfarad capacitor (an 8 Microfarad can also be used). In the basic model, the capacitor is located near the motor.2. Speed switch/controller: If the light on the switch is off or you notice that it is not working properly, you may need to replace the switch itself. It is a commercial component and easily found in any electrical supply store (similar to that of an electrical power strip). What is recommended to do:- First of all, unplug the power for safety.- If you are able to do so, visually check the capacitor and try replacement.- If you are not familiar with electrical components, we recommend that you contact a trusted electrician
Mogu pomoći oko toga. Za BiH, nažalost, ovdje nemam točne informacije o troškovima dostave i carine za svaku pojedinu narudžbu, pan ne mogu izračunati konačan iznos do Ljubuškog (posebno zbog mogućih carinskih/dodatnih troškova na ulazu u BiH). Here's what to do now:- Za zemlje EU imamo jasne cijene pouzeća, ali BiH nije u EU, pa se tiznosi ne primajenjujujujujujujujuju directly.- Proizvodi koji su vidljivi na web stratrici dostupni su za kupnju, ali se konačna cijena dostave i eventualnih dodatnih troškova za BiH definira tijekom procesa narudžbe. Predlažem from:1. Na strange gdje ste gledali fan (pretpostavljam ovaj krovni aksijalni fan za dimnjak) dodate proizvod u košaricu.2. Upišete adresu u Ljubuškom idete dalje do koraka dostave – tamo će se prikazati točan trošak pošiljke za Vašu adresu prije potvrde narudžbe. Ako želite, možete mi napisati:- tocan naziv ili link fan koji gledate i mogu You can see the odabira modela i objasniti sve korake za narudžbu. Usput, please remove them from my email (do you want to know more about the new ones)?
Excellent question, this is an essential point for the fence to work well.1. Connect the energizer to the start of the fence Since your E/220 energizer is located in a shed and the fence starts further away, you need to use a special connection cable, different from the fence wire: - Use a high voltage cable (connection cable for electric fence), designed to carry the impulse without losses, even if: - it runs underground,- or runs along walls, buildings, etc.
If you can tell me: - the approximate distance between the canopy (energizer) and the first fence post, I can provide you with a schematic diagram adapted to your exact case (for example: length, way of passage, type of connection to the first wire).
If you can tell me: - the approximate distance between the canopy (energizer) and the first fence post, I can provide you with a schematic diagram adapted to your exact case (for example: length, way of passage, type of connection to the first wire).
Thanks for the detail on the hat.1. About the hat- To install the Gemi aspirator it is normally necessary to remove the cap you have now.- In its place, at the end of the tube, is mounted:1. The 250mm round adapter e2. Above, the Gemi aspirator.2. Model to choose (power and temperature) According to the information available from Gemi, the models are divided as follows:- Basic model:- 2500 m³/hour- Up to 300 °C- 3 year warranty- Professional models (they all have the same engine and suction level):- 3800 m³/h- Up to 700 C- Differences only in the material and warranty years:- Professional “Standard”: galvanized sheet metal, 6 years- Stainless steel: AISI 304 stainless steel, 8 years- Corten: Corten steel, 8 years- Copper: stainless steel with copper finish, 10 years For your case (paellero, embers, fireplace with 2 elbows and 6 m high):- Yes, the right thing is to choose a professional 3800 m³/h model resistant up to 700 C.- It is recommended when the fireplace is complicated (elbows, bad draft) and when working for a long time with strong embers (such as in a paella pan). The difference between the pros is only the material/finish and the warranty years; The power and projection are the same in everyone.-
What you say makes perfect sense and fits perfectly with the way models are designed:- On a technical operating level, all professional models (galvanised, stainless steel, Corten, copper) → have the same motor, → same suction power: 3800 m³/h, → same resistance: up to 700 C.- The real difference lies in the material and durability/aesthetics:- The AISI 304 stainless steel model:- It is only designed for:- Combine it with stainless steel pipes (like yours), so it looks homogeneous.- Offer greater resistance to corrosion and salinity.- It has an 8 year warranty.- This is in fact the most logical option when the entire system is made of stainless steel. So, with your 250 mm stainless steel tube, the ideal for everything to be homogeneous and durable is:- Professional stainless steel vacuum cleaner (AISI 304 stainless steel), 3800 m³/h, 700 C,- Version with round base,- With 250mm round tube adapter. Just remember: before installing it, you will need to remove the current cap and fit the adapter + aspirator in its place.
Yes, you can, and in fact it is one of the intended uses. From what you say you are referring to ours: High temperature resistant cable for fireplace extractor (it is the special fiberglass cable with steel mesh, up to approx. 350 °C) According to our instructions:- The cable can pass:- Outside the fireplace, using a normal 3×1.5 mm² outdoor cable, or- Inside the fireplace/chimney, using our high temperature resistant cable. In your specific case (work + metal tube):- Yes, it is possible to pass the cable in the space between the work and the metal tube, as long as:- Use the special Gemi cable resistant to high temperatures.- Do not leave it in places where it can receive direct flames or strong mechanical shocks.- This cable is specifically designed for:- From the aspirator go down to the speed regulator area- Even passing inside the chimney or between the pipe and the work. Important: It resists very high temperatures, but is not designed to withstand a prolonged fire inside the chimney (i.e. uncontrolled fire). If you tell me approximately how many meters you have left from the exhaust fan to where you will put the regulator (inside the house, in the wall, etc.), I can guide you on how many meters of this cable you should order.
Yes, it's measured. For the Gemi chimney vacuum cleaner (both basic and professional), the sound pressure (noise) is:- 1st speed: 38 dB- 2nd speed: 38 dB- 3rd speed: 41 dB- 4th speed: 53 dB- 5th speed: 56 dB- 6th speed: 59 dB The 38 dB of the first speeds are the value of the background environmental noise measured at 3 meters.
For triangular section iron poles, unfortunately you do not have a "perfect" solution with our specific insulators, because:- The iron post insulators we sell are only adjustable from 1mm to 18mm in diameter and are meant for round rods/pegs, not triangular sections.- We do not have insulators with nuts or specific systems for particular profiles (triangular, T-shaped, L-shaped, etc.) in our catalogue. Having said that, there are still 2 practical solutions that are often used in these cases:
2) Use iron insulators only where possible and "bypass" the triangular poles. If in other sections you have compatible iron rods or poles (1–18 mm round), you can use iron insulators: https://www.gemimarket.it/recinto-elettrico/40-isolatori-per-recinto-elettrico-per-pali-in-ferro-8053017260662.html And in correspondence of the triangular posts:- Avoid fixing the insulator to the pole itself.- Pass the wire supported by other supports (additional plastic pegs, or wood fixed near the iron pole as in point 1).
If you tell me:- how high is the net,- more or less at what height the dog tends to push / break, I can suggest more precisely where to place the wires compared to the already existing net.
Good morning. Yes, it is possible to integrate the Gemi extractor with a home automation system to manage turning it on and off, but at the moment we do not offer direct Wi-Fi/wireless remote control without making electrical connections.
I cannot confirm a specific system of that type with the available information. What I can tell you is that the Gemi vacuum cleaner is set up to be controlled with the included manual speed regulator. Furthermore, it is confirmed that the 6-speed regulator can be installed flush with the wall.
Excellent observation: it depends on how the iron poles are placed now.1. Case A – You already have two iron poles ~4 m apart If along the 250 m line you already have a sequence of rods every 4 m, and you decide that:- the gap will be between pole n10 and pole n11 (for example), then:- You are NOT obligated to add wooden poles.- Simply use those two iron rods as “gate posts”:- double hook insulators on both mounts,- on the poles immediately before and after continue with the normal insulators for iron. In this case, no extra pole is necessary.2. Case B – In the area of the gap the poles are too far away or poorly positioned. If, however:- in the area where you want the gap, the real distance between two rods is greater than 4 m, or- the position is not comfortable (e.g. curved, difference in height), then yes, it makes sense:- add 2 "service" poles dedicated to the gate (wooden ones are also fine),- mount on it:- normal wood insulators along the line,- and the double hook insulators in the opening part. - use the wooden posts as gate uprights where you can fix:- on one side the "fixed" thread,- on the other the handles.
The base of the Gemi Elettronica smokestack (square model) measures 43x43 cm. The fan itself is mounted centrally within this base.
the basic model of the square-based Gemi smokestack will adapt perfectly to your situation. Here's why:- The square base is designed to fit fireplaces from 20x20cm to 43x43cm.- Having a 180mm (18cm) round hole in the center is not a problem; the fan will cover it easily and the smoke will be sucked in for the round opening.- The fan intake area is centrally positioned and has more than enough coverage for a 180mm hole. You can safely install the square base fan on the 180mm round hole!
Now I don't have any information about physical stores or distributors in the Madrid area; I only have the data from Gemi's online store. Our chimenea extractors are mainly sold online: https://gemimarket.es (España version) and the general information sheet for the extractors is: https://www.gemimarket.it/aspiratori/36-aspiratore-per-camino-tirafumo-aspirafumo-tiracamino-8012004024793.html
For most standard domestic fireplaces and stoves, the Base model (300 °C) is generally sufficient during normal operation, as flue gas temperatures usually remain well below this value. However, there are two main reasons why many people choose Professional (700°C) models instead:1. Safety margin in case of chimney fire or abnormal overheating- The 700 °C models are expressly designed to withstand very high temperatures, *even in the event of a chimney fire*.- With the base model at 300°C, you have less margin of safety if something goes wrong (tar/creosote buildup catching fire, very strong draft with a lot of fuel, etc.).2. Installation on short chimneys- The professional model is recommended if your chimney is less than 3 meters.- Short fireplaces tend to have worse draft and can get stronger local heating at the top, so the Pro model is safer and more effective. So:- If you have a normal domestic fireplace, good maintenance and a flue length greater than 3 m, the basic 300 °C model is usually adequate.- If your chimney is less than 3 m, you want maximum safety, or you burn a lot/very intensely, the professional/steel/copper 700°C models are the safest choice. If you want, tell me:- the approximate height of the chimney,- type of appliance (open fireplace, stove, insert, boiler, pizza oven, etc.),- and if you have ever had problems with drafts/smoke or creosote build-up, and I can tell you more precisely which temperature class is best suited.
I can help you with this. From what you describe:- You have a large opening for the fireplace (approximately 3.5 feet x 3 feet)- The chimney is made of 8" x 8" brick tiles, internal section approximately 6" x 6"- There is a prolonged return of smoke into the house- You are looking for an electrical socket above the flue. Gemi electric fireplace fans are specifically designed for:- Recreate the correct chimney draft- Solve smoke problems caused by poor natural draft or wind- Work even in strong wind conditions- Can be installed at any height on the flue (even low/short flues)1. Is the fan suitable for your situation? Yes, in principle:- The Gemi extractor is designed exactly to "reproduce the natural draft of the chimney" to avoid the return of smoke into the environment (fireplaces, stoves, ovens, barbecues, etc.).- It is also suitable in case of strong winds, which is a very common cause of smoke returning. Given your chimney:- Interior approximately 6" x 6" (~15 x 15 cm), exterior usually approximately 8" x 8" (~20 x 20 cm).- For square/rectangular fireplaces Gemi offers a square-based fireplace extractor with adjustable brackets from 20 x 20 cm up to 43 x 43 cm.- The chimney cap has the minimum dimensions (approximately 20 x 20 cm) for that square model, so it falls exactly within the adjustable range. So: yes, you can use the Gemi square base chimney extractor on a square chimney flue of approximately 8" x 8" (20 x 20 cm). If your fireplace is larger than 43 x 43 cm you could still install it by fixing the base to the four corners with dowels, but in your case it is not necessary.2. If you already have a hood (hat) If you already have a hood or rain cap:- The Gemi fan can be installed inside a hood, regardless:- Remove the existing cap and fit the fan, or- Order fan without hood
In order to guide you well, I just need clarification on the chimney stack situation. From what you wrote I understand:- Round insulated flue- Internal diameter 180 mm- External diameter 230 mm Now the choice between round model and square base model depends on how the barrel comes out on the roof:1. The insulated round pipe protrudes above the masonry of the chimney cap by several centimeters (i.e. "it goes beyond the chimney cap") → In this case, as per our indications, the round model is chosen with an adapter suitable for the external diameter of the flue. In your case you will have to take the round model with adapter for Ø 230 mm (external diameter).2. The round pipe is flush with the wall or it only protrudes a few cm and there is a masonry chimney cap around it → In this case, bring the pipe flush with the wall (cut it if necessary) and close the space between the pipe and the wall. Then an extractor with a square base is installed, with adjustable brackets, fixed directly to the wall.
At the moment there is no official forum available where you can directly discuss the problems of fences with wild boars via our website. However, I can help answer any questions you have about how to make an effective fence against wild boars, advise you on the right products or give you technical tips!
No. It is not a recommended solution. The insulators for iron poles are designed to be fixed on metal rods/poles with a precise diameter (from approximately 1 mm to a maximum of 18 mm), so that the electric wire remains well distanced from the metal and does not discharge. If you simply hook them to the iron fence:- the wire risks touching the network → continuous short circuit (sparks, noises, fence that doesn't work);- insulation is not guaranteed, because the net does not offer the same type of stable fixing as a post. The correct solution is:- use poles (iron, wood or plastic) with insulators fixed to the poles;- if you only have an iron net, it is still advisable to put dedicated pegs in front or behind the net, and run the wire on the insulators mounted on the pegs, not directly on the net. If you tell me:- which animals do you want to contain/keep out- how many meters of fencing needs to be done- what type of poles do you have now (wood, iron, concrete, approximate diameter) I can tell you the type of insulators and the indicative number to purchase.
I can help you, but first I need some important information: does your chimney have a square (or rectangular) or round mouth/neck? In seaside areas (marine environments), the professional stainless steel model is usually recommended, because it resists salt corrosion much better than standard models. To Gemi, for:- Square/rectangular fireplaces → the square-based smoke extractor is used (M/43 series) which has adjustable frames/frames to adapt to fireplaces of approx. 20×20 cm up to approximately 43×43 cm, and can only be fixed in the corners if the fireplace is larger.- Round chimneys → the round model is used with an adapter ring/clamp for the diameter of your pipe. In both cases, for the beach area the stainless steel version of the model that corresponds to the shape of your fireplace is ideal. To guide you better, please tell me:1. If your fireplace is square/rectangular or round2. Approximate measurements (e.g. tube 30×30 cm, or Ø20 cm)3. Whether it is for wood burning fireplace, stove, oven, barbecue, etc.
Gemi fireplace fans are suitable for both external and internal fireplaces. They are designed for:- Regulate and improve the draft of fireplaces, ovens, stoves and barbecues- Work in open or semi-open environments (such as fireplaces/outdoor barbecue areas)- Resists high temperatures (depending on the model: from 300 °C up to 700 °C) For your specific case:- The flue has an external diameter of 10 inches, which is approximately 25.4 cm.- Gemi supplies round adapters from 10cm up to 43cm for round base fireplace fans.- So, you should choose a round base chimney extractor and select the adapter size that corresponds to the outer diameter of the chimney flue (in your case, the closest option to 25–26 cm).
The fireplace fan switch unit is a standard commercial component and can be easily replaced. You don't need a special Gemi part: any compatible switch (such as those used for a power strip) will work. You can find a suitable replacement at any electrical supply store in your area, just make sure it matches the type and voltage.
Great question! Here's how to fix the adapter on a round chimney: - The adapter supplied with the fireplace extractor is of the "female" type: it is positioned outside your chimney, wrapping it.- Simply choose the adapter whose diameter is slightly greater than or equal to the external diameter of your chimney.- Fixing: 1. Place the adapter around the flue.2. It is installed simply by “snapping” the adapter onto the top of the tube.3. To ensure perfect sealing and fixing, it is recommended to use high temperature silicone or metal tape around the connection.4. Then the smoke extractor connects directly to the adapter. Remember: - The adapter does not fit inside the duct, it is positioned outside.- There is no "male/female" distinction because all adapters are designed to wrap the hose. If your pipe is not perfectly round or has irregularities, it is always possible to adjust its tightness with a special gasket. Want installation advice or other details?
These are not silly questions, on the contrary: they are very sensible checks, especially if it is rented. For assembly, from the material we have it is not indicated as a requirement that the chimney must be "cleaned" in a particular way before installation. What is indicated is above all to check the shape of the flue:- round → the model for a round flue must be chosen, measuring the external diameter of the pipe and also ordering any round adapter- square or rectangular → for external flues the assembly kit is already included in the package. In general, assembly is do-it-yourself and there is also a video guide on the site: www.gemimarket.it/content/12-guida-all-installation-aspiratori For the second question: yes, the fireplace extractor is suitable for solving smoke problems and also works in difficult situations, for example with strong winds. However, I don't have a specific indication that confirms that it can be installed "to eliminate the glass" of the fireplace or that it makes the presence of glass superfluous: I don't want to give you an imprecise answer on this. Since it is rented, the most useful thing is to understand what type of chimney it has. you can indicate whether the output is:- round- square- rectangular If you want, I will also explain which model to look at based on the shape.
Now I understand exactly what you are thinking, I will answer you directly: If you do it this way:- Start from the center,- Climb the pole up to the upper edge,- Walk the entire 500 m using the upper thread,- Go down at the end to the central thread,- Everything comes back through the central thread,- Go down at the end to the lower thread,- Everything comes back through the bottom thread,- And we return to the central area, that is, if the 3 levels are, in practice, a single continuous “zig-zag” thread (top → center → bottom) without cuts, then: > There is no need to make bridges. > Simply connect one end of this continuous wire to the red terminal of the control unit. > The entire route (top, middle and bottom) is electrified. But pay attention to 2 important points:1. Is it really a single thread?- If it's just a physical wire that goes to all heights and in every direction: that's right, you don't need bridges.- If there are 3 separate strands (one roll for each height): then you already need bridges to join them together.2. Actual total length- If you do “top + center + bottom” approximately 500 m, the total cable will have approximately 1500 m of useful length.- For wild boars B/12 still works, but it is very important to have:- very well prepared soil (3 1 m rods in moist soil),- good joints (no bad contacts),- little vegetation touching the cables. If you want, let me know how you plan to run this single wire (where it goes up/down between the wires, near the switch or on the opposite side) and I'll tell you what the ideal place is to connect the switch wire to the circuit.
it is possible to join the ends of the wires to the end of the fence, and in some cases it is even advantageous. But there are two different situations:1. It has a single continuous thread (as in your case of 500 m) If your thread is already a single continuous thread, which comes out of the central area, goes all the way around and ends away from the central area:- It is not mandatory to join the ends.- you can leave:- A test lead connected to the control unit output (red)- The other end simply ends at the fence, securely attached to the last insulator. If you want you can close the ring:- Bring this final end close to the beginning and join the two ends of the same thread.- There is a “closed ring” around the perimeter, but without connecting the second end to the central one.- This may help a little to maintain continuity if at some point the wire has poor contact, but it is not mandatory.2. Has multiple strands (e.g. 3 heights, but separate) If there were 3 separate strands (one at the bottom, one in the middle, one at the top):- Yes, you can and should join them (build bridges) with each other:- Both at the beginning (near the power plant),- Like at the end of the fence,- And also in some intermediate points,- So that everyone is connected to each other and everyone has power.
If you tell me exactly how it is now:- A continuous thread that makes up the 3 levels,- Or 3 separate wires (low, medium, high), I will tell you if in your specific case it is better to close the ring at the end or leave it with only one end connected to the central one.
If you tell me exactly how it is now:- A continuous thread that makes up the 3 levels,- Or 3 separate wires (low, medium, high), I will tell you if in your specific case it is better to close the ring at the end or leave it with only one end connected to the central one.
The Gemi Elettronica professional fireplace fan (regardless of the covering, including the Corten/“Corton” models) has the following dimensions, excluding the round tube:- Base: 43 x 43 cm (square)- Height: 43 cm (without brackets)
we also deliver to Switzerland.- Delivery times in Switzerland: generally 4 to 6 working days after shipment.- Shipping costs: the exact amount is automatically calculated on the site once you enter your address in Switzerland. Regarding customs duties/import taxes: - For shipments to Switzerland, customs duties and/or local VAT may be applied by the Swiss authorities.- These possible costs do not depend on us and are normally paid by the recipient at the time of customs clearance or delivery. I cannot indicate the precise amount of these charges in advance as they depend on Swiss customs regulations at the time of importation.
Our products are from Gemi Elettronica, an Italian company. The company is based in Italy (headquarters in Milan and production site in Francavilla in Sinni, in the province of Potenza).
Wooden pole insulators are not suitable for the galvanized iron pegs where the net is mounted.
What to use on galvanized iron poles?- [Ring insulators with nut for iron/galvanized poles](https://www.gemimarket.it/recinto-elettrico/116-isolatore-anellare-con-dado-per-pali-ferro-per-recinto-elettrico-8053017260693.html) These models are designed specifically for mounting on the pegs where the metal mesh is usually fixed.
What to use on galvanized iron poles?- [Ring insulators with nut for iron/galvanized poles](https://www.gemimarket.it/recinto-elettrico/116-isolatore-anellare-con-dado-per-pali-ferro-per-recinto-elettrico-8053017260693.html) These models are designed specifically for mounting on the pegs where the metal mesh is usually fixed.
It is mainly designed for smoke (to improve the draft and prevent the smoke from returning to the room), but it also protects very well from rain. From the information available on Gemi fireplace fans:- The base is built with a raised edge specifically to prevent the infiltration of rainwater into the flue.- The motor body acts as a protective cap, shielding the chimney from wind and rain, preventing water from entering the chimney from above.- There is also a metal mesh that protects from birds and rodents, without obstructing the smoke outlet. So:- It is not a generic "rain cap only" product: its main function is to regulate the draft and solve smoke problems.- But yes, if installed correctly it also prevents water from entering the chimney from above during rain.
For a barbecue with a round tube with a diameter of 20.5 cm: Our smoke extractor adapters are always chosen based on the external diameter of the tube and in standard sizes (20 cm, 22 cm, 25 cm, etc.). In the catalog examples, e.g.- For 22cm hose → 220mm adapter- For 25 cm hose → 250 mm adapter With 20.5 cm you are halfway between two standard sizes. The correct thing would be:1. Safely check the actual outside diameter of the pipe with a tape measure or pressure gauge.2. If the model offers a 200mm (20cm) and 220mm (22cm) adapter, the usual thing is:- If the pipe is closer than 20cm → choose 200mm and use a high temperature resistant gasket/sealant to accommodate it.- If it clearly exceeds 20.5 cm and approaches 21–22 cm → better 220 mm, adjust with sealant or small filling ring. Since specific adapter options vary by model, I need one more detail to be specific:- Is your 8 inch tube the safe outside size?- Is this a completely round metal chimney directly on the barbecue? Reply me and I will tell you exactly which size to select in the menu (200mm or 220mm) and how to mount it.
Great question, and it's important to ask it correctly so you don't get shocked every time you pass by.1. Use a gate handle (safe passage) To create a passage to the chicken coop it is necessary to create an "electric gate" with the appropriate electric gate handle. Gemi offers for example: - Handle only: https://www.gemimarket.it/maniglie-cancello-recinto-elettrico/106-maniglia-per-recinto-elettrico-recinti-elettrici-recinzioni-elettriche-recinzioni-elettrificate-8053017260860.html- Handle kit + spring/cable (5 m): https://www.gemimarket.it/maniglie-cancello-recinto-elettrico/108-kit-maniglia-cancello-5-metri-per-recinto-elettrico-recinti-elettrici-recinzioni-elettriche-recinzioni-elettrificate-8053017261331.html With this it is possible to open/close the passage without unplugging your energizer and without taking a sip of juice.2. Principle of assembly of the passage For each wire of your fence (in your case 2 wires: 20 cm and 40 cm): 1. Fixed side- The wire reaches a pole.- The end of the wire is fixed to a special passage insulator (double hook) or to an insulated attachment point.- Example of Gemi passage isolator: https://www.gemimarket.it/isolatori-recinto-elettrico/110-isolatore-doppio-gancio-per-passaggio-barriera-per-recinto-elettrico-recinti-elettrici-recinzioni-elettrific-8053017260693.html2. Handle side (“door” side)- On the other side of the passage place another pole with an insulating tie rod.- Hang the gate handle on this side.- The handle hooks/unhooks to the hook on the fixed side.- With attached handle = closed circuit, live wire.- When you release the handle to pass = open circuit, passage is free. Repeat this principle for each of your two strands (one handle kit per strand of strand or a combined system if desired).3. Tips for your chicken coop- Place the passage in a position comfortable for you, but not too close to a place where the dog can learn to "take advantage" of the opening.- When you open it to go into the chicken coop, be careful not to let the dog go out that way.- The rest of the fence always remains tensioned, only the "gate" part is open when the handle is released.
No. In many cases it is not necessary to replace the entire wire, just make a correct splice at the point where it broke. From our technical indications:- The connection of the conductive wire for electric fences → can be done with a simple knot between the two ends → it is better to do them only where necessary, to avoid having too many joints. To repair after a tree falls:1. Trim the ends of the broken thread carefully (if they are too damaged).2. Strip the plastic covering that protects the internal conductor, a few centimeters.3. Tie a strong knot between the two ends.4. Connect the internal lead wires well together (they must touch well, not just the external plastic). This way the current flows again and you don't lose effectiveness. The entire length of wire is replaced only if:- it is very damaged for many meters- or there are many joints close to each other
For a 400 x 200 mm flue, no special adapter or reducer is necessary to connect the classic fan (with a square base) by Gemi Elettronica. The square base fireplace extractor features adjustable brackets and is designed to fit square or rectangular fireplaces from 20x20cm up to 43x43cm (430 x 430mm).
Yes, you can use it, but with some important conditions.1. Type of post: it's fine if it's like this. The post for perimeter fences is fine as a ground post if:- it is made of galvanized iron (not often painted, not just rusty bare iron),- has at least 1 meter of part that can be inserted into the ground,- you can plant it deep enough. If it is a galvanized "net" post, T-shaped or square profile, it is not a problem: the important thing is that it is galvanized and makes good contact with the ground.2. Number of stakes Even using that type of stake:- you still need 3, not just one.- You plant them:- for approximately 80 cm into the ground,- with 20 cm above ground to connect the cable,- about 3 meters away from each other. Using only one pole (even if it is large) greatly reduces the effectiveness of the energizer.3. How to connect them- Connect the pegs together with yellow/green cable.- From the EARTH terminal of the energizer → go to the first post.- On the post:- scrape off (if necessary) a little oxide/paint where you connect the cable,- wrap the copper well around the metal,- tighten with pliers or use a clamp.4. When it's NOT good It's not a good solution if:- the post is only painted and is almost not in contact with the ground (poor conductivity),- it is short and you can only insert it 20–30 cm,- it is very rusty (rust worsens conduction). In that case it is better to take real 1 m galvanized pegs.
The E220 is designed to be powered from the mains (220V) and comes with a standard AC plug suitable for EU sockets, which typically means it has 2 terminals (live and neutral) and may include a grounding pin depending on the type of socket in your country.
The wire tensor (wire tensioner) present in the fence kit is used for:1. Tighten the fence wire- Its job is to tighten the thread so that it does not bend.- With the tensioners you can easily tighten the fence later if the wire becomes loose over time (heat, cold, pushing by animals, etc.).2. Maintain correct tension during long rides- On a line like your 125m square, it helps to maintain both levels of thread:- straight- at the right height- more effective against jabalí (a loose thread is easier to push under or through).3. Allow adjustment without retying knots- Instead of untying and re-tying the knots, the tensioner mechanism is turned to:- increase or loosen tension- correct any slack displayed.
Do you absolutely have to use it on your 125m / 2 wire fence? It is highly recommended, in particular:- on the longer sides of the square,- and if Jabalí could push the wire. You don't need a turnbuckle on every side and on every level; often:- 1 tensioner per line (per thread level) is enough for a long time,- positioned where it can be easily accessed for tightening from time to time.
Do you absolutely have to use it on your 125m / 2 wire fence? It is highly recommended, in particular:- on the longer sides of the square,- and if Jabalí could push the wire. You don't need a turnbuckle on every side and on every level; often:- 1 tensioner per line (per thread level) is enough for a long time,- positioned where it can be easily accessed for tightening from time to time.
For a 12V, 7Ah battery with your B/12:- In continuous use (24h), the company indicates an autonomy of approximately 8–12 hours.- If you only do the fencing from evening to morning, for example:- 10–12 hours per night → the battery normally lasts about 1 night.- If you do it for shorter periods (e.g. 6–8 hours), you could stretch it to about 1 1/2 nights, but that's already at the limit. So, in practice:- Consider a 12V 7Ah battery as a short battery life solution (about a full night of use).- For real daily use, the company recommends a 12 V car battery (about 40 Ah) with the B/12, which guarantees several days of autonomy if the fence does not have leaks. If you tell me roughly how many hours per night you plan to keep it on, I can estimate more concretely whether a 7Ah battery per night is realistic or whether you should think about something larger.
With the information I have I can be precise about the autonomy, but only general about the *life* of the battery, because it depends on the brand, quality, climate, etc. From Gemi's data we know:- A 12V 40Ah car battery on a B/12 offers approximately 5–6 days of battery life (with minimal/no losses).- 12V batteries are rechargeable without a fixed limit on the number of recharges: > "Is the 12V battery rechargeable up to how many times? > There is no limit for recharging the 12V battery." Applied to your use case (14 hours per day, 5–6 days per cycle, then recharge):- You should perform regular charge/discharge cycles, but within what the manufacturer considers normal (they explicitly suggest a 12V car battery for the B/12).- There is no maximum number of charging cycles declared by Gemi. Realistically, whether the battery will still “hold a charge” in a year will depend on:- How deeply you discharge it each time- How quickly and correctly you charge it- Temperature (extreme heat/cold shortens life)- General quality/age of the battery But with normal care (do not leave it completely discharged for a long time, protect it from extreme conditions, recharge it regularly):- you can expect it to still be usable and able to power the fence after a year of this type of use.- Capacity may gradually reduce over time, but Gemi has no indication that this cycle pattern is inappropriate for a 12V car battery with B/12. If long-term battery health is a major concern of yours (multi-year use, frequent cycling), a 12V deep cycle/leisure battery is, in principle, better suited to repeated discharging/recharging, but for the B/12 in particular, a 12V car battery is an approved and recommended option and should still work after a year if treated properly. If you want, tell me if the battery will be permanently left outdoors or in a sheltered room, so we can review some simple habits to keep it healthy for as long as possible.
you can purchase a replacement controller for your fireplace extractor directly from our website. Since you searched for "replacement fan controller", we recommend visiting the fireplace fan section of our online store to find compatible controllers and accessories.
If a person or dog touches the wire, it receives a pulse shock. For the dog:- it's not dangerous- the shock is very short, with a mainly dissuasive effect. For people, and especially for children:- it is still an impulse shock of 10,000 volts- you don't get stuck like with 220V electricity- but you must not approach or touch the wires. For dogs, there is also an important note:- the standard models are designed especially for large wild animals- for specific use with dogs, the weakened model is recommended, available in the catalog
I do not currently have specific information on the compatibility of the Pro Square Chimney Exhaust Fan with US homes, such as voltage requirements or certifications for the US market. What I can confirm is that the Pro Square Chimney Extractor is designed to fit square or rectangular fireplaces with dimensions from 20x20cm to 43x43cm, and can also be installed on larger fireplaces by attaching the base to the corners.
Thanks for contacting me! Unfortunately, I am unable to place orders for you on Amazon or match prices from our website to Amazon. The best way to purchase the fan at the price of €499 is directly through our website. If you have problems with payment, I will be happy to help you resolve the problem so you can complete your order at the lowest price. Could you please
For earthing, the important thing is not so much the diameter, but that the poles are:- galvanized- 1 meter long- well planted deep (80 cm in the ground, 20 cm outside) The material I have available does not indicate an official minimum diameter of the earth piles, so I cannot give you a "catalogue" measurement. You can also use galvanized rods that are not too large, as long as:- you can stick them well into the ground for 80 cm- make good contact with the ground (better if humid, with vegetation)- you can connect them well with the stripped yellow-green cable (copper in metal-metal contact) Always remember:- there must be 3 1 m galvanized pegs, spaced approximately 3 meters apart- connected in series with the yellow-green cable If you tell me what diameter the ones you can bury have (for example 8 mm, 10 mm, 12 mm...) and what type of soil you have (hard, stony, soft), if, in general, they would be fine and maybe suggest some tricks to plant them better.
the reasoning is right and you are hitting the point: the real perimeter counts, not just the square meters. I'll start from the data you wrote and then answer the question about the distance from the cultivation.1. 7500–8000 m2 square: perimeter and meters of wire If we simplify:- 8000 m2 → side ≈ √8000 ≈ 89–90 m- Perimeter of the square: 90 m × 4 = 360 m But you did:- 90 m × 3 = 270 m- then × 3 wires = 810 m Here there is only one small error: the perimeter is made ×4, not ×3. So:- Fence perimeter (if it followed the exact edge of the 8000 m2): → ~360 m- With 3 wires: → 360 m × 3 = 1080 m of wire So for 8000 “pure” m2 approximately 1080 m of actual wire would be enough.2. But the wire should not be attached to the lavender. That's right: keep the fence wider than the cultivation to:- pass with tractor/trailer around- avoid the branches touching the wire- have some margin for future expansions Suppose:- free band around the lavender: 5–10 m per side
Example 2 – 10m margin all around- Fence side: 90 + 10 + 10 = 110 m- Perimeter: 110 × 4 = 440 m- Thread for 3 threads: 440 × 3 = 1320 m So, for a cultivation of approximately 7500 m2 (say 80×95, 85×90 etc.) with a little margin all around:- Realistic fence perimeter: 400–500 m- Thread for 3 strands: 1200–1500 m3. Comparison with the material You now have in your cart:- Wire 1000 m 6 mm² – QTA 2 → 2000 m total If the effective perimeter, with margin around the lavender, is:- 400–450 m → 3 wires = 1200–1350 m → with 2000 m you are wide, but not “exaggerated”:- you have 650–800 m left for:- vertical bridges between the wires- future additions- any changes in the shape of the fence- 500–550 m → 3 wires = 1500–1650 m → with 2000 m you have 350–500 m of margin: still perfect Only if really:- you fenced off a perimeter close to 700–715 m as you had assumed (much larger than necessary for 7500–8000 m2), then:- 3 wires → 2100–2150 m needed- the 2 coils of 1000 m (2000 m) would be few- 3 coils would be needed (3000 m) But for 7500 m2 of lavender it makes no sense to reach a perimeter of 700 m, unless you also want to fence off a lot of "empty" land beyond the lavender.4. Short answer to your question > "If the lavender cultivation were 7500 m2 and considering that the wire should not be attached to the cultivation, how many meters do I need?" Realistic estimate, with margin around:- Cultivation ≈ 7500 m2- With a ring of 5–10 m of space around it:- Fence perimeter: 400–500 m- Thread (3 threads): 1200–1500 m Then:- with 2000 m of 6 mm² wire that you have in your cart:- you are safely covered- you have plenty of safety margin- you are not buying "absurd" material for this surface
Example 2 – 10m margin all around- Fence side: 90 + 10 + 10 = 110 m- Perimeter: 110 × 4 = 440 m- Thread for 3 threads: 440 × 3 = 1320 m So, for a cultivation of approximately 7500 m2 (say 80×95, 85×90 etc.) with a little margin all around:- Realistic fence perimeter: 400–500 m- Thread for 3 strands: 1200–1500 m3. Comparison with the material You now have in your cart:- Wire 1000 m 6 mm² – QTA 2 → 2000 m total If the effective perimeter, with margin around the lavender, is:- 400–450 m → 3 wires = 1200–1350 m → with 2000 m you are wide, but not “exaggerated”:- you have 650–800 m left for:- vertical bridges between the wires- future additions- any changes in the shape of the fence- 500–550 m → 3 wires = 1500–1650 m → with 2000 m you have 350–500 m of margin: still perfect Only if really:- you fenced off a perimeter close to 700–715 m as you had assumed (much larger than necessary for 7500–8000 m2), then:- 3 wires → 2100–2150 m needed- the 2 coils of 1000 m (2000 m) would be few- 3 coils would be needed (3000 m) But for 7500 m2 of lavender it makes no sense to reach a perimeter of 700 m, unless you also want to fence off a lot of "empty" land beyond the lavender.4. Short answer to your question > "If the lavender cultivation were 7500 m2 and considering that the wire should not be attached to the cultivation, how many meters do I need?" Realistic estimate, with margin around:- Cultivation ≈ 7500 m2- With a ring of 5–10 m of space around it:- Fence perimeter: 400–500 m- Thread (3 threads): 1200–1500 m Then:- with 2000 m of 6 mm² wire that you have in your cart:- you are safely covered- you have plenty of safety margin- you are not buying "absurd" material for this surface